Vestfrost VKG 511 Manuel utilisateur
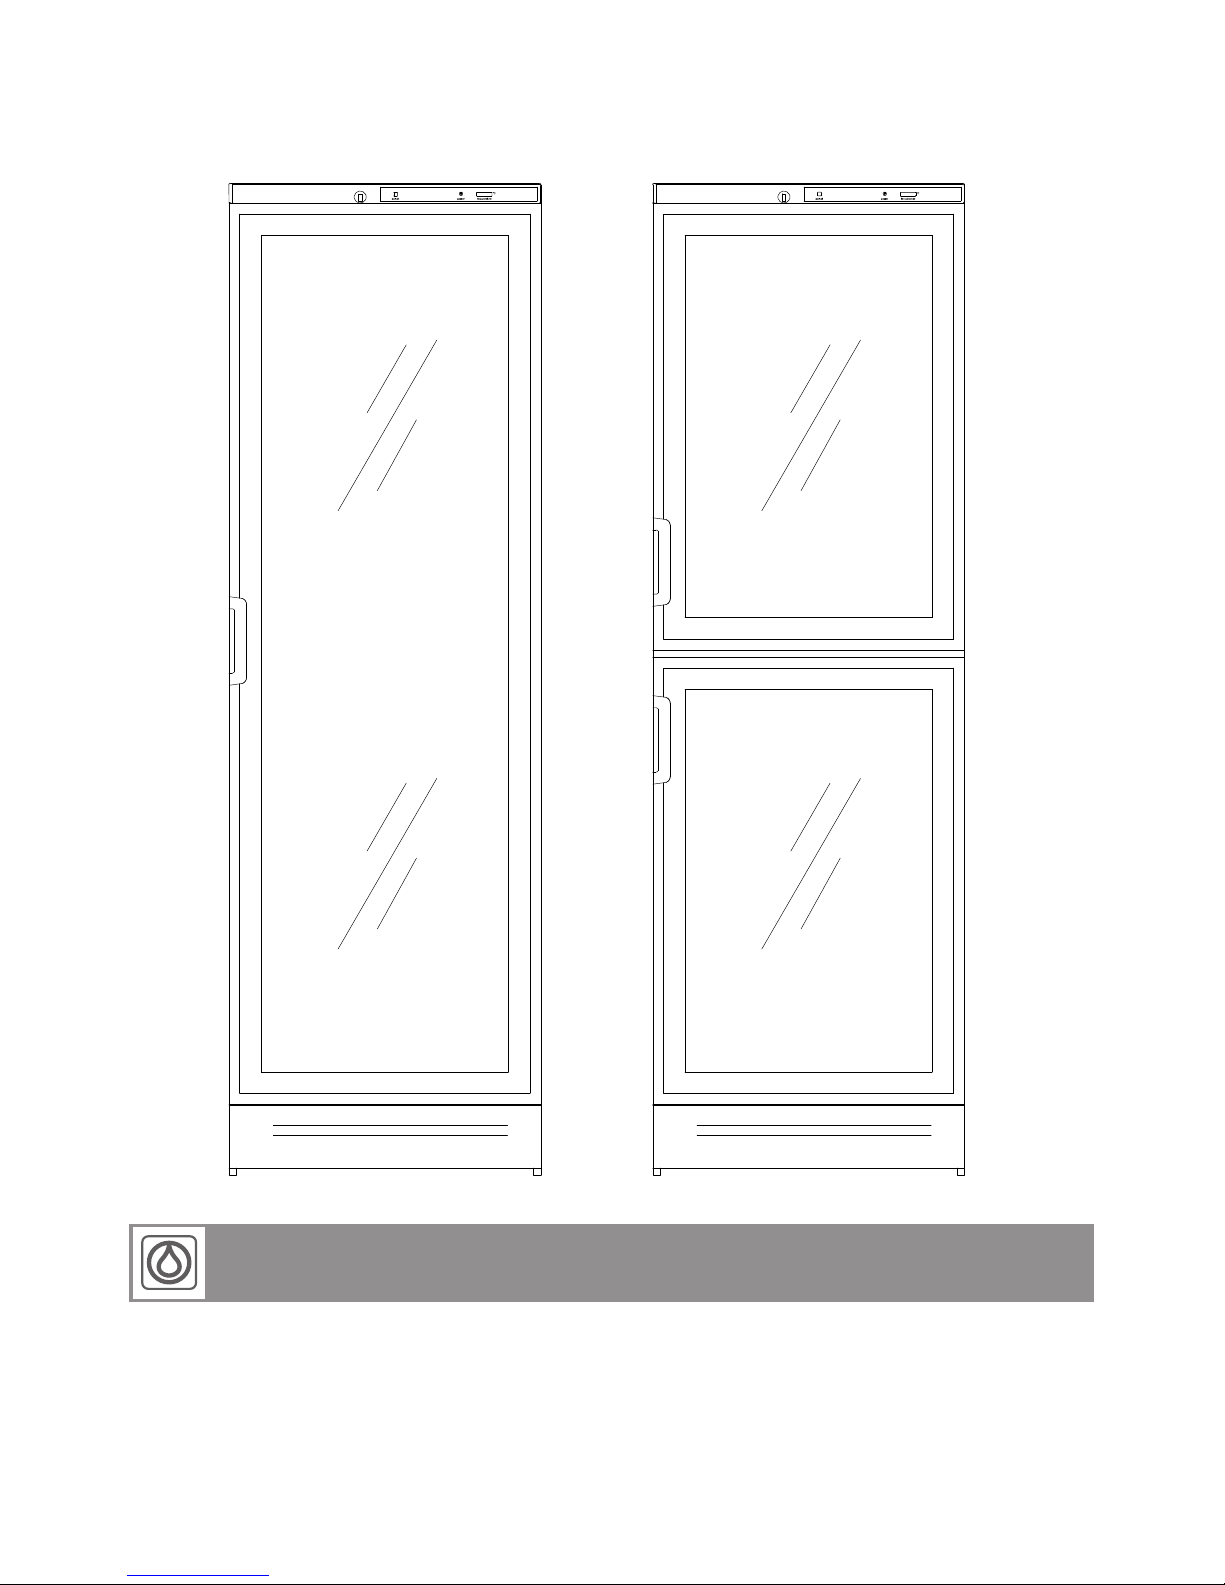
VKG 511-570-571-581 FKG 311-370-371
NL Gebruiksaanwijzing
ES Instrucciones para el uso
IT Manuale d’uso
RUS Instructions for use
GB Instructions for use
DE Bedienungsanleitung
FR Mode d’emploi
DK Brugsanvisning
2
GB
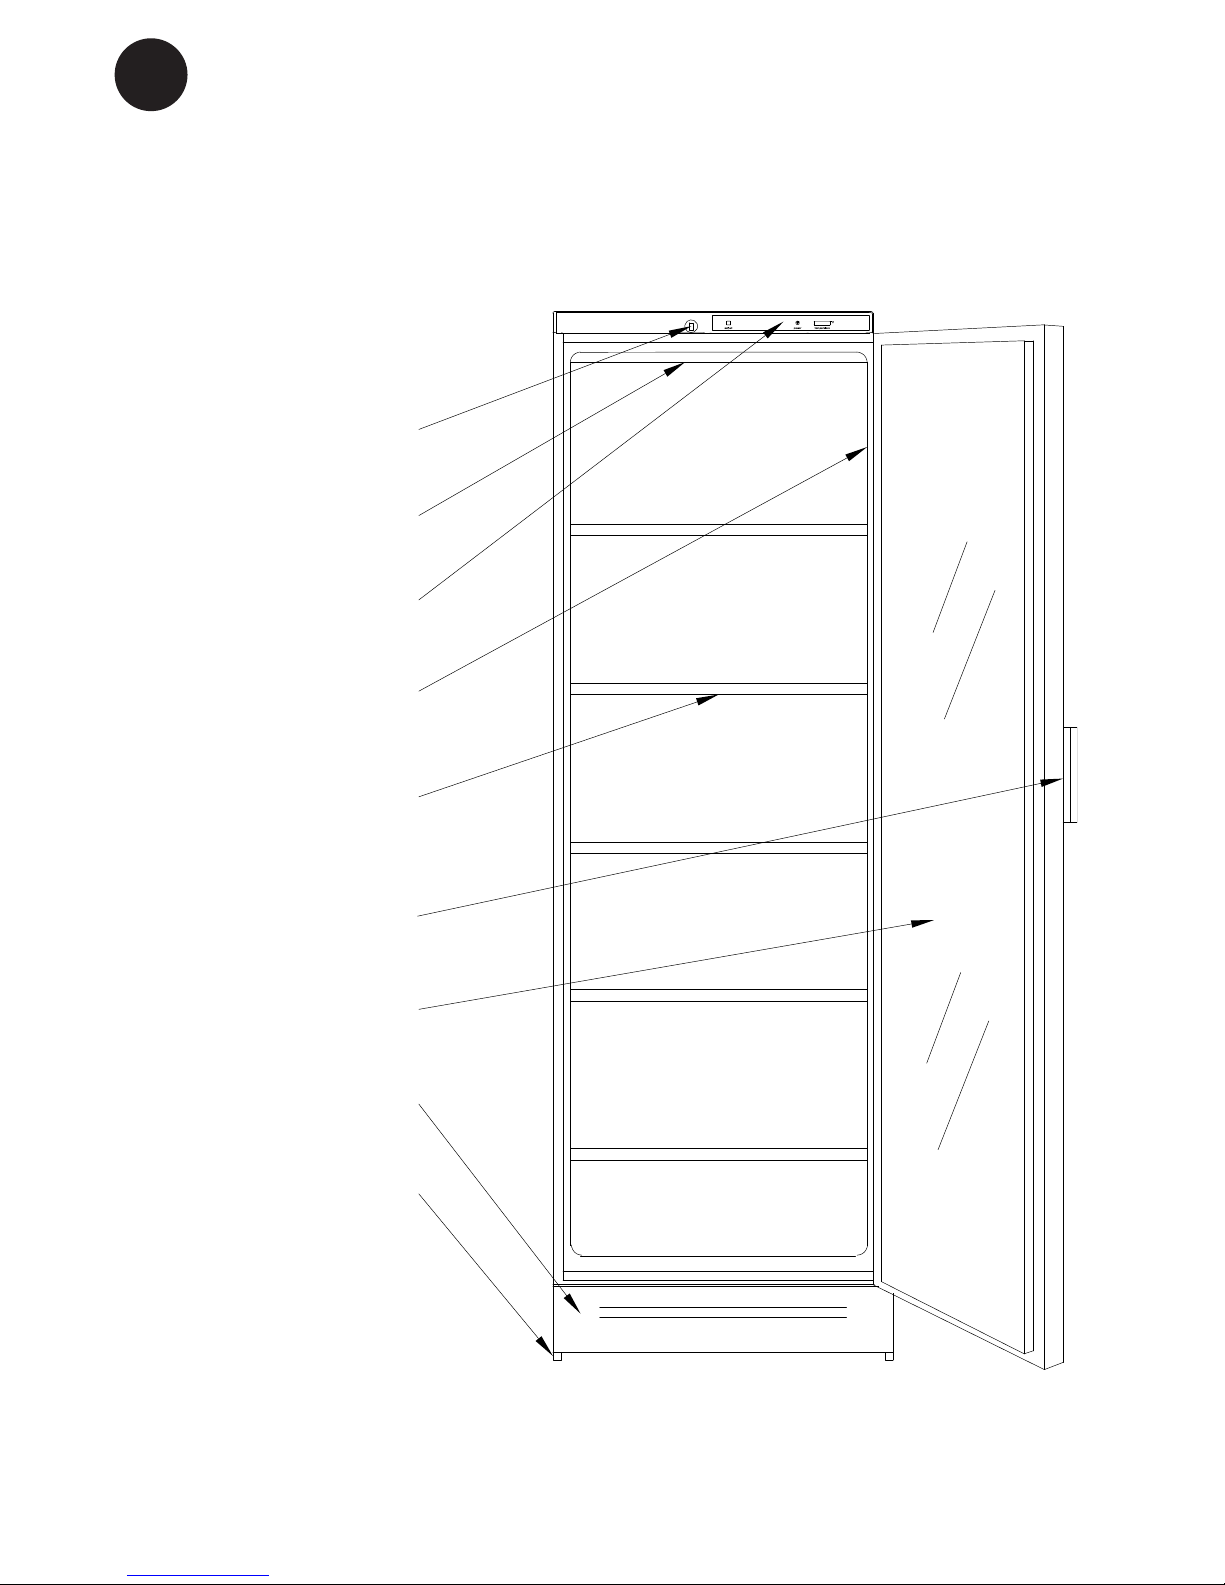
Get to know your wine or bottle cooler:
Lock
Top lighting
Control panel
Rating plate
Shelf
Door handle
Glass door
Kick plate
Adjustable feet

3
GB
In case this appliance contains hydrocar-
bon refrigerant please refer to guidelines
listed below.
As the appliance contains a ammable
refrigerant, it is essential to ensure that the
refrigerant pipes are not damaged.
Standard EN378 species that the room in
which you install your appliance must have
a volume of 1m³ per 8 g of hydrocarbon
refrigerant used in the appliances. This is
to avoid the formation of ammable gas/
air mixtures in the room where the appli-
ance is located in the event of a leak in the
refrigerant circuit. The quantity of the refrig-
erant used in your appliance is indicated on
the rating plate.
WARNING: Keep ventilation openings in
the appliance’s cabinet or in
the built-in structure clear of
obstruction
WARNING:Do not use other mechanical
devices or other means to ac-
celerate the defrosting process
than those recommended by
the manufacturer
WARNING: Do not damage the refrigerant
system
WARNING:Do not use electrical appli-
ances inside the refrigerated
storage compartment, unless
they are of a type recommend-
ed by the manufacturer
WARNING: Do not expose the appliance
to rain
WARNING:This appliance is not intended
for use by young children or
inrm persons unless they have
been adequately supervised by
a responsible person to ensure
that they can use the appliance
safely. Young children should be
supervised to ensure that they
do not play with the appliance
●Always keep the keys in a separate place
and out of reach of children
● Before servicing or cleaning the appli-
ance, unplug the appliance from the
mains or disconnect the electrical power
supply
● If the supply cord is damaged, it must be
replaced by the manufacturer, its service
agent, or similarly qualied persons in
order to avoid a hazard
●Relevant for Australia: Supply cord
tted with a plug complies with AS/NZS
3112.
● Frost formation on the interior evaporator
wall and upper parts is a natural phenom-
enon. Therefore, the appliance should
be defrosted during normal cleaning or
maintenance
● Directions for replacing the illuminating
lamps are to be included in the instruction
●Please note that changes to the appli-
ance construction will cancel all warranty
and product liability
●WINE COOLER - VKG: This appliance
is intended to be used exclusively for the
storage of wine
CLASS 1 LED PRODUCT
Warning.

4
GB
Contents
Get to know ............................................2
Warning ..................................................3
Before starting the appliance..................4
Maintenance...........................................4
Has the appliance stopped working?......5
Technical data.........................................5
Installation ..............................................5
Control panel ..........................................6
Reversing the door .................................7
Ajustment of the door .............................9
Mounting of lock. ....................................9
Warranty, spare parts ...........................10
Disposal................................................ 11
Switch off the appliance and pull out the
plug when cleaning the cabinet.
Only use an unscented detergent when
cleaning the cabinet inside.
You may remove the top panel and wash it
when cleaning the cabinet inside.
The kick panel can be removed to faciliate a
vacuum-cleaning of the oor.
To make the cooling system work at its
optimum it is necessary from time to time
to clean the wire condensator and the com-
pressor at the back of the cabinet by means
of a brush or a vacuum cleaner. Remember
to clean the drain.
Maintenance
Check that the cabinet is undamaged.
Please report any damage immediately to
your dealer. Wash the cabinet and inner
lining with a mild unscented detergent and
wipe it dry. Do not use abrasive scouring
powder, steel wool or similar.
Before starting the
appliance

5
GB
Before calling a repairman, check that
●The plug is properly plugged into the wall
socket.
●The fuse is intact.
●The power has not been cut off.
●All controls are correctly set.
● Switch off the cabinet for 15 minutes (for
instance at the thermostat). Switch it on
again and after 5 minutes check whether
frost has formed on the evaporator.
●Do not open the cabinet unnecessaryly.
Has the appliance
stopped working?
Installation.
See drawings - page A - C.
Install the cabinet in a dry place and so that
it is not exposed to direct sunlight or any
other source of heat.
Place the cabinet in a level position. This is
easily achieved by adjusting the adjustable
feet at the front edge of the base.
The cabinet may not rest against a wall on
its hinged side. When placing the cabinet
on a carpet or on a wooden oor you should
adjust it once more after some time as the
cabinet might settle in soft foundati ons.
If you want to build the appliance into a
cupboard you must consider 3 factors:
1. There must be space above the appli-
ance in order to make the cooling system
work satisfactorily.
2. When the door is opened the appliance
takes up more room in the width and
therefore the door must either be placed
outside the cupboard or there must be
a space of at least 1,5 cm at the hinge
side.
3. The distance to the wall at the hinge side
must be of a sufcient size.
.
Furthermore it is possible to build together
two appeliance. If one of these is a wine
cabinet please observe a min. distance of
25mm between the cabinet in order to keep
cooling performance intact.
It is safest to place the earthed wall socket
abo ve the appliance and at least 2.0 m
above the oor. Any local installation rules
for appliances of this kind must be ob-
served.
Technical data.
This device complies with relevant EU
directives including Low Voltage Directive
2006/95 EEC. and Electromagnetic Com-
patibility Directive 2004/108/EC
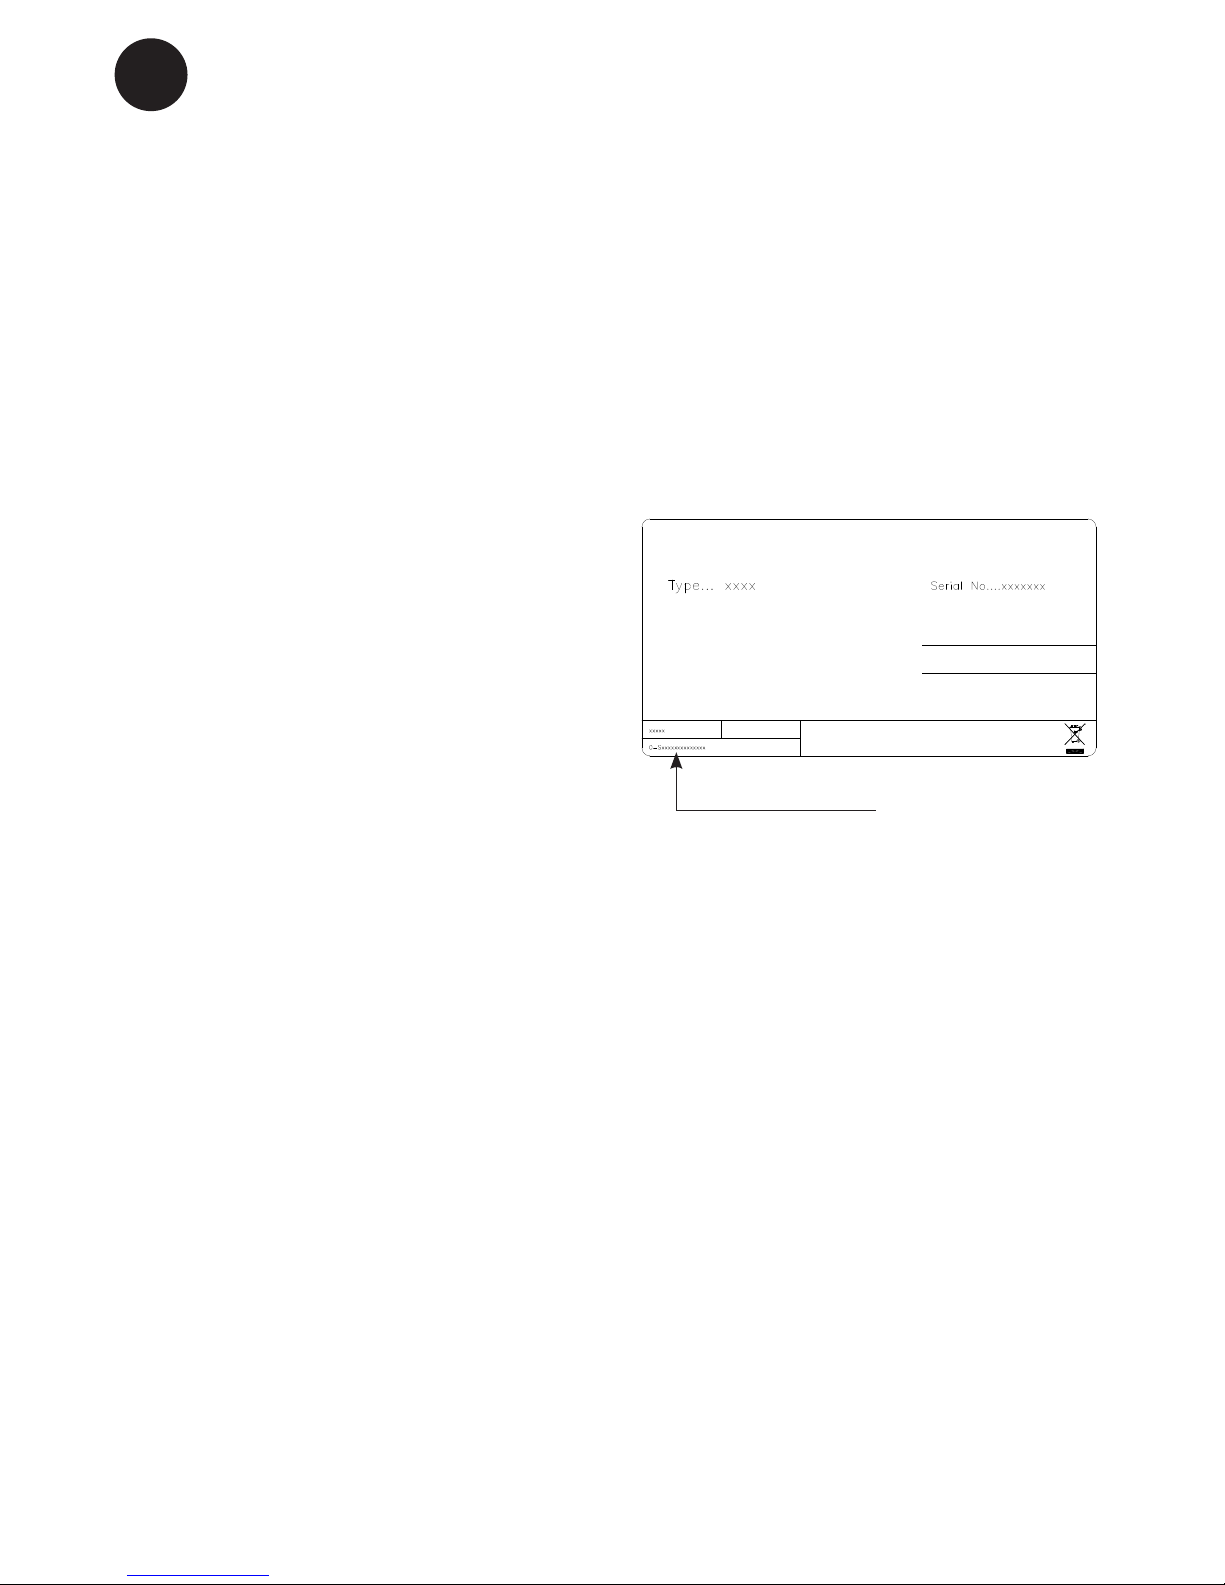
The rating plate provides various techni-
cal information as well as type and serial
number.

6
GB
Control panel.
During a storm the electricity supply might
be cut off.
You should be aware of this when installing
the appliance in weekend cottages or else-
where where you would not immediately
observe that the power has been cut off.
Construction and details in the accessories
are subject to alter ation without previous
notice.
Connect the appliance to the socket outlet.
A green light indicates that the appliance
has been switched on.
The thermostat knob is adjustable from 0
(stop) to 7 (coldest). Find the position of
the therm ostat which gives you the desired
temperature. Start at position 4.
1. Lock (Not all Appliances has lock in top,)
2. Green light indicating power on
3. Thermometer
4. Thermostat button.
5. Door switch for internal fan
6. Light switch
The switch (6) on the top right of the control
panel is for turning the top lighting on and
off.
7
GB
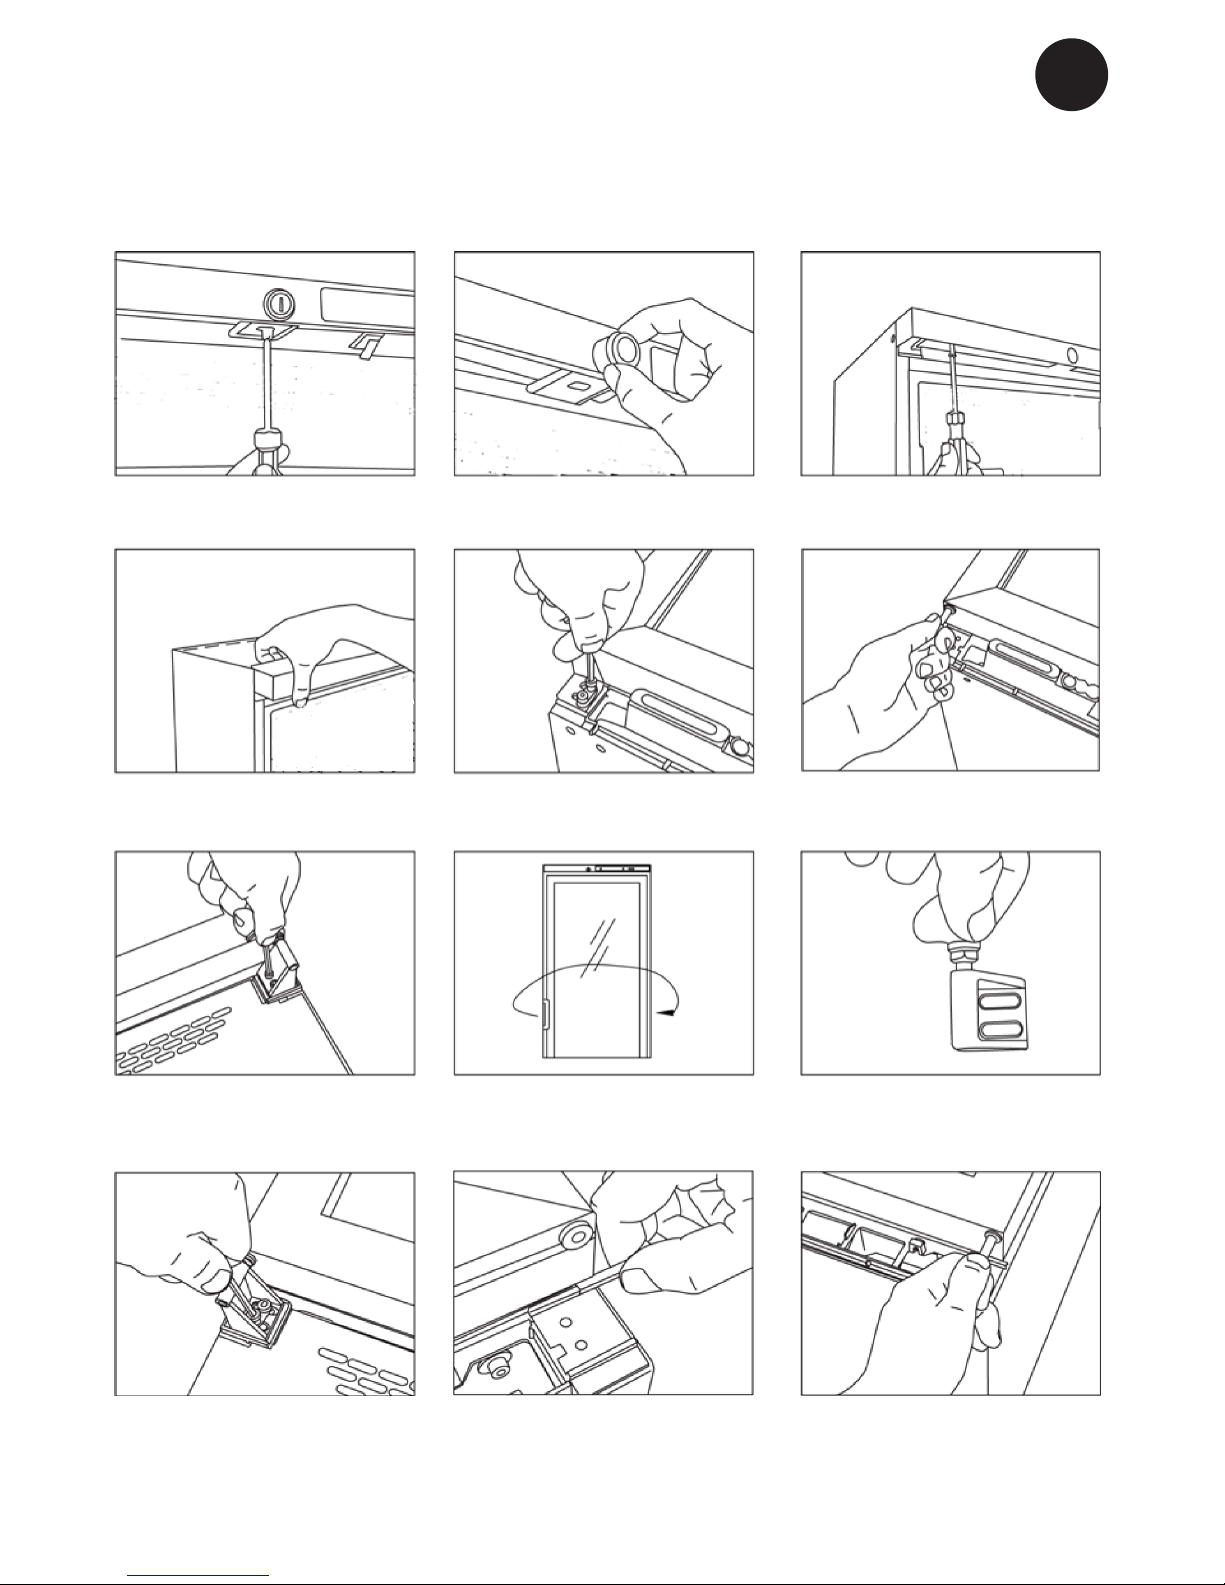
1. Remove the lock pin using a
at-headed screwdriver.
2. Remove the lock housing. 3. Loosen the top panel. Do not
remove the screws, just loosen
them.
4. Tilt the top panel forwards to
remove it (it is secured in tree
places)
5. Lay the appliance on its back
and remove the upper hinge,
using the hex key.
6. Pull the torsion spring out
of the door together with the
hinge.
7. Remove the bottom hinge
using the hex key.
8. Move the door handle to the
opposite side. 9. Move the hinge pin to the op-
posite side of the bottom hinge.
10. Ret the bottom hinge on
the opposite side.
11. Move the palstic door guard
to the opposite side.
12. Insert the hinge pin and
tosion spring into the the top of
the door on the opposite side.
Reversing the door.
(Not all appliance have lock.)

8
GB
14. Secure the top hinge in
position.
15. Raise the appliance into
uppight possion. Click the top
panel into place (it is secured in
three places.)
16. Retighten the top panel
screws using a screwdriver.
17. Ret the lock housing and
lock pin.
18. After reversing the door, it is important to check that the sealing strip provides a tight seal
all the way round. If it does not, carefully heat the strip all the way round using a hair dryer.
Then ease the strip outwards slightly so that it forms a tight seal against the cabinet. Be care-
ful not to heat the strip so much that it melts!
● Dismount the middle hing pin and
bushing.
● Dismount the door
● Cover for hinge hole is dismount-
ed an remounted in opposite site.
Reversing the door for
appliance with 2 doors.
13. Fit the left-side top hinge (avail-
able as extra). Tighten the tosion
spring approx. 1/2 turn (anticlockwise
on left side, clockwise on rigth.)

9
GB
Mounting of lock for
appliance with 1 door.
(Optional extra.)
Adjustment of the door.
Mounting of lock for
appliance with 2 doors.
(Optional extra.)
10
GB
Warranty, spare parts and service.
Warranty disclaimer
Faults and damage caused directly or
indirectly by incorrect operation, misuse,
insufcient maintenance, incorrect building,
installation or mains connection. Fire, ac-
cident, lightening, voltage variation or other
electrical interference, including defective
fuses or faults in mains installations.
Repairs performed by others than approved
service centres and any other faults and
damage that the manufacturer can sub-
stantiate are caused by reasons other than
manufacturing or material faults are not
covered by the warranty.
Please note that changes to the construc-
tion of the appliance or changes to the
component equipment of the appliance will
invalidate warranty and product liability, and
the appliance cannot be used lawfully. The
approval stated on rating plate will also be
invalidated.
Transport damage discovered by the buyer
is primarily a matter to be settled between
the buyer and the distributor, i.e. the dis-
tributor must ensure that such complaints
are resolved to the buyer’s satisfaction.
Before calling for technical assistance,
please check whether you are able to rectify
the fault yourself. If your request for assist-
ance is unwarranted, e.g. if the appliance
has failed as a result of a blown fuse or
incorrect operation, you will be charged
the costs incurred by your call for technical
assistance.
Spare parts
When ordering spare parts, please state
the type, serial and product numbers of
your appliance. This information is given on
the rating plate. The rating plate contains
various technical information, including type
and serial numbers.
Product number.
Autres manuels pour VKG 511
1
Ce manuel convient aux modèles suivants
8
Table des matières
Langues :
Autres manuels Vestfrost Refroidisseur de vin

Vestfrost
Vestfrost FZ375W Manuel utilisateur

Vestfrost
Vestfrost Tecfrigo 32 Guide de démarrage rapide

Vestfrost
Vestfrost WFG 18 Manuel utilisateur

Vestfrost
Vestfrost WFG46 Manuel utilisateur

Vestfrost
Vestfrost FZ W Series Manuel utilisateur

Vestfrost
Vestfrost WFG 185 Manuel utilisateur

Vestfrost
Vestfrost WFG 185 Manuel utilisateur

Vestfrost
Vestfrost FUNCTION Manuel utilisateur

Vestfrost
Vestfrost W155 Manuel utilisateur

Vestfrost
Vestfrost WFG48 Manuel utilisateur


