Skriware 2 Manuel utilisateur

USER MANUAL
Skriware 2
USER MANUAL
Skriware 2

TABLE OF CONTENTS
Skriware 2 User Manual
Read before proceeding 2
Warning stickers 3
Complies with the European Directives 4
General conditions 5
Hello, I’m Skriware 2 6
Components overview 7
Setting up the 3D printer 8
First set up 9
Levelling the printing platform 9
Filaments 10
Dashboard 12
Printing 15
Skrimarket 15
Taking care of your Skriware 2 18
Technical Specification 19
Troubleshooting 20
01 Skriware 2 | User manual
SAFETY & COMPLIANCE
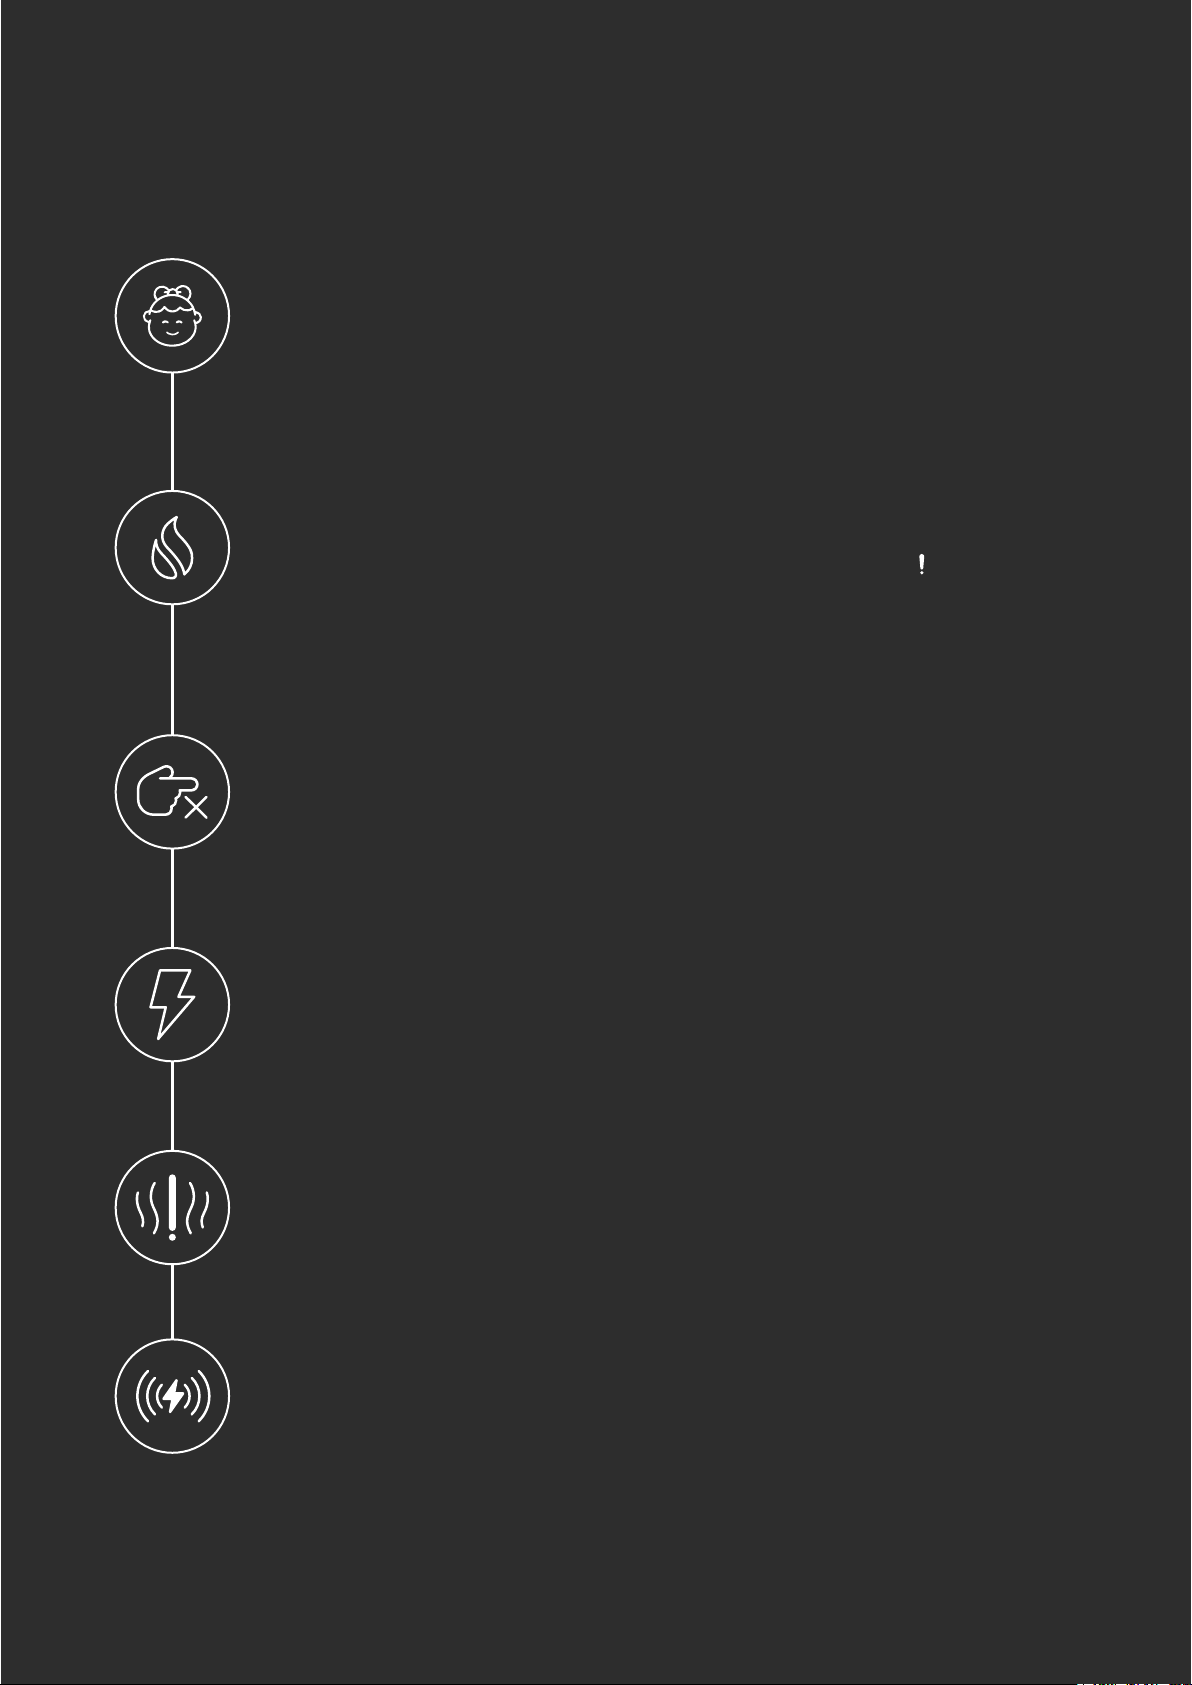
Read before proceeding
Risk of burns
Skriware 2 itself operates in a safe temperature spectrum but some of its parts
can get extremely hot (up to 280OC/536OF). Never touch the hotend, extruder, or
printing platform and their vicinities while you can see the red symbol on the
display. These parts can stay hot for up to 30 minutes after the 3D printer finishes
operating.
Children supervision
We made Skriware 2 easily accesible but due to the possible hazards listed below
children should only use it under adult’s supervision.
Moving mechanical elements
Never reach into the Skriware 2 work area, and be careful around it, while it
operates. Extruders’ gantry system uses engines that may pull in a piece of
clothing or clip a body part.
Risk of electrocution
Skriware 2 requires electric power to operate. Always connect the power cable to
a grounded power socket. Never perform any maintenance while the printer is
connected to a power socket, unless it is explicitly stated otherwise.
Dangerous vapours
It is advised to use your Skriware 2 in a well ventilated area. Depending on a type
of filament, some dangerous vapours can be released during a print process.
Electromagnetic and radio interference
Skriware 2 3D Printer is an electronic device and may cause radio and television
interference. It also utilizes Wi-Fi radio which may cause disruptions in certain
environments.
Skriware 2 | User manual 02
SAFETY & COMPLIANCE
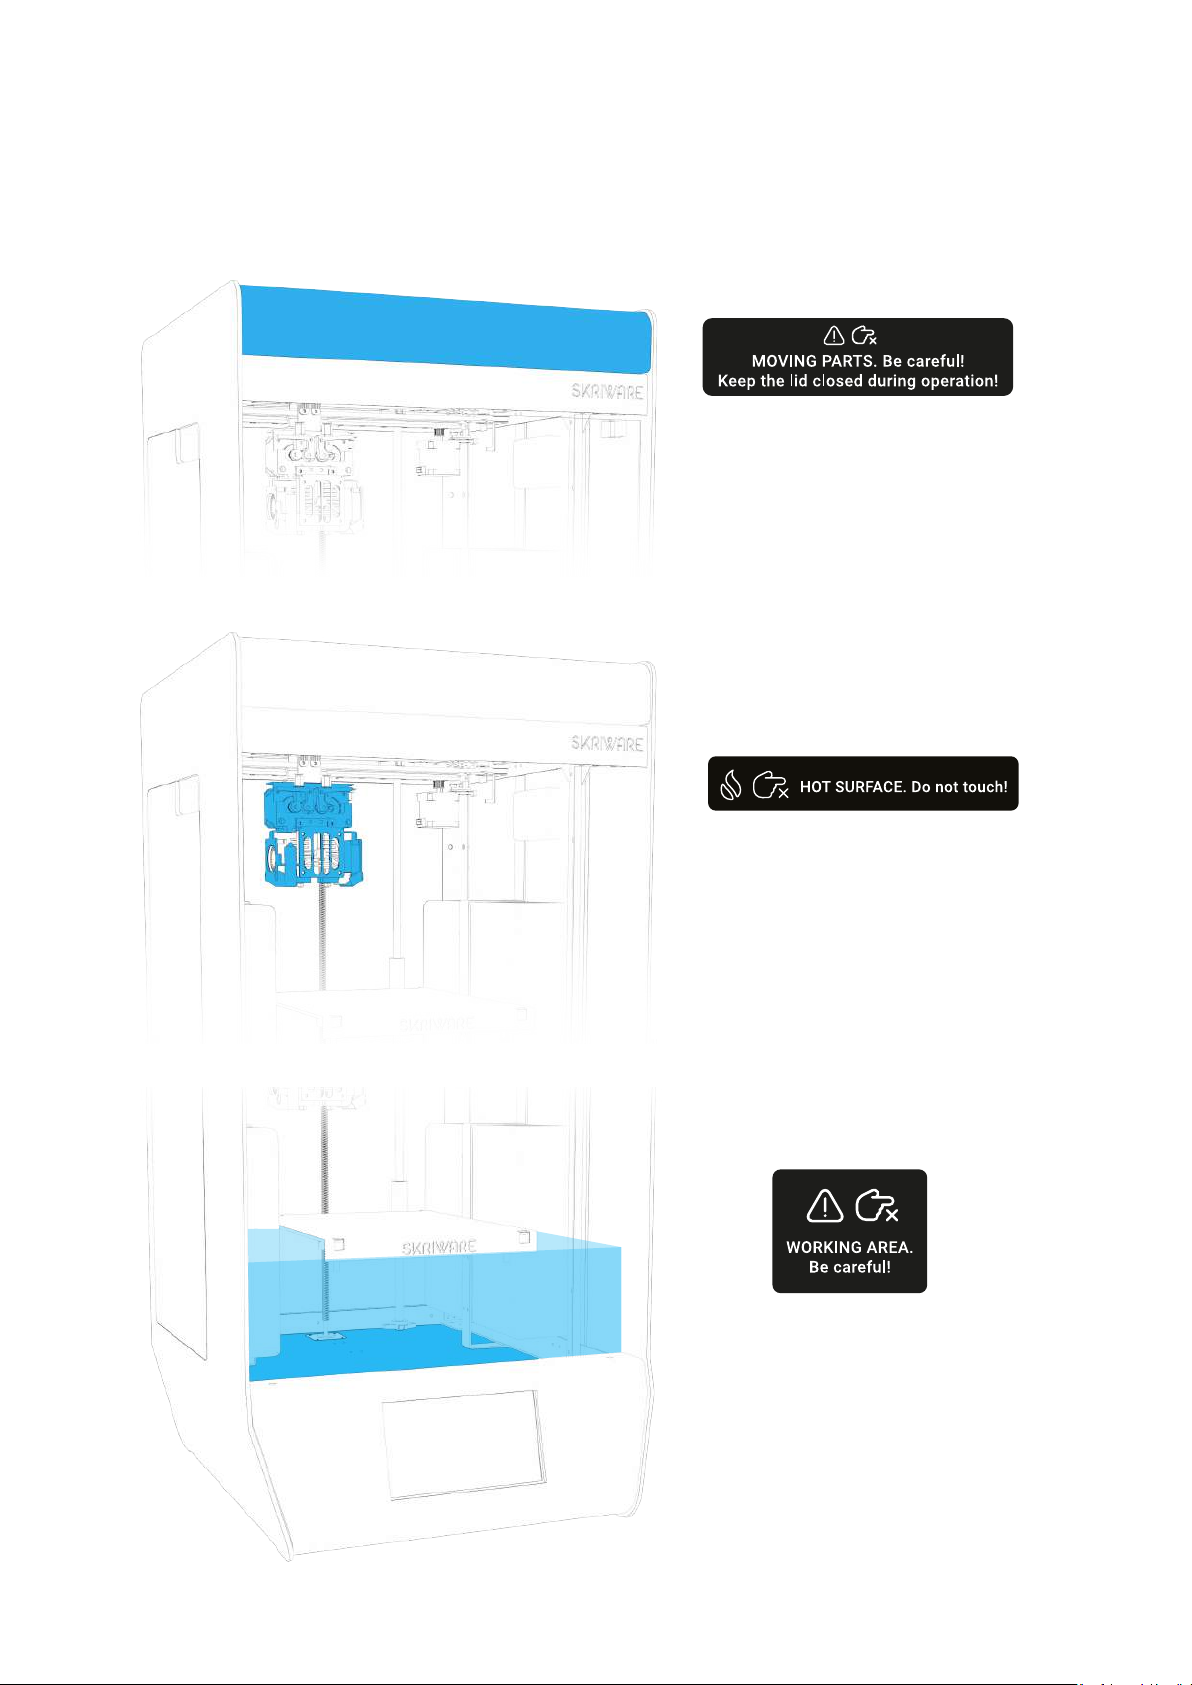
Warning stickers
Make sure to keep the lid
closed during the printing
process! There are moving
parts that may cause harm!
Do not touch the gantry
during the printing process!
The parts may be hot and
cause burns!
Keep your hands away during
the printing process! The
moving platform may cause
harm!
03 Skriware 2 | User manual

SAFETY & COMPLIANCE
Complies with the European Directives
2001/95/WE General Product Safety
and harmonized standards:
PN-EN 60950-1:2007/A12:2011
2014/35/UE Low Voltage
and harmonized standards:
PN-EN 60335-1:1999
PN-EN 60950-1:2007/A2:2014-05
2014/30/UE Electromagnetic Compatibility
and harmonized standards:
PN-EN 55014-1:2012
127 PN-EN 61000-6-1:2008
PN-EN 61000-6-3:2008
This is confirmed by the sign
placed on the device
Skriware 2 | User manual 04

The warranty is granted for a period of 12 months from the date of sale.
The printer must only be used in accordance with the following user manual.
Any use of the printer in violation of the manufacturer's guidelines contained in the following
user manual, results in the loss of the warranty.
During the warranty period, any defects originating from manufacturing process will be
removed free of charge.
Warranty repair request will only be considered in a written form containing a detailed
description of the problem and its cause. A form can be requested after contacting
support@skriware.com.
Any warranty claim must first be recognized as justified by Skriware or its Reseller.
In the event of a justified warranty repair, the costs of transportation to the service centre are
covered by the User and the return journey by the Guarantor. In the event of unjustified
warranty repair, the User will be charged for the costs of transportation to and back from the
service centre as well as any repair costs.
The warranty period is extended by the time of repair and transportation.
The warranty excludes:
mechanical damage caused by improper use;
thermal damage;
chemical damage;
damage caused by surges in the power network, or any other random events;
parts that are subject to wear during normal operation: extruder head (nozzle, hot end,
heater, plastic insulator, thermistor), filament, replaceable beds;
surface damages (discolouration, scratches, abrasions) caused by errors in storage or
use of the product;
damage caused by operation under conditions that do not meet the specifications;
cables, buttons, sockets and other components exposed to intentional or accidental
damages;
changes or temporary limitation of functionality as part of software upgrades;
limitations or lack of connection with Skriware online services.
WARRANTY
General conditions
05 Skriware 2 | User manual
WELCOME
Hello, I’m Skriware 2
Thank you for choosing Skriware 2! Our team has poured countless hours and sleepless nights
into making it the most feature-packed, user-friendly 3D printing device on the planet.
Whether you are a tinkerer, a hobbyist, an educator, a student, an industry professional, a
designer, an architect, or you simply want to print that cool stuff you saw on the internet we
believe that Skriware 2 is the right choice for you.
Please keep in mind that your 3D printer is a part of a bigger ecosystem of Skriware products.
That means that you can do more with it than possibly with any other 3D printer currently on
the market. Want to design and print robots while learning how they work? We got you
covered! Don’t know how to use slicing software to prepare your 3D prints? No worries! Are
you a teacher looking to engage your students on a whole new level? Skriware has something
special for you! Go visit www.skriware.com for all the details on those and other exciting
features we have prepared. Our team is constantly working on adding more and more to our
software and hardware solutions. If you would like to make a suggestion or simply say hi, write
to us at info@skriware.com or send us a Facebook message!
You can read up on all the features and innovations we added and how to use them in the
following manual but if something is unclear do not hesitate to write us at
support@skriware.com.
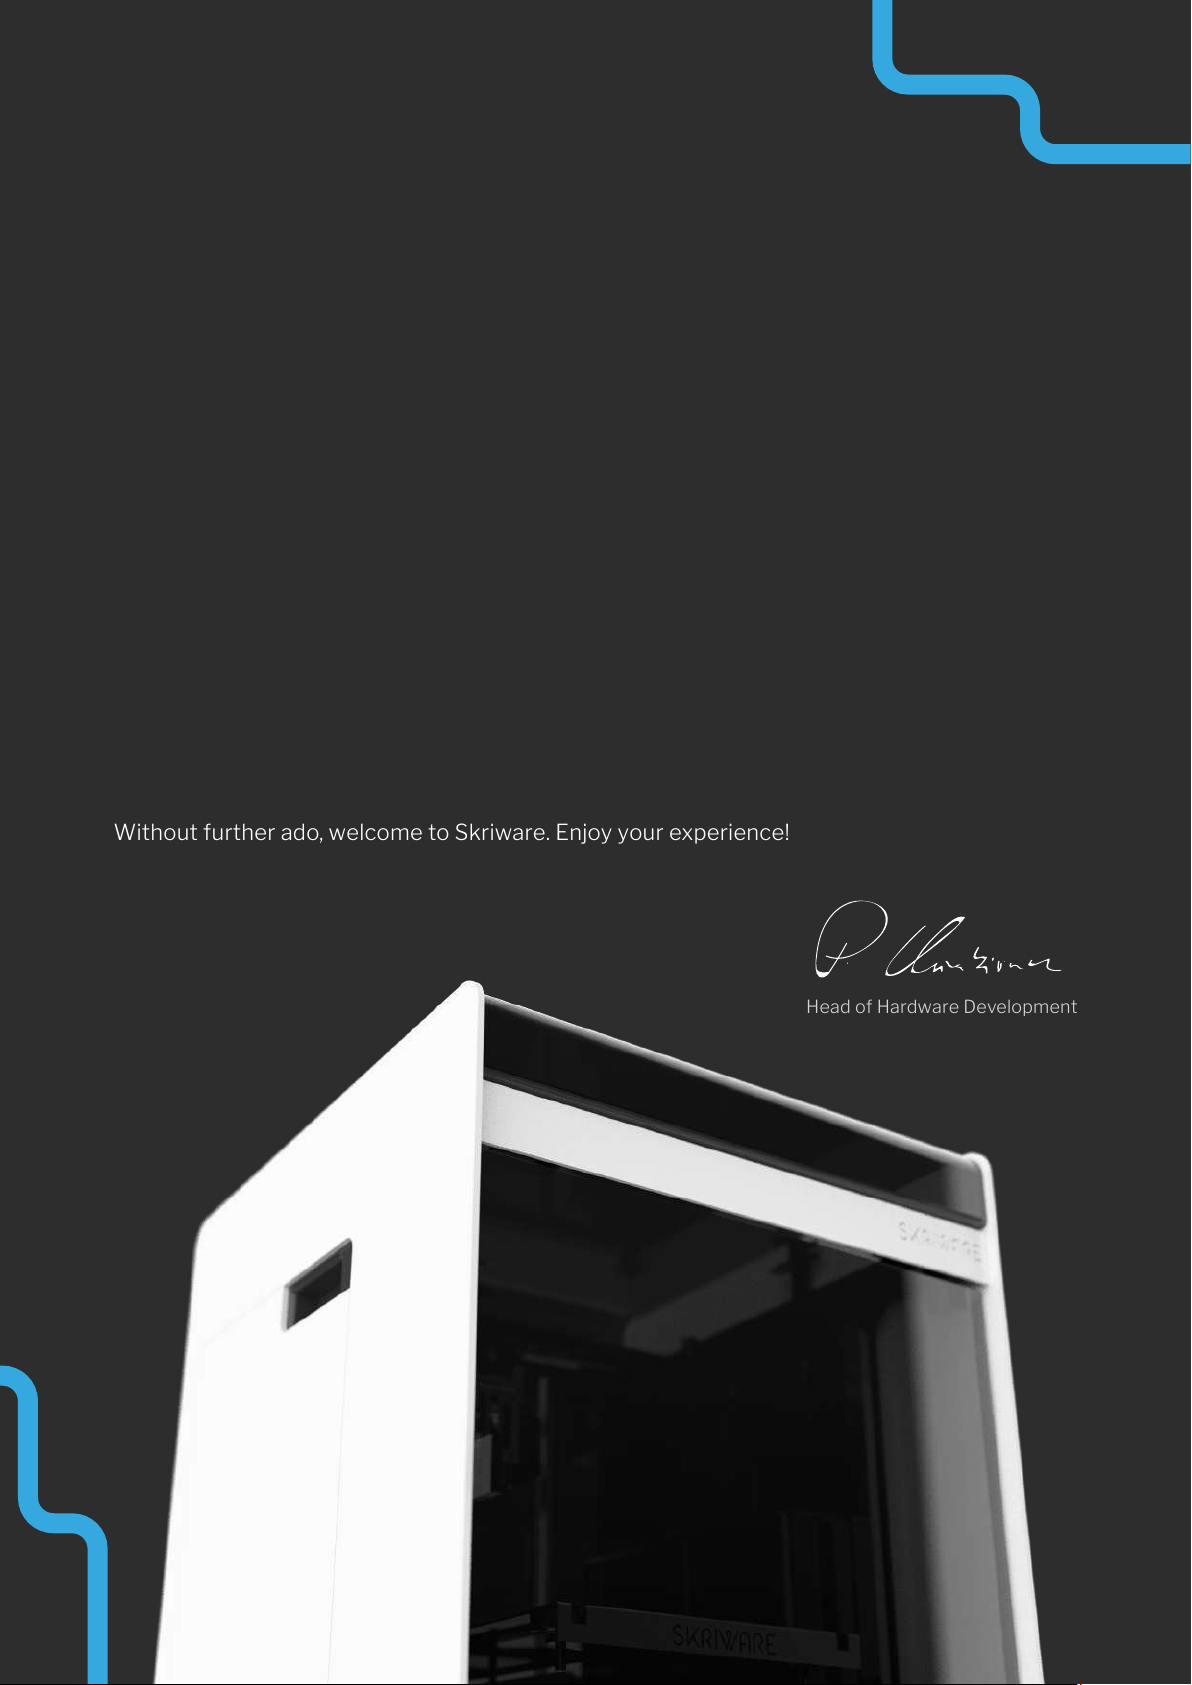
Without further ado, welcome to Skriware. Enjoy your experience!
Head of Hardware Development

SKRIWARE 2
Components overview
Doors
Touchscreen
Printing bed
ON/OFF touch button
Bed regulation knobs
Printing bed clips
Camera
Print head
Filament proximity sensor
Adjustable feet
USB port
Filament chamber
Filament chamber
Power supply socket
Switch I/0
Ethernet port
Filament input hole
07 Skriware 2 | User manual
SKRIWARE 2
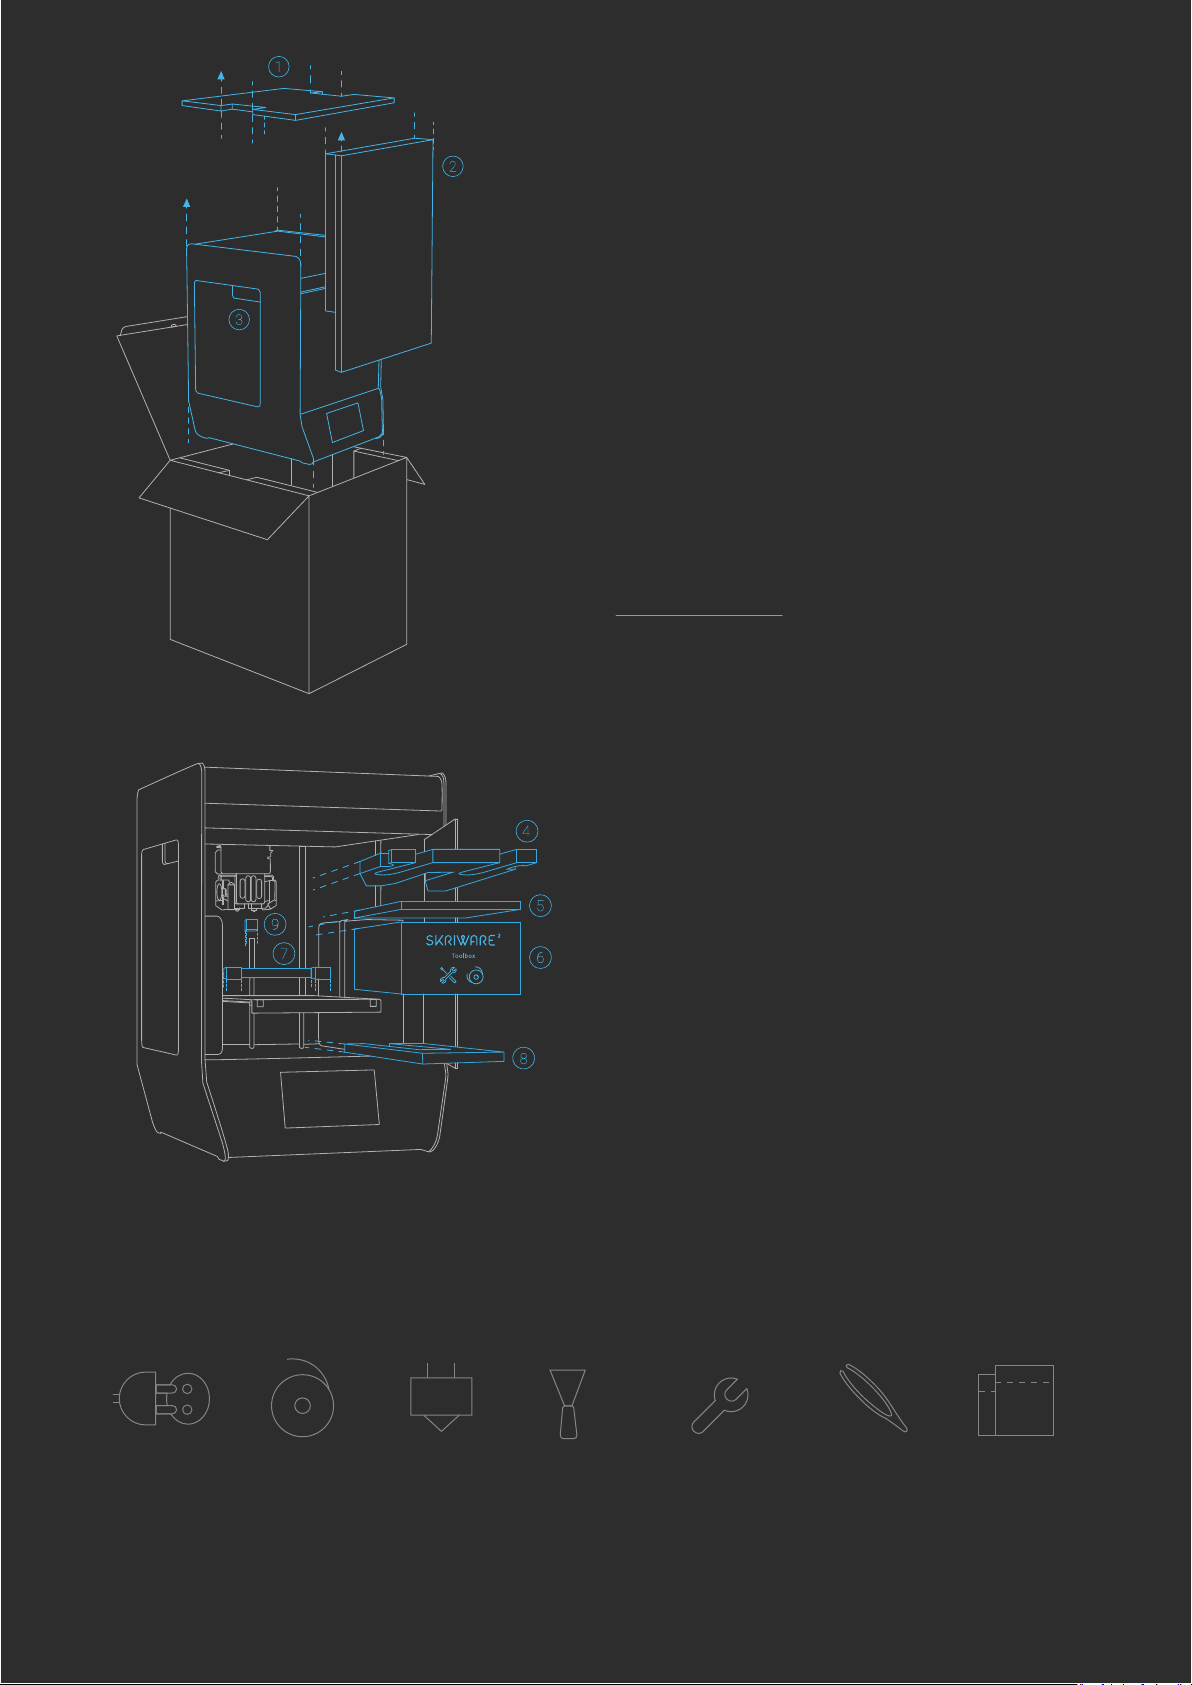
Setting up the 3D printer
Whats in the toolbox?
To securely take your new Skriware 2 3D printer
out of the box, remove the top securing panel
first (1) and then both front securing panels (2).
Your 3D printer comes in a foil bag. Open it by
removing the sticker on the top. You will find
handles on both sides (3) by which you can lift
Skriware 2. Place it on the designated working
surface. Make sure it is stable and level. Use the
adjustable feet on the bottom of the printer to
adjust its level. Remove the stickers securing the
moving parts.
Plug the power cable into the 3D printer’s power
socket on its back and into a grounded power
socket, and then set the power switch on the
back to 1 (ON) position. Optionally plug ethernet
cable in the ethernet port.
Power
cable
2 Filaments 2 spare
nozzles
Spatula Hex keys 2mm,
2,5mm, 4mm &
7mm spanner
Tweezers 2 zipper bags
with dessicant
Gently push the front see-through panel of your
Skriware 2 3D printer to open it, and start
removing securing elements:
4) gantry system’s securing foam
5) extruders’ securing foam
6) toolbox
7) printing platform’s securing foam
Raise the printing platform gently by pulling up
by the platform's back edge (not the front one!).
8) bottom printing platform’s securing foam
9) Z leading screw's securing foram
Skriware 2 | User manual 08

LET’S START
First set up
Touch the Power button on the front of your Skriware 2 3D printer to turn it on. If this is your first time,
you will be guided through the set up wizard to:
connect to a network,
pair your 3D printer with your existing or new Skriware account,
learn about the functionalities of the dashboard.
CALIBRATION
Levelling the printing platform
The printing platform comes pre-levelled.
However, it is possible that it has moved during the
delivery and needs alignment. Go to SETTINGS –>
Maintenance, press CALIBRATE, and follow the
on-screen instructions.
Filament detection
Proximity sensor
Power button
Touch panel
Calibration Card
Use this card to check if the
distance between nozzles and
the printing bed is correctly
adjusted.
Please do not throw
away this card.
09 Skriware 2 | User manual
Autres manuels pour 2
1
Table des matières
Autres manuels Skriware Imprimante 3D


