point PAX S80 Manuel utilisateur

Point Transaction Systems Oy
Vanha Nurmijärventie 62 D
FI-01670 Vantaa
www.point.
point@point.
Tel: 09 477 433 0
Fax: 09 436 24 90
Billing:
09 477 433 42
laskutus@point.
Supplies:
09 477 433 44
tarviketilaukset@point.
Service:
09 477 433 70
Opening hours: Mon - Fri at 8 - 16
Sales:
09 477 433 40
myynti@point.
Order handling:
09 477 433 43
tilaustenkasittely@point.
Customer service:
0600 01 02 03 (1,25 € / min)
Mon - Fri: 8 - 19
Sat: 9 - 14
asiakaspalvelu@point.
© Point Transaction Systems Oy | All rights reserved | ver. 1.0

INDEX:
1. BEFORE USE
1.1 Important 4
1.2 Terminal structure 4
1.3 Technical data 5
1.4 Connecting the terminal 6
1.5 Switching the paper 7
1.6 Keypad 7
1.7 Using the menus 7
1.8 Letters and special characters 8
1.9 Testing the connection 8
2. DAILY USE
2.1 TRANSACTIONS 9
2.1.1 Chip card transaction 9
2.1.2 Swipe card transaction 9
2.1.3 Void 10
2.1.4 Manual entry 10
2.1.5 Receipt copy 11
2.1.6 Return 11
2.2 REPORTS AND BANK CONNECTION 12
2.2.1 Print batch 12
2.2.2 Monthly report 12
2.2.3 Journal 12
2.2.4 Send batch 13
2.2.5 Blacklist 13
2.2.6 Report explanations 14
2.3 AUTHORIZATION NOTIFICATIONS 15
3. SETTINGS
3.1 Terminal settings 17
3.2 Print parameters 17
3.3 Sending time 18
3.4 Cashier number 18
3.5 Merchant info 18
3.6 Fixed IP-address 19
3.7 Connection type 19
3.8 GPRS APN 19
3.9 Floor limit 20
3.10 Date and time 20

4. PATU -KEYS
4.1 Key input 21
4.2 Clearing the keys 21
5. DOWNLOADS
5.1 Downloading the program 22
5.2 Downloading the parameters 22
5.3 Downloading the certicate 22
6. SPECIAL FUNCTIONS
6.1 Cash receipt 23
6.2 Cash withdraw 24
6.3 Extra 25
6.4 VAT 25
6.5 Mandatory authorization 26
6.6 Preauthorization 26
6.7 Invoice 26
7. TROUBLESHOOTING
7.1 Notications on the screen 27
7.2 Notications on the receipt 27
7.3 Other exceptions 28
7.4 Service 29
7.5 Deleting transactions 30
8. USEFUL CONTACT INFORMATION 31
9. ALPHABETICAL INDEX 32

1. BEFORE USE
4
1.1 Important
Notice! If these instructions are not followed and the terminal
is damaged it will void the warranty.
• Protect the power cord and modem. If they are damaged they are not to be
used anymore.
• Terminal can only be connected to an electric outlet that has a groud connec-
tion a fuse connection.
• The terminal needs to be placed rmly on a table. It can not be exposed to
direct sunlight, hot temperature, moist or dust.
• The terminal is not waterproof or dustproof, and is intended for indoor use only.
• Poor-quality paper can jam the printer and create excessive paper dust.
• Disconnecting the power during a transaction may cause transaction data les
not yet stored into terminal memory to be lost.
• Never use thinner, trichloroethylene, or ketone -based solvents – they may
cause deterioration of plastic or rubber parts. Do not spray cleaners or other
solutions directly onto the keypad or terminal display.
• If the terminal is damaged it needs to be sent to service. Never try to x the
terminal by yourself.
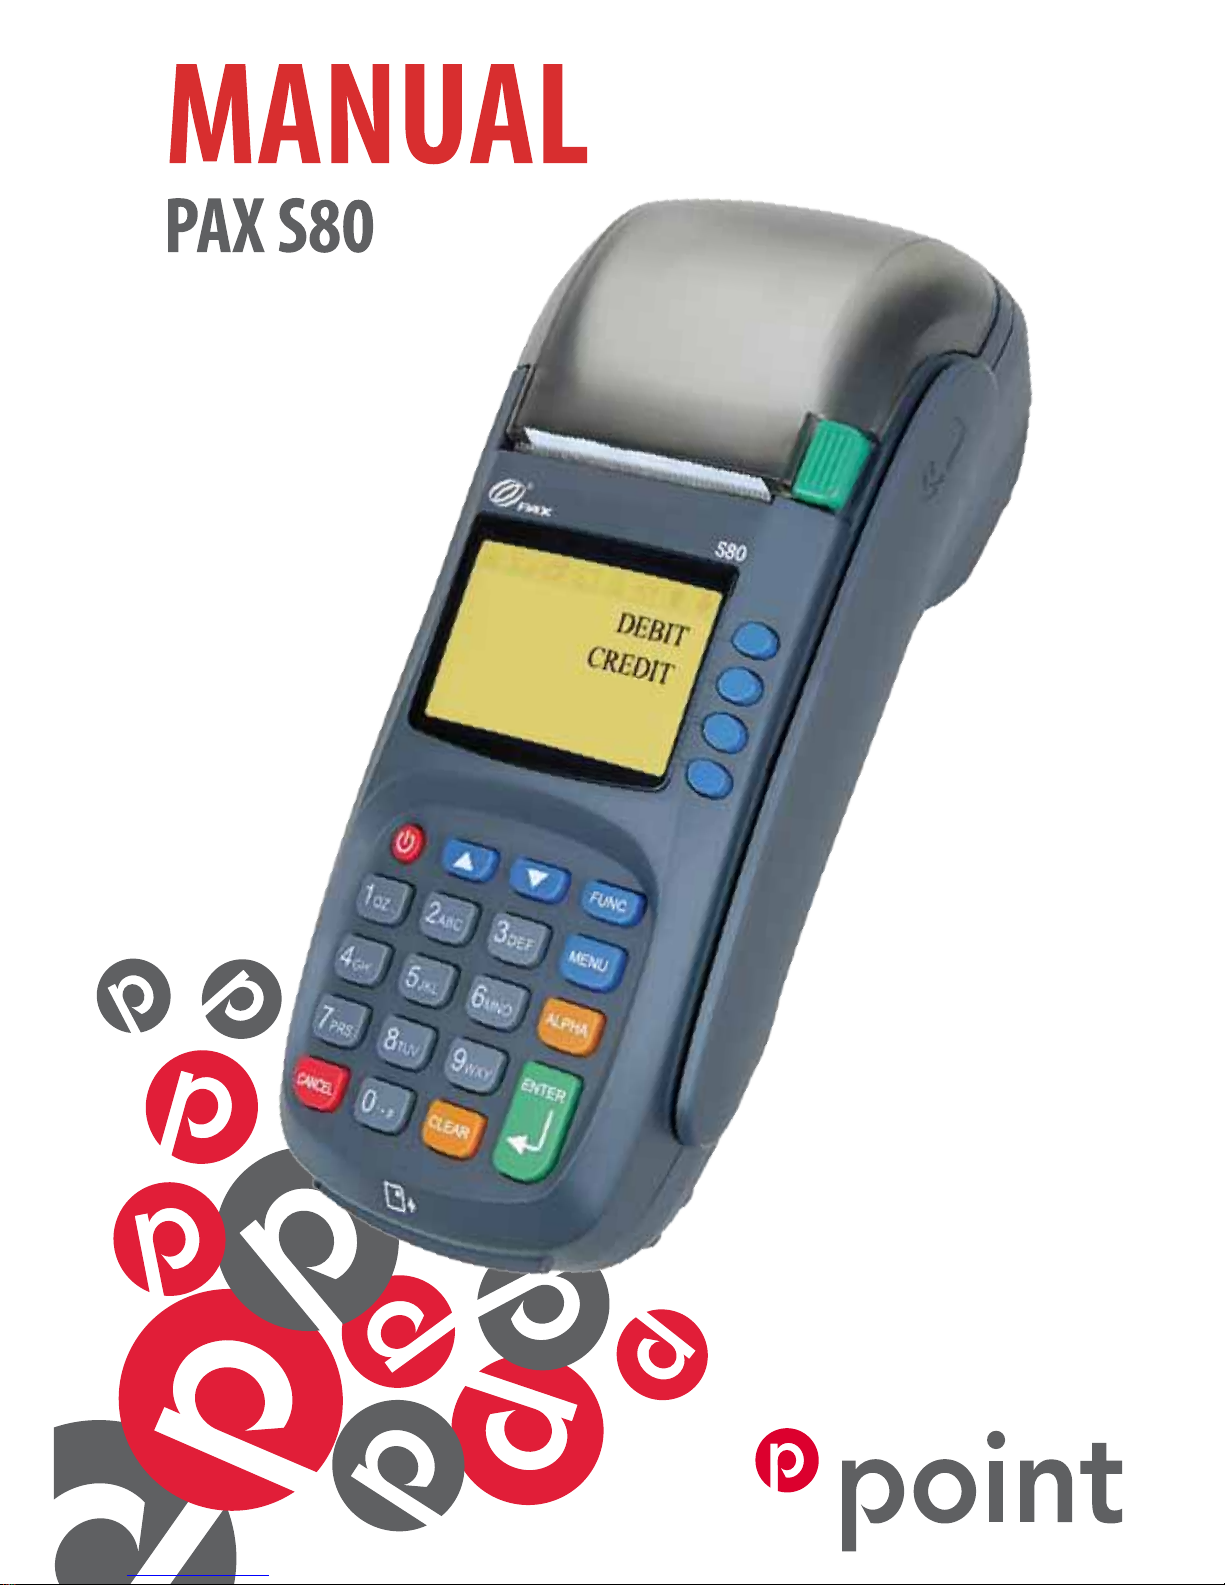
1.2 Terminal structure
!

1. BEFORE USE
5
1.3 Technical data
CPU: 32-bit, ARM9-processor
Memory: 8MB FLASH, 16MB SDRAM
Display: 128 x 64 pixel LCD display with LED backlight
Keypad: 10 alphanumeric keys, 8 functional keys and 4 ATM keys, 1 power
key
Readers: Magnetic card reader and IC card reader, EMV certied
SAM: 3, ISO7816
Connections: Broadband and GPRS
Printer: Thermal printer, 20 lps. Paper width: 58 mm
Dimensions: 216 mm x 95mm x 86mm (including key shield) (L x W x H)
Weight: 525 g

6
1. BEFORE USE
1.4 Connecting the terminal
• Connect the power cord to the power pack.
• Take o the cord shield from the bottom of the terminal
• Attach all the needed peripherals at place
• Place back the cord shield
• When using GPRS, place the SIM card into the SIM slot
• Place the terminal rmly to a table
• Switch on the terminal using the power key
Broadband:
Attach the ethernet cable to: LAN.
Attach the power cord to: POWER.
GPRS:
Attach the power cord to: POWER.
Place the SIM card to the right slot: the one that is sideways. Make sure that the locking
mechanism is in the right position so that the SIM card stays in place.

1. BEFORE USE
7
1.5 Switching the paper
• Press down on the button located on the right side of the terminal to unlatch
the paper roll cover, then lift the cover up and back.
• Remove any partial roll of paper in the printer tray.
• Hold the roll so the paper feeds from the bottom of the roll.
• Drop the paper roll into the printer tray.
• Close the paper roll cover by gently pressing directly on the cover until it clicks
shut, allowing a small amount of paper past the glue residue to extend outside
the printer door.
• The terminal informs “Paper loaded, press Enter.” Press Enter.
1.6 Keypad
1.7 Using the menus
Move in the menus by pressing the arrow buttons. Make selections by pressing F1
– F4 buttons. Accept selections by pressing Enter. Get to previous menu by pressing
Cancel and to the base screen by pressing Cancel several times.

8
1.8 Letters and special characters
Input letters and special characters by rst pressing the number with the wanted
character and then ALPHA button so many times that the character appears. Switch
capital letters to lower case letters by pressing FUNC.
1 = QZ.
2 = ABC
3= DEF
4 = GHI
5 = JKL
6 = MNO
7 = PRS
8 = TUV
9 = WXY
0 = , * # - + _ (space)
1.9 Testing the connection
Press MENU and choose SEND BATCH.
The terminal connects to the bank and if everything is correct it retrieves the nec-
essary les and the blacklist. After this it returns to the base. Now you are ready to
accept card transactions. If any problems should occur see page 32 for more informa-
tion.
1. BEFORE USE

2.1 TRANSACTIONS
2.1.1 Chip card transaction
ENTER AMOUNT: Type in the amount, cents included and press Enter.
PLEASE INSERT OR SWIPE CARD: Insert the card into the chip slot chip facing up.
CREDIT / DEBIT: The customer selects the preferred payment method.
ENTER PIN: The customer enters their PIN-code and presses Enter.
Notice! You can bypass the PIN-code by pressing Enter. In this case the respon-
sibility for the transaction is yours.
The terminal prints out the receipts. The rst one is for the merchant and the second
one for the customer.
If the PIN-code was entered the receipt does not have to be signed. The terminal will
remind you to check the customer’s ID if the transaction exceeds 50,00 € (depend-
ing on the card used). Check the ID and write the last 4 digits of the social security
number and which ID was checked to the receipt.
REMOVE CARD: Take the card out of the reader.
Notice! The card must be in the reader during the whole transaction or the
transaction will be aborted.
2.1.2 Swipe card transaction
ENTER AMOUNT: Type in the amount, cents included and press Enter.
PLEASE INSERT OR SWIPE CARD: Swipe the card from the magnetic card reader.
CREDIT / DEBIT: Select the preferred payment method.
The terminal prints out the receipts. The rst one is for the merchant and the second
one for the customer. Ask the customer to sign the receipt.
The terminal will remind you to check the customer’s ID if the transaction exceeds
50,00 € (depending on the card used). Check the ID and write the last 4 digits of the
social security number and which ID was checked to the receipt.
9
2. DAILY USE
Table des matières
Manuels Terminal de paiement populaires d'autres marques


Ingenico
Ingenico iWL250B Manuel utilisateur

Optimum
Optimum M4230 Manuel utilisateur

Triton
Triton RL5000 Manuel utilisateur

Ingenico group
Ingenico group Lane/8000 Manuel utilisateur

Gilbarco
Gilbarco FlexPay IV CRIND Manuel d'installation et d'exploitation

Infinite Peripherals
Infinite Peripherals Infinea Tab Lite Manuel utilisateur


