Fortune Culture Technology L6 Manuel utilisateur

Contents
1. Packing List…………………………………………………………………………………….……1
2. Safety Introductions……………………………………………………………………….……2
3. Printer Parameters………………………………………………………………………….……3
4. Printer Overview…………………………………………………………………………….……4
5. Menu Directory…………………………………………………………………………….……..5
6. Platform Leveling………………………………………………………………………..……….6
7. Slicer Software………………………………………………………………………….…………8
8. First Print Introductions…………………………………………………………..…………21
9. FAQ and Machine Maintenance…………………………………………………………23
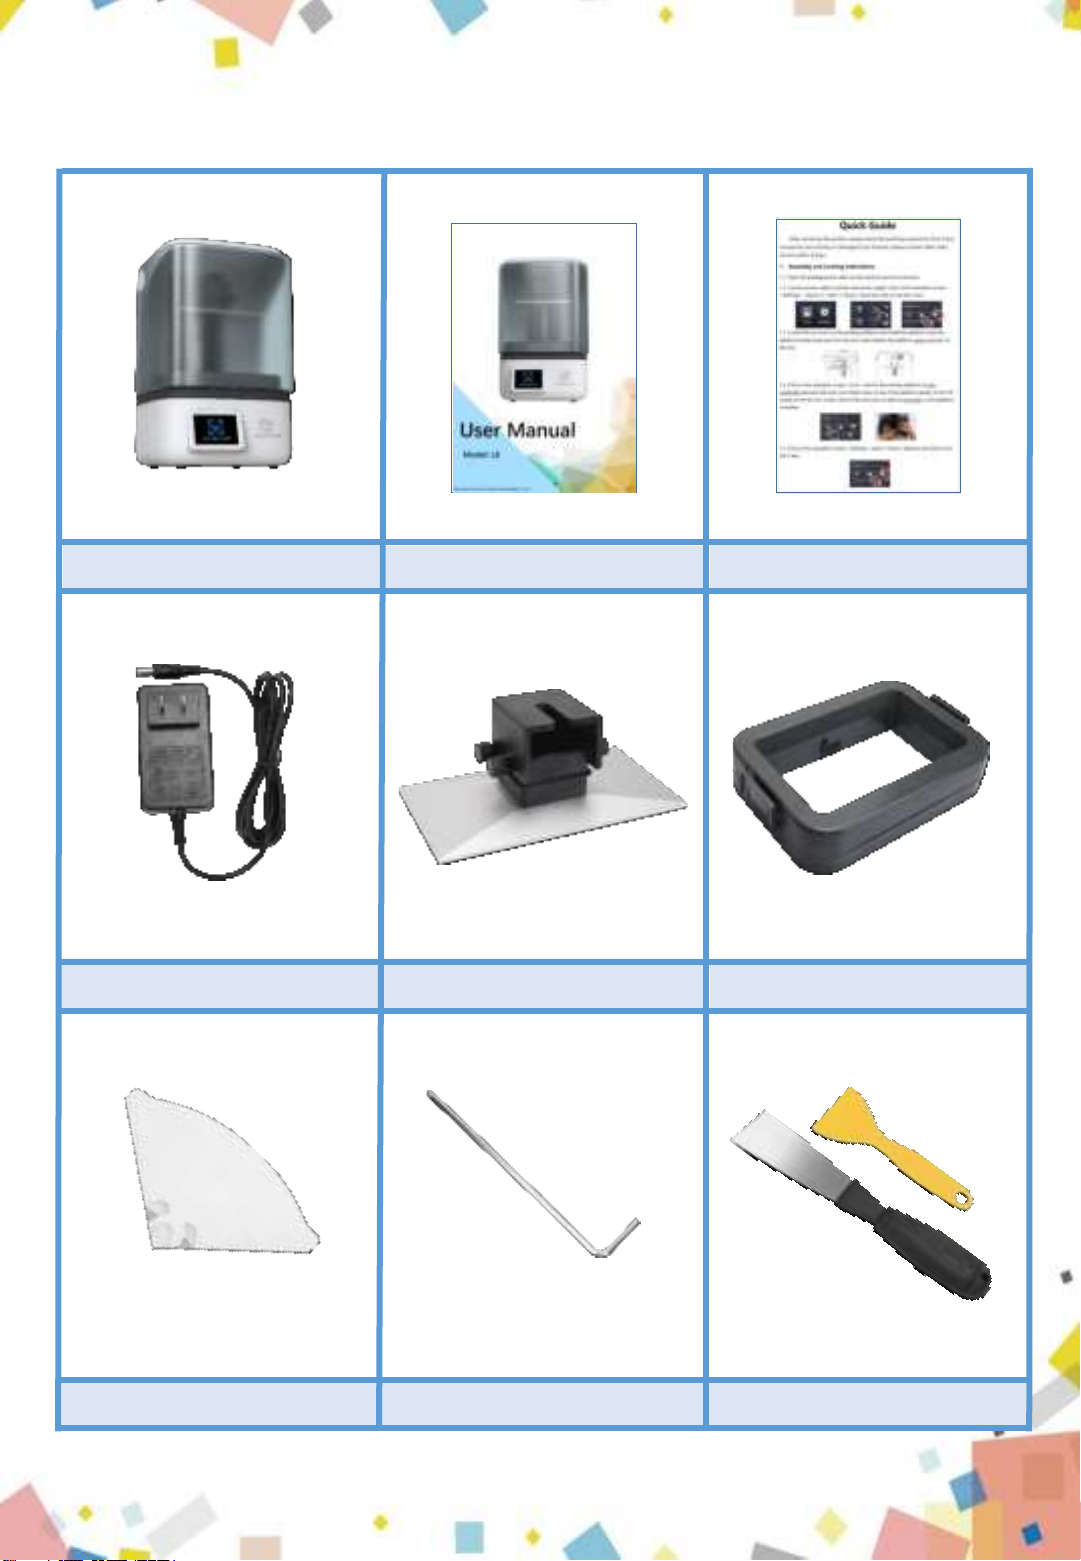
1. Packing List
Paper Funnel * 2 Allen Wrench * 1 Scrapers * 2
Print Platform * 1 Resin Vat * 1
Quick Guide * 1
User Manual * 1
3D Printer * 1
Power Adapter * 1
1
2. Safety Instructions
Always follow the safety instructions during assembly and usage, to avoid any
unnecessary damage to the 3d printer or individual injury.
●After receiving the printer, please check the packing accessories first. If any accessories
are missing or damaged (non-human), please contact after-sales service within 3 days to
reissue. (If you do not contact after-sales service within the specified time, the possible costs
will be borne by the customer.)
●Wear gloves and mask to avoid direct skin contact when using. If resin splashes into the
eyes or mouth accidentally, rinse with plenty of water.
●Always use the LCD 3D printer in an open and well ventilated area. It is recommended t
o use the printer indoors and avoid direct sunlight and dusty environment.
●Recommended ambient temperature is 15-40 degrees, and the ambient humidity is 20%-
80%. Use outside of this range may bring poor printing results.
●In case of emergency, please immediately shut down the power of the 3D printer and co-
ntact the technical support.
●It is recommended to use protection glasses when cleaning/sanding the printed models
to avoid small particles contacting eyes.
●Please keep the 3D Printer and its accessories out of the reach of children.
●Please don't disassemble the 3D Printer by yourself, which will cause your warranty to ex-
pire. Please contact the after-sales service if you have any questions.
●If you do not use the machine for a long time, please pay attention to rain and moisture
protection for the 3D printer.
2
3. Printer Parameters
Model L6
Operation 3.5 Inch Touch Screen
Slicer Software CHITUBOX
Connectivity WIFI, USB
Technology UV Photocuring LCD
Light Source 405nm UV Matrix Parallel Light Source
XY Resolution 0.047mm(2560*1620)
Z Axis Accuracy 0.00125mm
Layer Thickness 0.025-0.1mm
Print Speed 20~60mm/h
Rated Power 48W
Offline Printing Support
Operate System Windows
Build Volume 130.56(L)x82.62(W)x150(H)mm
Print Materials 405nm Photopolymer Resin
Net Weight 4.7kg
Gross Weight 6.6kg
Printer Dimensions 270(L)x275(W)x405(H)mm
Package Size 340(L)x340(W)x490(H)mm
3
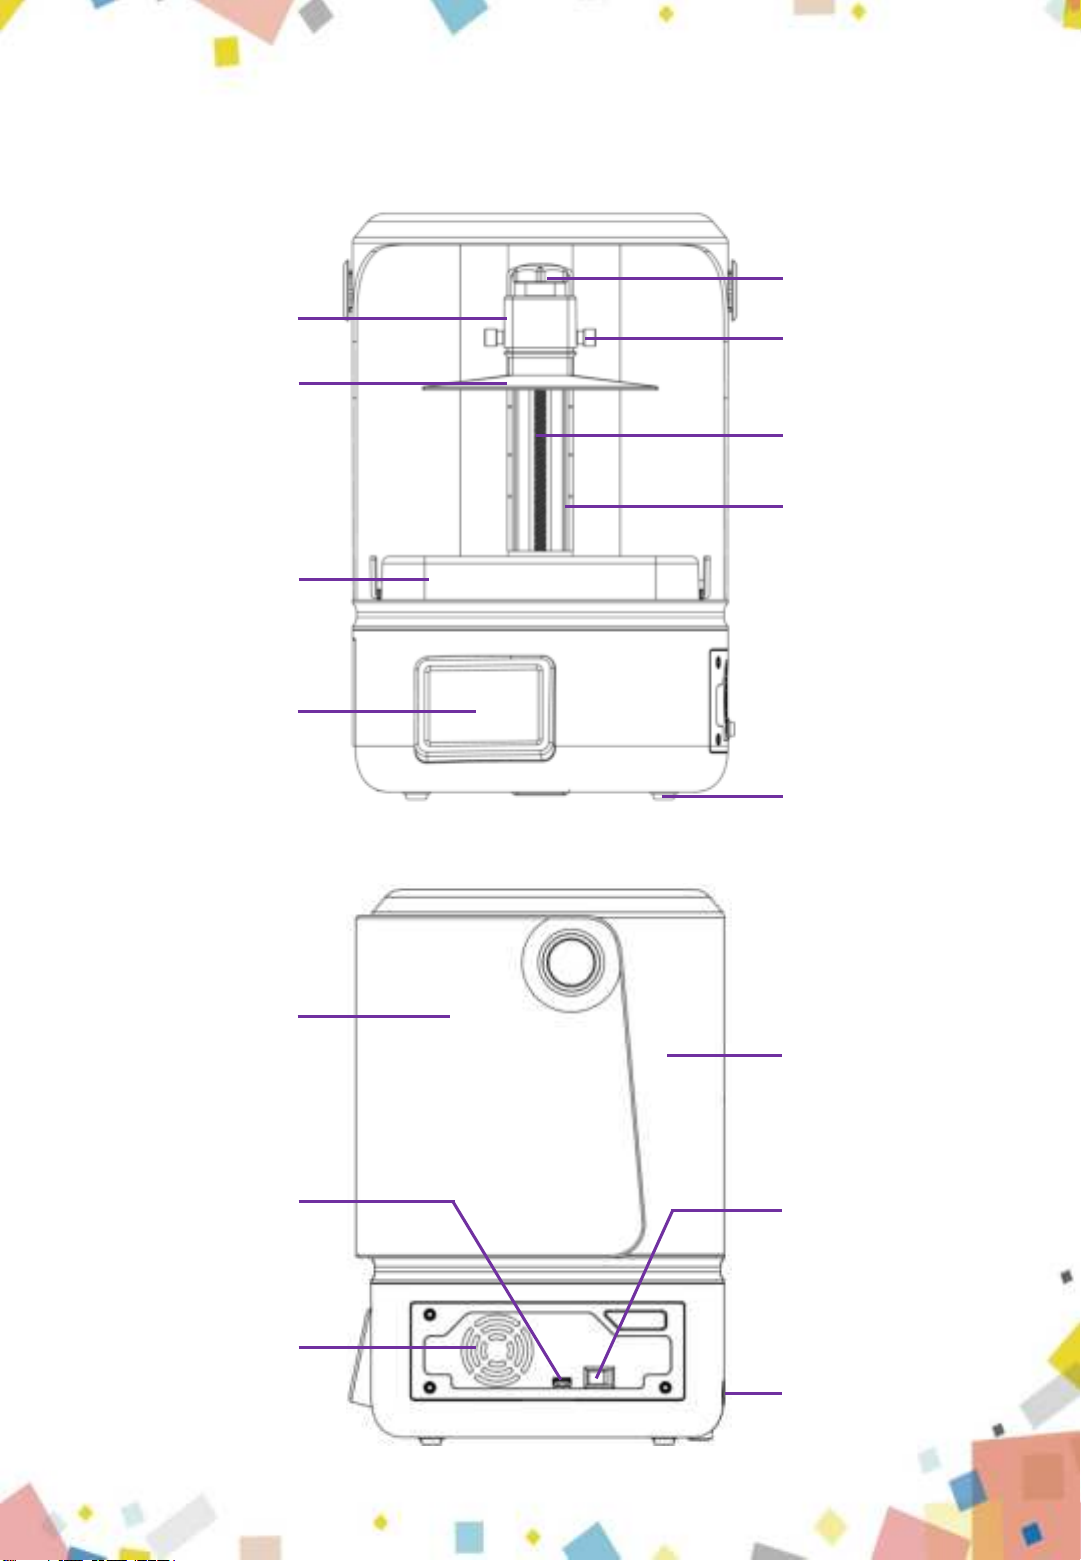
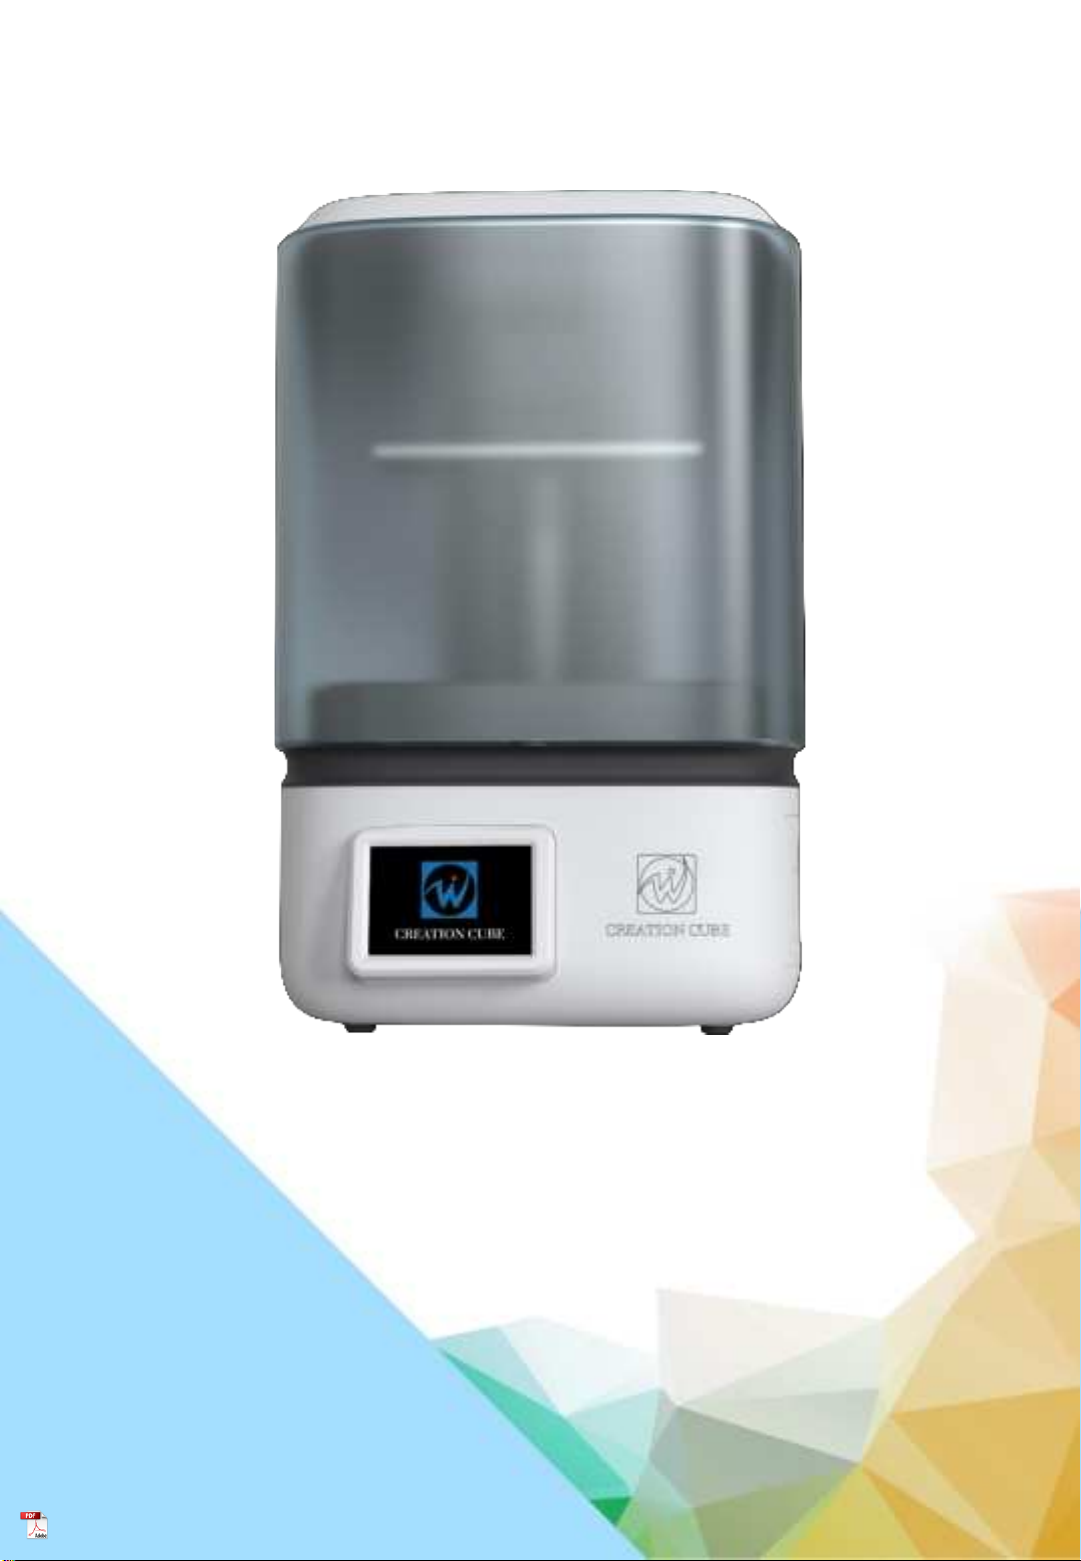
4. Printer Overview
Air Vent
Z Leadscrew
UV-blocking Cover
Linear Guidway
Printer Shell
Platform Arm
USB Port Power Switch
Screws
4
Build Platform
Resin Vat
Touch Screen
Platform Securing Knob
Leveling Pad
Power Interface
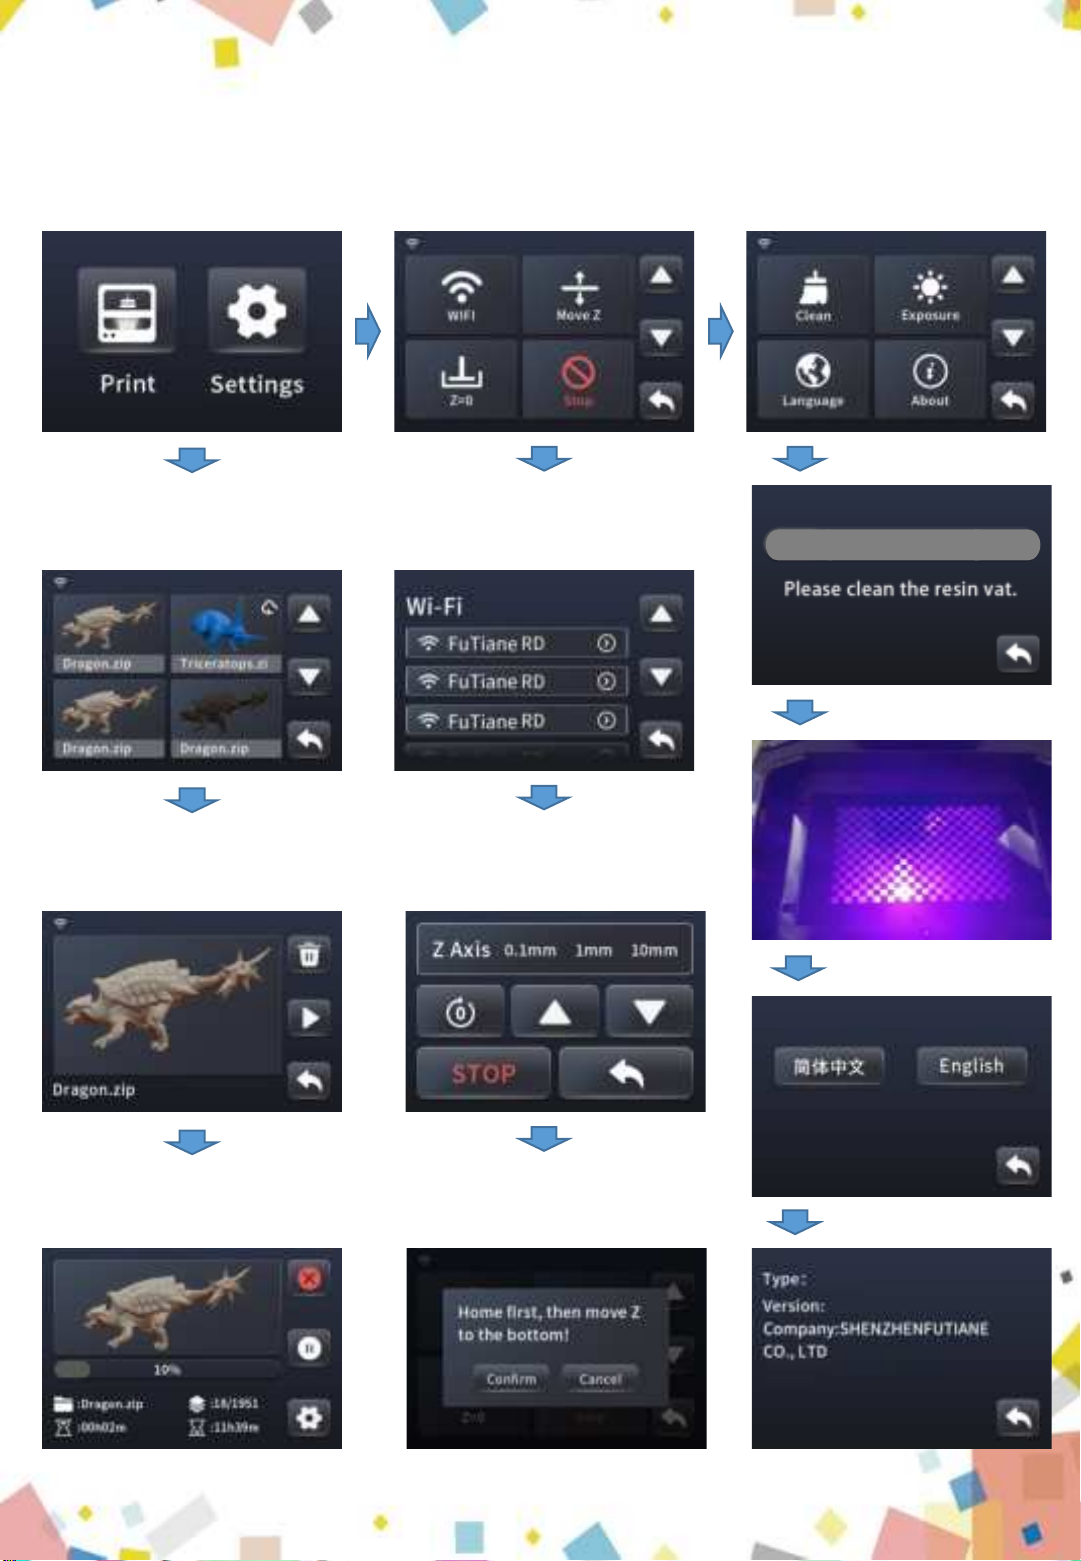
5. Screen Functions
Menu
Print
Choose files
Exposure test
Start
Settings 1 Settings 2
WIFI
Clean the vat
Move Z
Z=0
Language
Info
0.1mm 1mm 10mm
5
100%
L6
V1.0.1
6. Assembly and Leveling Instructions
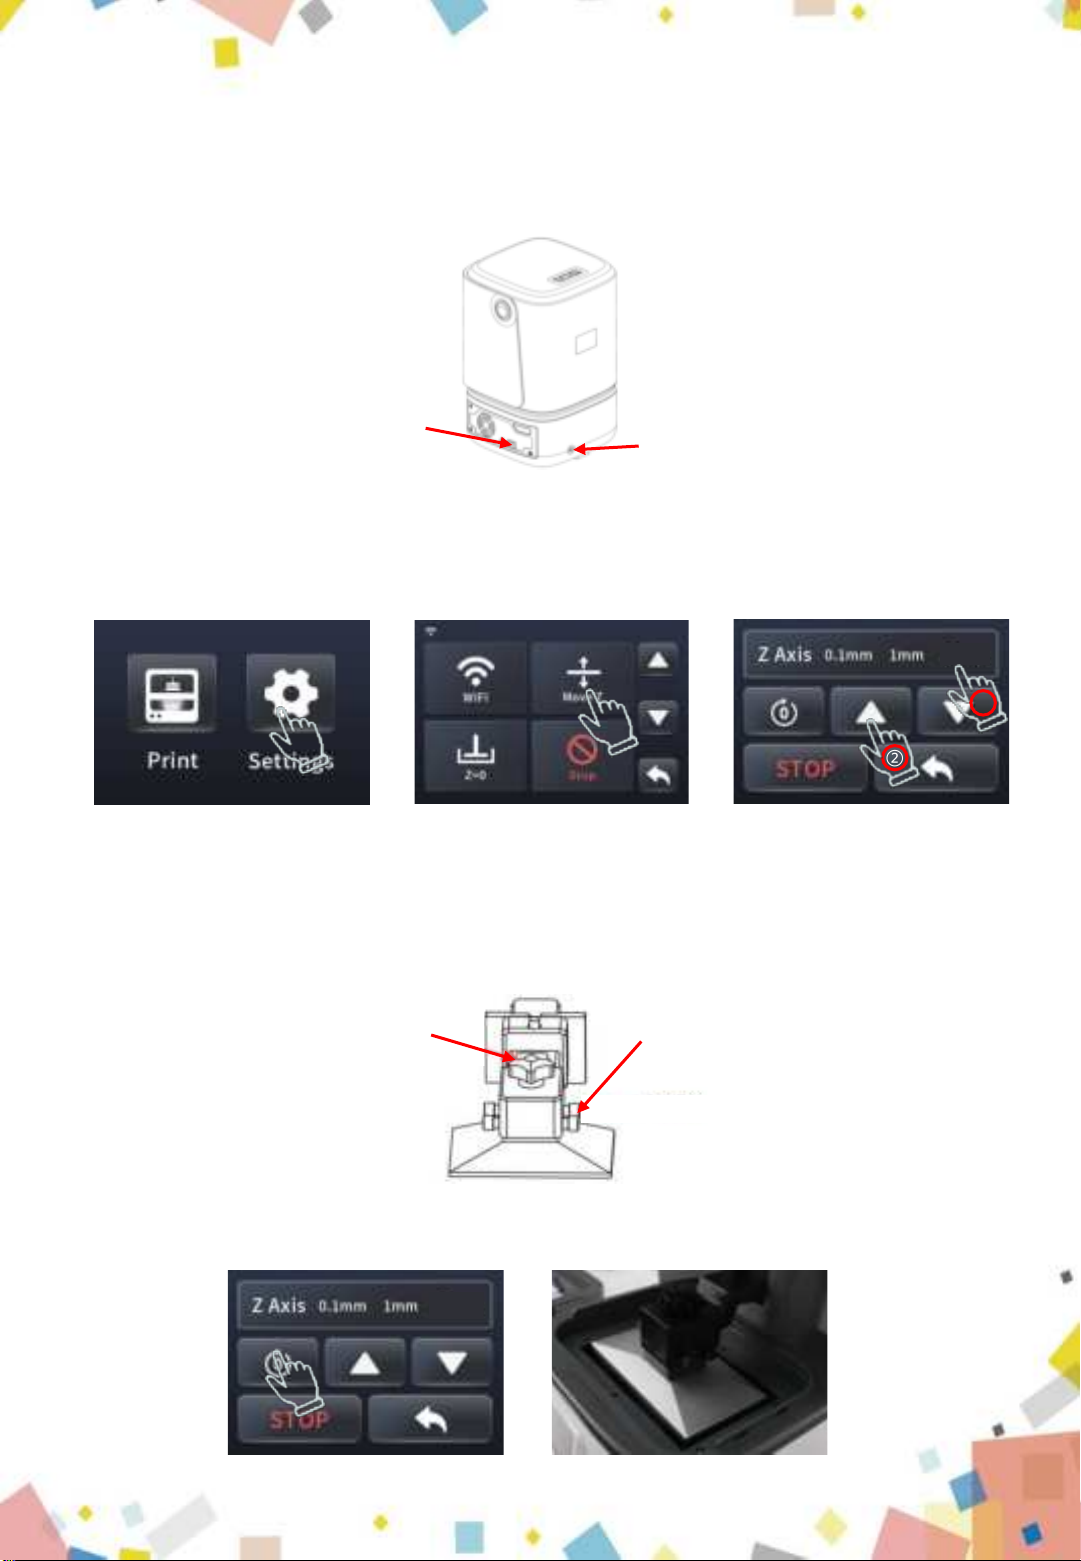
6.1 Connect power cable to printer and power supply; as shown in picture (6.1)
6.2 Click on the operation screen <Settings>-<Move Z>, select <10mm> travel and
click to rise the Z axis. Check and keep the LCD screen and the platform clean and free
of debris; as shown in picture (6.2)
6.3 Loosen the set screw on the printing platform with an Allen wrench so the platform
can be rotated freely. Install the platform onto the platform bracket and push it to the
end. Lastly tighten the platform securing knob on the top; as shown in picture (6.3)
6.4 Click“HOME”, wait for the Z axis to descend and then it will stop automatically; as
shown in picture (6.4&6.5)
Picture (6.1)
Picture (6.2)
Picture (6.3)
Power interface
Power switch
Picture (6.4) 6
10mm
:
:10mm
Platform Securing Knob Fastening screw
②
①
Picture (6.5)
6.5 After the Z-axis descends and stops, gently press on top of the platform with your
hand, to let it fit evenly on the 2K LCD screen and ensure that the printing platform is
parallel to the LCD screen. Then fix the set screw as tight as possible; as shown in
picture (6.6)
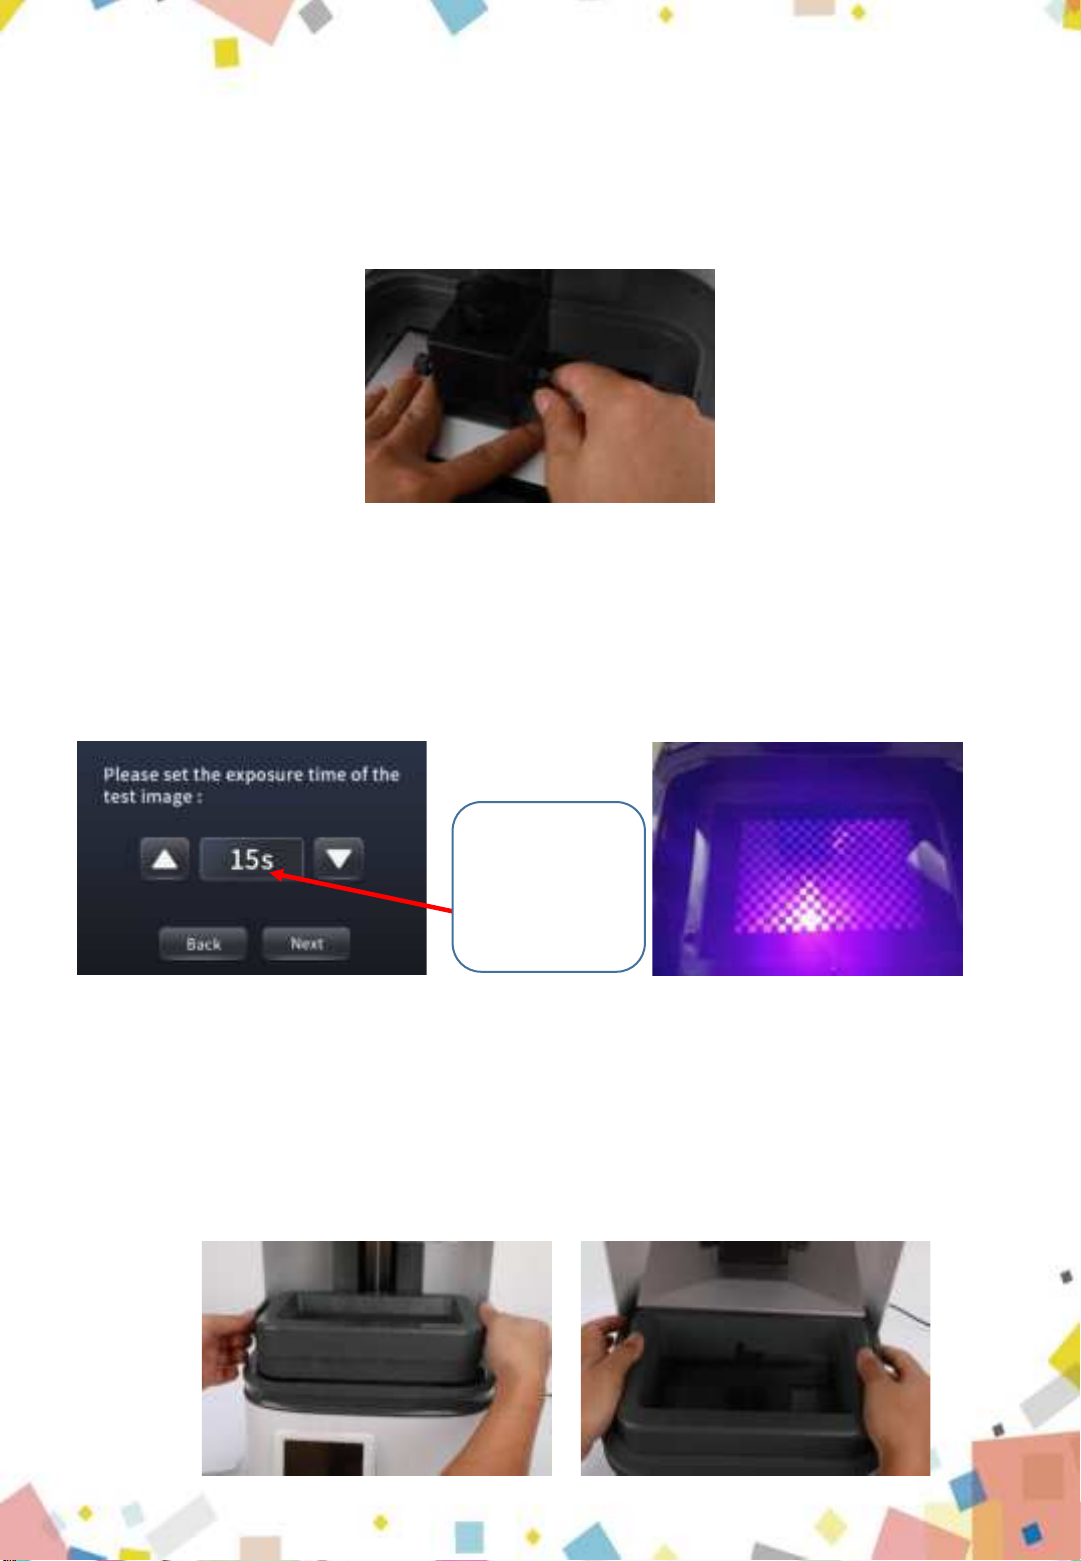
6.6 The platform rises about 120mm, click on the operation screen <Return>-<Next>-
<Exposure>-<Next> to check whether the light source is working normally, as shown
in picture (6.7); The 2K screen should display the same as the picture below the image
indicates that the UV lights work perfectly; as shown in picture (6.8)
6.7 Before putting it in the resin vat, please make sure the release film is tight. If the
release film is not tight, please tighten the screw on the bottom of the resin vat to fix
the release film; then follow the steps in the figure below to install it. Put the resin vat
back and fasten the press buckles on both sides to complete the leveling. (as shown in
picture 6.9&6.10)
Picture (6.7) Picture (6.8)
Click here to
change the
detection
exposure time
Picture (6.10)Picture (6.9) 7
Picture (6.6)

7.Use of Slicing Software
The 3D printer reads the slice file and cascades out three-dimensional objects.There-
fore,users need to convert 3D format files (such as stl format or obj format) into
machinereadable slice files (such as ZIP format). This process is commonly known as
"slicing", that is, "cutting" the 3D model into many Floor.Software that can convert 3D
format files into slice files is called slice software.
7.1 Installation of CHITUBOX
Open the slicing software installation package in the included U disk, select the
installation program (such as 32-bit or 64-bit) suitable for the current co- mputer
operating system type, and then start the installation; as shown in figure (7.1)
Figure (7.1)
8
Table des matières


