Zunidata Systems 10P Series Manuel utilisateur

Zunidata
10P digital signage player
and data collection terminal
Model: 10PX-XX
User Manual

1
10PX-XX Sample Manual
Content
Declaration........................................................................................................................... 2
Product Instruction.............................................................................................................. 2
Power on the Product ........................................................................................................ 3
Without Mounting Bracket............................................................................................ 3
Use Mounting Bracket................................................................................................... 3
Insert SD Card .................................................................................................................... 4
Insert USB Devices............................................................................................................ 4
Home Screen ...................................................................................................................... 5
System Bar.......................................................................................................................... 8
Applications........................................................................................................................11
Language........................................................................................................................... 12
Date & Time....................................................................................................................... 13
Volume................................................................................................................................ 14
Brightness.......................................................................................................................... 14
Scheduled Power On/Off................................................................................................. 15
Wi-Fi.................................................................................................................................... 19
Ethernet.............................................................................................................................. 20
Bluetooth............................................................................................................................ 21
Virtual Keyboard ............................................................................................................... 24
Switch Input Methods....................................................................................................... 25
Take Photos & Shots........................................................................................................ 26
Surf Online......................................................................................................................... 29
Browse Files...................................................................................................................... 30
Play Media......................................................................................................................... 31
Install & UninstallApps .................................................................................................... 31
Install Apps.................................................................................................................... 31
Uninstall Apps............................................................................................................... 34
Reset to Factory Default.................................................................................................. 36
2
Declaration
Please read the instructions carefully before equipment installation and
using the device.
Do not put the product in high temperature, humid or dusty environment.
Do not drop, crash or break down this product.
Do not power off the device when it’s formatting or upgrading, otherwise it
will cause operation system error.
This product is not waterproof.
Use only approved add-on enhancements.
Product Instruction
1. Camera (optional): 5M pixels camera
2. LED Indicator:
Green Power supply is on.
Light Off Power supply is off.
3. SD Card Slot / Cover: support external SD card
4. Exit Button: return to the previous page
5. Function Keys (Up / Down): select the up/down item
6. Function Keys (Vol+ / Vol-): adjust the system volume
7. Speakers: audio output
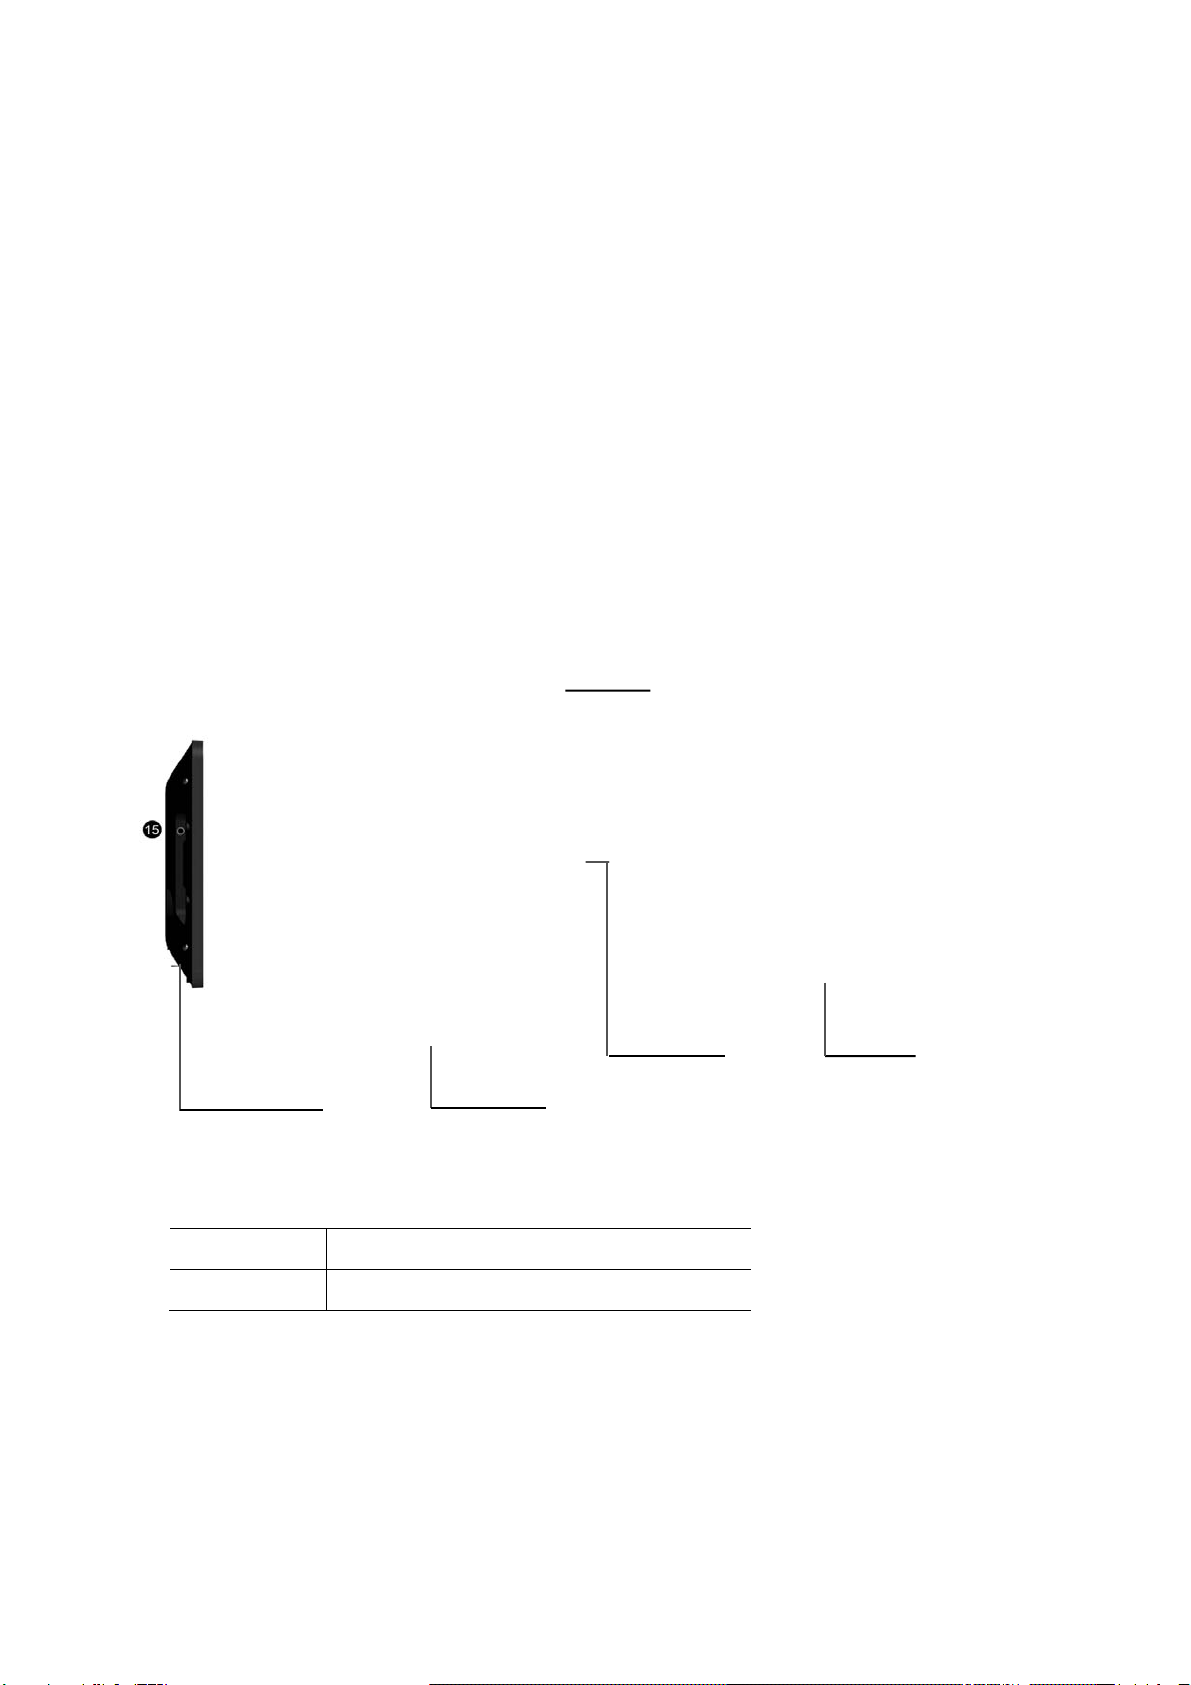
Right Side
Back
Top
Bottom
Front

3
8. VESA Mount Holes: for installing the bracket
9. DC In Jack: powered by 12V/2A DC input
10. Add-on module slot: to put optional add-on module
11. 10/100Mbps RJ45 Ethernet Port: support Ethernet connection
12. USB Port: support USB 2.0 Host type A
13. Micro-USB Port: support Micro-USB 2.0
14. Power Switch: switch power ON/OFF
15. Headphone audio port
17. DC In Jack: powered by 12V/2A DC input
18. Security Plate Insert
19. Battery Stand: battery stand with battery cell
Power on the Product
Without Mounting Bracket
Step1 Power on the power adapter that connected to this product.
Step2 Switch the power switch (#14 in Product Instruction) next to DC in
jack to ON.
Use Mounting Bracket
Step1 Put the mounting bracket to the back of the tablet, and tighten the
installation screws on the screw holes.
Step2 Plug the power adapter into the DC in jack (#16 in Product
Instruction) at the bottom of the mounting bracket, and then turn on the
power switch (#14) at the bottom of the product.

4
Note: The mounting bracket contains battery inside. The power adapter can
be unplugged once finishing charging. Please fully charge the battery before
the first use.
Insert SD Card
This product supports external SD card.Please insert your SD card into the
SD Card Slot (#3 in Product Instruction) on the top of this product.
Insert USB Devices
This product supports USB and Micro-USB to deal with your files.
USB
Plug your USB memory into the USB port (#12 in Product Instruction) on
the bottom of this product, and then you can do the file operations via the File
Browser. (See in Browse Files).
Micro-USB
Connect the Micro-USB port (#13 in Product Instruction) on the bottom of
this product and the USB port on your computer with a Micro-USB-to-USB
cable.
Click the “Turn on USB storage” button in the “USB mass storage” window
that pops up automatically to make the device memory visible in your
computer.

5
Home Screen
In the home screen, you can long-press the blank space to change the
wallpaper or drag widgets to desktop.
Change Wallpaper:
1. Click “WALLPAPER”.
2. Select one picture from system presets or your own pictures.

6
3. Click “Set wallpaper” on the upper-left corner of the screen to apply the
wallpaper.
Add Widgets:
1. Click “WIDGETS”.
2. Long-press a widget and drag it to desktop.

7
3. A dialog prompts you to allow adding a widget for the first time. Check the
checkbox and then click “Create”.
4. If you want to remove an icon, long-press the widget and drag it onto
“×Remove” at the top of the screen and drop it until it turns red.

8
System Bar
Navigation Buttons
1. Volume-: Decrease the system volume.
2. Back: Return to the previous page.
3. Home: Return to the home screen.
4. Recents: Switch between recently used apps.

9
To remove an app from the list, you could long-press the icon to select
“Remove from list”.
Or swipe the app item up or down to remove it.
Table des matières
Manuels Terminal tactile populaires d'autres marques

Wincor Nixdorf
Wincor Nixdorf iPOS plus Advanced Manuel utilisateur

Ingenico
Ingenico AXIUM EX4000 Manuel utilisateur

Heisei Electronics
Heisei Electronics Q-POS 815 Manuel utilisateur

Amano
Amano MTX-15 Manuel utilisateur

FLOWBIRD
FLOWBIRD CWT Compact Touch Manuel utilisateur

Demco
Demco SP7 Manuel utilisateur


