Veeder-Root EMR3 XStream-PKG Manuel utilisateur

XSTREAM 2.4 GHZ WIRELESS MODEM
For use with VEEDER-ROOT EMR³ DATALINK
INSTALLATION INSTRUCTIONS
Manual 577013-894, Rev. B
Page 1 of 14
INTRODUCTION
This Installation Guide Contains the necessary information to Connect the XStream Wireless Modems to
the EMR³ Interconnect Box and the Office Computer for running the EMR³ Datalink Program. For
Specific Instructions on Running the Program itself, Refer to the Program Manual that is included on the
Software Disk and the Quick Start Guide that is included with the Office Kit.
DESCRIPTION:
The Wireless Kits come in three types:
Kit Number
Description
General Contents and Comments
0846000-034
Office Kit - XStream 2.4 GHZ –
Europe and Other
The office kit includes:
•Wireless USB modem with standard
antenna,
•Regular USB Cable for connecting the
modem to the office PC,
•Quick Start Guide,
•Installation Guide
•Program Disc. The Program Disc includes
the USB Drivers and the full Program
Manual as a .pdf file.
0846000-035
Truck Kit with Keypad -
XStream 2.4 GHZ – Europe
and Other
The Truck Kit with Keypad includes:
•Wireless modem with standard antenna,
•Special RS-232 Cable for Connecting to
Interconnect Box
•Cord grip and Velcro patch
•Installation Guide
•Optional Keypad for EMR³ Register Head
0846000-036
Truck Kit - XStream 2.4 GHZ –
Europe and Other
The Truck Kit without Keypad includes:
•Wireless modem with standard antenna,
•Special RS-232 Cable for Connecting to
Interconnect Box
•Cord grip and Velcro patch
•Installation Guide
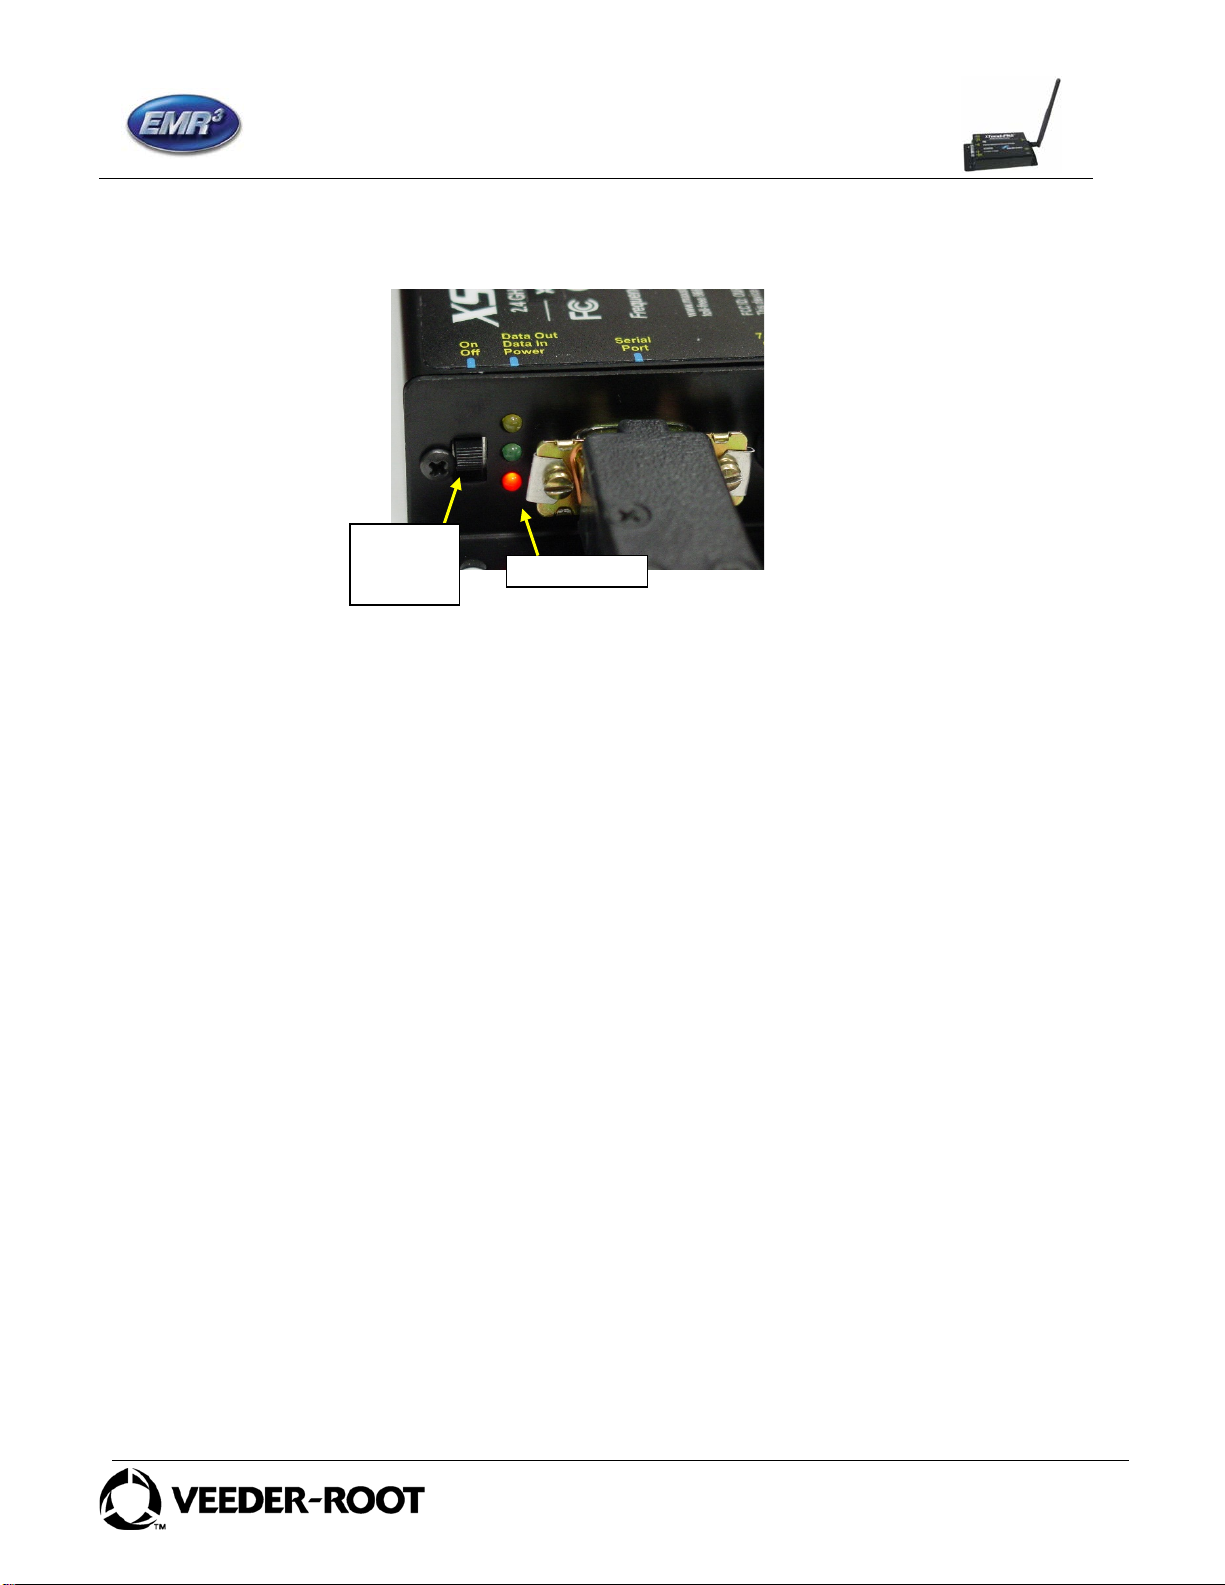
INDIVIDUAL MODEM UNIQUE ADDRESS - IMPORTANT
Each Serial Modem has a Unique Address assigned by Veeder-Root. This number is on the
label on the Modem Itself, and on the Modem Box. For each Truck / Interconnect Box, this
number is your traceability from the Specific Truck to the Office Software. The Truck Modem
number will be entered into the Office Software and identified with the specific Truck Number (or
other local identification).

XSTREAM 2.4 GHZ WIRELESS MODEM
For use with VEEDER-ROOT EMR³ DATALINK
INSTALLATION INSTRUCTIONS
Manual 577013-894, Rev. B
Page 2 of 14
TRUCK KIT MODEM:
XStream 2.4 GHz, 0.1 Watt,
Approved for use in Europe.
Unique Address Assigned
By Veeder-Root
Example of Label on Side of Modem
FOR XSTREAM 2.4 GHZ MODEMS
XSTREAM TRUCK MODEM MOUNTING AND CONNECTION:
1. The dip switches on the XStream modem should be set to: 1=ON 2=OFF 3=OFF 4=OFF
5=OFF 6=OFF
2. Screw the antenna into the modem and hand tighten.
3. Mount the modem to the back window of the vehicle or other surface of the vehicle using the
Velcro patch provided, or the modem can be attached with screws or bolts using the tabs on
the modem.

XSTREAM 2.4 GHZ WIRELESS MODEM
For use with VEEDER-ROOT EMR³ DATALINK
INSTALLATION INSTRUCTIONS
Manual 577013-894, Rev. B
Page 3 of 14
4. Add the screw clips and screws to the head of the RS-232 cable, plug into the connector,
and tighten the screws to secure the connector the modem.

XSTREAM 2.4 GHZ WIRELESS MODEM
For use with VEEDER-ROOT EMR³ DATALINK
INSTALLATION INSTRUCTIONS
Manual 577013-894, Rev. B
Page 4 of 14
WIRING THE SPECIAL RS-232 CABLE INTO THE IB – TRUCK KIT ONLY –XSTREAM
MODEM:
Power should be off to the Interconnect Box before connections are made.
The special RS-232 cable included with the truck kit provides the communication to the wireless
modem and also the modem power. Modem power is provided from the “12 V OUT” in the
Interconnect Box.
Install the cord grip in the interconnect box and connect the cable wires by color according the
pictures. You can shorten the RS-232 cable if you like.
For XStream modem: Green is RX, Black is TX, White is Ground, Red is 12 V Out
RS-232
special
cable
Red to
12 V
Out
V+ from
Vehicle
V-
Or
Battery
Ground
Red Wire from special
RS-232 Cable to
12V Out
RS-232
Connect:
Green RX
Black TX
White
Ground

XSTREAM 2.4 GHZ WIRELESS MODEM
For use with VEEDER-ROOT EMR³ DATALINK
INSTALLATION INSTRUCTIONS
Manual 577013-894, Rev. B
Page 5 of 14
Upon completion of the wiring and power to the IB is turned on, Turn on the Switch of the
XStream modem and the red light on the modem next to the RS-232 connector will be on.
Before leaving the vehicle, go to the display, and make sure the PORT 2 ASSIGN under
SETUP, SYSTEM ADDRESS is set to OBC.
•Push the MODE button to get to SETUP, Arrow Up to SYSTEM ADDRESS, NEXT to
IB ADDRESS, Arrow up to PORT 2 ASSIGN, NEXT, if not OBC the Arrow to OBC
and ENTER, ENTER, and ENTER. You can then push the MODE button to get back
to Volume Mode.
Red Power
Power
switch Up -
On

XSTREAM 2.4 GHZ WIRELESS MODEM
For use with VEEDER-ROOT EMR³ DATALINK
INSTALLATION INSTRUCTIONS
Manual 577013-894, Rev. B
Page 6 of 14
FOR XSTREAM 2.4 GHZ OFFICE USB MODEMS
XSTREAM OFFICE KIT INSTALLATION:
1. Screw the antenna into the modem and hand tighten. The antenna should point upwards.
If using the High Gain Antenna, it connects to the same location.
2. Insert the power supply cable connector into the modem completely, and attach the USB
CABLE
3. Plug the power supply into a normal 110 volt outlet, or with the proper non-Americas Plug.
The three green signal lights on the modem will be lit.
4. The modem can sit on a desk, but for best results it should be place as high as possible. Or,
the modem can be attached with Velcro, or screws or bolts using the tabs on the modem to a
surface. A high gain antenna will enhance the modems capability.
5. Attach the other end of the USB Cable to a USB port on your computer.
3 Green
Lights when
power
connected.
Power
supply
connection

XSTREAM 2.4 GHZ WIRELESS MODEM
For use with VEEDER-ROOT EMR³ DATALINK
INSTALLATION INSTRUCTIONS
Manual 577013-894, Rev. B
Page 7 of 14
INSTALLING USB MODEM DRIVERS
The Modem is a “plug-and-play” device that should automatically be detected by your PC.
“Found New Hardware Wizard” dialog box appears
1. Verify the Program CD is inserted into the CD Drive.
2. Select the ‘Install from specific list or location (Advanced)’ option; then select
the ‘Next’ button.
3. Select the "Search for best driver in these locations" option and check the
‘Search removable media (CD-ROM...)’ box.
4. Select the ‘Next’ button.
Hardware Installation "Windows Logo Testing" alert box appears
5. Select the ‘Continue Anyway’ button.
6. Select the ‘Finish’ button.
7. Repeat steps 1 through 5 to install the second driver.
8. (Re-boot computer if prompted to do so.)
Once the Modem drivers are successfully loaded the Red LED on the Modem will be lit
indicating a successful USB Link.

XSTREAM 2.4 GHZ WIRELESS MODEM
For use with VEEDER-ROOT EMR³ DATALINK
INSTALLATION INSTRUCTIONS
Manual 577013-894, Rev. B
Page 8 of 14
Finding the communications port for using the USB Modem with the DataLink Program
Start, Control Panel
Double Click on System to get the
System Properties Window to the left

XSTREAM 2.4 GHZ WIRELESS MODEM
For use with VEEDER-ROOT EMR³ DATALINK
INSTALLATION INSTRUCTIONS
Manual 577013-894, Rev. B
Page 9 of 14
Click on the Hardware Tab
Device Manager Screen:
Click on Device Manager

XSTREAM 2.4 GHZ WIRELESS MODEM
For use with VEEDER-ROOT EMR³ DATALINK
INSTALLATION INSTRUCTIONS
Manual 577013-894, Rev. B
Page 10 of 14
Click on the “+” of Ports and you will find the MaxStream USB Modem Communication Port.
Note: If there is no MaxSteam Port, then the Drivers for the MaxStream Modem have not
been loaded. Plug the MaxStream USB Modem into your computer and follow the Plug-
and-Play instructions, or got to Add Hardware on the Control Panel.
For use with the DataLink Software, refer to the Quick Help Guide 577013-860.
When you click on the “+” of
Ports, you will find the
MaxStream PKG-U Modem and
the computer assigned Com port
- In this example “6”.
This Communication Port
Number will be entered on the
Configuration page of the
DataLink program.
Autres manuels pour EMR3 XStream-PKG
5
Table des matières
Autres manuels Veeder-Root Modem
Manuels Modem populaires d'autres marques

Davicom
Davicom DM562AP Manuel utilisateur

EpiValley
EpiValley TATA indicom SXC-1080 Manuel utilisateur

Zte
Zte WiMAX Manuel utilisateur

Intelimax
Intelimax MA-2060 Manuel utilisateur

SMC Networks
SMC Networks D3CM1604V Manuel d'utilisation et d'entretien

Telstra
Telstra Wi-Fi 4G Advanced Pro X Manuel utilisateur

US Robotics
US Robotics 3453C Manuel utilisateur

MaxTech
MaxTech Plug & Play Internal Voice/FAX/Data/SVD... Manuel utilisateur

Zte
Zte MF823 Manuel utilisateur

Four-Faith
Four-Faith F1403 Manuel utilisateur

Sierra Wireless
Sierra Wireless AIRLINK MP595W Manuel utilisateur

Gemtek
Gemtek WiMAX WIXFBR-103 Manuel utilisateur


