SunFounder GalaxyRVR Manuel utilisateur

SunFounder GalaxyRVR Kit for Arduino
Release 1.0
www.sunfounder.com
Sep 07, 2023


CONTENTS
1 Assemble Video 3
2 Play Mode 5
2.1 Quick Guide ............................................... 6
2.2 Avoid(E) ................................................. 10
2.3 Follow(F) ................................................. 10
2.4 STT(J) .................................................. 10
3 Course Mode 13
3.1 Lesson 1 Unveiling the Mars Rover ................................... 13
3.2 Lesson 2 Understanding and Making Rocker-Bogie System ....................... 19
3.3 Lesson 3: Entering the World of Arduino and Coding .......................... 22
3.4 Lesson 4: Mastering the TT Motor ................................... 32
3.5 Lesson 5: Unleashing Mars Rover Mobility ............................... 46
3.6 Lesson 6: Exploring the Obstacle Avoidance Module .......................... 50
3.7 Lesson 7: Enhancing Rover Navigation with Ultrasonic Module .................... 59
3.8 Lesson 8 Advanced Obstacle Avoidance and Intelligent Following System ............... 66
3.9 Lesson 9: Lighting the Way with RGB LED Strips ........................... 70
3.10 Lesson 10: Exploring the Mars Rover Visual System - Servo and Tilt Mechanism ........... 75
3.11 Lesson 11: Exploring the Mars Rover Visual System - Camera and Real-time Control ........ 82
3.12 Lesson 12: Driving the Rover with the App ............................... 94
3.13 Lesson 13: Investigating the Mars Rover Energy System ........................ 103
4 FAQ 111
4.1 Q1: Compilation error: SoftPWM.h: No such file or directory ..................... 111
4.2 Q2: avrdude: stk500_getsync() attempt 10 of 10: not in sync: resp=0x6e? ............... 111
4.3 Q3: How can I use the STT mode on my Android device? ....................... 113
4.4 Q4: About the ESP32 CAM Firmware .................................. 115
i

ii

SunFounder GalaxyRVR Kit for Arduino, Release 1.0
Imagine piloting a rover on the desolate terrain of Mars, exploring alien landscapes and confronting the unknown.
Sounds like a dream for NASA engineers, right?
Not anymore.
Welcome to the world of the GalaxyRVR, a Mars Rover kit from SunFounder, designed to bring interplanetary explo-
ration right into your living room.
Built upon the same universal rocker-bogie system employed by NASA’s real Mars rovers, GalaxyRVR is capable of
traversing all kinds of terrains – be it rocky mountains, sandy beaches, or grassy fields. The suspension system ensures
smooth mobility, making the alien world of Mars feel just like home.
Equipped with a high-definition camera module, GalaxyRVR offers a first-person view, providing an immersive piloting
experience as if you’re truly navigating the Red Planet. Its advanced obstacle avoidance module and ultrasonic module
ensure it can dodge obstacles, embodying a spirit of autonomy and resilience.
Delve into the Cosmos: The Courses
•Play Mode: Want a quick start? Play Mode is designed for those who can’t wait to start their Martian jour-
ney. With factory-preloaded code, simply assemble your GalaxyRVR and control it using the convenient app to
explore its multitude of functions.
•Course Mode: Intrigued by the underlying technology? Course Mode is for those who want to delve deeper.
Understand the principles behind the GalaxyRVR’s design, learn to code, and empower your rover with a variety
of exciting features.
This documentation is your guide to exploring the intricacies of GalaxyRVR. It includes detailed assembly instructions,
programming guides, and insights into the working principles of a Mars Rover, all aimed to stimulate your curiosity
and foster creativity.
CONTENTS 1

SunFounder GalaxyRVR Kit for Arduino, Release 1.0
The GalaxyRVR isn’t just a toy, but a gateway to Mars, an educational tool, and a catalyst for limitless imagination.
Start your cosmic journey today with GalaxyRVR, and let your world become an extension of Mars.
2 CONTENTS

CHAPTER
ONE
ASSEMBLE VIDEO
Note:
•If you want to learn while assembling the various components, you can refer to Course Mode. In Course Mode,
each lesson comes with assembly videos, component principles, and related test code, allowing you to learn as
you go. So, you can skip this chapter.
•If you want to quickly assemble and start playing, you can watch the assembly video first. After completing the
assembly, proceed to Play Mode to learn about the app installation and connection. Then, you can use the app
to control the GalaxyRVR.
For the assembly of the GalaxyRVR, we provide printed assembly instructions in the kit. Here is the PDF version of it:
If you are having difficulty understanding the printed assembly instructions, you can instead follow our step-by-step
assembly video.
Note:
•The assembly videos are in a series of 7. You can check out other videos from the playlist in the upper-right
corner, or let it play automatically.
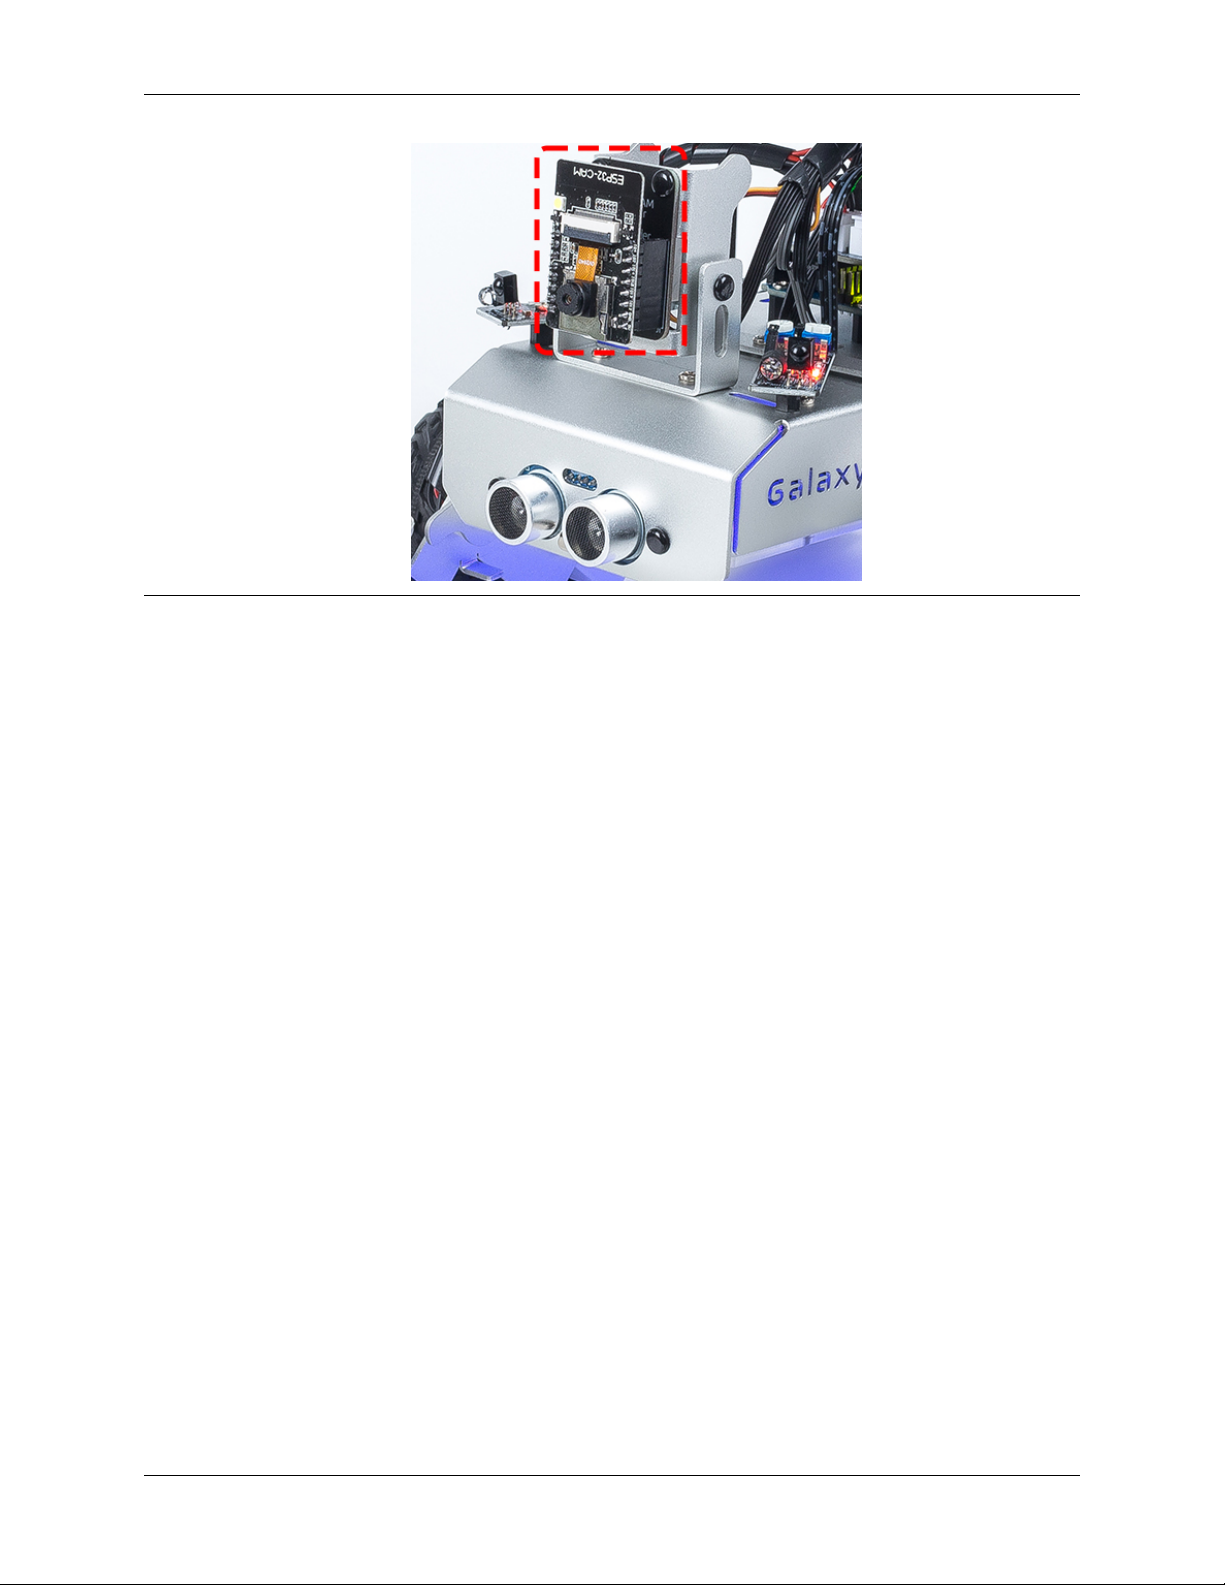
•When inserting the ESP32 CAM into the Camera Adapter, be aware of its orientation. It should align properly
with the ESP32 Adapter.
3
SunFounder GalaxyRVR Kit for Arduino, Release 1.0
4 Chapter 1. Assemble Video

CHAPTER
TWO
PLAY MODE
Are you eager to kick-start your Martian journey right away? Our Play Mode is perfectly tailored for those of you who
just can’t wait to dive in. Equipped with factory-preloaded code, you can jump straight into the action after assembling
your GalaxyRVR. Use the user-friendly SunFounder Controller app to explore its myriad of functions including first-
person driving, switching between obstacle avoidance and follow modes, and even voice control.
But before you set off to explore the Red Planet, let’s make sure you are fully equipped and ready for the adventure.
Below is a Quick Guide to assist you in this exciting journey!
Note:
•If your R3 board has already been uploaded with other code, but you want to continue using Play Mode, you will
need to download the relevant code.
–GalaxyRVR Codes
•Then, open the galaxy-rvr.ino file located in the galaxy-rvr-main\galaxy-rvr directory.
•Move the switch to the right and then click Upload.
5

SunFounder GalaxyRVR Kit for Arduino, Release 1.0
2.1 Quick Guide
1. Let’s start the GalaxyRVR.
•If it’s your first time using the GalaxyRVR or if the battery cable has been unplugged, the GalaxyRVR Shield
will engage its over-discharge protection mechanism. To deactivate this protection, plug in the Type-C cable
for approximately 5 seconds. If the power indicator lights up, the protection status has been released. Check
the battery indicators – if both are off, please continue charging the battery using the Type-C cable.
•To activate the ESP32 CAM, move the mode switch to the Run position, and press the reset button to
reboot the R3 board. You will then observe a cyan light flashing on the bottom strip.
2. Install SunFounder Controller from APP Store(iOS) or Google Play(Android).
3. Connect to the GalaxyRVR Network.
For optimal communication between your mobile device and the Rover, you’ll need to connect them
to the same local area network (LAN) provided by GalaxyRVR.
•Find GalaxyRVR on the list of available networks on your mobile device (tablet or smartphone),
enter the password 12345678, and connect to it.
•The default connection mode is AP mode. After you’ve connected, there might be a prompt
warning that there is no internet access on this network. If so, choose “Stay connected”.
6 Chapter 2. Play Mode
Table des matières
Autres manuels SunFounder Matériel informatique


Manuels Matériel informatique populaires d'autres marques

EMC2
EMC2 VNX Series Manuel du propriétaire

Panasonic
Panasonic DV0PM20105 Manuel utilisateur

Mitsubishi Electric
Mitsubishi Electric Q81BD-J61BT11 Manuel utilisateur

Gigabyte
Gigabyte B660M DS3H AX DDR4 Manuel utilisateur

Raidon
Raidon iT2300 Manuel utilisateur

National Instruments
National Instruments PXI-8186 Manuel utilisateur


