Smart Vision Lsi Crossover XCHM3 Mode d’emploi

2 / 3 p/n 483933 Rev. 3/12
LSI Industries Inc. 10000 Alliance Road
Cincinnati, Ohio 45242
(513) 793-3200
Fax (513) 793-0147
www.lsi-industries.com
©2012 LSI Industries Inc.
483933 Rev. 3/12 1 / 3
LSI Industries Inc. 10000 Alliance Road
Cincinnati, Ohio 45242
(513) 793-3200
Fax (513) 793-0147
www.lsi-industries.com
INSTALLATION AND ASSEMBLY INSTRUCTIONS
Crossover® XCHM3 LED Area Luminaire
SAVE THESE INSTRUCTIONS AND DELIVER TO OWNER AFTER INSTALLATION
BEFORE YOU BEGIN
Read these instructions completely and carefully, observing all CAUTIONS and
WARNINGS shown throughout these instructions.
WARNING! RISK OF ELECTRIC SHOCK
· Disconnect or turn off power before installation or servicing.
· Verify that supply voltage is correct by comparing it with the luminaire label information.
· Make all electrical and grounded connections in accordance with the National Electrical Code (NEC) and any
applicable local code requirements.
CAUTION: RISK OF INJURY
·
Wear gloves and safety glasses at all times when removing luminaire from carton, installing, servicing or performing
maintenance.
·Allow lamp/luminaire/driver to cool before handling.
NOTICE: RISK OF PRODUCT DAMAGE-
Failure to follow instructions could result in damage to product
and void ALL warranties!
·
Only install fixture with lens facing downward.
·
Never connect components under load.
·
Do NOT mount or support these fixtures in a manner that can cut the outer jacket or damage wire insulation.
·
Do NOT exceed fixtures maximum ambient temperature rating.
CLEANING INSTRUCTIONS
· It will occasionally be necessary to clean the outside of the lens. Frequency of cleaning will depend on
ambient dirt level and minimum light output which is acceptable to the user.
· Lens should be wiped with a DAMP cloth with a solution of warm water and a mild, non-abrasive household
detergent. Dry with soft, dry, clean cloth.
· Do NOT use chemical cleaners such as powder cleansers, bleach, etc.
· Do NOT use scouring pads, as this will scratch and damage the lens finish.
· Do NOT wipe with a soiled cloth or wet towel - these may leave a residue that can damage finish.
· Do NOT pressure wash or hose down luminaire.
Crossover® XCHM3 LED, cont'd.
ALL UNITS:
1. Remove luminaire from packaging, taking care to protect lens and finish. Check packing slip to make sure all
parts are present before proceeding. Check carton for supplied mounting hardware.
2. Place luminaire on its back, lens-up, on protected surface. Open door by loosening (2) screws.
IMPORTANT! Type FT and FTA reflector models have arrows imprinted on reflector (look thru lens). See
below for certain reflector types and how they mount to pole with specific light output! Reference luminaire
layout.
3. Lay pole on raised surface. Protect pole finish with soft cloth.
4. From hardware kit, install nut plate into pole end, so the large center hole is closest to pole end. Thread both
all-thread rods into nutplate. See Figure 1.
5. Feed supply wiring thru center of arm. Slide arm over all-thread.
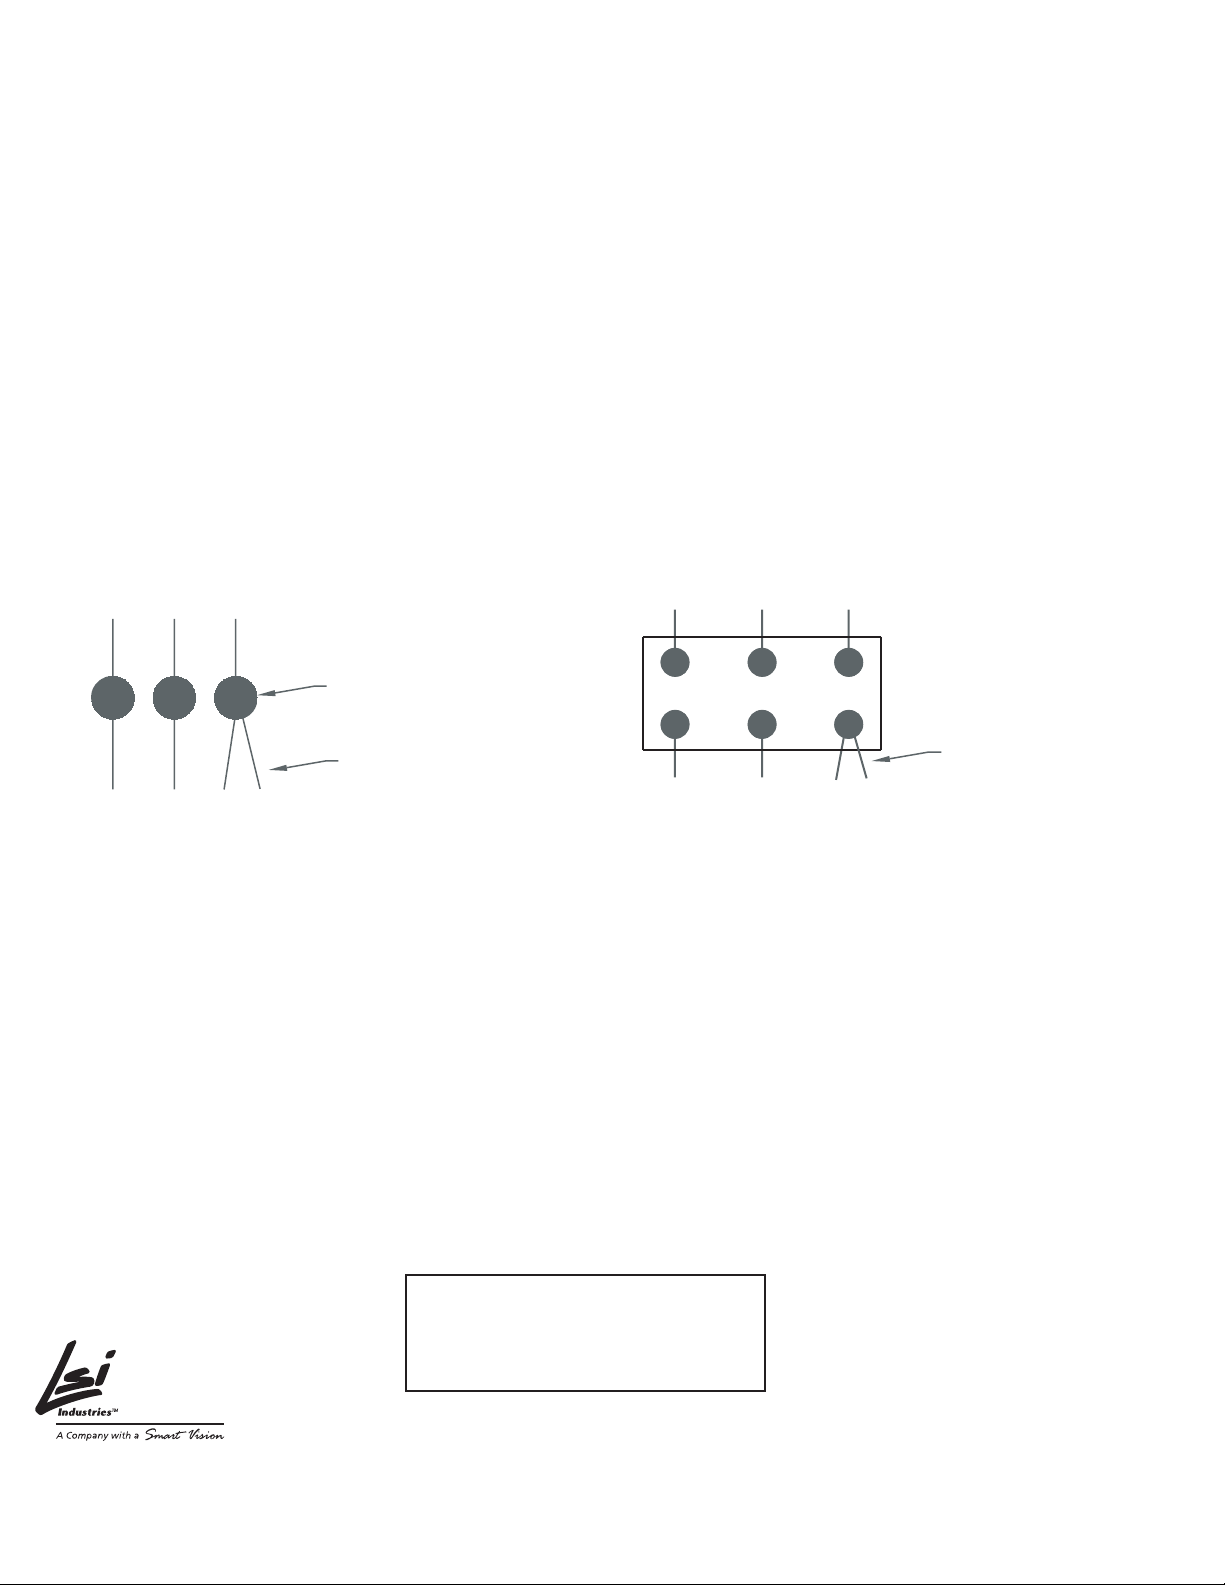
Figure 1
Listed for Wet
Locations
Type 5
(light beams
all directions)
Type FT and FTA
(note light beam
arrow in center)

2 / 3 p/n 483933 Rev. 3/12
LSI Industries Inc. 10000 Alliance Road
Cincinnati, Ohio 45242
(513) 793-3200
Fax (513) 793-0147
www.lsi-industries.com
©2012 LSI Industries Inc.
483933 Rev. 3/12 1 / 3
LSI Industries Inc. 10000 Alliance Road
Cincinnati, Ohio 45242
(513) 793-3200
Fax (513) 793-0147
www.lsi-industries.com
INSTALLATION AND ASSEMBLY INSTRUCTIONS
Crossover® XCHM3 LED Area Luminaire
SAVE THESE INSTRUCTIONS AND DELIVER TO OWNER AFTER INSTALLATION
BEFORE YOU BEGIN
Read these instructions completely and carefully, observing all CAUTIONS and
WARNINGS shown throughout these instructions.
WARNING! RISK OF ELECTRIC SHOCK
· Disconnect or turn off power before installation or servicing.
· Verify that supply voltage is correct by comparing it with the luminaire label information.
· Make all electrical and grounded connections in accordance with the National Electrical Code (NEC) and any
applicable local code requirements.
CAUTION: RISK OF INJURY
·
Wear gloves and safety glasses at all times when removing luminaire from carton, installing, servicing or performing
maintenance.
·Allow lamp/luminaire/driver to cool before handling.
NOTICE: RISK OF PRODUCT DAMAGE-
Failure to follow instructions could result in damage to product
and void ALL warranties!
·
Only install fixture with lens facing downward.
·
Never connect components under load.
·
Do NOT mount or support these fixtures in a manner that can cut the outer jacket or damage wire insulation.
·
Do NOT exceed fixtures maximum ambient temperature rating.
CLEANING INSTRUCTIONS
· It will occasionally be necessary to clean the outside of the lens. Frequency of cleaning will depend on
ambient dirt level and minimum light output which is acceptable to the user.
· Lens should be wiped with a DAMP cloth with a solution of warm water and a mild, non-abrasive household
detergent. Dry with soft, dry, clean cloth.
· Do NOT use chemical cleaners such as powder cleansers, bleach, etc.
· Do NOT use scouring pads, as this will scratch and damage the lens finish.
· Do NOT wipe with a soiled cloth or wet towel - these may leave a residue that can damage finish.
· Do NOT pressure wash or hose down luminaire.
Crossover® XCHM3 LED, cont'd.
ALL UNITS:
1. Remove luminaire from packaging, taking care to protect lens and finish. Check packing slip to make sure all
parts are present before proceeding. Check carton for supplied mounting hardware.
2. Place luminaire on its back, lens-up, on protected surface. Open door by loosening (2) screws.
IMPORTANT! Type FT and FTA reflector models have arrows imprinted on reflector (look thru lens). See
below for certain reflector types and how they mount to pole with specific light output! Reference luminaire
layout.
3. Lay pole on raised surface. Protect pole finish with soft cloth.
4. From hardware kit, install nut plate into pole end, so the large center hole is closest to pole end. Thread both
all-thread rods into nutplate. See Figure 1.
5. Feed supply wiring thru center of arm. Slide arm over all-thread.
Figure 1
Listed for Wet
Locations
Type 5
(light beams
all directions)
Type FT and FTA
(note light beam
arrow in center)

3 / 3 p/n 483933 Rev. 3/12
LSI Industries Inc. 10000 Alliance Road
Cincinnati, Ohio 45242
(513) 793-3200
Fax (513) 793-0147
www.lsi-industries.com
Installation Questions?
Call LSI Field Service Department at:
1-800-436-7800 Ext. 3300
Fax: 1-877-861-1368
Crossover® XCHM3 LED, cont'd.
ALL UNITS:
6. Position luminaire over all-thread. Feed supply wiring through center hole on back of luminaire. Use supplied
hardware to secure luminaire to pole and/or arm bracket. To ensure level luminaire, tighten upper nut first,
then lower nut, (tighten each to 25 ft-lbs.) making sure luminaire and/or arm is "square" to pole.
WARNING: Wiring to be performed by qualified electrician! Wire per National Electrical Code and local code.
IMPORTANT: Reference luminaire label for input voltage! Luminaire can be connected to 120-277VAC, 50/60
Hz or 347-480V, 60Hz only.
IMPORTANT WIRING INFORMATION - Risk of electrical shock!
* Make certain supply wiring is not "Hot" before wiring luminaire.
* Make certain supply voltage corresponds to luminaire voltage, as marked on luminaire label.
7. Close door. Be careful not to pinch any wiring between door and housing. Install pole cap. If ordered and
equipped, install photocell or photocell shorting cap.
8. The luminaire and pole assembly is now ready for installation to anchor bolts. When erecting pole, use belts,
slings or ropes - do NOT use chain or cable. Do not attach to luminaire or arm!
NOTE: Pole must be pointed in right direction. See Step 2 for proper light output direction for each
reflector type.
9. Set and level pole using nuts and washers provided.
SUPPLY WIRING
LINE NEU GRND
BLK WHT GRN
(LINE) (NEU) (GRND)
(2)
LUMINAIRE LEADS
OPTIONAL
TERMINAL BLOCK
WIRING DIAGRAM
SUITABLE WIRING
CONNECTORS
WHT BLK GRN
(2)
NEU LINE GRD.
CONNECT BOTH
HOUSING AND
DOOR GROUNDS!
CONNECT BOTH
HOUSING AND
DOOR GROUNDS!
SUPPLY WIRING
LUMINAIRE LEADS
Table des matières
Manuels Éclairage extérieur populaires d'autres marques

Lindby
Lindby 9949029 Manuel utilisateur

HEPER
HEPER DOGO Side LW6048.585-US Instructions d'installation et d'utilisation

HEPER
HEPER LW8034.003-US Instructions d'installation et d'utilisation

Maretti
Maretti VIBE S 14.6080.04.A Manuel utilisateur

BEGA
BEGA 84 253 Manuel

HEPER
HEPER MINIMO Instructions d'installation et d'utilisation

LIGMAN
LIGMAN BAMBOO 3 Manuel utilisateur

Maretti
Maretti TUBE CUBE WALL 14.4998.04 Manuel utilisateur

Maxim Lighting
Maxim Lighting Carriage House VX 40428WGOB Manuel utilisateur

urban ambiance
urban ambiance UQL1273 Manuel utilisateur

TotalPond
TotalPond 52238 Manuel utilisateur

Donner & Blitzen
Donner & Blitzen 0-02661479-2 Manuel utilisateur