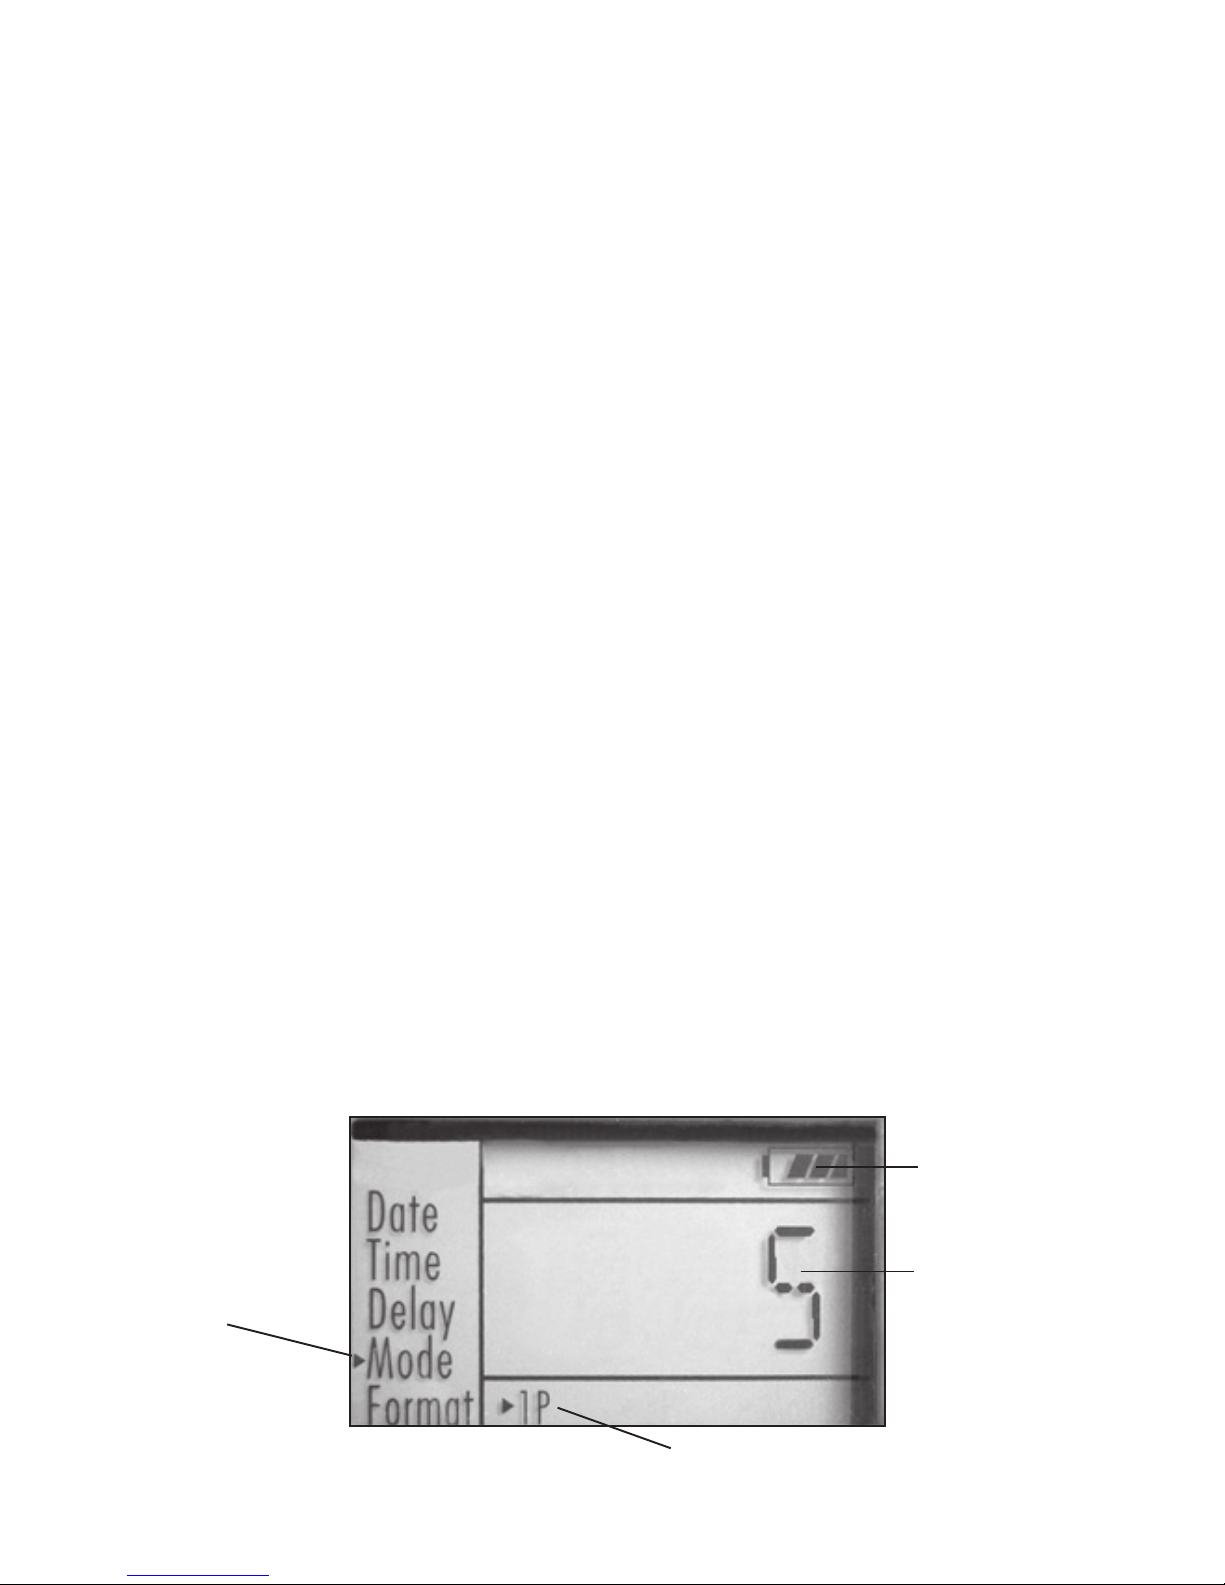
Simmons 119236C Manuel utilisateur

Instruction Manual
Lit# 95-0141/02-12
119234C
119236C
WHITETAIL®
Trail Cameras


Page Index
Introduction 5
Parts & Controls Guide 6-7
Battery and SD Card Installation 8
About the Setup Menu 9
Using the Setup Menu 9
SETUP MENU REFERENCE TABLE 10-11
Camera Operation 12
Mount the Camera 12
Power on the Camera 12
Test the Coverage Area 13
Secure the Camera 13
Viewing the Photos and Videos 14
Glossary 15
Technical Specications 16
Troubleshooting/FAQ 17-20

4
IMPORTANT NOTE
Congratulations on your purchase of one of the best trail cameras on the
market! Simmons is very proud of these cameras and we are sure you will
be pleased with yours as well. We appreciate your business and want to
earn your trust. Please refer to the notes below and the instructions in
this manual to ensure that you are completely satised with this product.
If your Simmons Trail Cam does not seem to be functioning properly
or if you are having photo/video quality issues, please check the
Troubleshooting/FAQ section on pages 17-20.
Problems are often due to something simple that was overlooked, or
require only changing one setting to solve.
If your problem continues after trying the solutions in the
Troubleshooting/FAQ section, please call Simmons Customer Service
at (800) 423-3537. In Canada, call (800) 361-5702.
Simmons recommends using 4 Energizer® Lithium AA batteries in this
Trail Cam to obtain maximum battery life.
Do Not Mix Old and New Batteries
Do not mix battery types-use ALL lithium or ALL alkaline.
Rechargeable batteries are not recommended.
Simmons recommends using SanDisk® SD and SDHC Cards
(up to 32GB capacity) in this Trail Cam.

5
INTRODUCTION
Congratulations on your purchase of a Simmons WhiteTail Digital
Trail Camera. This camera is designed to record animal activity in the
outdoors with its still image and movie modes and weatherproof, rugged
construction. Your WhiteTail trail cam features a compact, portable size
and an extra long battery life.
Main Features:
• 2.0 (119234C) or 5.0MP (119236C) digital sensor
• Compact Size (120mm*94mm*46mm)
• Long Battery Life (Up to 6 months)
• Trigger Time=1.2 seconds or less
• Automatic IR Filter
• LCD Display
• 15 (119234C) or 18 (119236C) Night Vision LEDs
• Adjustable Photo Delay: 5~ 59 second ,1~ 10mins (default 10S)
• Multiple Shot Mode (3 images per trigger)
• 640*480 at 30 FPS Videos
• Supports up to 32 GB SD Card
• Date, Time & Moon Phase Imprint
• Auto Exposure
• Auto White Balance
• Power Supply: 4 AA batteries (lithium or alkaline)
• Mounting Socket for Standard Tripods
• Weatherproof

6
Parts and Controls Guide
Front of Camera
Camera
Lens
Infrared
LED Array
PIR Motion
Sensor
Tripod
Socket
Padlock
Hole
IR LED Array Detail
PIR
Indicator
(Setup
Mode
Only
Light
Sensor

7
Control Panel Detail
Parts and Controls Guide
Control Panel
(Front Unlatched & Opened)
Power
Switch
USB Port LCD
Display
SD Card
Slot
Battery
Compartment

8
BATTERY and SD CARD INSTALLATION
The Simmons WhiteTail Digital Trail Cameras are designed to operate
using 4 AA batteries. We recommend using Lithium (for longest life) or
Alkaline batteries.
NOTE: Always set the power switch to the OFF position when installing or
removing batteries.
Please make sure the batteries are inserted correctly, as indicated inside
the battery compartment. Incorrect voltage or polarity (+/-) will damage
the camera.
Do not mix old and new batteries.
Do not mix battery types-use ALL lithium or ALL alkaline.
Rechargeable batteries are not recommended.
Memory
Your WhiteTail Digital Trail Camera has a memory card slot, to accept SD
cards up to 32GB max. capacity (sold separately).
Inserting an SD card
• Make sure the power switch is in the OFF position whenever adding
or removing memory.
• Insert an SD card into the card slot completely and oriented correctly
as shown by the icon above the slot (label up, contacts facing down
and notched corner on the right).
• To remove the SD memory card, depress the SD card and pull out
the card gently.
Using a new, blank SD card is recommended. If the SD card has been used
in another device, please make sure to format using the Format option in
the WhiteTail trail cam’s Setup menu before you set the camera to capture
photos/videos. New cards are ready to use straight from the package.

9
ABOUT THE SETUP MENU
Slide the power switch to the On position.You’ll see“WAIT”on the display,
then the setup menu screen. Before you start using the camera, you’ll no
doubt want to set the date/time so they are imprinted correctly on your
photos, and maybe change the trigger delay time and image resolution
to your preferences. This is done by editing the settings of an item listed
in the Setup Menu.
To enter the Setup Menu at any time, press the SETUP button (to left of
the power switch).
USING THE SETUP MENU
The Setup Menu has 5 dierent items, which appear on a list in the left
frame of the display. Here’s how to edit (change) the setting of a menu
item:
1. Select the menu item you want to edit by pressing the UP or DOWN
button until the item is blinking. Note: you can see the current/
default setting for each item (without changing it) in the main center
frame as you move up and down the list of items.
2. Press the OK button.
3. You can now select the setting you prefer for the selected item by
pressing the UP or DOWN button. The setting displayed in the
center frame will blink until you press OK to conrm it is the setting
you want to save.
4. To exit the Setup menu at any time, simply press the Setup button.
SETUP MENU DISPLAY
SELECTED
MENU
ITEM
CURRENT
SETTING OF
SELECTED ITEM
Indicates Photo (1P or 3P) or Movie Mode
Battery Level

10
Menu Item Settings
(Bold=default)
Description/Operation
Date set year, month,
and day
Press OK and use the UP/DOWN
keys (to change the setting), then
press OK again to go to the next
date parameter and repeat, to
set the current year, month, and
day. Press OK after setting the
day to move on and set the Time
(next item)
Time set hour and
minute
Press OK and use the UP/DOWN
keys (to change the setting) then
OK again ( to move to the next
eld) to set the current hour (24-
hr format only, “00”=midnight,
“12”=noon) and minute.
Delay set minutes (0-
10) or seconds
(5-59)
Default delay
time= 10 sec.
Selects the length of time that
the camera will“wait” until it
responds to any additional
triggers from the PIR after an
animal is rst detected and
remains within the sensor’s
range. During this user set
“ignore triggers”interval, the
camera will not capture photos/
videos. This prevents the card
from lling up with too many
redundant images. Settings
begin with 10 second default
time. Press OK, set the delay time
in minutes (if desired), press OK
and set the delay in seconds.
The following table lists all of the menu items, their available settings,
and a description of their functions:
Ce manuel convient aux modèles suivants
1
Table des matières
Langues :
Autres manuels Simmons Appareil photo numérique


