Scilogex SCIP5-Mini Manuel utilisateur

Operation Manual
Ver. 1.7

2
Before use
Dear User:
Thanks for your trust.
This operating manual is designed to familiarize you with the operation
of our units and their possible applications, please read the operating manual carefully prior your use.
And handle the device with care during transportation, unpack, testing, operation, maintains, storage, and
scrape.
Catalog
Warning ........................................................................................................................................................................................................... 3
Unpack and check ............................................................................................................................................................................ 4
Setting up ............................................................................................................................................................................................ 5
Safety Temperature ............................................................................................................................................................................................... 5
Operation ............................................................................................................................................................................................ 6
Error codes ........................................................................................................................................................................................ 12
Device maintains ............................................................................................................................................................................. 12
Accessories ....................................................................................................................................................................................... 13
Warranty ............................................................................................................................................................................................ 13
3
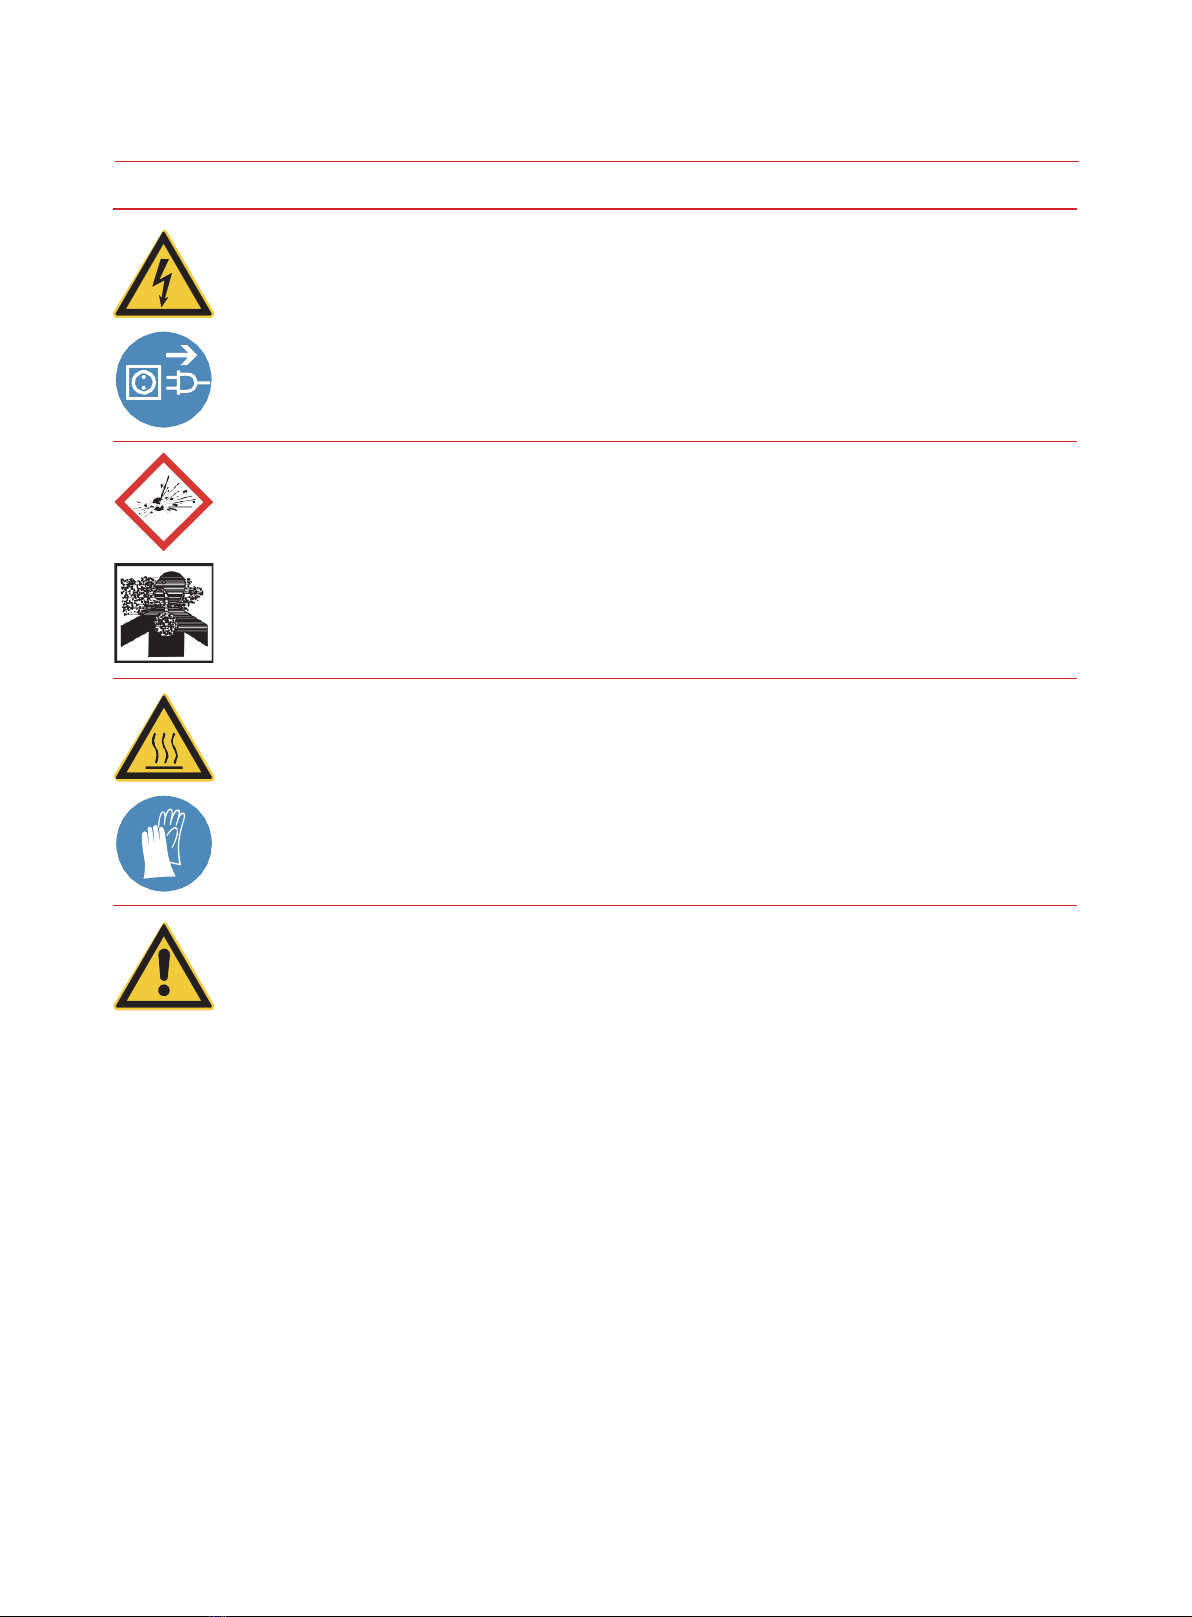
Warning
Warning !
Danger of electric shock.
Have all service and repair work carried out by authorized specialists only.
Switch off the unit and pull the plug before carrying out any service or repair work.
Warning !
Do not operate the device in explosive atmospheres, with hazardous substances.
Warning!
Unit parts may develop high surface temperatures. A hot surface means it has a temperature
of 60 ° C / 140 ° F or more.
Let the device cool down to an uncritical safe temperature. Use
safety gloves.
Requirements for the operating personnel
The operator is responsible for the qualifications of the person operating the unit, To
ensure that the person who operate the unit is trained in the relevant work application by a
trained person.
The operative must receive regular training about the dangers involved with their work and
about action to prevent such dangers.
Ensure that everybody involved with the operation, maintenance and installation have
read and understood the safety information and the operating manual. The unit may only
be configured, installed, maintained and repaired by trained personnel.
If hazardous substances or substances which may become hazardous are used, the unit
may only be used by a person who is completely familiar with these substances and the
unit. This person must be able to assess the possible dangers in full.

4
The device can only run without any malfunction or damage.
As the operator of the device, any malfunction or damage found, please: Switch
off the device.
Pull the plug of the device.
Contact us for trouble shooting or repairing.
Note:
Place the unit on an even, stable, clean, nonslip, dry and fireproof surface.
The bath may be filled with flammable materials. Fire hazard!
Recommended fluids only, chemical dangers may occur, depending on the bath
medium.
Prevent water getting into hot bath oils.
The safety temperature limit must always be set to at least 25C lower than the flash point
of the fluid used.
Check the filling level of the bath fluid at regular intervals. The pump and heater must
always be completely covered with bath fluid.
Risk of burning caused by vapor or hot water at the outlet of the cooling coil.
The formation of explosive mixtures is possible if the ventilation is
inadequate.

5
Unpack and check
Unpack the device and check the device an accessories carefully。
Please FILL the warranty card if you found any damage of the device and accessories,notify the
distributor and inform us immediately.
Setting up
Functional Module
Control
Panel
Pump
Inlet
Pump
Outle
t
Drain
Power
cord
Liquid Filling
Cap
Pump
Inlet
OverFlow
Liquid level
Venting

6
Setting up
Place the unit on an even, stable, clean, nonslip, dry and fireproof surface.
Keep at least 10 cm of open space on the front and rear side.
Do not set up the device close to heat sources and do not expose to sun light.
Ensure the pump plug is security fixed without any external circulation。
Filling and draining
Connect the inlet and outlet to the external reactor (if needed).
Attention: Ensure the drain valve is fully closed before Filling.
Remove the bath cover before Filling.
Monitor the liquid level during Filling.
Attention: Do not empty the bath while it is still hot, there is a risk of burning! Only drain
with a suitable draining hose and container.

7
Operation
Control panel:
Item Button/Indicator Function
AMenu/Pump button
BRun / Stop button
C Temperature setting (up)
D Temperature setting (down)
E LED display
F Cooling indicator
G Pump indicator
H Heater indicator
I External temperature
sensor indicator
press for 1 seconds,to turn on/off the circulation pump.
press for 5 seconds, to entry setting mode (Menu). press
for start/stop circulation and temperature control. press
for turn up the setting temperature.
press for turn down the setting temperature.
Display for the temperature and pump speed. Indicator
on when compressor activation
Indicator on when pump activation
Indicator on when heater on.
Indicator on when external temperature sensor plug in.
H
A
F
D
D
C G
B
I
E

8
Menu:
Press button (A) for 5 seconds to enter the setting mode.
To set the maximum temperature limitation (High Temperature —— Hi T):
Press button (B),to jump to the next setting item.
Press button (A),to exit the setting mode, and display the working temperature.
Press button (C) or (D) to enter the max. temperature setting interface.
Press button (C) or button (D) to adjust the max. temperature limitation.
Press button (B) to save the setting and exit.
Press button (A),to exit the setting mode, and display the operation temperature,
To set the lowest temperature limitation (Low Temperature —— LO T):
Press button (B),to jump to the next setting item.
Press button (A),to exit the setting mode, and display the working temperature.
Press button (C) or (D) to enter the lowest temperature setting interface.
Press button (C) or button (D) to adjust the lowest temperature limitation.
Press button (B) to save the setting and exit.
Press button (A),to exit the setting mode, and display the operation temperature,
Beeper(Beep):
Press button (B),to jump to the next setting item.
Press button (A),to exit the setting mode, and display the operation temperature,
Press button (C) or button (D) to enter the beeper setting interface.
Press button (C) or button (D) to turn on/off the beeper.
0: Beeper off 1: Beeper on
Press button (B) to save the setting and exit.
Press button (A),to exit the setting mode, and display the operation temperature,

9
Working mode (Mode):
Press button (B),to jump to the next setting item.
Press button (A),to exit the setting mode, and display the operation temperature,
Press button (C) or (D) to enter the working mode setting interface.
Press button (C) or button (D) to adjust the working mode setting. Press button (B) to save the
setting and exit.
Press button (A),to exit the setting mode, and display the operation temperature.
Note:
Mode 1: After power failure, no automatic restart of functions.
Mode 2: After power failure automatic restart of functions, depending on previous settings.
Mode 3: After power failure automatic restart of functions, depending on previous settings. Set values
(set in A1or B) cannot be changed.
Over temperature protection(Over temperature —— O T):
Press button (B),to jump to the next setting item.
Press button (A),to exit the setting mode, and display the operation temperature,
Press button (C) or (D) to enter the over temperature protection setting interface.
Press button (C) or button (D) to adjust the over temperature protection temperature value.
For example, to set the over temperature protection temperature value at 110.0 ° C, then the device
will cut off the heating circuit if the fluid temperature is higher than the setting value 110.0° C.
Press button (B) to save the setting and exit.
Note: The over temperature protection will be changed to HIT+10.0℃ after the maximum temperature
(HIT) modification
.

10
Temperature calibration Reset(Calibration —— rCAL):
Press button (B),to jump to the next setting item.
Press button (A),to exit the setting mode, and display the operation temperature.
Press button (C) or (D) to enter the temperature calibration mode setting interface.
0:reset 1:1-points cal. 2:2-points cal. 3:3-points cal.
When the setting value is “0”, press button (B) to reset the previous calibration data.
Temperature calibration point 1:
The interface for viewing the value before correction:
Press button (B),to jump to the next CLP2 item.
Press button (A),to exit the setting mode, and display the operation temperature.
Press button (C) or (D) to enter the interface for viewing the value.
Press button (B),to jump to the temperature calibration point 1 deviation value
interface .
Press button (A),to exit the setting mode, and display the operation temperature.
Deviation value interface:
Press button (B),to jump to the next CLP2 item.
Press button (A),to exit the setting mode, and display the operation temperature.
Press button (C) or (D) to enter the temperature calibration point 1 deviation value input
interface.
Press button (B),save the deviation value and jump to the next CLP2 item.
Press button (A),to exit the setting mode, and display the operation temperature.
The device can be calibrated a total of 3 points.
Table des matières
Autres manuels Scilogex Refroidisseur


