Page 4 of 9
Step (1)
Install mounting kit or prepare a flat, secure mounting location for the winch. Carefully follow the
instructions included with the mounting kit.
Note: If you choose not to use a mounting kit, you will need to drill holes in the structural support of
your vehicle. Be certain that your structural support will stand up to the rated pulling forces of this
winch.
Step (2)
Position the winch over the holes in the mounting kit or structural support.
Step (3)
Secure winch to mounting kit or structural support using bolts, washers and nuts supplied.
Note: In order to gain access to the hardware directly underneath the cable drum it may be
necessary to unspool the cable from the winch drum.
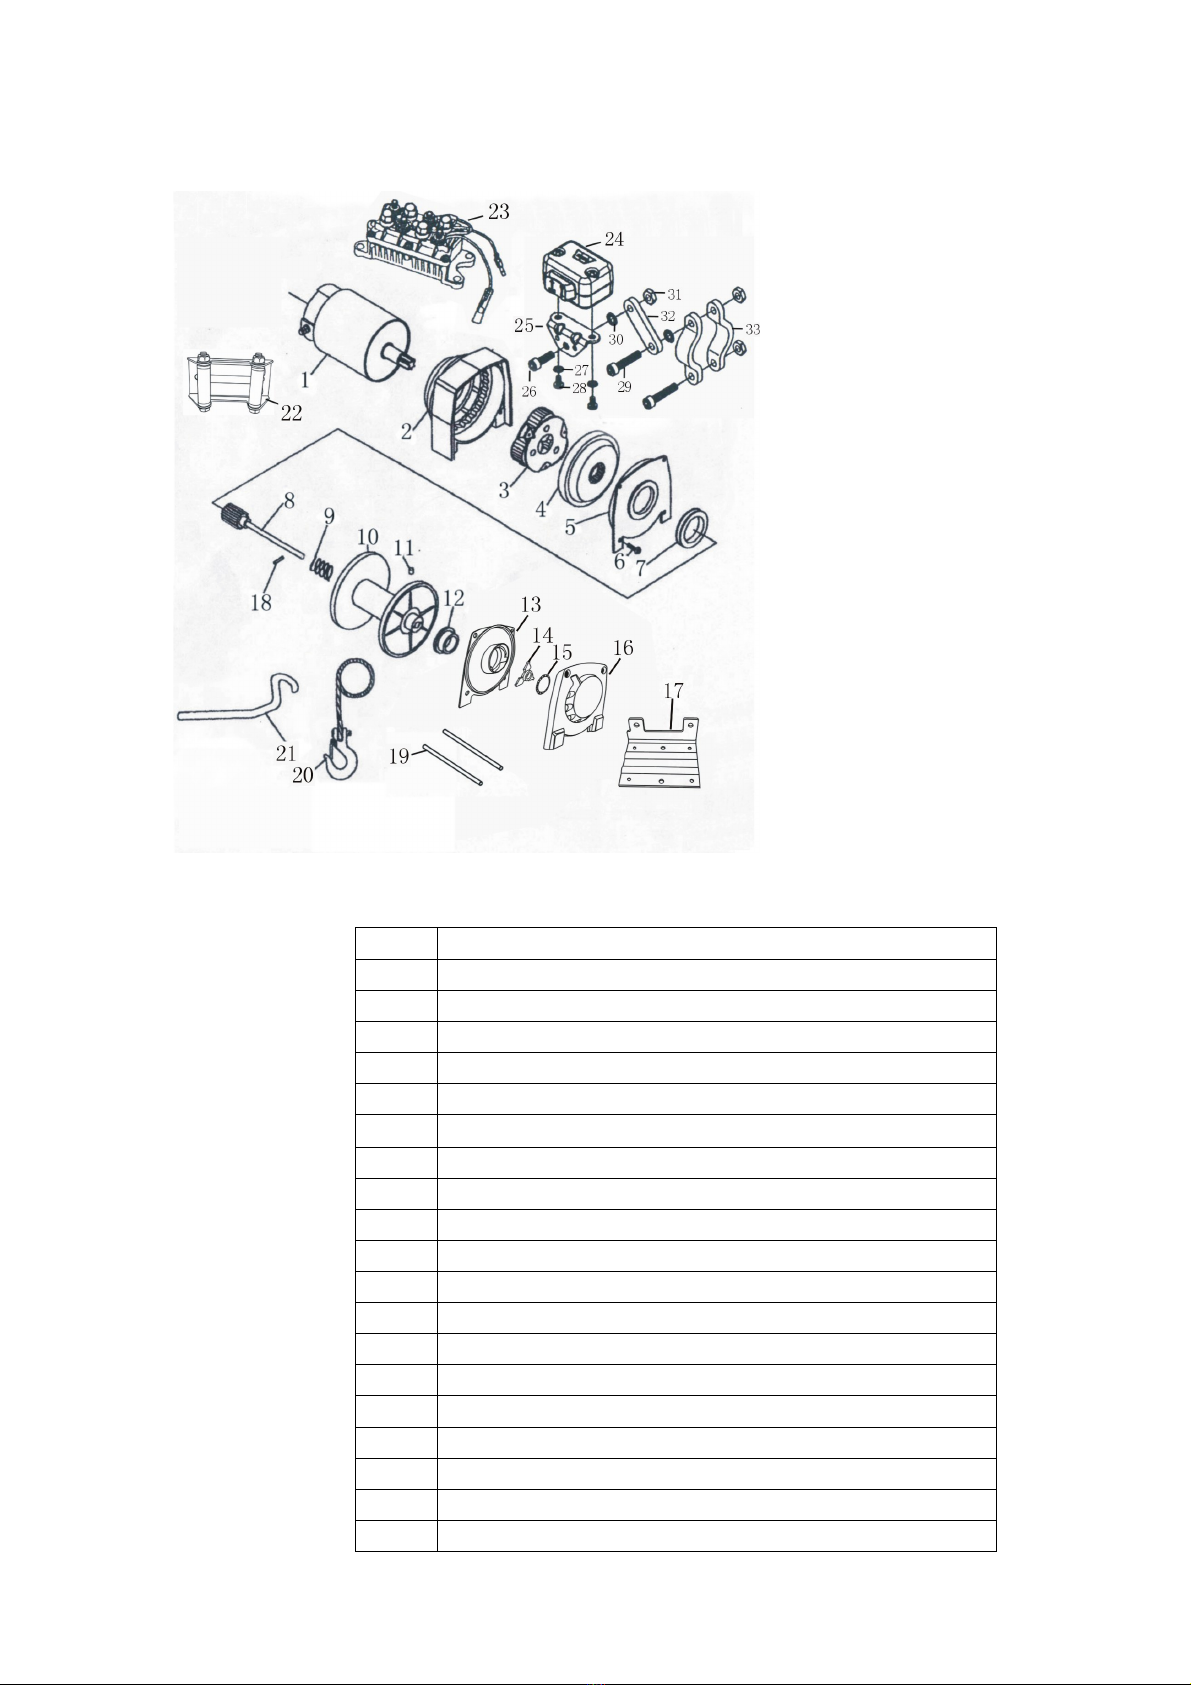
WINCH WIRING INSTALLATION
CAUTION: When attaching wires to the motor or solenoid terminals, hold the inner nut with
a wrench while tightening the outer nut with a second wrench. Do not allow the terminals to rotate in
their housings. Rotation may cause internal wire damage or part misalignment.
Step (1)
Contactor Location: The contactor is mainly a safety component for your winch system. It
separates your winch from its power source when not in use. It is recommended that the contactor
be mounted close to the battery in a clean, dry location. Typical locations are in or near the rear
storage box and on some models under the seat. Make sure the location you chose allows sufficient
clearance from all metal components such as frame tubes. Drill mounting holes once location is
found but do not install as it is easier to wire the contactor prior to mounting.
Step (2)
Switch Mounting: Switch is typically mounted on the left handlebar. Use a piece of black electrical
tape to prevent rotation on the bar. Do not install over any wires or hoses. Once mounted, route the
wiring harness back to where the contactor will be mounted, attaching the harness to hard points on
the vehicle with cable ties. Splice this wire to a key controlled electrical wire, or connect to terminal
1 of contactor, or battery positive pole (We recommend splice the wire 7 to No.1 on Contactor or
battery positive terminal). A test light can be used to locate an appropriate wire. The wire should
only have power when the key is on. Attach the two bullet point wires to their corresponding wires
on the contactor in Figure 1.
NOTE: When routing the wires, the appropriate terminals should be located near the battery, switch
mounting point and winch. Your installation requirements will vary depending upon your vehicle and
winch. Note that if the wires are not long enough to reach the battery, switch mounting point and
winch you may need to increase the length and/or wire gauge of the wiring harness.
WARNING: Ensure that the wiring harness does not interfere or come in contact with
any hot or moving engine, suspension, steering, braking or exhaust parts.
Step (3)
Attach battery wires to contactor locations 1 and 2 as shown in Figure 1. Do not connect to battery
at this time.