NewTek Connect Manuel utilisateur

i
NewTek Connect
Studio Input/Output Module
User Guide

ii
Revised –August 24, 2021
Trademarks: NDI, TriCaster, 3Play, TalkShow, Video Toaster, LightWave 3D, and Broadcast Minds are registered
trademarks of NewTek, Inc. MediaDS, Connect Spark, LightWave, and ProTek are trademarks and/or service
marks of NewTek, Inc. All other products or brand names mentioned are trademarks or registered trademarks of
their respective holders.

iii
T A B L E O F C O N T E N T S
CHAPTER 1 INTRODUCTION AND SETUP.................................................................................................5
Section 1.1 Welcome...................................................................................................................................................................5
Section 1.2 Overview ...................................................................................................................................................................5
Section 1.3 Setting Up..................................................................................................................................................................6
1.3.1 Command and Control ...................................................................................................................................................6
1.3.2 Input/Output connections..............................................................................................................................................7
Section 1.4 Networking................................................................................................................................................................7
CHAPTER 2 USER INTERFACE...................................................................................................................8
Section 2.1 The Desktop ..............................................................................................................................................................8
2.1.1 Configure Channels ........................................................................................................................................................9
Section 2.2 Titlebar & Dashboard..............................................................................................................................................14
2.2.1 Titlebar Tools................................................................................................................................................................15
2.2.2 System Configuration (Mark M)...................................................................................................................................16
2.2.3 System Configuration (Mark D)....................................................................................................................................19
2.2.4 Notifications .................................................................................................................................................................20
2.2.5 Viewport Tools .............................................................................................................................................................21
2.2.6 Dashboard Tools...........................................................................................................................................................22
APPENDIX A: KEY/FILL CONNECTIONS.................................................................................................25
A.1 Mark M Systems ...........................................................................................................................................................25
A.2 Mark D Systems............................................................................................................................................................25
APPENDIX B: NDI®(NETWORK DEVICE INTERFACE).............................................................................26
APPENDIX C: DIMENSIONS AND MOUNTING......................................................................................26
APPENDIX D: ENHANCED SUPPORT (PROTEK).....................................................................................27
APPENDIX E: RELIABILITY TESTING......................................................................................................27
CREDITS...................................................................................................................................................29

iv
5
Chapter 1 INTRODUCTION AND SETUP
This chapter explains how to connect power, monitors and audio visual devices to your
NC1 Input/Output Module. It also reviews the registration process. After completing this
short section, you’ll be all set to begin using NewTek Studio I/O Module.
SECTION 1.1 WELCOME
Thank you for purchasing this NewTek product. As a company, we are extremely proud of our record of
innovation and commitments to excellence in design, manufacture, and superb product support.
NewTek’s innovative live production systems have repeatedly redefined broadcast workflows, providing new
possibilities and economy. In particular, NewTek has been a leader in introducing integrated devices
providing a complete set of tools related to program creation and broadcast, along with web streaming and
social media publishing. This tradition continues with the NC1 Studio IO Module. Its implementation of NDI®
(Network Device Interface) protocol places your new system squarely in the forefront of IP technology
solutions for the video broadcast and production industries.
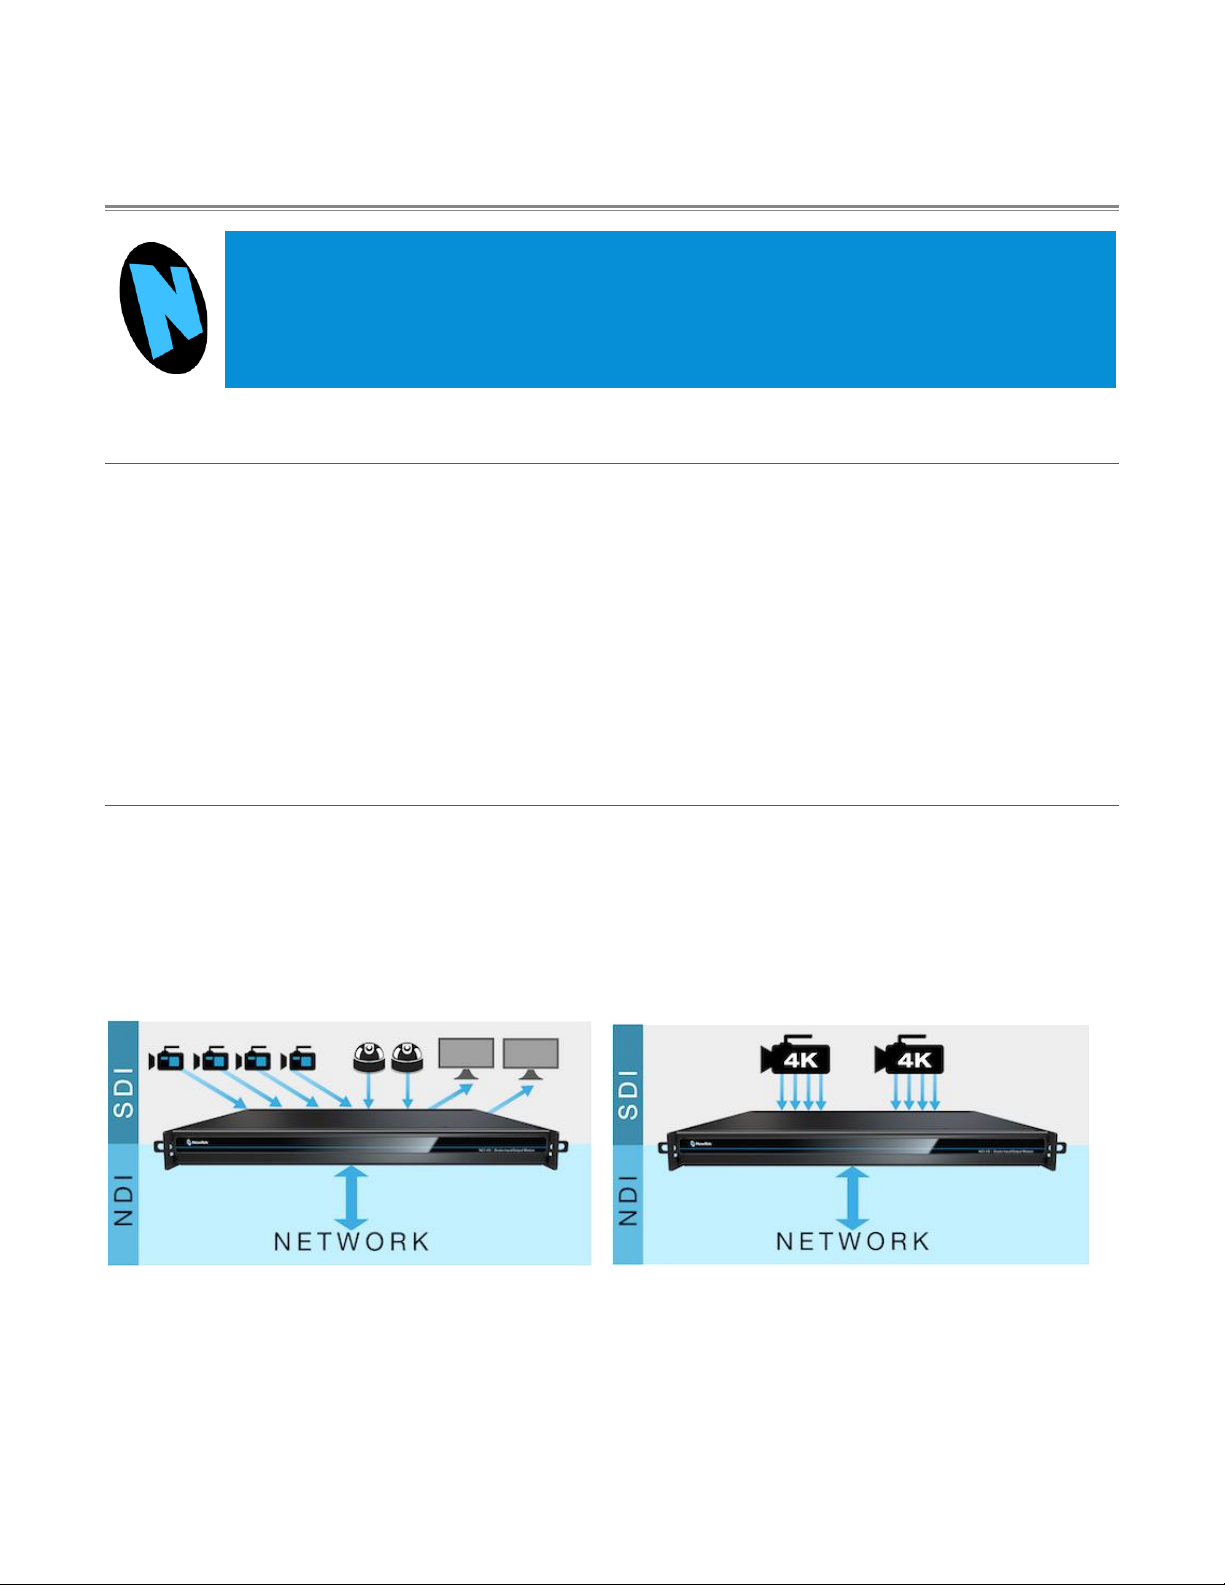
SECTION 1.2 OVERVIEW
Commitments and requirements can change from production to production. A powerful, versatile platform
for multi-source production and multi-screen delivery workflows, the Studio I/O Module quickly pivots to
accommodate additional cameras, devices, displays or destinations.
With NC1 IO’s turnkey installation and operation, you can easily assemble a network of modules to configure
your own multi-system and multi-site workflows.
From increasing your available inputs and outputs, to merging established and emerging technologies, to
linking locations across your network, the NewTek Studio I/O Module is a universal solution that adapts to
your production needs.

6
•Translate up to 8 compatible video sources to SDI or NDI for input, output, or a combination of both
•Configure for dual-channel 4K Ultra HD at 60 frames per second with support for 3G-SDI quad-link
grouping
•Integrate with compatible systems and devices across your network for switching, streaming, display,
and delivery
•Stack modules in a single location or station in multiple locations to meet the demands of your
productions
SECTION 1.3 SETTING UP
1.3.1 COMMAND AND CONTROL
Hint: NC1 IO's interface requires a monitor resolution setting of at least 1280x1024.
1. Connect an external computer monitor to the HDMI
port on the backplate (see Input/Output connections).
2. Connect the mouse and keyboard to USB ports also on
the backplate.
3. Connect the power cord to NC1 IO's backplate.
4. Turn on the computer monitor.
5. Press the Power switch on NC1 IO's faceplate (located
behind the drop-down door).
At this point, the blue Power LED will illuminate, as the device
boots up. (If this does not happen, check your connections
and retry). Though not a requirement, we do strongly
recommend that you connect NC1 IO using an uninterruptable
power supply (UPS), as for any ‘mission critical’ system.
Likewise, consider A/C “power conditioning”, especially in
situations where local power is unreliable or ‘noisy’. Surge
protection is especially important in some locales. Power
conditioners can reduce wear on NC1 IO's power supplies and
other electronics, and provide a further measure of protection
from surges, spikes, lightning and high voltage.
A word about UPS devices:
‘Modified sine wave’UPS devices are
popular due to low manufacturing
costs. However, such units should
generally be viewed as being of low
quality and possibly inadequate to
fully protect the system from abnormal
power events.
For a modest added cost, consider a
"pure sine wave" UPS. These units can
be relied on to supply very clean
power, eliminating potential problems,
and are recommended for applications
demanding high reliability.

7
FIGURE 1
1.3.2 INPUT/OUTPUT CONNECTIONS
External audio and video sources are connected to the appropriate inputs.
1. HDMI –monitor port
2. Ethernet –network connections
3. USB –connect keyboard, mouse and other peripheral devices
4. Motherboard audio connectors
5. Genlock and SDI In/Out –current generation units (designated ‘Mark M’) provide HD-BNC
connectors (High Density BNC); earlier (Mark D) units employ DIN 1.0/2.3 (Mini BNC) connectors
6. Power
SECTION 1.4 NETWORKING
Generally, simply connecting a suitable cable from one of the two Gigabit Ethernet ports on NC1 IO's
backplane is all that is required to add it to a local area network (LAN). In some settings, additional steps
may be required. You can access the system Network and Sharing control panel to accomplish more
extensive configuration tasks. If further help connecting is required, please consult your system
administrator.
4
3
2
1
5
6

8
Chapter 2 USER INTERFACE
This chapter explains the layout and options of the user interface, and how to configure
NC1 IO audio and video input and output. It also introduces the various supplemental video
production features NewTek IO provides, including Proc Amps, Scopes and capture.
SECTION 2.1 THE DESKTOP
The NC1 IO default Desktop interface is shown below, and provides very useful remote monitoring options
in addition to configuration and control features.
The Desktop interface includes dashboards running across the top and the bottom of the screen. By default,
the large middle section of the Desktop is divided into quadrants, each displaying one video ‘channel’.
Beneath each channel’s viewport is a toolbar. (Note that additional viewport toolbar controls are hidden
when not in use, or until you move the mouse pointer over a viewport.)
Continue reading for an overview of the NC1 IO Desktop features.
FIGURE 2

9
2.1.1 CONFIGURE CHANNELS
NC1 IO allows you to select different audio and video sources for each channel via the
Configure panel ( Figure 4). Click the gear next to the channel label below a viewport to
open its Configure panel (Figure 3).
INPUT TAB
FIGURE 4
The tabbed Input pane allows you to select audio and video sources for this channel, and set their format.
You can immediately choose any NDI or SDI connector configured as an input (the latter are shown in the
Local group), a webcam or PTZ camera with compatible network output, or even an input from a suitable
external A/V capture device. (Quad-link selections list the four associated SDI input numbers that will be
used, for reference.)
FIGURE 3

10
See also Appendix A: Key/Fill Connections for key/fill connection details.
A Delay setting is provided for both audio and video sources, allowing precise A/V synchronization where
a/v source timing differs.
CLIPS AND IP SOURCES
As mentioned in the previous section, an IP
(network) source –such as a PTZ camera with NDI
network video output –can be directly selected.
The Video Source drop down menu contains an
Add Media item to let you select a video file, and
Add IP Source menu item (Figure 5).
Clicking the Add IP Source entry opens the IP Source
Manager. Adding entries to the list of sources
shown in this panel causes corresponding entries
for new sources to appear in the Local group shown
in the Video Source menu of the Configure Channel
panel (Figure 6).
FIGURE 6
FIGURE 5
Table des matières
Manuels Unité de contrôle populaires d'autres marques

Festo
Festo Compact Performance CP-FB6-E Manuel de la liste des pièces

Elo TouchSystems
Elo TouchSystems DMS-SA19P-EXTME Manuel utilisateur

JS Automation
JS Automation MPC3034A Manuel utilisateur

JAUDT
JAUDT SW GII 6406 Series Guide rapide

Spektrum
Spektrum Air Module System Manuel utilisateur

BOC Edwards
BOC Edwards Q Series Manuel utilisateur


