ATA004N and ATA005P Smart Battery Data Reader
Operating Instructions
Inspired Energy 25440 NW 8th Place, Newberry FL 32669
US toll free: 1-888-5-INSPIRE (1-888-546-7747) Tel: 352 472 4855 Fax: 352 472 4859
www.inspiredenergy.com
If you wish to save the
scanned data, click the
logging button. A screen
will prompt you to enter a
filename / location, and
data logging will then
begin with one full record
saved for every scan.
•Plug the USB connector into an available USB port (1.0 or higher) in your computer. The Blue LED will
illuminate indicating power from the USB
•Plug the male blade or D-Sub connector into the battery pack observing the polarity.
oThe units are protected against reverse polarity insertion.
At this point the software can read the battery data, and the system can be used to assess the state of health
of the battery. The green LED will illuminate indicating that the SMBus internal pull-ups are on.
•If you wish to view &/or log dynamic battery data during a charge or discharge, plug the female connector
into a charger or into your battery-powered device. This will enable the battery to operate the device as if it
were inserted.
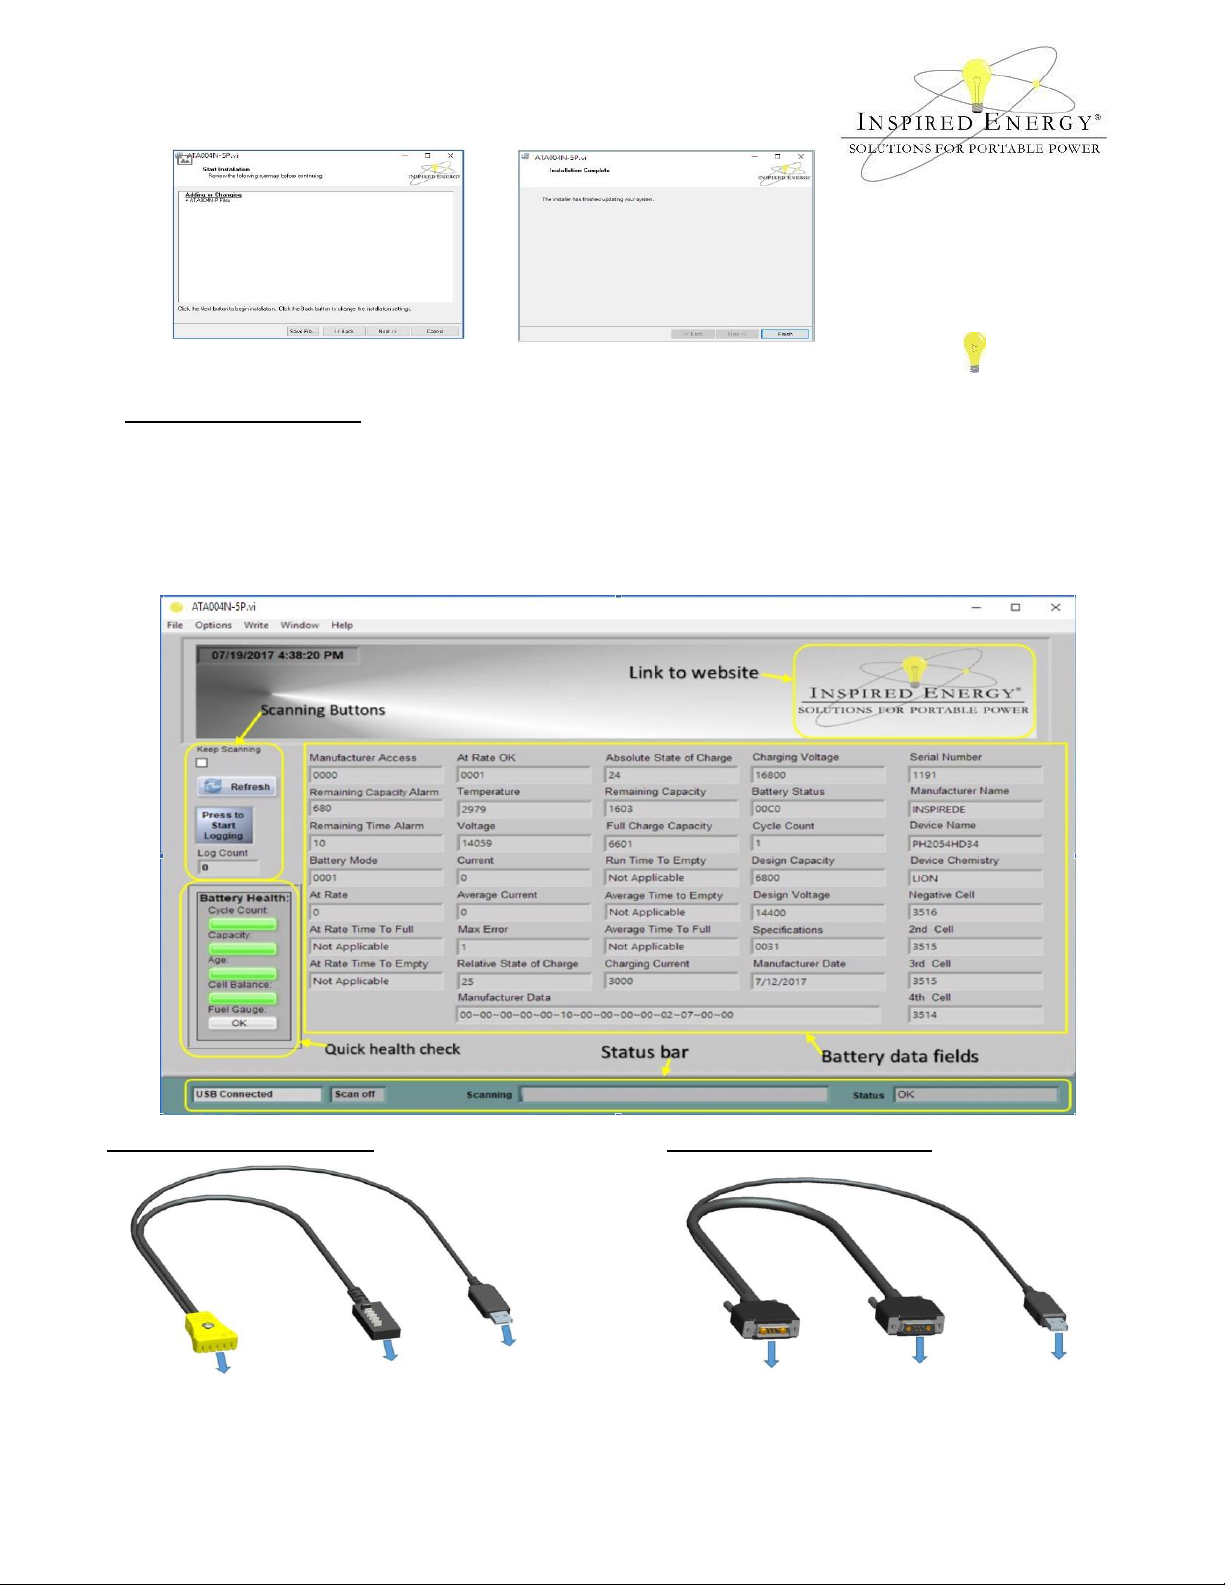
The Battery Health monitor provides a quick check on a battery’s state of health. The bars will change from green
through amber to red depending on the health of the battery. These are only a guide, and a red bar does not
necessarily mean that the battery requires replacement. We recommend that you establish acceptable limits for
your particular application, and always re-calibrate the battery before making any end of life determination. For
example; you may decide to replace the battery only if two or more red bars are showing.
In the example shown above, the battery is a few years old & the fuel gauge requires calibration, but otherwise it
is in good health & will continue to provide good service.
Operating the ATA004N-5P software
With the battery & USB
port connected, you can
scan the battery manually
by using the “Refresh”
button.
To scan the battery
automatically click the
“Keep Scanning”
checkbox.