iLive ILO69TC Manuel utilisateur

INSTRUCTION MANUAL
FOR BUILT-IN OVENS

OPEN 24/7
ILVE ACCESSORIES ONLINE SHOP

ItalianoEnglishFrançaisDeutschEspañolPortuguês
1
INDEX
OVEN PRESENTATION 3
Installation and hook-up 3
Demo mode 3
setting the clock (first power-on) 4
switching on the oven 4
MAIN FUNCTIONS 5
active buttons from left to right 5
Cooking functions 5
simple gestures for cooking 6
CONTROL PANEL FUNCTIONS 7
SEQUENCE OF THE FUNCTIONS POSSIBILITY 7
ISTRUZIONI DI FUNZIONAMENTO 8
Conventional cooking 8
Fan cooking 8
Defrosting 8
Grill cooking 9
Temperature regulation 9
residual heat 9
oven light control 10
FUNCTIONS OF THE CLOCK 10
Minute-counter 10
Programmed cooking time 10
Delayed cooking 11
SAFETY: BLOCK TURNING ON THE OVEN 12
Key function 12

2
ItalianoEnglishFrançaisDeutschEspañolPortuguês
ItalianoEnglishFrançaisDeutschEspañolPortuguês
3
OVEN PRESENTATION
Dear Customer, your new oven is managed by an electronic card which constantly
monitors its operation in order to improve its all-round performance.
The state-of-the-art, reliable and precise touch control system.
The elegant, orderly and discreet interface, more user-friendly than ever before!
Just a few buttons, lots of functions and no difficult combination or sequence of
buttons. Simply concentrate on following the recipe and the oven is ready with two
movements!!!
Installation and hook-up
Dear Customer, this oven is a sophisticated electronic appliance, classified as a
durable good. Its installation requires licensed, qualified professionals for both the
hook-up of the power line and its placement in the kitchen counter.
Demo mode
This is the name of the mode usually implemented by the oven every time the electricity
supply fails and also when the oven is first connected.
The aim is to display all the control potentials with a recorded sequence of commands.
In this mode the oven is NEVER really activated, as the heating elements are
not switched on!!
The control panel is NOT ACTIVE so the oven does not respond to commands!
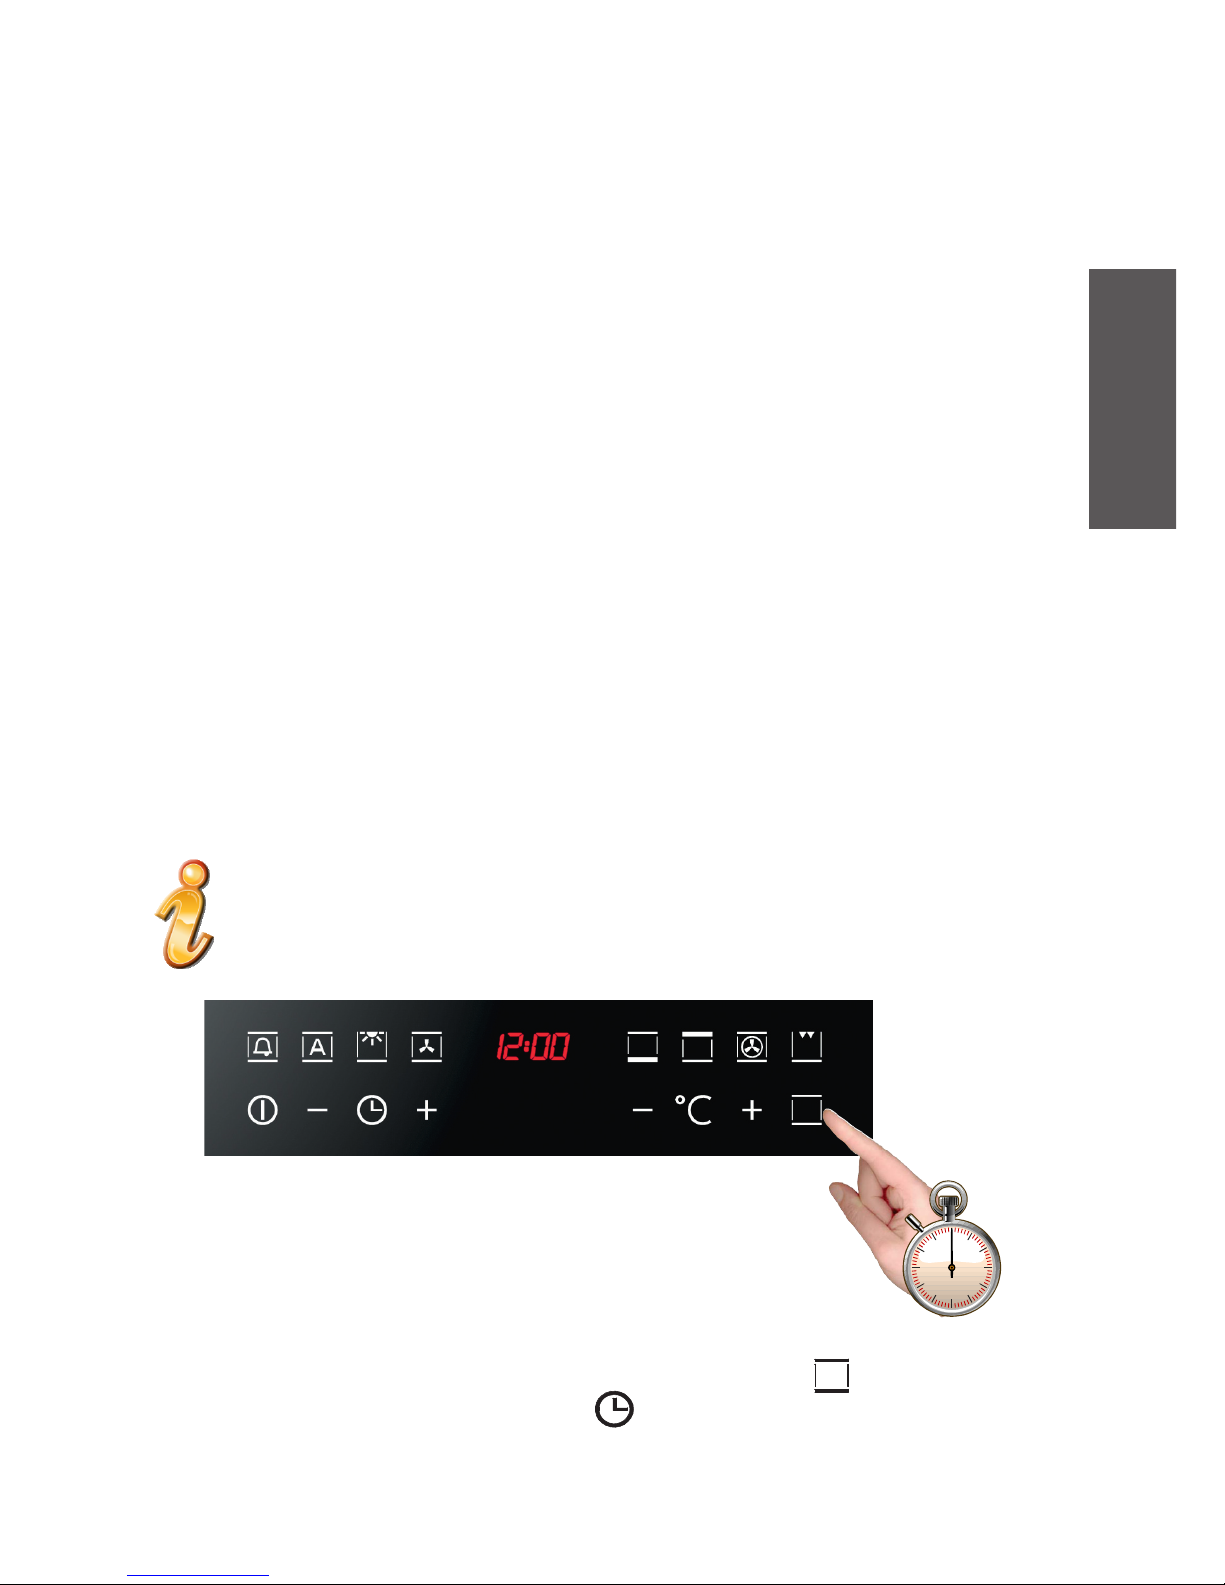
To exit from this mode, press the oven’s scroll functions button , for 5 seconds and
use the “+” and “-” buttons of the clock to set the exact time. The new time is
accepted 3 seconds after no “+” or “-” button is pressed and the digits stop flashing.

4
ItalianoEnglishFrançaisDeutschEspañolPortuguês
Setting the clock (first power-on)
With the oven off, press the oven time button ( ) for 3 seconds. This takes you to
Clock Setting mode.
The time will flash on the display (at the first power-on, it displays “12:00”). Use the “+”
and “-” buttons to set the time. The time set is automatically accepted if you press the
oven timer button or if no keys are pressed for 3 seconds: in the latter case, the digits
stop flashing.
Switching on the oven
The oven is switched on using the ON/OFF symbol shown in the
figure.
The control activates all the symbols, illuminating the background.

ItalianoEnglishFrançaisDeutschEspañolPortuguês
5
MAIN FUNCTIONS
Active buttons from left to right:
Power on and off with a simple touch (pressing it for 5 seconds activates the key
or “Child lock” function)
- Decrease the time
Clock
+ Increase the time
- Decrease temperature
is not a button but a silkscreen
+ Increase temperature
Scrolls through functions (each touch corresponds to a function of the oven)
Cooking functions
The control provides up to 14 different specific cooking functions depending on the
model you have!
Every function has a set temperature chosen on the basis of cooking tests using
frequently used recipes and can easily be adjusted to suit personal preference.
The following table contains the results of the cooking tests carried out in our
laboratories by a professional chef. However, this is merely a guide and the values
indicated are simply to help you get started and try our your own recipes, always
achieving the best results!

6
ItalianoEnglishFrançaisDeutschEspañolPortuguês
Simple gestures for cooking
Two simple movements are all it takes to set a cooking programme, thanks to the
state-of-the-art control logic: switch on the oven and select the best function for the
dish you are preparing.
The control proposes a temperature for every function. It is possible to change
it t any time, but if you are happy with it, you don’t need to do anything else.
The oven will be automatically activated in a few seconds!

ItalianoEnglishFrançaisDeutschEspañolPortuguês
7
CONTROL PANEL FUNCTIONS
1. Oven Light (this turns on whenever you power on the oven)
2. + (static) pre-set to 190 °C (can be set from 50 to 250 °C)
3. Upper heating element pre-set to 180 °C (can be set from 50 to 250 °C)
4. Lower heating element pre-set to 50 °C (can be set from 50 to 250 °C)
5. Small grill pre-set to 250 °C (can be et from 50 to 250 °C)
6. + ((Large grill ) pre-set from 250 °C (can be set from 50 to 250 °C)
7. + + (large ventilated grill) pre-set to 165 °C (can be set from 50 to 250 °C)
8. + + (static ventilated) pre-set to 165 °C (can be set from 50 to 250 °C)
9. Ventilated (circular + fan) pre-set to 165 °C (can be set from 50 to 250 °C)
10. + Pizza (ventilated + lower heating element) pre-set to 230 °C (can be set from 50 to 250 °C)
11. Radial ventilation pre-set to ----- °C (defrost if used alone can be set from 40 to 60 °C)
12. + + (lower heating element + large grill) pre-set to 190 °C (can be set from 50 to 250 °C)
13. + (lower heating element + fan) pre-set to 165 °C (can be set from 50 to 250°C)
14. + (small ventilated grill) pre-set to 165 °C (can be set from 50 to 250 °C)
SEQUENCE OF THE FUNCTIONS POSSIBILITY

8
ItalianoEnglishFrançaisDeutschEspañolPortuguês
INSTRUCTIONS FOR USE
Conventional cooking
A classic system that uses upper and lower heat suitable for cooking a single dish.
It is a good idea to insert the food when the oven has reached the pre-set
temperature, i.e., when the °C symbol stops flashing. If you need to increase the
temperature towards the end of cooking, use the + temperature regulation button.
We recommend opening the door as little as possible during cooking.
Fan cooking
For this type of cooking a fan positioned at the back allows the circulation of hot
air inside the oven, creating uniform heat. In this way cooking is more rapid than
conventional cooking. It is a suitable method for cooking dishes on more than one
shelf, especially when the food is of different types (fish, meat etc.).
Defrosting
When you select the “radial fan” function, the fan will circulate room-temperature
air inside the oven to quickly defrost frozen food.
The temperature display will show “d--o”. It is possible to regulate the temperature of
the oven from 40 °C to 60 °C, in increments of 5 °C.
Table des matières
Autres manuels iLive Four


