
Dual XPA2500 Mode d'emploi

INSTALLATION/OWNER’S MANUAL
Mobile Power Amplifiers
XPA SERIES
XPA2500
XPA4640

2
XPA SERIES INSTALLATION
Preparation
Please read entire manual before installation. Due to the technical nature of amplifiers,
it is highly recommended that your DUAL amplifier is installed by a professional installer
or an authorized dealer.
Before You Start
•Disconnectnegativebatteryterminal.(consultaqualifiedtechnicianforinstructions)
•Avoidinstallingtheamplifierwhereitwouldbesubjecttohightemperatures,suchas
fromdirectsunlight,orwhereitwouldbesubjecttodust,dirtorexcessivevibration.
•Useextremecautionwhendrillingholestoavoiddamagingfuellinesorexisting
vehiclewiring.
•Allamplifierinstallationsrequirepower,signalandspeakerwires(notincluded).
•Anamplifierinstallationkit(soldseparately)ishighlyrecommendedtofacilitatethe
installation. Consult your dealer for recommendations.
Mounting Location
•Chooseamountinglocationfortheamplifier.Suggestedlocationsincludeunderaseat
orinthetrunk.
•Theamplifiercanbemountedhorizontal(recommended)orvertical.Foroptimum
performance,makesuretoprovideatleast1"ofspacetoaroundallsides.Donot
mounttheamplifierundercarpetsorwhereairflowisrestricted.
•Donotinstalltheamplifierwhereitmaybeexposedtomoisture.
•Theoptimummountinglocationvariesbetweenvehicles.Remembertotestall
amplifier functions before completing the final mounting procedure.
TYPICAL MOUNTING METHOD

NOTE
Be sure to follow specific instructions included with your amplifier installation kit
(not included with this amplifier). The information below should be used a general
guideline only.
Power Wire (+12V)
•Disconnectnegativebatteryterminalbeforeproceeding.Consultaqualified
technician for instructions if you are unsure.
•Planwireroutingbeforecuttinganywirestolength.Beginbyroutingthepower
+12Vwirefromthebatterytotheamplifierlocation.Useagrommetwhenrunning
wiresthroughthefirewallormetalopenings.Avoidrunningthepowerwirenear
existingvehiclewiringtopreventinducednoisefromenteringtheaudiosystem.
•Useextremecautionwhendrillingholestoavoiddamagingfuellinesorexisting
vehiclewiring.
•The+12VwireMUSTbefusedwithin18"ofthebatteryforprotectionofthevehicle’s
electrical system.
Ground Wire (GND)
•Theamplifiergroundwireshouldbeasshortaspossible.Chooseacleanunpainted
sectionofmetalorthevehiclechassiswhenattachingthegroundconnection.Be
sure to clean the area of any dirt or grease.
Remote Turn-on Wire (REM)
•Theremoteturn-onwireconnectstotheheadunit'samplifierturn-onleador
powerantennaoutput.
Speaker Wires
•Chooseadequategaugespeakerwiredependingonyourexactamplifier/speaker
combination.Besuretoobservepolaritywhenconnecting.
•Donotgroundanyspeakerwiresorconnectanyspeakerwirestogether.
Input Signal
•Theamplifier'sinputsignalconnectstotheheadunit'slowlevel(RCA)orhighlevel
(speakerwire)outputs.
•Lowlevelinputsignaldeliverthebestperformance.Ifunavailable,usethehigh
levelinputs-wheninterfacingwithfactoryheadunitforinstance.
CAUTION
•Donotusebothlowandhighlevelinputsatthesametime-connectonlyoneor
the other.
•Neverrunanywiresunderneathoroutsidethevehicle.
3
XPA SERIES INSTALLATION
Connection Descriptions

4
XPA SERIES INSTALLATION
Power and Speaker Connections
LEDIndicator
BassBoost
CrossoverModeSwitch
CrossoverFrequency
1
2
3
4
InputLevelControl
HighLevelInputs
LowLevelInputs
InputModeSwitch
5
6
7
8
XPA2500
XPA4640
34 5 6 7
21
123456
77
8

SpeakerConnection(s)
Ground Connection
RemoteConnection
1
2
3
+12VDCBatteryConnection
Fuse(s)
4
5
5
XPA SERIES INSTALLATION
Audio Inputs and Controls
432
5
1
XPA2500
XPA4640
1 2 3 45

6
XPA SERIES INSTALLATION
Fuse Rating
Whenreplacingfuses,makesurenewfuse
is the correct type and amperage. Using an
incorrect fuse could damage the amplifier.
XPA250025ampATOx1
XPA464025ampATOx2
Power/Ground Wire Size
Foroptimumperformance,useonlythewire
sizelistedbeloworlarger.Makesuretouse
thesamesizepowerandgroundwire.
XPA250010gauge
XPA46408gauge
Main Power Connections
Connect+12V,GNDandREMwiresaccordingly.AsuitablefuseMUSTbeinstalledonthe
+12Vleadwithin18"ofthebatteryforprotectionofthevehicle’selectricalsystem.
Typical Wire Routing

7
XPA SERIES INSTALLATION
Amplifier Connections
Speaker Connections
Connectspeakerwiresobserving
polarity.Theminimumimpedance
load for the XPA2500 and XPA4640
is 2 ohms stereo and 4 ohms
bridged.Useofloadslowerthan
these is not recommended and
may cause amplifier damage.
TheXPA2500andXPA4640can
bewiredforstereo,bridgedor
stereo/bridgedsimultaneous
operation.
Input Signal Connections
Low Level Input (RCA)
Lowlevel(RCA)inputsignalispreferredforbestperformance.Typicaltrunk-mount
amplifierinstallationsrequirea17-20footRCAcable.Mosttrucksandunder-seat
applicationsrequirea6-9footRCAcable.UsingtwistedpairconstructionRCAcableswill
minimize noise.
High Level Input (Speaker Wire)
Highlevelinputsshouldonly
beusedwhenRCAoutputsare
notavailablefromtheheadunit.
Connecttheheadunitspeaker
outputstothehighlevelinput
connectorasshownbelow.The
blackwire(signalreferenceground)
mayormaynotrequireaconnection
tochassisground-dependingon
your particular installation.
Subwoofer (mono)
Typical Bridged Wiring
(4 ohms minimum)
2 Speakers (stereo)
Typical Stereo Wiring
(2 ohms minimum)
CAUTION
Donotusebothlowandhighlevelinputsatthesametime-connectonlyoneortheother.
XPA2500speakerconnectionsshown

8
XPA SERIES OPERATION
Configuration/Setup
Theinputlevelcontrol(gain)isusedtoobtainthebest
possiblematchbetweentheheadunitaudiooutputand
theamplifierinput.Beginbyturningtheinputlevelcontrol
fullycounterclockwise.Next,turnuptheheadunitvolume
controlaround3/4ofthewayup.Adjusttheinputlevel
controlclockwiseuntilaudibledistortionisheard,then
slightlycounterclockwisetoprovidethebestmatch.
Repeatforallinputlevelcontrols.
Select2 CHmodeiftheheadunitonlyhas1pairofRCA
outputs.PlugtheRCA’sfromtheheadunitintochannels
1/2or3/4.All4amplifierinputswillreceiveasignal.
NOTE:Thereisnofaderfunctionwhenusing2 CH mode.
Select4 CHmodeiftheheadunithas2pairsofRCA
outputs.PlugtheRCA’sfromtheheadunitintochannels
1/2and3/4.
Thecrossoverisusedtofilteroutfrequenciesaboveor
belowacertainpoint.ChooseLPFwhenusingtheamplifier
withsubwoofers,HPFwhenusingwithmidrange/tweeter
combinations and FULLwhenusingwithcoaxial-type
speakers.
NOTE Choose FULLwhenusingtheamplifierinstereo/
bridgedsimultaneousmode.Inthismode,passive
crossoversarerequired.Failuretousethecorrectpassive
componentsmaydamagetheamplifierand/orspeakers.
Consultaqualifiedprofessionalforrecommendations.
Thiscontrolallowspreciseadjustmentofthecrossover
frequency.
Thiscontrolprovidesadditionalboost@45Hzwhenused
withsubwoofers.Adjustthiscontrolwithcaution-as
improperusecandamagespeakers!
TheLEDindicatorilluminatesgreenduringnormal
operation(POWER)andredwhentheamplifierdetectsa
fault(PROTECT).
Input level Control
Input Mode Switch
(XPA4640)
Crossover Mode
(XPA2500 & XPA4640)
Crossover Frequency Control
Bass Boost
LED Indicator

9
XPA SERIES WARRANTY
Limited One-Year Warranty
Thiswarrantygivesyouspecificlegalrights.
Youmayalsohaveotherrightswhichvaryfrom
state to state.
DualElectronicsCorp.warrantsthisproductto
the original purchaser to be free from defects in
materialandworkmanshipforaperiodofone
year from the date of the original purchase.
Dual Electronics Corp. agrees, at our option,
duringthewarrantyperiod,torepairanydefect
inmaterialorworkmanshiportofurnishan
equalnew,renewedorcomparableproduct
(whicheverisdeemednecessary)inexchange
withoutcharges,subjecttoverificationofthe
defect or malfunction and proof of the date of
purchase.Subsequentreplacementproducts
arewarrantedforthebalanceoftheoriginal
warrantyperiod.
Who is covered? Thiswarrantyisextendedto
the original retail purchaser for products
purchasedandusedintheU.S.A.
What is covered? Thiswarrantycoversall
defectsinmaterialandworkmanshipinthis
product.Thefollowingarenotcovered:
installation/removalcosts,damageresulting
from accident, misuse, abuse, neglect, product
modification, improper installation, incorrect
linevoltage,unauthorizedrepairorfailureto
followinstructionssuppliedwiththeproduct,
or damage occurring during return shipment of
the product.
What to do?
1.Beforeyoucallforservice,checkthe
troubleshootingguideinyourowner’s
manual.Aslightadjustmentofanycustom
controlsmaysaveyouaservicecall.
2.Ifyourequireserviceduringthewarranty
period,youmustcarefullypacktheproduct
(preferablyintheoriginalpackage)andship
itbyprepaidtransportationwithacopyofthe
original receipt from the retailer to an
authorizedservicecenter.
3.Pleasedescribeyourprobleminwritingand
includeyourname,areturnUPSshipping
address(P.O.Boxnotacceptable),anda
daytimephonenumberwithyourshipment.
4.Formoreinformationandforthelocationof
thenearestauthorizedservicecenterplease
contactusbyoneofthefollowingmethods:
•Callustoll-freeat1-866-382-5476
•E-mailusat[email protected]
ExclusionofCertainDamages:Thiswarranty
isexclusiveandinlieuofanyandallother
warranties,expressedorimplied,including
withoutlimitationtheimpliedwarrantiesof
merchantability and fitness for a particular
purpose and any obligation, liability, right,
claimorremedyincontractortort,whether
or not arising from the company’s negligence,
actualorimputed.Nopersonorrepresentative
is authorized to assume for the company any
otherliabilityinconnectionwiththesaleof
thisproduct.Innoeventshallthecompanybe
liableforindirect,incidentalorconsequential
damages.

10
XPA SERIES OPERATION
Specifications
CEA-2006PowerStandardSpecifications
(reference: 14.4VDC, 20Hz~20kHz)
PowerOutput:50 Watts RMS x 2 channels at 4 ohms and < 1% THD+N
Signaltonoiseratio:75dBA (reference: 1 watt into 4 ohms)
Additionalpoweroutput:
75 Watts RMS x 2 channels at 2 ohms and < 1% THD+N
150 Watts RMS x 1 channel at 4 ohms (bridged) and < 1% THD+N
Dynamicpower:300 Watts at 4 ohms
Frequencyresponse:20Hz~20kHz (-3dB)
Maximuminputsignal:6V
Minimuminputsignal:200mV
Speakeroutputimpedance: 2~8 ohms (stereo), 4~8 ohms (bridged)
Bassboost:0~12dB @ 45Hz
Crossoverrange:50~500Hz, 12dB/octave
Powersupply: 11-16 VDC, negative ground
Fuse: 25 amp ATO
Amplifierdimensions:8.9" x 2.13" x 9.17" (WxHxD)
(226 x 54 x 233 mm)
Typicalinstallationdimensions: 11.5" x 3.25" x 9.17" (WxHxD)
(292 x 83 x 233 mm)
CEA-2006PowerStandardSpecifications
(reference: 14.4VDC, 20Hz~20kHz)
PowerOutput:50 Watts RMS x 4 channels at 4 ohms and < 1% THD+N
Signaltonoiseratio:72dBA (reference: 1 watt into 4 ohms)
Additionalpoweroutput:
75 Watts RMS x 4 channels at 2 ohms and < 1% THD+N
150 Watts RMS x 2 channels at 4 ohms (bridged) and < 1% THD+N
Dynamicpower:600 Watts at 4 ohms
Frequencyresponse:20Hz~20kHz (-3dB)
Maximuminputsignal:6V
Minimuminputsignal:200mV
Speakeroutputimpedance: 2~8 ohms (stereo), 4~8 ohms (bridged)
Bassboost:0~12dB @ 45Hz
Crossoverrange:50~500Hz, 12dB/octave
Powersupply: 11-16 VDC, negative ground
Fuse: 25 amp ATO x 2
Amplifierdimensions:13.69" x 2.13" x 9.17" (WxHxD)
(348 x 54 x 233 mm)
Typicalinstallationdimensions: 16" x 3.25" x 9.17" (WxHxD)
(406 x 83 x 233 mm)
XPA2500
XPA4640
Autres manuels pour XPA2500
1
Ce manuel convient aux modèles suivants
1
Table des matières
Autres manuels Dual Amplificateur

Dual
Dual DA301L Mode d'emploi

Dual
Dual DPA250 Mode d'emploi

Dual
Dual TVV 46 Manuel utilisateur

Dual
Dual DA301L Mode d'emploi

Dual
Dual XIA2340 Mode d'emploi

Dual
Dual DA560D Mode d'emploi
Dual
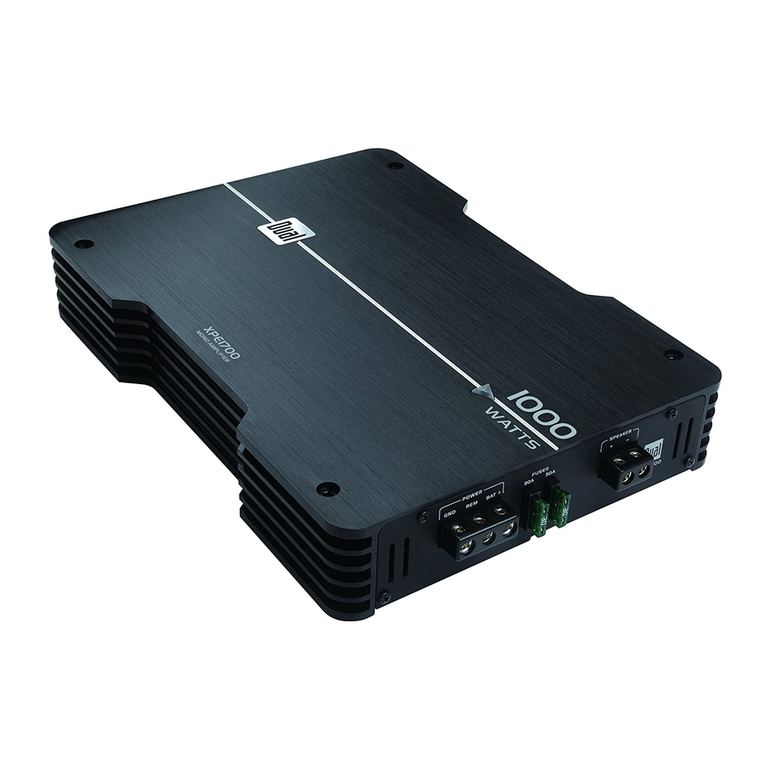
Dual XPE1700 Manuel utilisateur

Dual
Dual DA604D Mode d'emploi

Dual
Dual DA1000D Mode d'emploi

Dual
Dual XPR520 Mode d'emploi

Dual
Dual DBTMA100 Manuel utilisateur

Dual
Dual XPA2500 Mode d'emploi

Dual
Dual DPA250 Mode d'emploi

Dual
Dual DA604D Mode d'emploi

Dual
Dual XPE1700 Mode d'emploi

Dual
Dual illumiNITE XIA4225 Mode d'emploi

Dual
Dual XPR510D Manuel utilisateur

Dual
Dual CV 1260 Manuel utilisateur

Dual
Dual XPA2100 Mode d'emploi

Dual
Dual DMA804D Mode d'emploi


