Zap Zapino Manuel utilisateur

Operation and Maintenance Instructions
OWNER’S
MANUAL
We strongly recommend that you
read this entire manual before
using your vehicle for the first time
www.zapworld.com
ZAP © 2008 - All Rights Reserved

Read before riding Page 2
Delivery Inspection Page 3
Point Inspection Page 4
Installing the mirrors Page 4
Technical Specifications Page 5
Wiring Diagram Page 6
Ignition Key Positions Page 7
Handle Bar Controls Page 8
Accelerating & Braking Page 9
Battery & Charging Page 10
Performance Page 11
Maintenance Page 12
Maintenance Schedule Page 13
Frequently Asked Questions Page 14 -16
Troubleshooting Page 17
Diagnostic Warning Signal Lights Page 18
Warranty Page 19 - 21
Wiring Display Page 22
Equipment Location Page 23 - 24
Contents Page

2
1) To ensure the vehicle is functioning correctly, do a quick check of th vehicle's tires
and check that the brakes are working. (For more detailed maintenance instructions
see the Maintenance Schedule). Your vehicle has been thoroughly checked by our
engineers before delivery but on the spot checks are equally important.
2) When the key is inserted and turned to the "ON" position, the power indicator will
illuminate. If current drain is over 60A, the power will be automatically cut off to avoid
over-heating. Wait for one minute and then press the red button (see pg.7) to restart
the vehicle.
3) To avoid unplanned acceleration, always turn the key to the “OFF”position before
dismounting or leaving the bike unattended.
4)
5) This vehicle may be ridden in wet conditions, but be sure to avoid soaking it during
cleaning to avoid damaging any of the electric components.
6) The vehicle should not be left in strong, direct sunlight for long periods as some of
the electric components may overheat.
7) Motorcyclists and moped users must abide by the same traffic rules and
regulations as other motorists. Before taking your motorcycle/moped on a public
road, be familiar with DMV traffic rules and regulations and any special
requirements for motorcycles/mopeds.
8) Alcohol slows reflexes and greatly limits your ability to
operate a . Even a very small amount of alcohol will reduce your
ability to operate a safely.
9)
SAFETY NOTICE: Be sure that you are seated on the bike and kick stands
are clear of the floor before touching the throttle handle. If you twist the
throttle before you are ready to go or while you are mounting the bike it may
run away from you and could lead to an accident.
Note:
Never drink and ride.
Some states may classify ZAPINO as
a moped, others a motorcycle.
motorcycle/moped
motorcycle/moped
ALWAYS wear an approved safety helmet!
WARNING! Read Before Riding
If you believe that your vehicle has a defect which could cause a crash or could cause injury or death, you
should immediately inform the National Highway Traffic safety Administration (NHTSA) in addition to
notifying ZAP.
If NHTSA receives similar complaints, it may open an investigation, and if it finds that a safety defect exists
in a group of vehicles, it may order a recall and remedy campaign. However, NHTSA cannot become
involved in individual problems between you, your dealer, or ZAP.
To contact NHTSA, you may call the Vehicle Safety Hotline toll-free at 1-888-327-4236 (TTY: 1-800-424-
9153); go to http://www.safercar.gov ; or write to: Administrator, NHTSA, 400 Seventh Street, SW.,
Washington DC 20590. You can also obtain other information about motor vehicle safety from
http://www.safercar.gov.

3
The following checks/operations are necessary before riding and
delivering.
1) Always Charge the batteries (observing battery guidelines) before
using and after every use.
2) Check the action of the front and rear-wheel suspension.
3) Check the functionality of all controls.
4) Check the screws, nuts and fastening parts; check the engine
fixing, main and side kick stands, suspension strut, yoke and
steering-head bearing.
5) Check the lights/headlight.
6) Check all main screws.
7) Check the tire pressure.
8) Check the function of the front and rear brakes
9) Perform a final inspection of the following elements: steering,
brakes, instuments, indicator lights, lights and signal system, as well
as the tires and wheels.
10) Explain the terms and conditions of the warranty to the customer,
and have them return the registration card.
ALWAYS:
Pre-Delivery Inspection

Important Notes
1. Regularly perform a routine maintenance check. Doing so will
help protect yourself and your vehicle.
2. If any parts are damaged, whether normal or abnormal, please
check with the dealer before riding.
1. Mirrors need to be attached to the handle bars between the grips
and the brake handle.
2. Screw in the mirror clockwise. The mirror that goes on the left side
is curved to the left and the mirror that goes on the right side curves to
the right.
3. Secure mirrors by tightening the bolts.
4. Clean and adjust both mirrors before you ride. Adjust each mirror
so you can see the lane behind you and as far as possible the lane
next to you. When the mirror is properly adjusted you can see the
edge of your arm and shoulder.
Point Inspection before every use
Item Action
Front Brake Squeeze right hand brake and push the vehicle to
see whether it rolls easily. If it does, then the brake
must be tightened. Tighten the bolt until the vehicle
will no longer move with the brakes applied.
Rear Power/Disc Brake Listen for any noticeable grinding or squealing from
the tires while the brake is applied. If so, contact
the dealer to adjust.
Brake Fluid Check fluid gauge on the left handlebar to ensure
that the brake fluid is above the indicated level. If
not, top it up with a good brand of brake fluid.
Electric Switch Handle Turn THrottle counter clockwise then release; the
Throttle should spring back to stop position. If not,
contact your supplier.
Tires Check the tire pressure is 36 PSI
Controller/ Motor Check the usage and condition
Battery Check the power level by looking at the gauge or
with a voltage meter.
Signal Check to make sure your lights are working.
Nuts and Bolts Check to make sure that all nuts and bolts are
tightened and secured.
Speed Switch Normal Moped operation is DOWN
Installing the mirrors
4

5
OPTIONS
£
£
£
£
£
Solar Panel
Fast Charger
Extended Range
Luggage Boxes
220V Charger
Battery
Technical Specifications
Motor Power 3000W Brushless Hub Motor
Battery DC 60V, 38AH with the green saver ( silicone power) batteries
Charger 5A,110V~250V/50 Hz ~60Hz
Charging Time 6~10 Hours
Life of Battery 400 Deep Cycles
Wheelbase 10 Inches
Torque 103Nm (76 ft-lb)
Top Moped Speed 30 mph (50km/H) for 3000W motor
Single Charge 30Mile (50km) based on 38AH battery
Climbing Capacity 1:4 Gradient for a 155 lb. (70kg) Rider
Maximum Weight Capacity 282 lbs (128kg)
Tire Front:3.50-10.00 Inch 8PR Rear:3.5-10.00 Inch 8PR, tubeless
Gross Weight (135kgs) with 38AH60V battery
Net Weight (81kgs) (not include battery)
Battery Weight 128lbs (58kgs)
Product Size L 70”x W 27”x H47”
Brake System Front and Rear Disc brake
297 lbs
178 lbs

Wiring Diagram
CONTROLLER
POWER
MOTOR
ACCELEROTOR
UNDER-PRESSURE
SIGNAL
HALL SIGNAL
BRAKE
Red (0.75mm )
Red (2.5mm )
Black (2.5mm )
2
2
2
Blue (2.5mm )
Green (2.5mm )
Yellow (2.5mm )
2
2
2
Red (0.3mm )
Black (0.3mm )
Green (0.3mm )
2
2
2
Red (0.3mm )
Brown (0.3mm )
Yellow (0.3mm )
Red (0.3mm )
2
2
2
2
Green (0.3mm )
Blue (0.3mm )
Black (0.3mm )
2
2
2
White (0.3mm )
2
Brushless
Motor
Controller
DC to DC 60 V. Battery
Key Lock
+12V
Horn
Tail Light
Relay
6
Lights
Lights
Lights
Lights
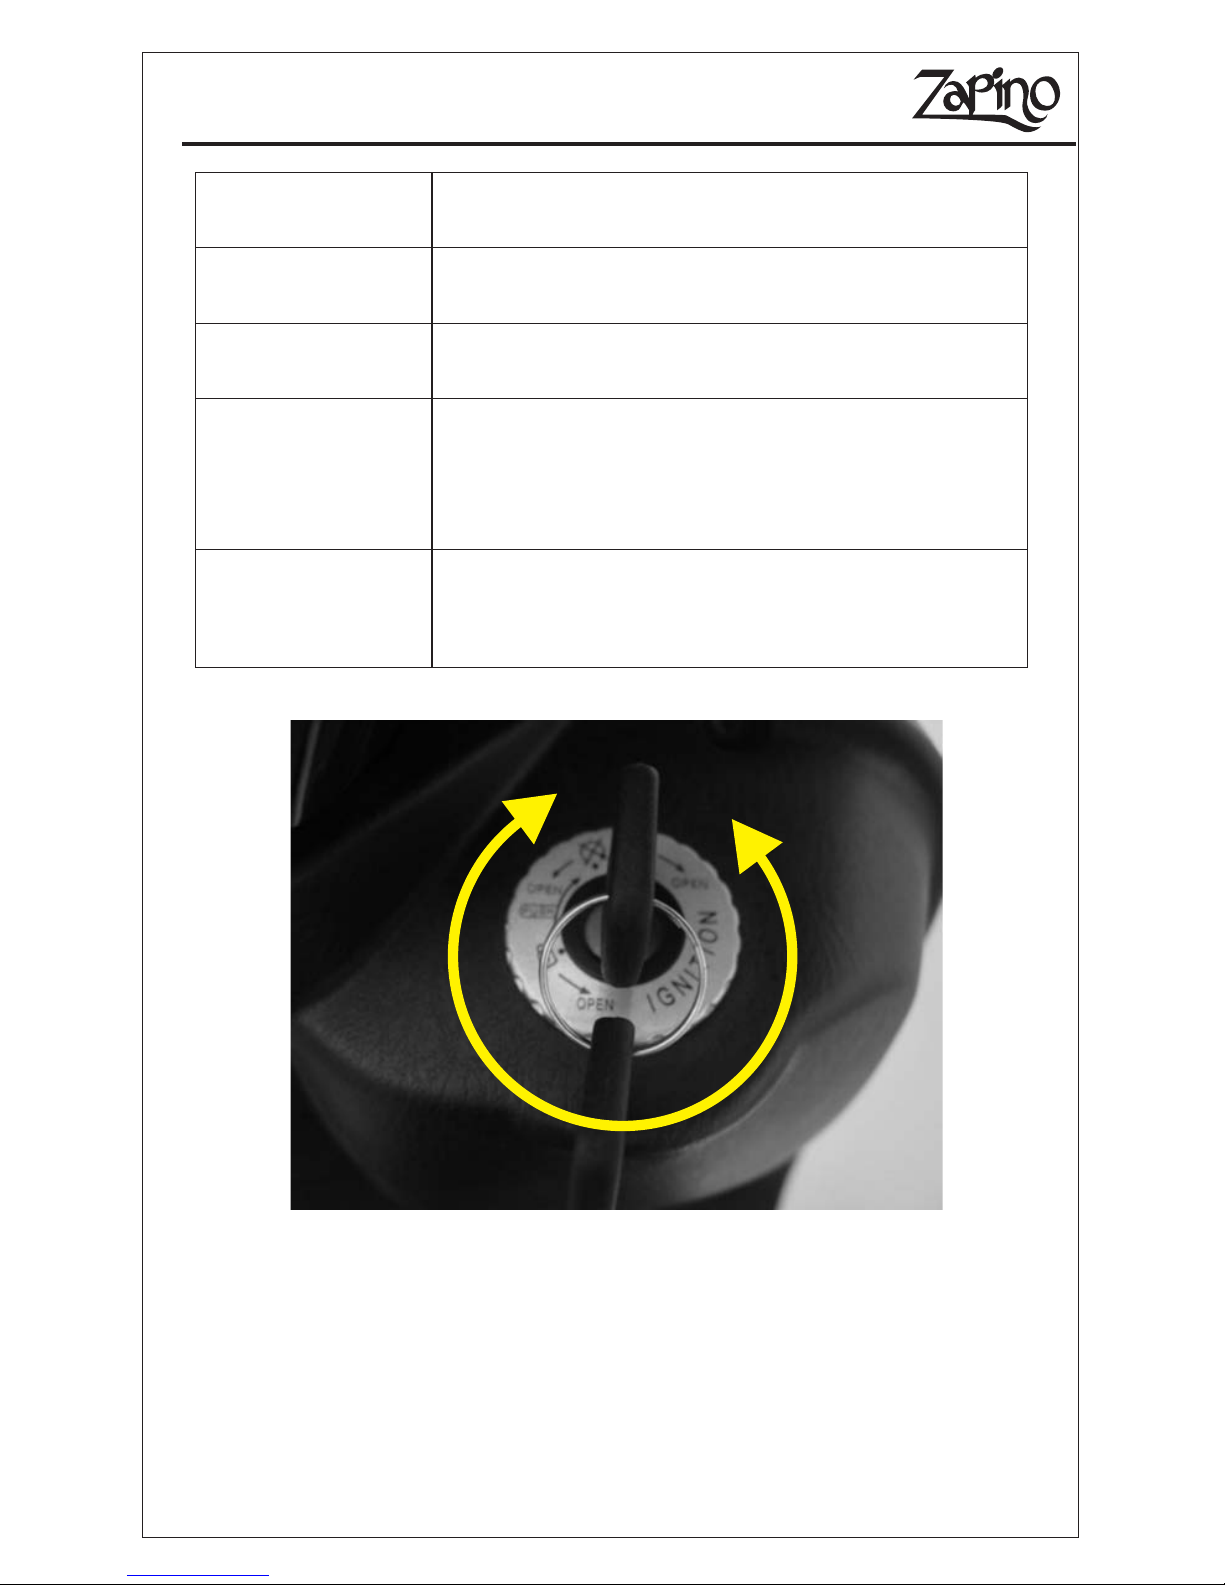
Ignition Key Positions
Key Position Description
On
Off
Lock Handlebar
Opening the seat
Key cannot be taken out when power is on
Key can be taken out when power is off
To prevent theft, turn the Handle Bar to the far
left and turn the key into the lock position. The
key can be taken out when handle bar is in the
lock position.
Turn the key in the slot to release the locking
mechanism of the seat, and to access Charge
port.
7

Handle Bar Controls
Headlight Switch
When Brake Handle is compressed the rear wheel will slow
to a stop and power will be cut off. Power will flow once lever
has been released.
Horn Push red button on the left.
High Beam Push switch up
Low Beam Push switch down
LEFT HANDLE BAR
Horizontal Switch
Horn Button
Rear Brake Lever
Left Turn Signal Slide switch to the left
Right Turn Signal Slide switch to the right
Turning off Signal Press central release button
Turn Signals
Horn
High/Low Beam
Rear Brake
1
2
4
3
1
2
3
4
Speed Switch
The dashboard lights, headlight, and taillight will turn on
when the switch is in the middle position.
Turn throttle counter clockwise to increase speed.
Economical speed switch can ensure longer range and high
speed switch provides bigger AMP for accelerating, climbing
and higher speed.
RIGHT HANDLE BAR
Front Brake Lever
Parking Lights
Throttle
When brake handle is compressed the front wheel will slow
to a stop and power will be cut off. Power will flow once lever
has been released. To start, turn the throttle counter
clockwise.
The dashboard lights, headlight, and taillight will turn on
when the switch is in the left position.
Head Light
Lights -On/Off
Throttle
SpeedHigh/Low
1
2
3
1
2
3
8

9
THROTTLE TIPS
BRAKING TIPS
If running under
top speed, don't always full throttle. Frequently releasing the
throttle and running with inertia will longer increase range too.
This motor has good torque and the inertia momentum is
enough to run an automatic distance without electric power.
1. Turn the key to the 'ON' position, and turn the Throttle gradually to
accelerate.
2. To prevent losing control of the vehicle, please turn the Throttle
slowly until the speed increases.
3. Do not turn the Throttle until you are in the position to drive.
4. To stop, release the throttle and apply the front and rear brake
simultaneously.
5. To move, release the brakes and turn the Throttle gradually.
6. The Brushless motor makes a small electromagnetic noise when
turning the Throttle to start. This is normal.
7. Please, for your safety and security, take the key out when you are
not riding.
1. For safety, this vehicle has a circuit cut-out brake system. When
the front and rear brake is applied, the controller will disable the
circuit; to run, release the throttle back to the start position then
accelerate again.
2. Less sudden braking will increase range entirely.
Accelerating and Braking
Table des matières
Autres manuels Zap Scooter


Manuels Scooter populaires d'autres marques


First Choice Mobility
First Choice Mobility Roma Medical Corella S741 Manuel utilisateur

Carrera
Carrera impel Manuel utilisateur

Afikim
Afikim Superlight SL-3 Manuel utilisateur

CareCo
CareCo ZOOM Manuel utilisateur

Douglas
Douglas Vespa G.S. Manuel utilisateur

Gazelle
Gazelle with BOSCH System Manuel utilisateur