Well PTI-840 Manuel utilisateur

Contents
I. Panel Description – 4 Ports.................................................................................................... 1
II. Panel Description – 1 Port......................................................................................................3
III. Connecting 4/1 Port ADSLRouter........................................................................................ 5
IV. Set Up TCP/IP In Windows.................................................................................................... 9
Option-A : Windows ME/98............................................................................................... 9
Option-B : Windows 2000 .................................................................................................. 10
Option-C : Windows XP..................................................................................................... 11
V. Set Up 4/1 Port ADSL Router................................................................................................ 12
4/1 Port ADSL Router 0

I. Panel Description – 4 Ports
1.1 Back Panel :
The back panel of the 4 Port ADSL Router contains ADSL/LAN, Reset, Power Adaptor
connection and Power ON/OFF Switch.
ADSL Port for connecting the 4 Port ADSL Router to the ADSL Service
Provider.
RESET Restore the 4 Port ADSL Router’s factory default setting.
Ports 1-4 Four 10/100Mbps Fast Ethernet Switch Port for connecting the 4 Port
ADSL Router to the network devices.
AC Jack 9VAC/1A Power adapter connector.
ON/OFF Power Switch to ON/OFF the 4 Port ADSL Router.
!
All the Ethernet port of the 4 Ports ADSL Router supports auto crossover
capability.
4/1 Port ADSL Router 1

4/1 Port ADSL Router 2
1.2 Front Panel :
The 4 Port ADSL Router’s LEDs indicators display information about the device’s status.
PWR Steady green light indicates the 4 PortADSL Router is powered on.
1 : LINK/ACT Steady green light indicates a valid Ethernet connection. Blinking
green light indicates active Ethernet session.
2 : LINK/ACT Steady green light indicates a valid Ethernet connection. Blinking
green light indicates active Ethernet session.
3 : LINK/ACT Steady green light indicates a valid Ethernet connection. Blinking
green light indicates active Ethernet session.
4 : LINK/ACT Steady green light indicates a valid Ethernet connection. Blinking
green light indicates active Ethernet session.
RXD Blinking green light indicates an active ADSL session.
ADSL 4 Port ADSL Router system status indicator. When blinking indicates
ADSL system is alive.
RDY Blinking green light indicates a valid ADSL connection. This will
light after the ADSL negotiation process has been settled.
Reboot & Restore the 4 Port ADSL Router’s factory defaults and clear all the
setting.
RESET Button :
!

II. Panel Description – 1 Ports
4/1 Port ADSL Router 3
2.1 Back Panel :
The back panel of the 1 Port ADSL Router contains ADSL/LAN, Reset, Power Adaptor
connection and Power ON/OFF Switch.
ADSL Port for connecting the 1 Port ADSL Router to the ADSL Service
Provider.
RESET Restore the 1 Port ADSL Router’s factory default setting.
LAN One 10/100Mbps Fast Ethernet Switch Port for connecting the 1 Port
ADSL Router to the network devices.
AC Jack 9VAC/1A Power adapter connector.
ON/OFF Power Switch to ON/OFF the 1 Port ADSL Router.
!
All the Ethernet port of the 1 Port ADSL Router supports auto crossover
capability.

4/1 Port ADSL Router 4
2.2 Front Panel :
The 1 Port ADSL Router’s LEDs indicators display information about the device’s status.
PWR Steady green light indicates the 1 PortADSL Router is powered on.
LINK/ACT Steady green light indicates a valid Ethernet connection. Blinking
green light indicates active Ethernet session.
RXD Blinking green light indicates an active ADSL session.
ADSL 1 Port ADSL Router system status indicator. When blinking indicates
ADSL system is alive.
RDY Blinking green light indicates a valid ADSL connection. This will
light after the ADSL negotiation process has been settled.
Reboot & Restore the 1 Port ADSL Router’s factory defaults and clear all the
setting.
RESET Button :
!

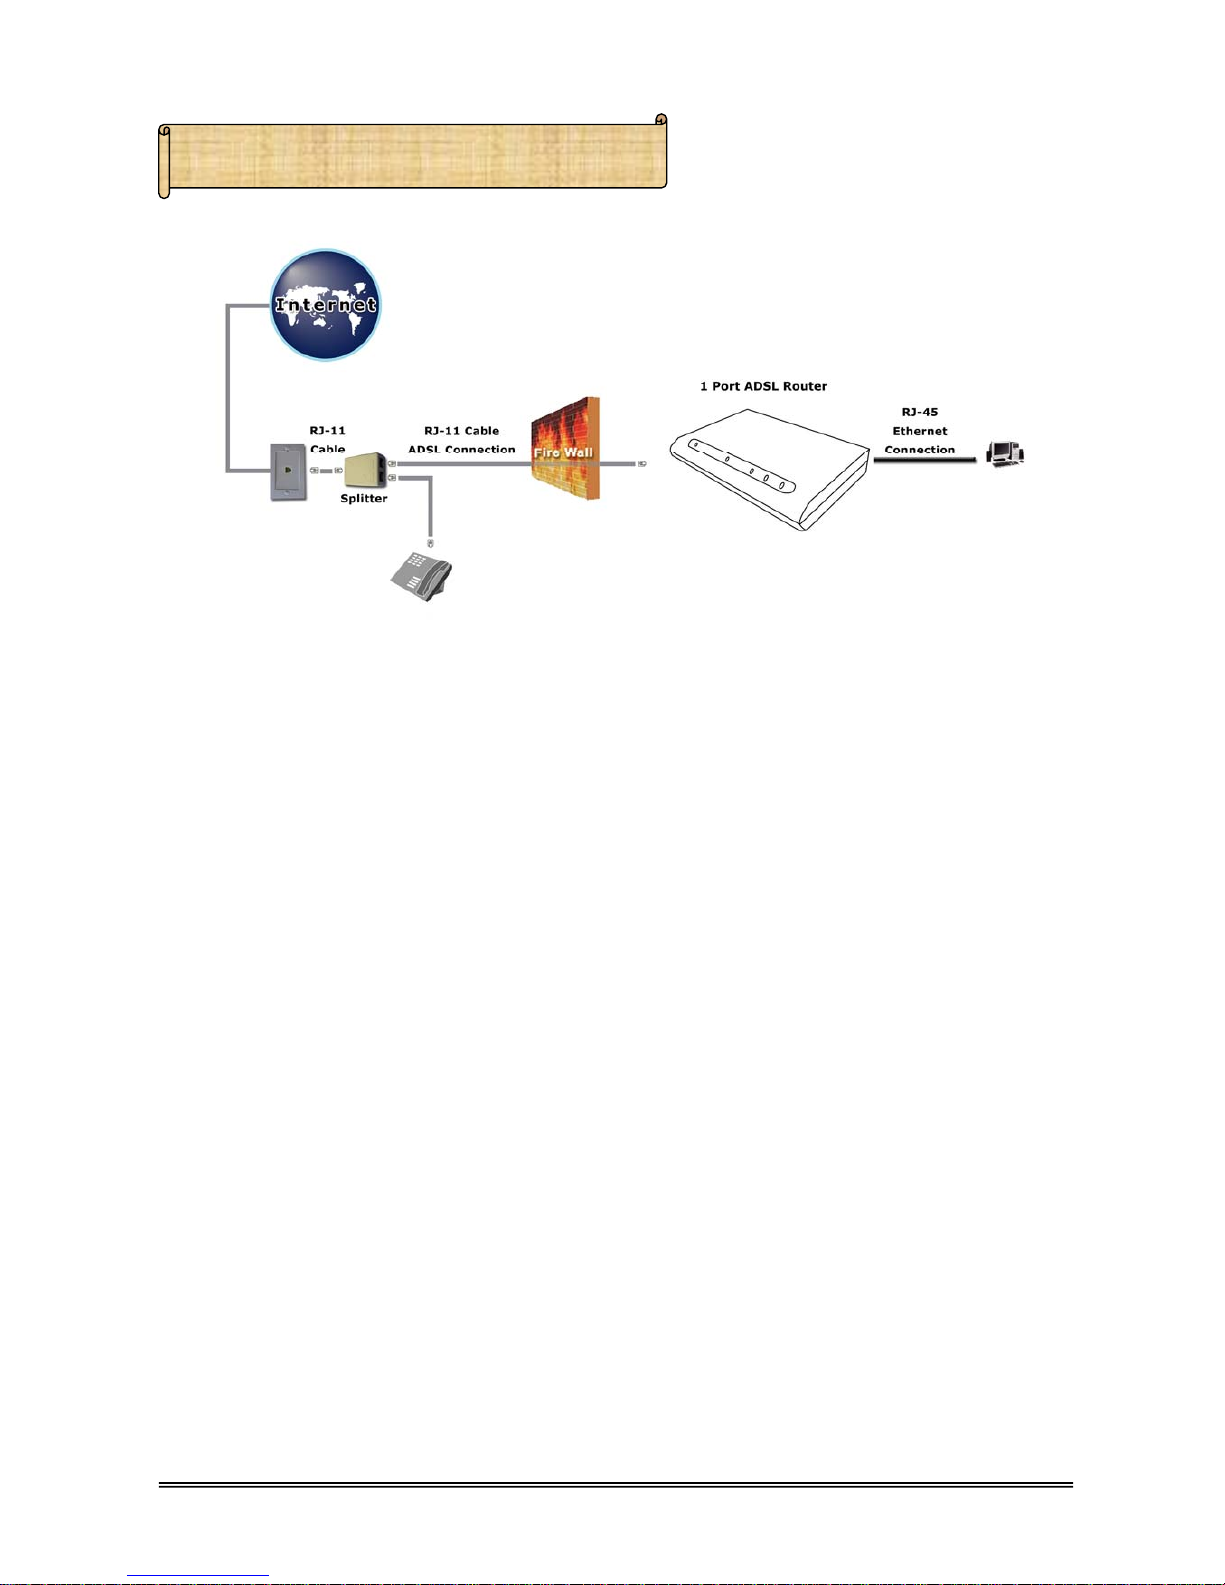
III. Connecting 4/1 PortADSLRouter
3.1 Connection Mechanism (4 Ports):
This section describes the hardware connection mechanism of your 4 PortADSL Router on
your Local Area Network ( LAN ) connect to the Internet, how to configure 4 Port ADSL Router for
Internet access or how to manually configure your Internet connection.
You need to prepare the following items before you can establish an Internet connection
through your 4 Port ADSL Router :
1. A computer which must have an installed Ethernet Adaptor and an Ethernet Cable.
2. An ADSL service account and configuration information provided by your Internet
Service Provider ( ISP ). You will need one or more of the following configuration
parameters to connect your 4 Port ADSL Router to the Internet :
a. VPI/VCI parameters
b. Multiplexing Method
c. Host and Domain Names
d. ISP Login Name and Password
e. ISP Domain Name Server ( DNS ) Address
f. Fixed or Static IPAddress
4/1 Port ADSL Router 5

4/1 Port ADSL Router
3.2 Connecting Steps (4 Ports):
Follow the following steps or instructions for connecting your 4 PortADSL Router :
1. Turn off your computer.
2. Connect the ADSL port of your 4 Port ADSL Router to the wall jack of the ADSL
Line with a RJ-11 cable.
3. Connect the Ethernet cable ( RJ-45 ) from your 4 Port ADSL Router to the Ethernet
Adaptor in your computer.
4. Connect the Power adaptor to the 4 Port ADSL Router and plug the other end into a
Power outlet.
5. Turn on your 4 Port ADSL Router.
6
Auto and self diagnostic process will turn the LED indicators ON and OFF
during the process.
The Power light will lit after turning on the 4 Port ADSL Router.
!
6. Turn on your computer.
7. Refer to the next chapter to setup or configure your Network Adaptor.
4/1 Port ADSL Router
3.3 Connection Mechanism (1 Port):
This section describes the hardware connection mechanism of your 1 PortADSL Router on
your Local Area Network ( LAN ) connect to the Internet, how to configure 1 Port ADSL Router for
Internet access or how to manually configure your Internet connection.
You need to prepare the following items before you can establish an Internet connection
through your 1 Port ADSL Router :
1. A computer which must have an installed Ethernet Adaptor and an Ethernet Cable.
2. An ADSL service account and configuration information provided by your Internet
Service Provider ( ISP ). You will need one or more of the following configuration
parameters to connect your 1 Port ADSL Router to the Internet :
a. VPI/VCI parameters
b. Multiplexing Method
c. Host and Domain Names
d. ISP Login Name and Password
e. ISP Domain Name Server ( DNS ) Address
f. Fixed or Static IPAddress
7

4/1 Port ADSL Router 8
3.4 Connecting Steps (1 Port):
Follow the following steps or instructions for connecting your 1 PortADSL Router :
1. Turn off your computer.
2. Connect the ADSL port of your 1 Port ADSL Router to the wall jack of the ADSL
Line with a RJ-11 cable.
3. Connect the Ethernet cable ( RJ-45 ) from your 1 Port ADSL Router to the Ethernet
Adaptor in your computer.
4. Connect the Power adaptor to the 1 Port ADSL Router and plug the other end into a
Power outlet.
5. Turn on your 1 Port ADSL Router.
!
The Power light will lit after turning on the 1 Port ADSL Router.
Auto and self diagnostic process will turn the LED indicators ON and OFF
during the process.
6. Turn on your computer.
7. Refer to the next chapter to setup or configure your Network Adaptor.

IV. Set Up TCP/IP In Windows
Option-A Windows ME / 98
Step 5: Erase all the previous setting.
Step 3: Select the network adapter installed
and click on Properties.
2
1
Step 2: Double-click the Network icon.
Step 1: Click Start →Settings
→Control Panel.
Step 4: Select Obtain an IP address
automatically.
1
2
Step 6: Select Disable DNS then click OK.
4/1 Port ADSL Router 9
Table des matières
Autres manuels Well Routeur réseau


Manuels Routeur réseau populaires d'autres marques


NETGEAR
NETGEAR FS526T - Switch Manuel utilisateur

Korenix
Korenix JetNet 5710G Series Manuel utilisateur

Automated Logic
Automated Logic ZN551 Manuel du propriétaire

Cisco
Cisco ASR 1000 Series Manuel de l'opérateur

EnGenius
EnGenius ESR-9710 Manuel utilisateur

Cisco
Cisco 805 Series Instructions d'utilisation et de sécurité