4
This manual should be read carefully before commencing operation of your
konekt wireless products. Always retain the product manuals for future use.
Symbols used:
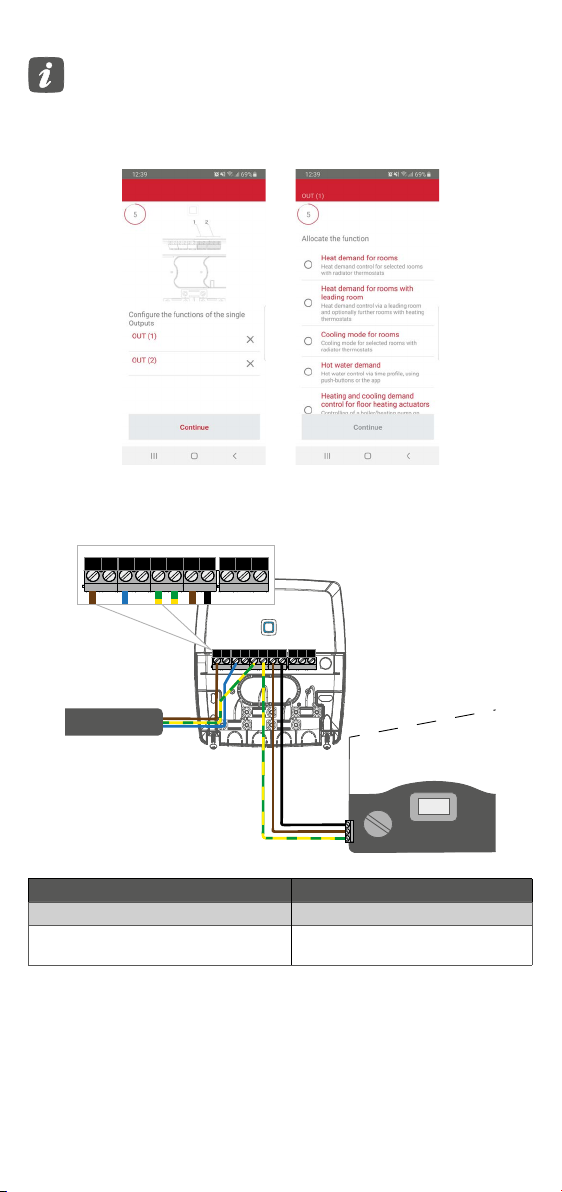
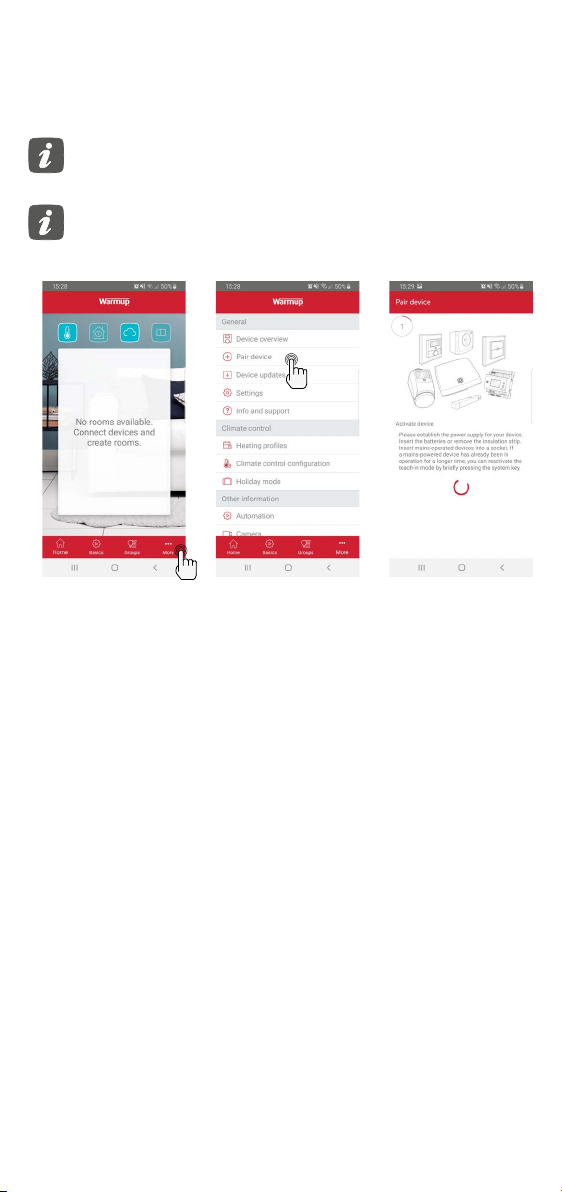
1 Information about this manual
2 Hazard information
The device is suitable for indoor use only. It must not be exposed to
moisture, vibrations, mechanical loads or temperatures outside of
its rated values.
For safety and licensing reasons (CE/UKCA), unauthorised change
and/ormodicationofthedevice(s)isnotpermitted.
The device and its packaging are not toys; do not allow children to
play with them. Small components such as batteries and packaging
presetariskofchokingorsuocation.
Using the devices, in any way or for any purpose, other than those
described in their installation and operation manuals invalidates
any warranty or liability.
This device is part of the building installation and must only be
installedbyappropriatelyqualiedandcompetentpersonsin
accordance with local regulations and standards.
To prevent risk of electric shock, the devices must be disconnected
from the mains supply and discharged before conducting any
works. Safeguard against the supply being switched back on
throughout works.
Non-compliance with the installation instructions may result in a
reoranelectricshock.
Thedevicemayonlybeusedforxedinstallations.Thedevices
mustbesecurelyattachedwithinaxedinstallation.
Ensure all cables connected to the device are correctly sized and
rated.
Do not exceed the rated loads of the device or any individual
output.
Manuals for 3rd party devices connected to these, such as heat
sources, valves and circulators, must be followed and complied with
to ensure compatibility.
This device is intended for use in residential, business and
commercial properties only.
Thedevicedoesnotrequireproductspecicmaintenance.Toclean,
use a soft, clean and lint-free cloth. To remove more stubborn
marks, dampen the cloth with warm water. Do not use detergents
or chemicals on the devices.
Do not open the devices except as instructed to by the installation
and operation manuals. It does not contain any user serviceable
components.
Important information
Hazard indication