VegaStream Vega 50 FXO Guide rapide

Version 0.5 26 August 2004 Page 1 of 37
For use with Vega 50 FXO – H.323 version 04.01.05.1 T017 or greater. © 2002-2004 VegaStream Ltd.
This document describes how to configure a Vega 50 FXO H.323 unit using the web browser
interface. The configuration described will allow the Vega to be rapidly installed and tested.
The instructions below configure the Vega 50 FXO (connected to 8 extension ports of a PBX or a
CO Switch) as follows:
• Calls presented to the Vega from the PBX or CO switch will be routed to a pre-defined IP
address based upon the physical port on the Vega on which the call arrived. (IP
addresses 192.168.1.100 to 192.168.1.107)
• Calls received by the Vega on the H.323 interface will be routed to the telephony interface.
The physical interface over which the call is routed will be defined by the IP address of the
H.323 device making the outbound call. The telephone number that will be dialled will be
the number presented by the H.323 device.
Initial configuration
V
ega 50 FXO (H.323)
Standalone mode – R5.1
…
LAN
POTS Telephones
Vega 50 FXO
p
b
x

Version 0.5 26 August 2004 Page 2 of 37
For use with Vega 50 FXO – H.323 version 04.01.05.1 T017 or greater. © 2002-2004 VegaStream Ltd.
The configuration process is broken down into 11 stages as follows:
1 Connect your Vega to LAN, Telephone and Power
2 Configure the basic LAN parameters
3 Configure password and login timeout
4 Check and configure LAN settings and Host name
5 Configure H.323 parameters
6 Configure the Dial Plan
7 Configure audio parameters
8 Configure POTS parameters
9 Configure pointer to CD ROM documentation
10 Save Changes
11 Archive Vega Configuration
Please also see:
12 Technical Support

Version 0.5 26 August 2004 Page 3 of 37
For use with Vega 50 FXO – H.323 version 04.01.05.1 T017 or greater. © 2002-2004 VegaStream Ltd.
1. Connect your Vega to LAN, Telephone and Power
Serial (RS232) LAN
POTS port 8
Power Switch
AC Power
POTS port 1
Before installing your Vega, ensure that you read the VegaStream VoIP Gateways Safety
and Compliance Information document.
LAN:
Using the yellow booted cable connect the LAN port on the Vega to a standard or fast Ethernet
hub or switch (10 baseT or 100 baseTx). The connector nearest the ferrite core should be
plugged into the Vega.
Telephony:
Connect the PBX or CO switch to the 8 POTS ports. Note the port numbers (interface Ids)
increase in an anticlockwise direction from the bottom left corner. Interface IDs are as follows:
13 12 11 10
06 07 08 09
Power:
Insert the power cable into the AC power inlet on the Vega and switch on. The power LED on the
front panel will illuminate.
The LAN LEDs will also illuminate indicating 10 (baseT) or 100 (baseTx) connection, and the FDX
LED will illuminate if Full Duplex mode has been negotiated.

Version 0.5 26 August 2004 Page 4 of 37
For use with Vega 50 FXO – H.323 version 04.01.05.1 T017 or greater. © 2002-2004 VegaStream Ltd.
2. Configure the basic LAN parameters
If a DHCP server is available, by default, the Vega will automatically pick up an IP address.
If the Vega has an LCD display, or you know the IP address served to the Vega, skip this
section and start at 3.
If DHCP is not to be used to provide the Vega with an IP address, or you need to check the
IP address provided to the Vega, connect the serial interface of the Vega to a PC serial
interface using a 9 way male to female straight through cable.
Configure a terminal emulator program (such as Microsoft’s HyperTerminal) for:
• Speed = 115200 baud
• Data bits = 8
• Parity = none
• Stop bits = 1
• Flow Control = none
Press <Enter> to get the Username: prompt
At the prompts enter the default user name and password
Username: admin
Password: admin
To display the current IP address, type:
show lan.ip
If this is not the IP address required, it can be overridden, together with other LAN parameters by
typing:
set lan.use_dhcp=0
set lan.ip=aaa.bbb.ccc.ddd
set lan.subnet=eee.fff.ggg.hhh
set lan.gateway=iii.jjj.kkk.lll
save
reboot system

Version 0.5 26 August 2004 Page 5 of 37
For use with Vega 50 FXO – H.323 version 04.01.05.1 T017 or greater. © 2002-2004 VegaStream Ltd.
3. Configure password and login timeout
Now configuration will be carried out using a web browser.
Enter the IP address of the Vega into the “Address” field of your web browser.
You will then be presented with the login page:
Version 0.5 26 August 2004 Page 6 of 37
For use with Vega 50 FXO – H.323 version 04.01.05.1 T017 or greater. © 2002-2004 VegaStream Ltd.
Enter the default Username and Password
Username: admin
Password: admin
Select
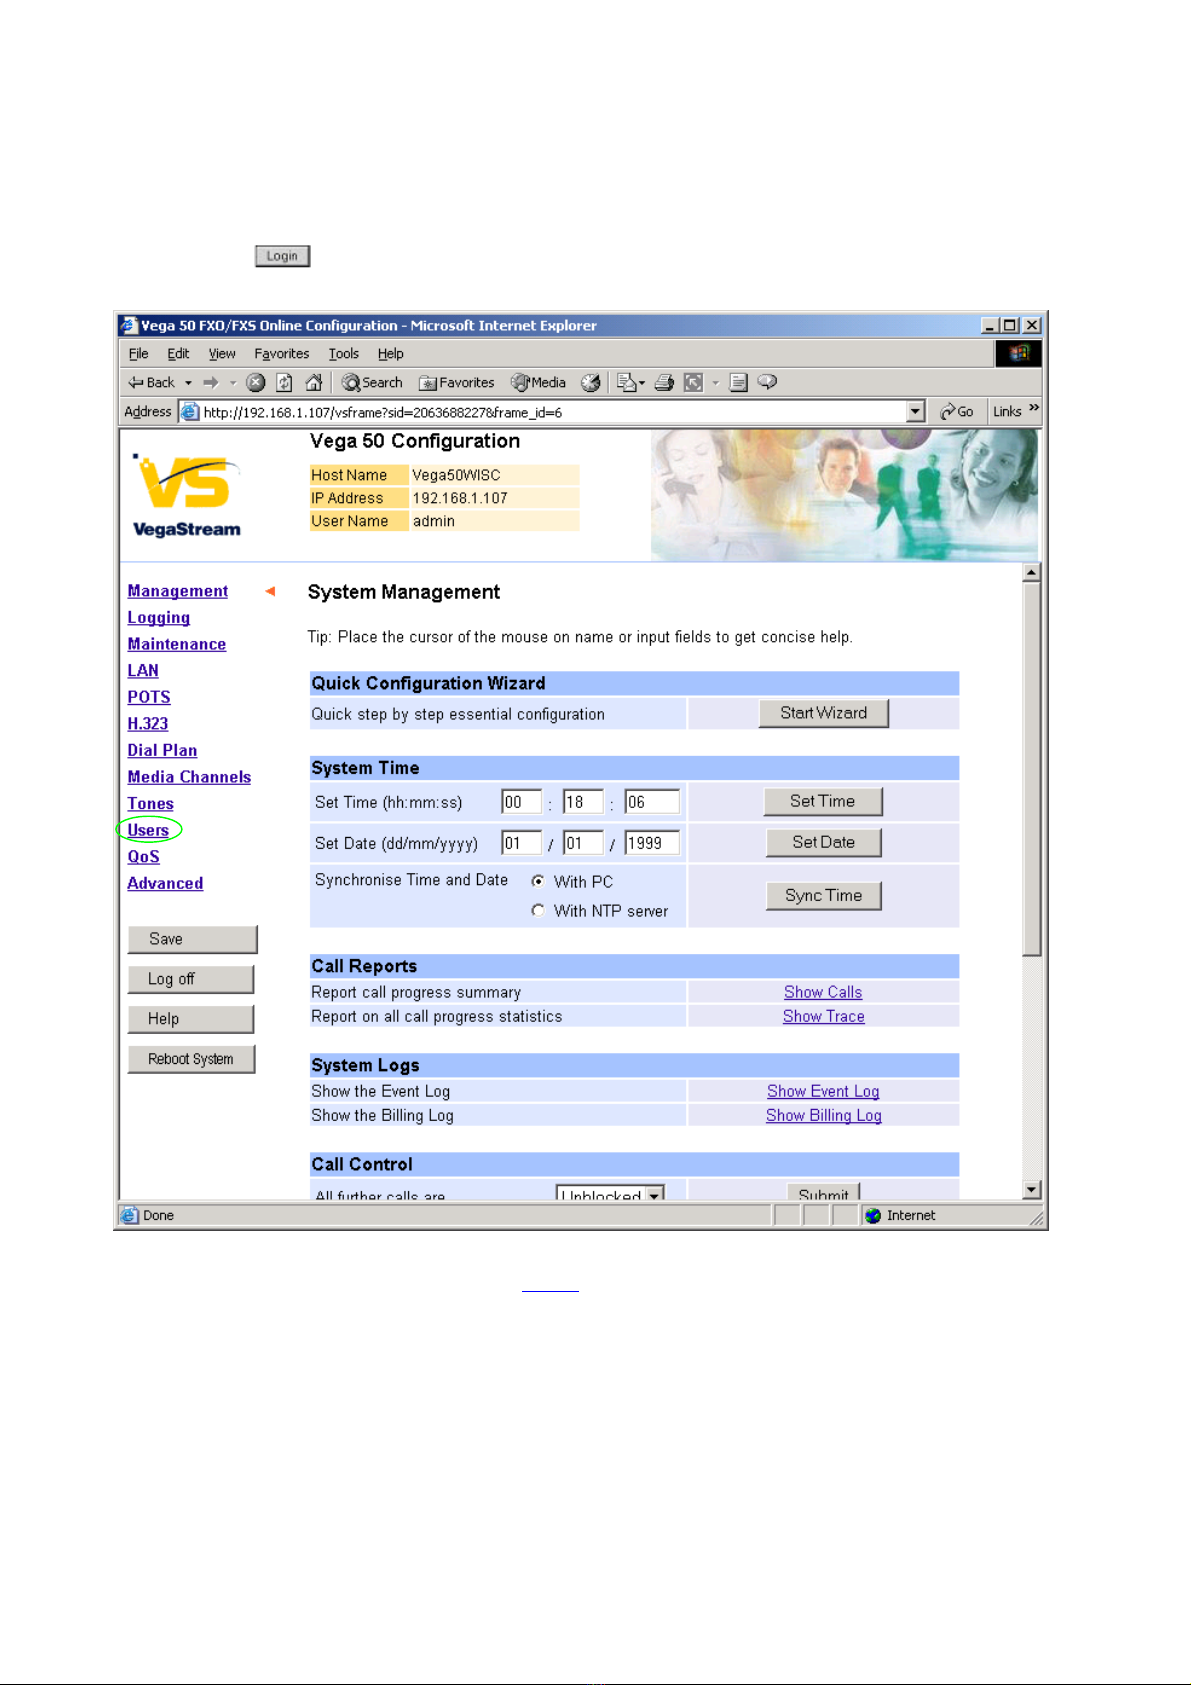
On the left hand side menu select Users

Version 0.5 26 August 2004 Page 7 of 37
For use with Vega 50 FXO – H.323 version 04.01.05.1 T017 or greater. © 2002-2004 VegaStream Ltd.
Recommended: Change the password
enter New Password and Re-enter Password then
select and then click “here” to return
Optional: Change the timeout1– default is 240 seconds; can extend to 7200 seconds (2hrs)
select and then click “here” to return
1If the web interface is not used for this length of time the Vega will automatically log off the session. This change is
only activated by logging out and back into the browser session.

Version 0.5 26 August 2004 Page 8 of 37
For use with Vega 50 FXO – H.323 version 04.01.05.1 T017 or greater. © 2002-2004 VegaStream Ltd.
4. Check and configure LAN settings and Host name
On the left hand side menu select LAN
Optional: If there are any LAN values that need to be set up (e.g. NTP server or tftp server) set
them up now, then
Select and then click “here” to return

Version 0.5 26 August 2004 Page 9 of 37
For use with Vega 50 FXO – H.323 version 04.01.05.1 T017 or greater. © 2002-2004 VegaStream Ltd.
5. Configure H.323 parameters
On the left hand side menu select H.323
If this Vega is to be inter-working with another Vega leave the H.323 LAN Configuration
alone, if it is to work with other manufacturer’s devices, it is often best to untick the
indicated items – as these are advanced H.323 features that are not always supported by
other manufacturers. Once the Vega and the other device are working in the basic H.323
mode, try enabling other features – back towards this configuration, as this will improve call
setup times.

Version 0.5 26 August 2004 Page 10 of 37
For use with Vega 50 FXO – H.323 version 04.01.05.1 T017 or greater. © 2002-2004 VegaStream Ltd.
6. Configure the Dial Plan
On the left hand side menu select Dial Plan
Firstly, turn off the default profile:
In the Profiles section, Profile ID 1
Select
Ce manuel convient aux modèles suivants
1
Table des matières
Autres manuels VegaStream Routeur réseau


Manuels Routeur réseau populaires d'autres marques


NETGEAR
NETGEAR FS526T - Switch Manuel utilisateur

Korenix
Korenix JetNet 5710G Series Manuel utilisateur

Automated Logic
Automated Logic ZN551 Manuel du propriétaire

Cisco
Cisco ASR 1000 Series Manuel de l'opérateur

EnGenius
EnGenius ESR-9710 Manuel utilisateur

Cisco
Cisco 805 Series Instructions d'utilisation et de sécurité