Table of Contents
1 Introduction..................................................................................................................................................................................... 1
1.1 Appearance of U1..............................................................................................................................................................1
Figure 1-3 Rear view of U1............................................................................................................................................ 1
1.2 Installing an SD Card........................................................................................................................................................ 2
Figure 1-3 Inserting an SD card.................................................................................................................................... 2
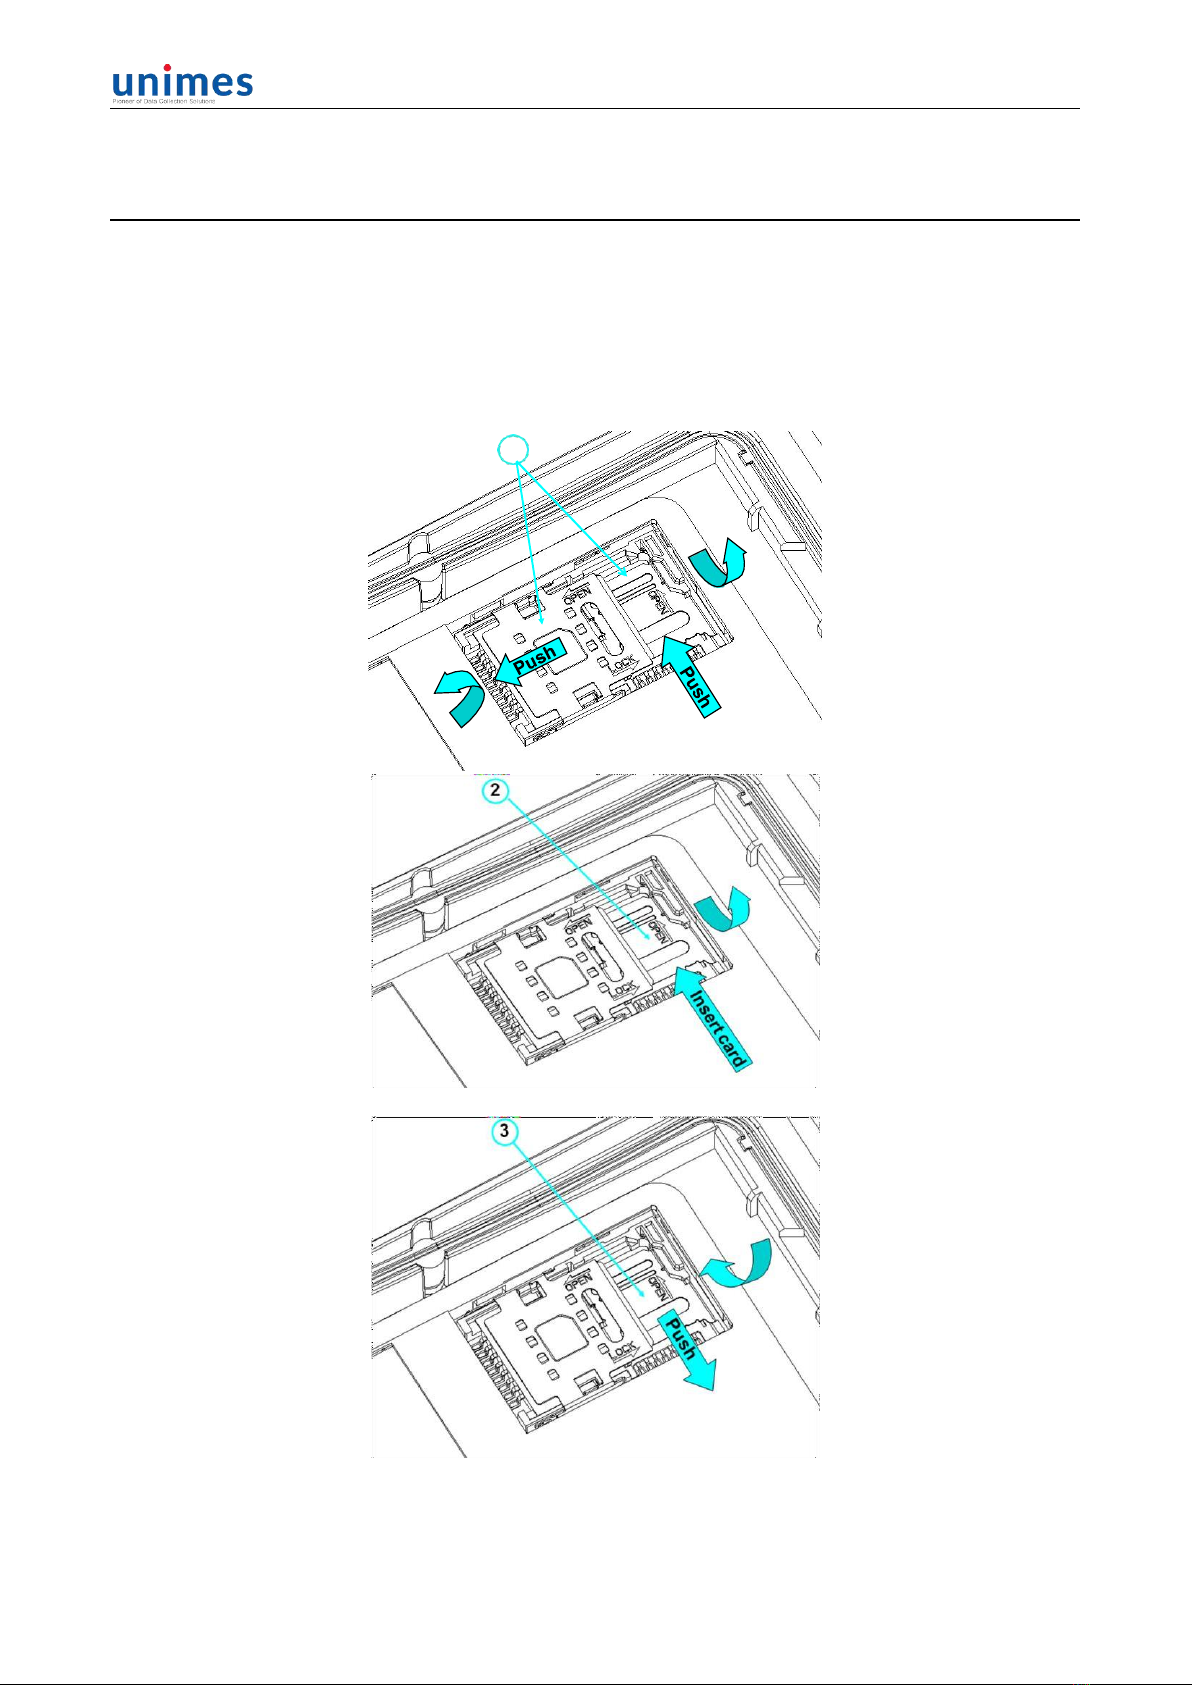
1.3 Installing a SIM Card.........................................................................................................................................................3
Figure 1-4 Inserting a SIM card.....................................................................................................................................3
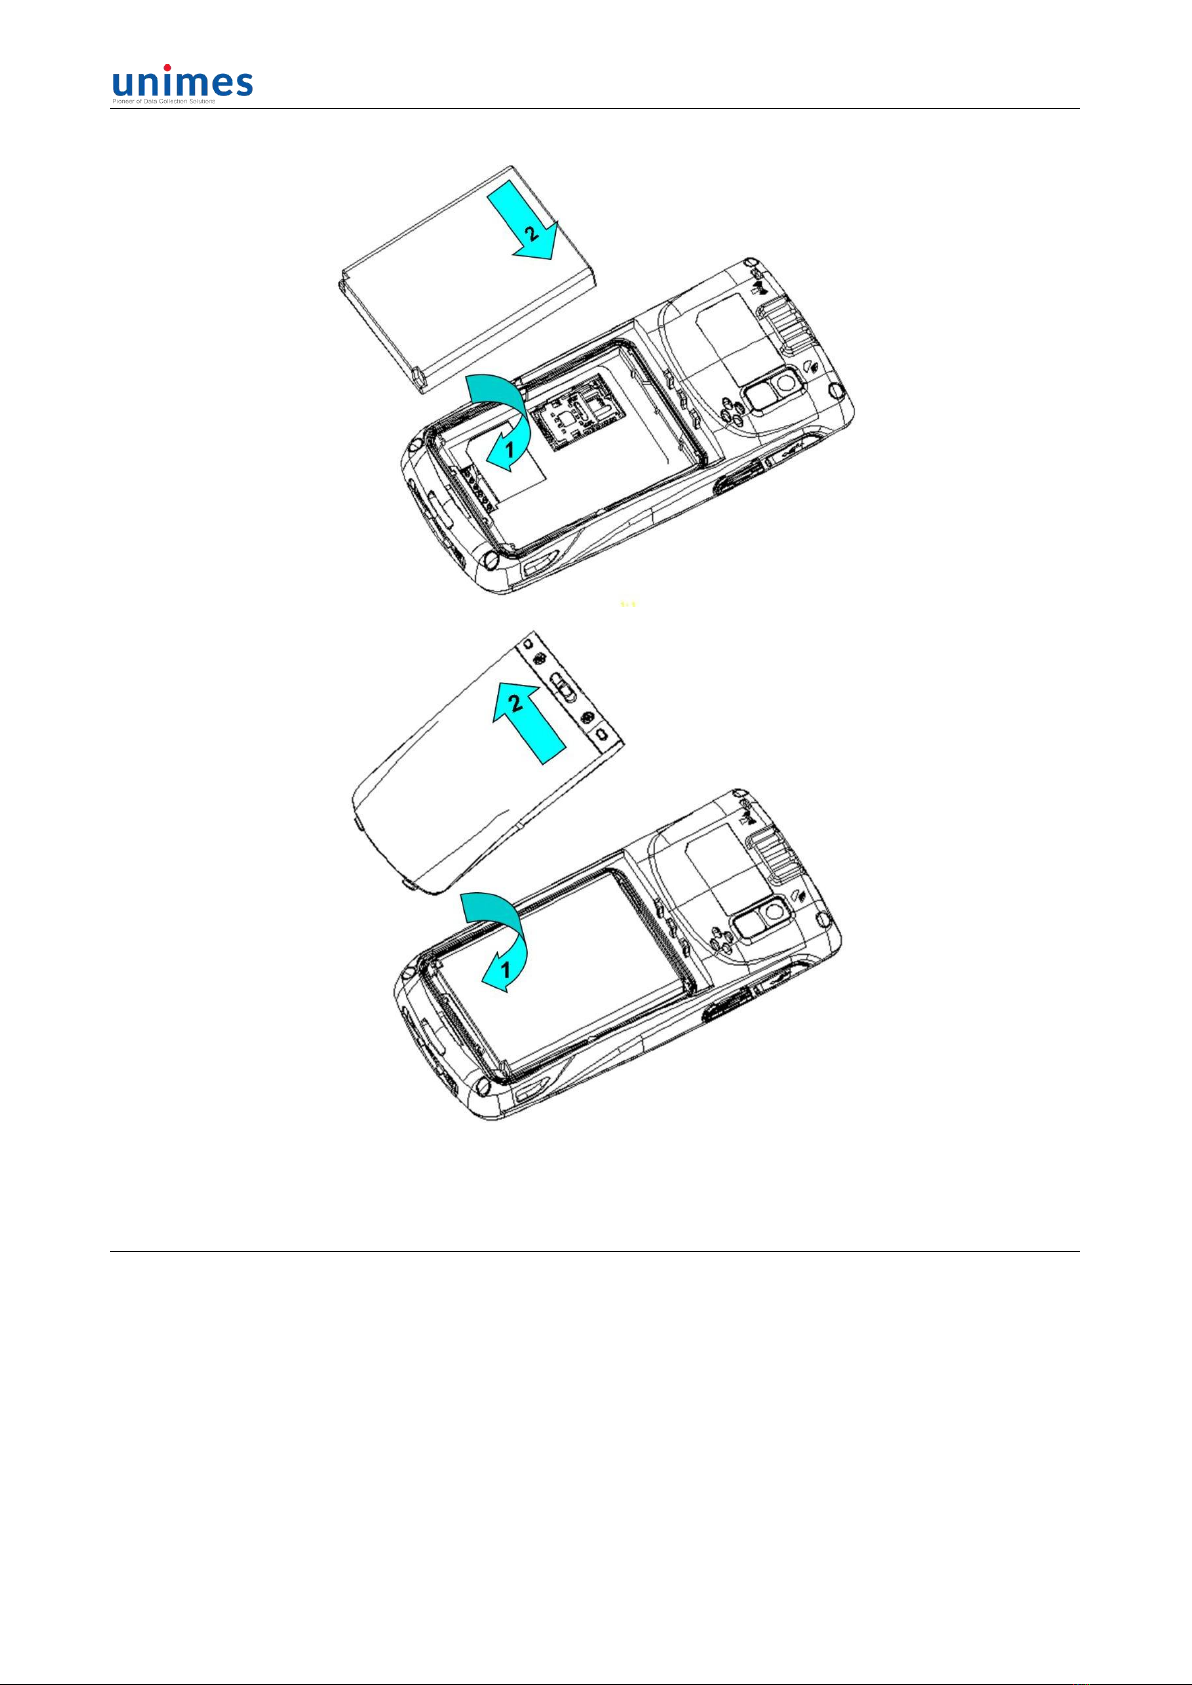
1.4 Installing a Battery............................................................................................................................................................. 3
Figure 1-5 Installing a battery........................................................................................................................................ 4
1.5 Disassembling the Battery Cover....................................................................................................................................4
1.6 Charging..............................................................................................................................................................................5
2 Instructions on the U1................................................................................................................................................................... 6
2.1 Power-on and Power-off...................................................................................................................................................6
2.2 Locking and Unlocking the U1.........................................................................................................................................6
2.3 Keys of U1.......................................................................................................................................................................... 6
2.4 Home................................................................................................................................................................................... 7
2.5 Status Icons and Indicators..............................................................................................................................................7
Table 2-1 Status icons.................................................................................................................................................... 8
2.6 Basic Settings.....................................................................................................................................................................8
2.6.1 Date and Time Setting.......................................................................................................................................... 8
2.6.2 Display Settings..................................................................................................................................................... 9
2.6.3 Ringtone Setting.................................................................................................................................................... 9
2.6.4 Security Setting....................................................................................................................................................10
2.6.5 Language and Input Setting...............................................................................................................................11
2.6.6 Shortcuts............................................................................................................................................................... 11
2.6.7 Widgets................................................................................................................................................................. 11
3 Call Function.................................................................................................................................................................................12
3.1 Making a Call....................................................................................................................................................................12
3.2 Contacts............................................................................................................................................................................ 12
1. Click Contacts to open the contact list.................................................................................................................. 12
3.3 SMS and MMS................................................................................................................................................................. 13
2. Click to send the message...................................................................................................................................... 13
3.4 Email.................................................................................................................................................................................. 14
4.1 Data Connection.............................................................................................................................................................. 16
4.2 Wi-Fi Network Connection............................................................................................................................................. 18
4.3 GPS................................................................................................................................................................................... 18
4.4 Connecting U1 to a Computer....................................................................................................................................... 19
4.5 Synchronization............................................................................................................................................................... 20
5.1 Installing and Using iScan.............................................................................................................................................. 21
6.1 Installing Software........................................................................................................................................................... 22
6.2 Uninstalling Programs.....................................................................................................................................................22
6.3 Managing Applications....................................................................................................................................................23
7.1 Precautions for U1...........................................................................................................................................................24
7.2 Troubleshooting............................................................................................................................................................... 25
Appendix...........................................................................................................................................................................................28
1D Laser Scanner........................................................................................................................................................................... 29
2D Area Imager............................................................................................................................................................................... 29
Infrared Communication Module.................................................................................................................................................. 29
RFID.................................................................................................................................................................................................. 30