Tevion GCE6020 Manuel utilisateur

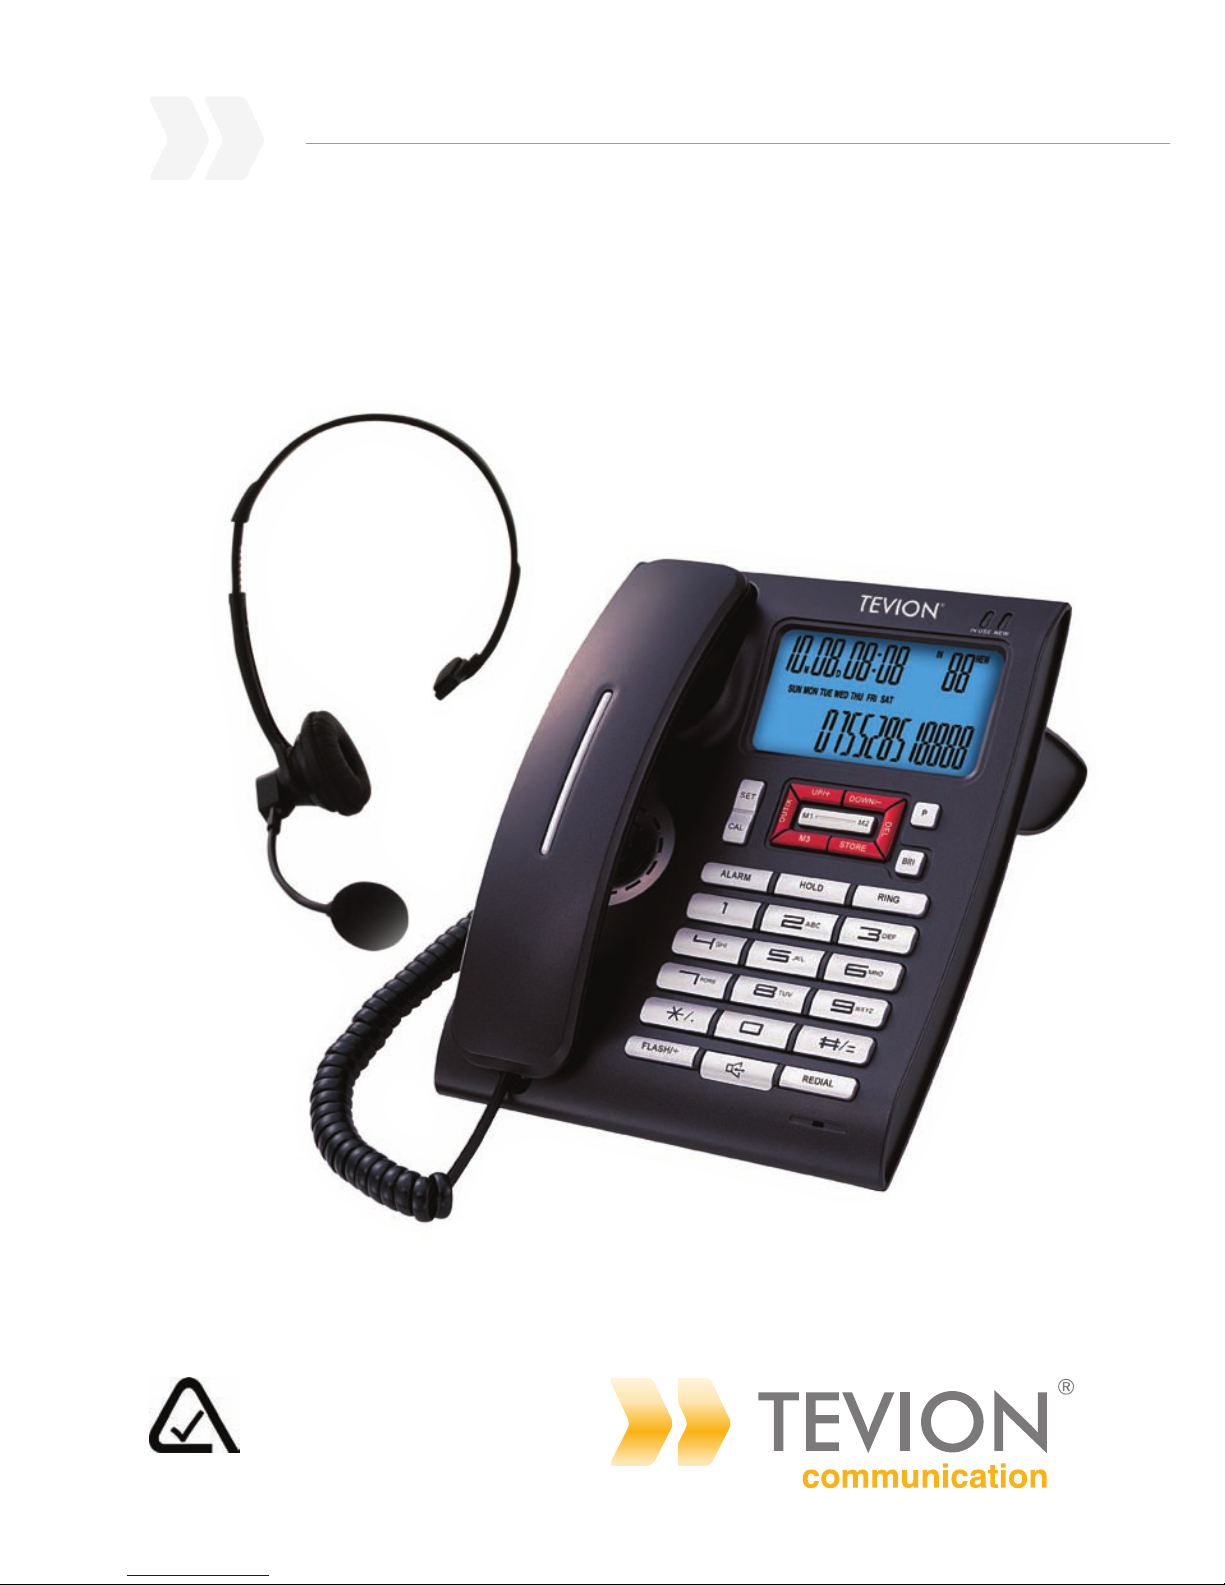
Corded Phone with Headset
Instruction Manual • Model Number GCE6020
After Sales Support
TEL: 1300 886 649
N13275

1After Sales Support
Telephone: 1300 886 649
Contents
Warranty 2
Welcome 3
Important safety instructions 4
Features 5
Know your Corded phone 6
Getting started 7
Installing batteries 7
Connecting the phone and attachments 7
Basic operations 8
Receiving a call 8
Making a call 9
Using the headset 9
Reviewing, deleting and calling back incoming numbers 10
'New' incoming call and 'Ringing' LED 10
Preventing FSK message to auto-adjust real time 11
Reviewing, deleting and calling back outgoing numbers 11
Features and functions 12
Setting date and time 12
Setting local area code and long distance code 12
Adjusting LCD contrast 12
Low battery detection 12
Setting ash time and alarm clock 13
Setting ring tone and adjusting ring volume 13
Adjusting hands-free volume 14
Selecting pulse or tone dialling mode 14
Setting PABX code 14
Hold on music 14
One-touch and two-touch memory operation 15
LCD backlight function 15
Flash function 15
Pause function 16
Lock 16
Key tone 16
Calculator function 16
Secret code setting and remote monitor function 17
Setup for parallel phones 18
FAQs 19

2
After Sales Support
Telephone: 1300 886 649
Corded Phone with Headset
Warranty Details
The product is guaranteed to be free from defects in workmanship and parts
for a period of 12 months from date of purchase. Defects that occur within
this warranty period, under normal use and care, will be repaired, replaced or
refunded at our discretion, solely at our option with no charge for parts and
labour. The benefits conferred by this warranty are in addition to all rights and
remedies in respect of the product that the consumer has under the Trade
Practices Act and similar state and territory laws.

3After Sales Support
Telephone: 1300 886 649
Congratulations on choosing to buy a TEVION® product.
All products brought to you by TEVION® are manufactured to the highest standards
of performance and safety and, as part of our philosophy of customer service and
satisfaction, are backed by our comprehensive 1Year Warranty. We hope you will
enjoy using your purchase for many years to come.
Welcome

4
After Sales Support
Telephone: 1300 886 649
Important safety instructions
Read this manual thoroughly before rst use, it is designed to familiarise you with
your new corded phone so you will be able to get the maximum use from your
new phone. Keep the manual in a safe place for future reference, along with the
completed warranty card, purchase receipt and carton. If applicable, pass these
instructions on to the next owner of the appliance.
Make sure to read and follow all safety precautions enclosed in this manual. They
will reduce the risk of re, electric shock and injury when correctly adhered to.
Always follow basic safety precautions and accident prevention measures when
using your telephone equipment, including the following:
• Read, understand and follow all warnings and instructions.
• Place the telephone on a level and stable surface. Falling o an unstable surface
may cause serious damage to the product.
• When you plug in the telephone, do not use an extension cord and make sure not
to overload your wall outlet, which will increase the risk of re or electric shock.
• Never push foreign objects of any kind into this product through openings in the
housing as these may aect dangerous voltage points or short circuit parts that
could result in re or electric shock.
• Never spill liquid of any kind on the product.
• Avoid moving or disconnecting this unit during a heavy storm, as there may be a
remote risk of electric shock from lightning and thunder.
• Do not attempt to x or alter the telephone or headset. In case of damage or
malfunction, contact a the after sales support line for advice.
• This appliance is not intended for use by persons (including children) with reduced
physical, sensory or mental capabilities, or lack of experience and knowledge,
unless they have been given supervision or instruction concerning the use of the
appliance by a person responsible for their safety.
• Unplug the product from the wall outlet before cleaning. Do not use liquid
cleaners or aerosol cleaners. Use a soft damp cloth for cleaning.
• Only connect the supplied headset to the earphone port.
• WARNING: Australian Approved Headset that can withstand the 7.0Kv Impulse
Test and 3.0Kv AC Electric Strength Test (EST) shall only be connected
to the earphone port.

5After Sales Support
Telephone: 1300 886 649
Features
• FSK / DTMF / ETSI compatible with auto-detection – automatically detects
the format of an incoming telecommunications signal: FSK (frequency-
shift keying), DTMF (dual-tone multi-frequency signaling) or ETSI (European
Telecommunications Standards Institute).
• 16-digit LCD display
• 99 incoming and 18 outgoing number memories
• 3 one-touch and 10 two-touch memories
• 16 types of ring tone to choose from
• Music on hold
• Do-Not-Disturb function
• Transfer function between parallel phones (using 2 similar models)
• Secret code function in Do-Not-Disturb state to avoid missing VIP calls
• Pre-dial and edit function
• Redial function
• Three-step lock function
• Alarm clock function with capability of storing 5 dierent alarm settings
• 16 levels of LCD contrast
• Calculator and key tone function
• Set PABX code
• Pulse/tone dialling mode compatible
• 4 levels of hands-free volume to choose from
• Ringing volume 8 steps to choose from
• LCD backlight function
• Anti-dialling from parallel phones
• Hands-free dialling and speaking function
• 'In use' and 'New call' LED indicator
• Convenient listening and speaking through earphone

6
After Sales Support
Telephone: 1300 886 649
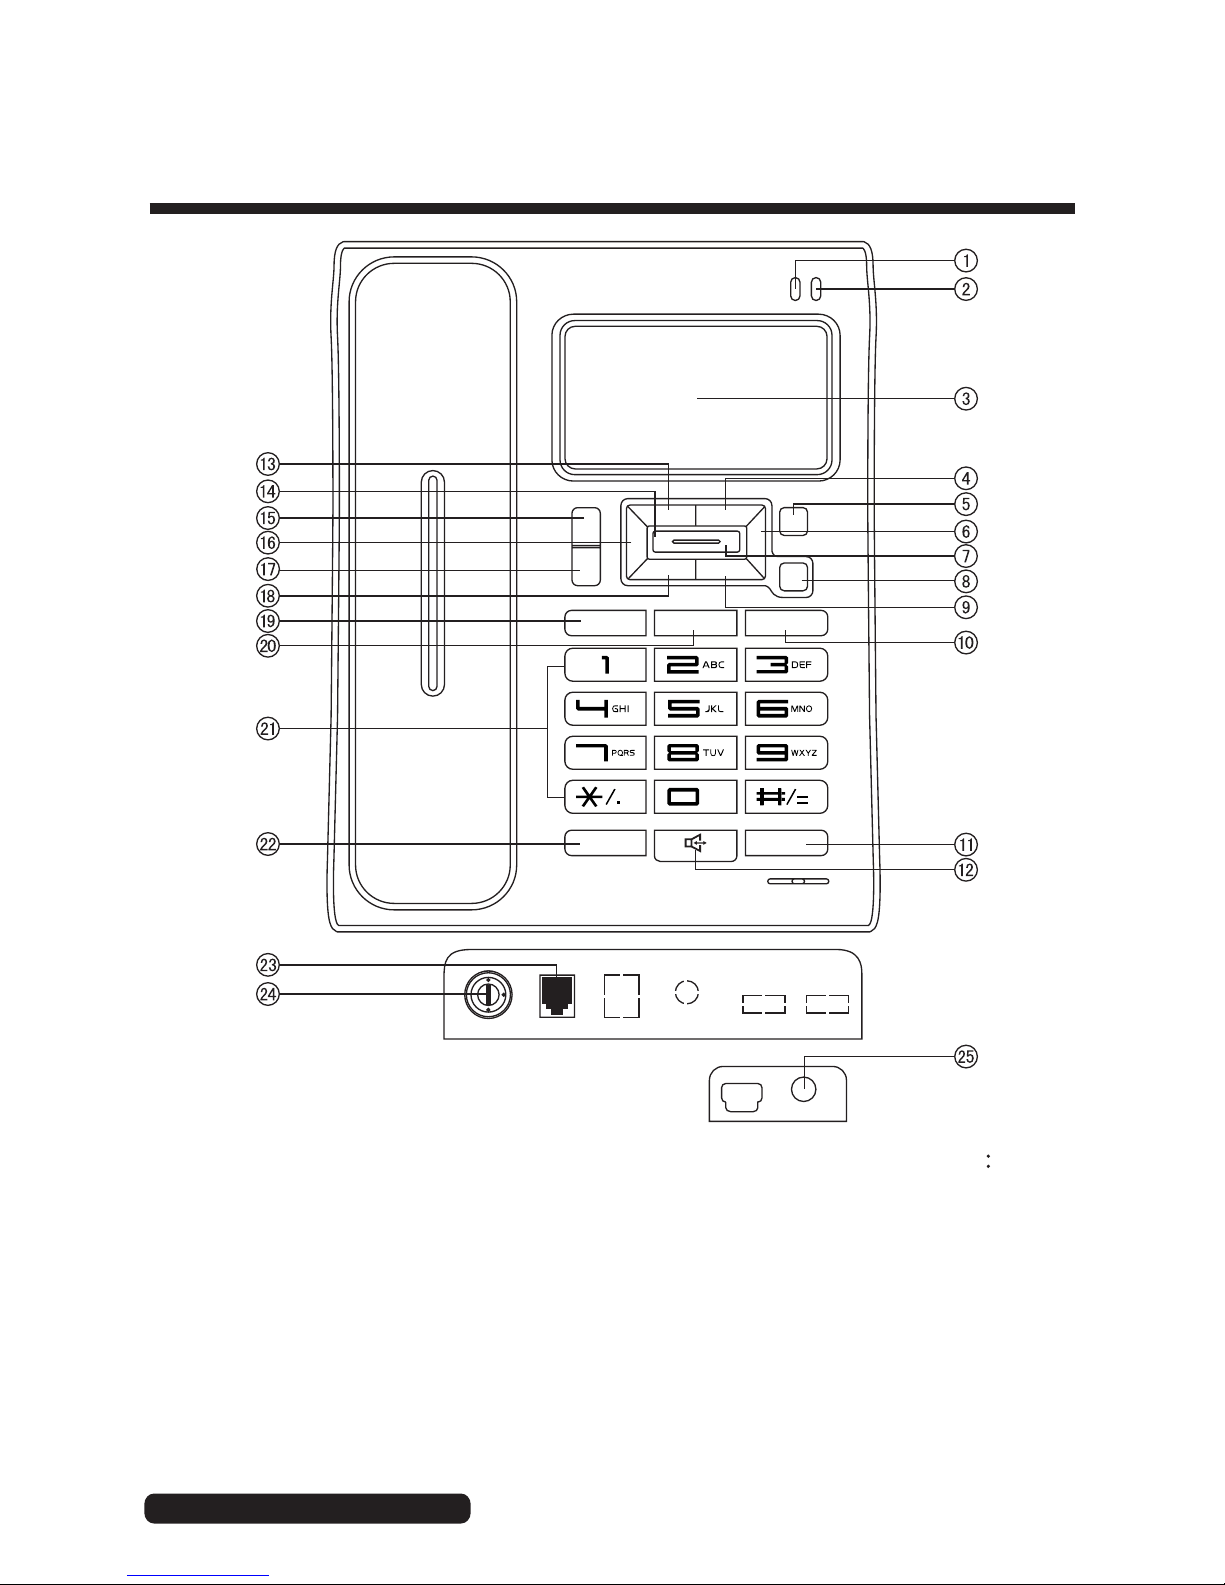
Know your corded phone
1 In use 8 Brightness 15 Setting 22 Flash/–
2 New 9 Store 16 Out/x 23 Line
3LCD 10 Ring 17 Calculator 24 Lock
4Down/- 11 Redial 18 M3 (memory) 25 Earphone
5 Pause 12 Hands-free 19 Alarm
6 Delete 13 Up/+ 20 Hold
7 M2 (memory) 14 M1 (memory) 21 Numerical keys
SET UP/+
OUT/×
DEL
M3 STORE
DOWN/ -P
BRI
CAL
IN USE NEW
ALAR M RINGHOLD
FLASH /÷REDIAL
M1 M2
LINE
LOCK
EARPHONE
The function keys are explained in the following operating instructions.

7After Sales Support
Telephone: 1300 886 649
Installing batteries
The unit requires three 1.5V AA size batteries (supplied). We recommend using
alkaline batteries.
To install batteries, rst make sure the unit is disconnected from the telephone line.
Open the battery compartment cover and insert the batteries following the polarity
markings in the compartment. Then close the cover.
Once the batteries have been installed correctly, a time display will appear on the
LCD screen. (To set the time and date, see page 12.)
Connecting the phone and attachments
• Insert one end of the line cord to the line jack at the back of the phone and the
other end to your phone outlet at the wall.
• Use the coiled cord to connect the handset to the left side of the phone unit.
• Plug the headset into the earphone jack at the right side of the phone unit.
• Select the correct dialling mode to 'tone' (see page 14 for instructions). The
default setting is 'pulse' dialling.
• Calling Number Display (CND) is a feature that allows you to see the telephone
number of incoming calls displayed on your handset's LCD screen, if your
caller's service is CND-enabled and they have not blocked transmission of their
number. To have your number displayed on outgoing calls, your telephone
service must be CND-enabled; check the costs for this service with your
telecommunications provider.
Getting started

8
After Sales Support
Telephone: 1300 886 649
Basic operations
Receiving a call
• When a call comes in, the telephone rings and the LCD displays the sequential
number of the call (a maximum of 99 incoming numbers can be kept on
record), the date, time, incoming caller ID number and the NEW icon. The NEW
LED indicator will ash when there are missed calls.
• If the same number is received again, and the previous call has not been
reviewed, the LCD displays the REP (repeat) icon.
• When the incoming memory is full, the latest incoming number replaces the
oldest number in the memory.
NOTE: For the phone to display incoming numbers and other information, the
telephone service must be CND-enabled (see page 7 for more on this).
From handset
1. Pick up the handset and talk to the other party.
2. When nished, return the handset to the base.
Switching to speakerphone
1. When using the handset, press the key and return the handset to the base.
2. When nished, press the key again.
From speakerphone
1. When the telephone rings, press the key and talk to the caller. For the other
party to hear your voice clearly, speak into the speaker from a distance of
32cm or less.
2. When nished, press the key again.
NOTE: It is recommended to let the phone ring at least twice before answering as
any incoming messages are generally transmitted between the rst and
second ring.

9After Sales Support
Telephone: 1300 886 649
Making a call
From handset
1. Pick up the handset.
2. When you hear the dial tone, dial the desired number.
3. The unit will start timing the conversation after 6 seconds.
4. When nished, return the handset to the base.
From speakerphone
1. Press the key.
2. When you hear the dial tone, dial the desired number.
3. The unit will start timing the conversation after 6 seconds.
4. When nished, press the key again.
Pre-dialing function
1. When the handset is on the base, dial the desired number.
2. If there are mistakes, use the red DEL key to edit.
3. Press the key or pick up the handset and the number will be dialled
automatically.
Redial
1. Pick up the handset or press the key.
2. Press the REDIAL key, the last dialled number will be dialled again.
Using the headset
Plug the headset into the EARPHONE jack at the right side of the phone unit and
make sure it ts you comfortably (it is adjustable). When the headset is connected,
you can make or answer a call as you would via speakerphone, but your caller will
only be heard through the earphone (so the call remains private) while you speak
into the attached microphone. Your hands are kept free.
Basic operations (continued)
Table des matières
Autres manuels Tevion Téléphone