Smittybilt Comp Series Manuel utilisateur

1
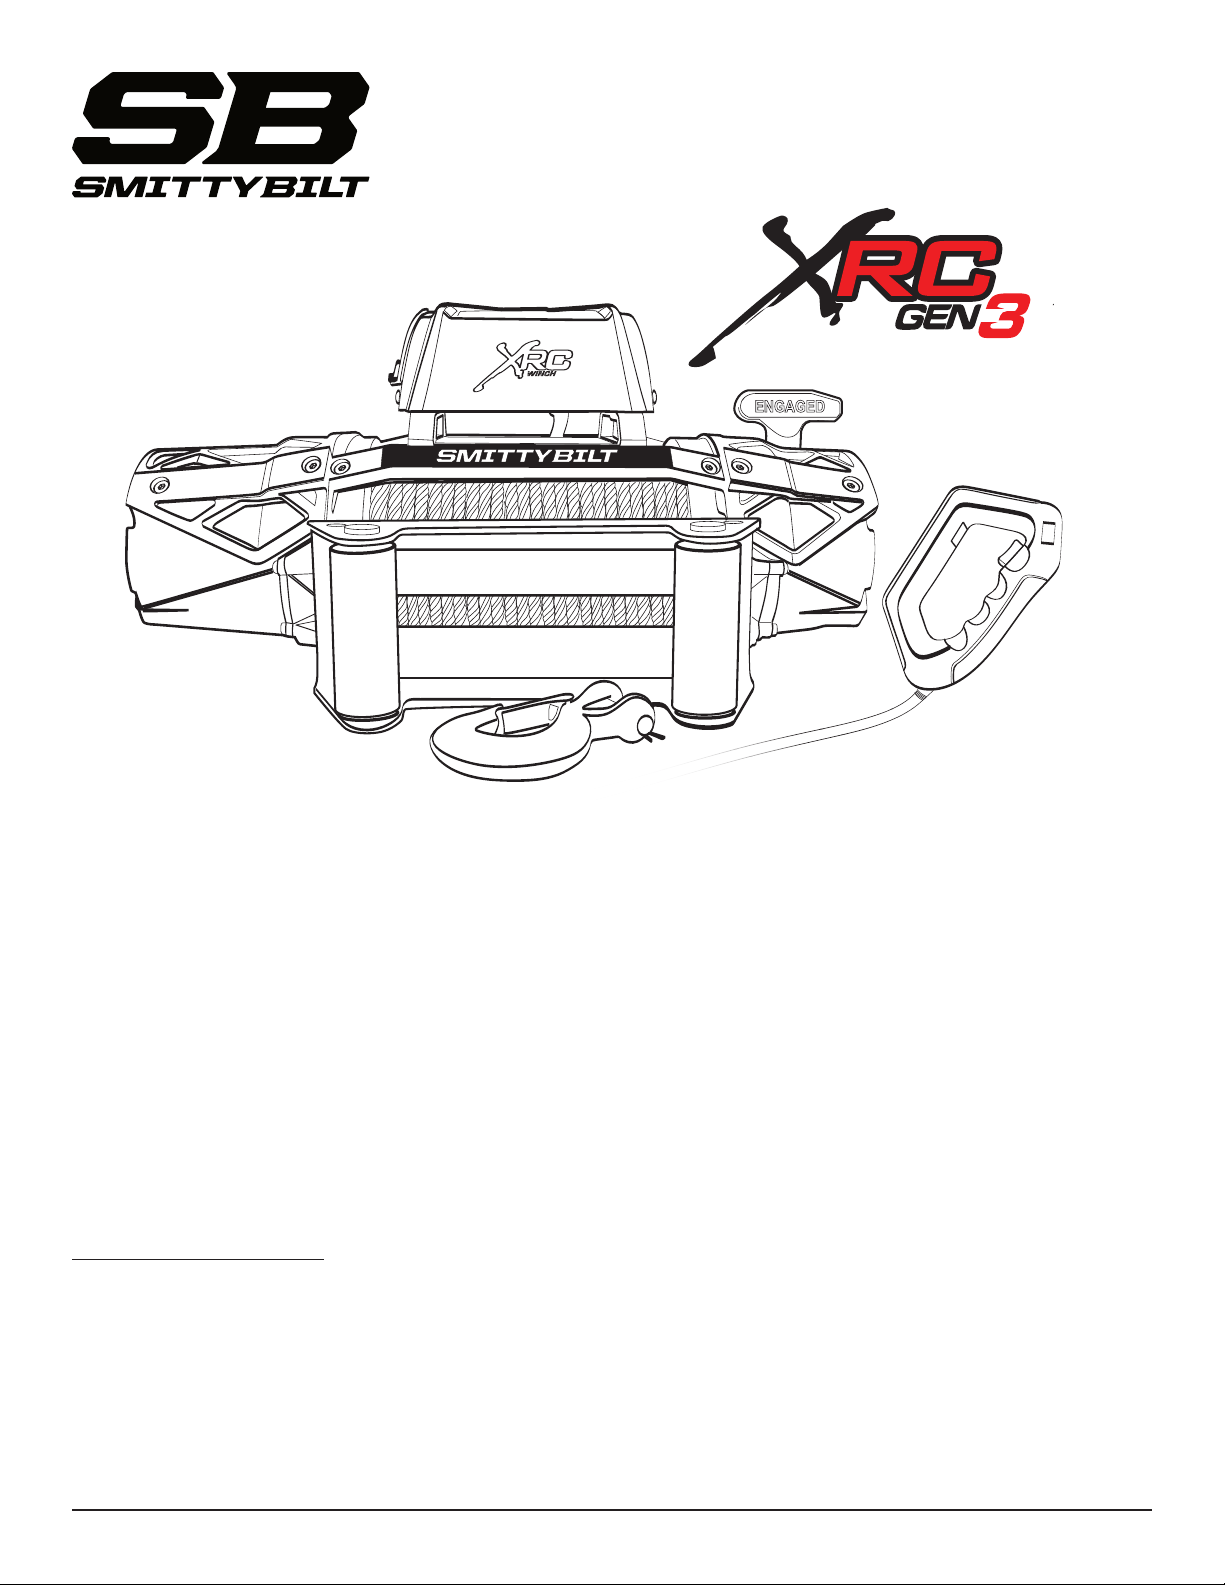
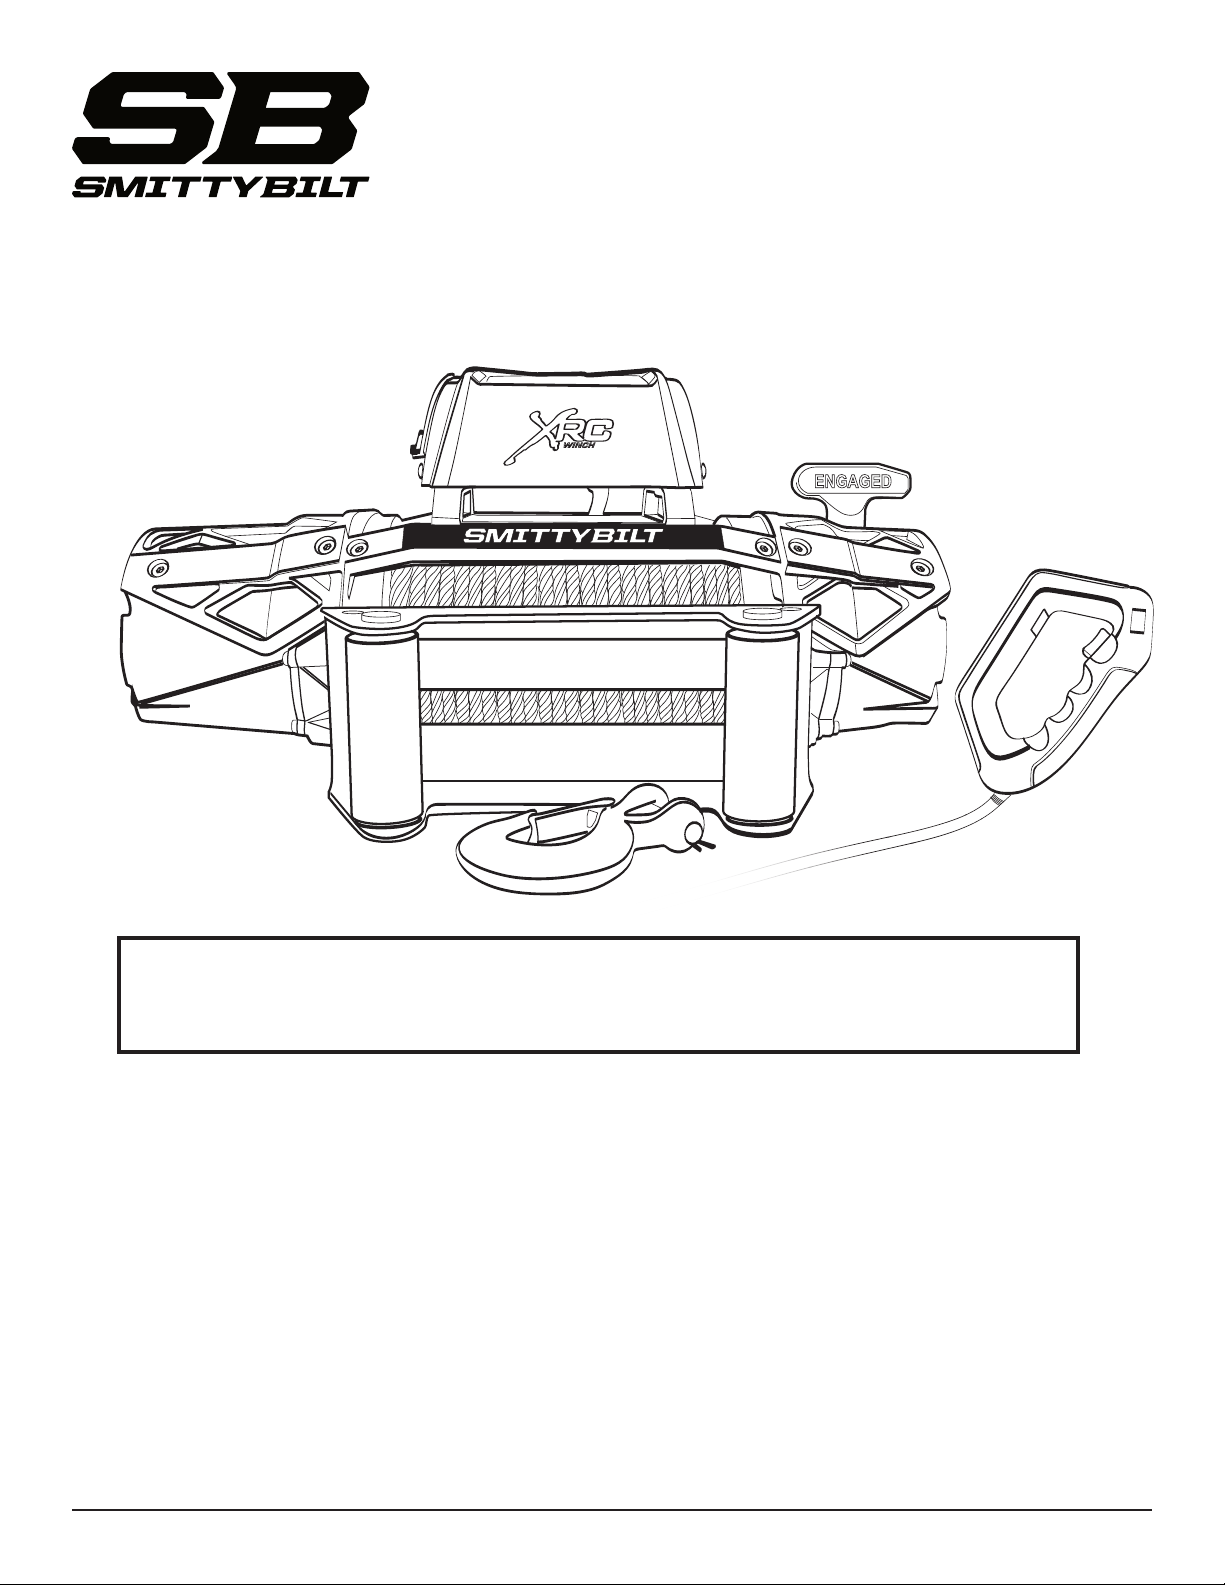
XRC GEN3INSTRUCTION MANUAL
2
#97695
XRC Gen3 9.5K
with 4-Way Roller Fairlead and Steel Cable
#97612
XRC Gen3 12K
with 4-Way Roller Fairlead and Steel Cable
#98695
XRC Gen3 9.5K COMP SERIES
with Aluminum Hawse Fairlead and Synthetic Rope
#98612
XRC Gen3 12K COMP SERIES
with Aluminum Hawse Fairlead and Synthetic Rope
XRC Gen3 Winches include:
• 9.5k or 12k XRC Gen3 Winch
• Steel Cable or Synthetic Rope
• 4-Way Roller or Hawse Fairlead
• Movable Control Box Mounting Bracket
• Remote Controller with Load Indicator
• Forged Winch Hook
New Remote Controller Features .......................3
New Control Box Features ..................................4
Safety Precautions ...............................................5
Operation Warnings .............................................6
Winch Operation ...................................................7
Winch Mounting ....................................................8
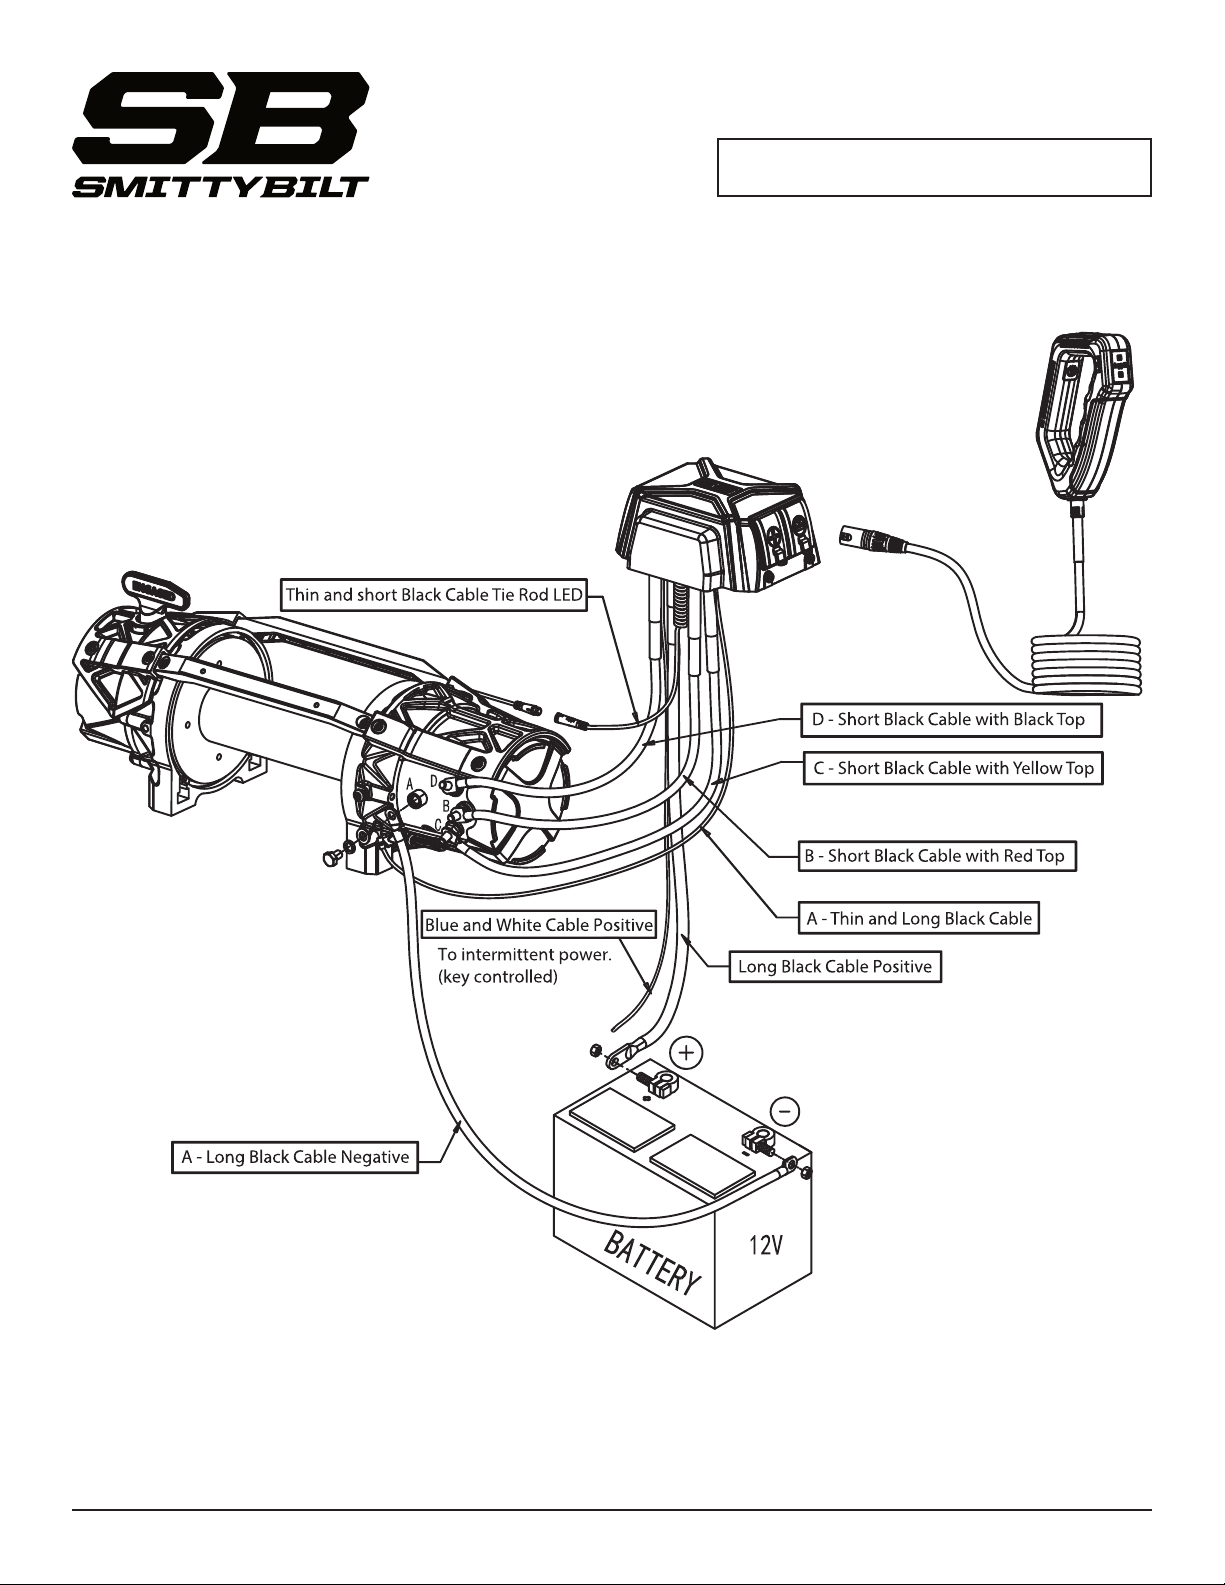
INSTALLATION INSTRUCTIONS
Electrical Connections .......................................10
Auxiliary 12v Power Post ................................... 11
Armor Plate Removal .........................................12
Control Box Mounting ........................................14
Wiring for DRL and Tie Bar Lighting ................. 16
Motor Wire Nuts Supplement ............................17
Product Specications .......................................18
Understanding IP Ratings ..................................19
Service Parts .......................................................20
Troubleshooting ..................................................22
Warranty ..............................................................23
Smittybilt 400 W. Artesia Blvd., Compton, CA 90220 • Customer Service: (310) 762-9944 • (888) 717-5797
3
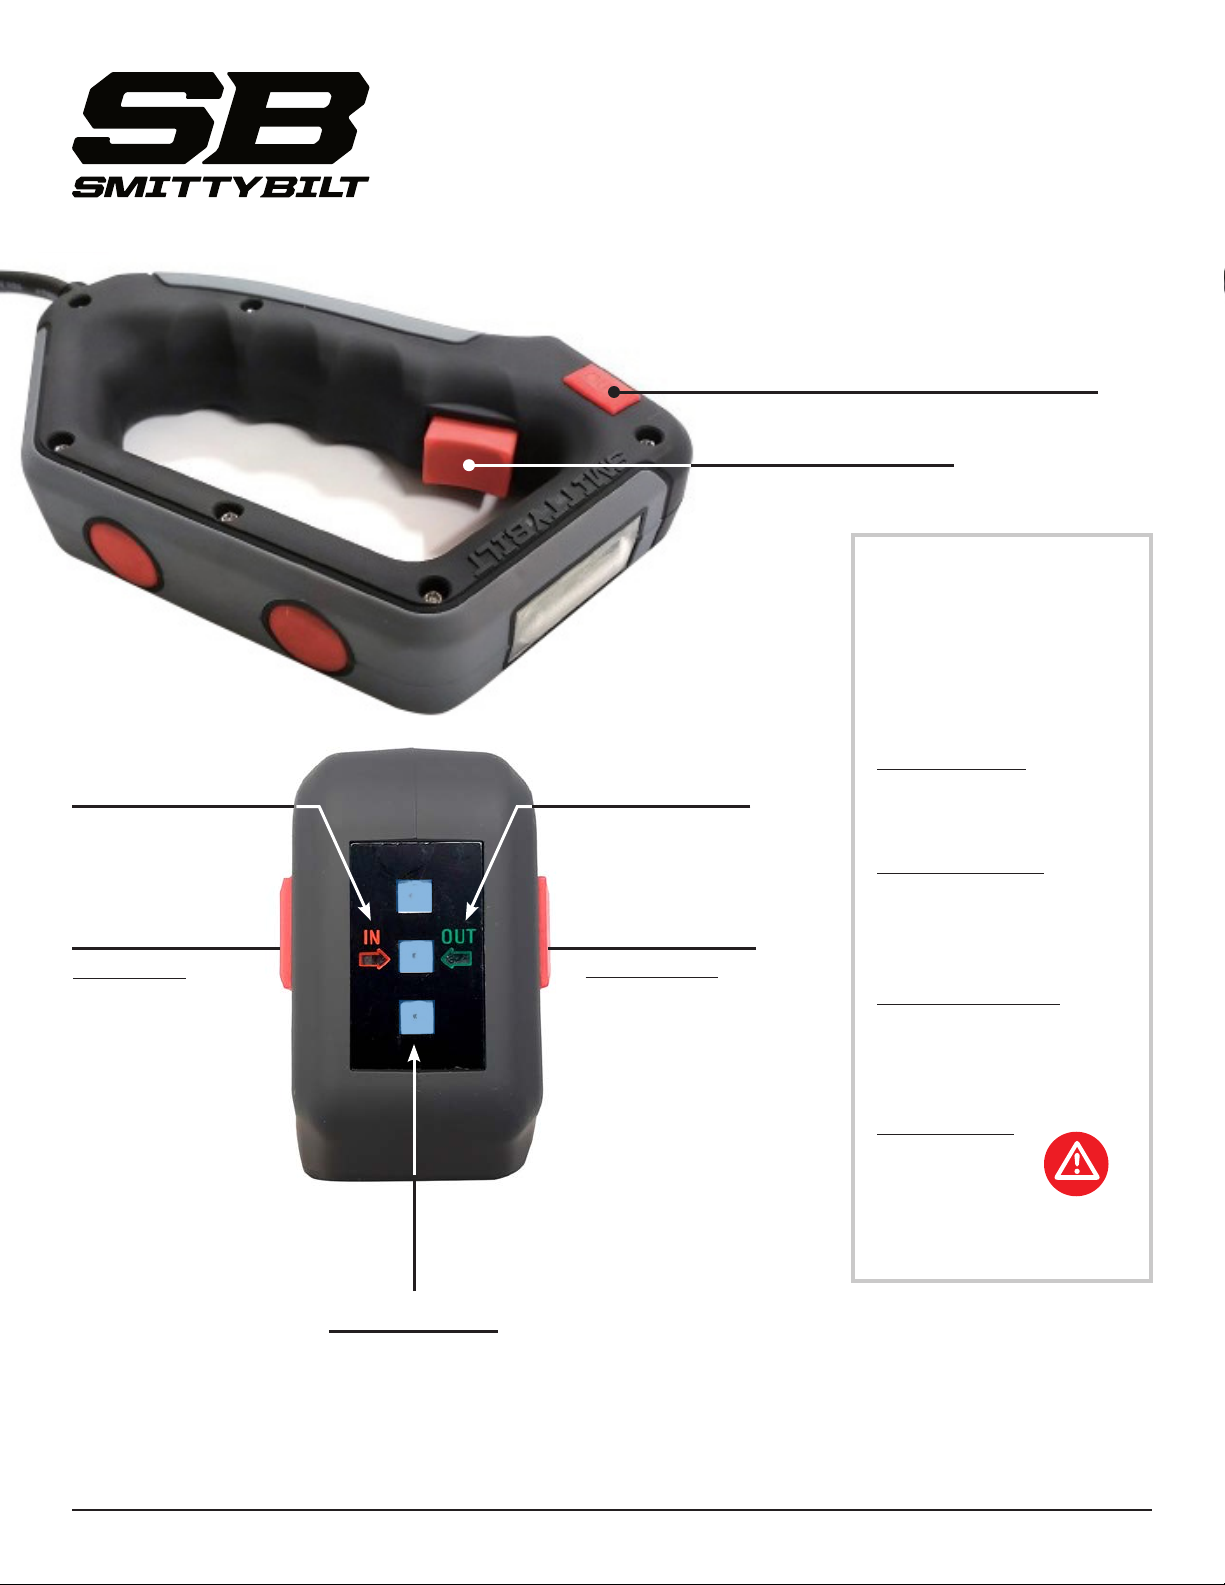
Power switch
Direction switch (IN/OUT)
NEW! XRC Gen3 Winch
Remote Controller Features
Load Indicator
Power IN
switch
To power IN:
Press the power IN
switch. The switch
cover and IN indica-
tor will light up. Use
the power switch to
control the winch.
Note: If you press
the power IN switch
a second time, the
remote will go into
neutral and will not
power the winch.
Power IN
indicator light
Power OUT
switch
To power OUT:
Press the power OUT
switch. The switch
cover and IN indica-
tor will light up. Use
the power switch to
control the winch.
Note: If you press the
power OUT switch
a second time, the
remote will go into
neutral and will not
power the winch.
Power OUT
indicator light
What do the
colored lights
on the Load
Indicator mean?
COLOR: BLUE
READY
Winch is ready to start
COLOR: GREEN
LOADING
Winch is operating within
safe levels
COLOR: YELLOW
MAX LOAD
Winch is operating at
maximum load
COLOR: RED
OVERLOAD
STOP!!!
Time to use snatch
block or other assist
IMPORTANT: Load indicator lights will let you know approximately how much load is on your winch based on the
chart above. Maximum pulling power is only achieved when pulling from the rst layer of rope on the drum. Avoid
continuous winching at high load and always check motor temperature frequently. If motor is too hot to touch , allow
to cool before you continue your recovery. It is recommended to re-access your recovery and consider the use of a
snatch block when recovery exceeds full load and/or when red over load lights begin to light up.
4
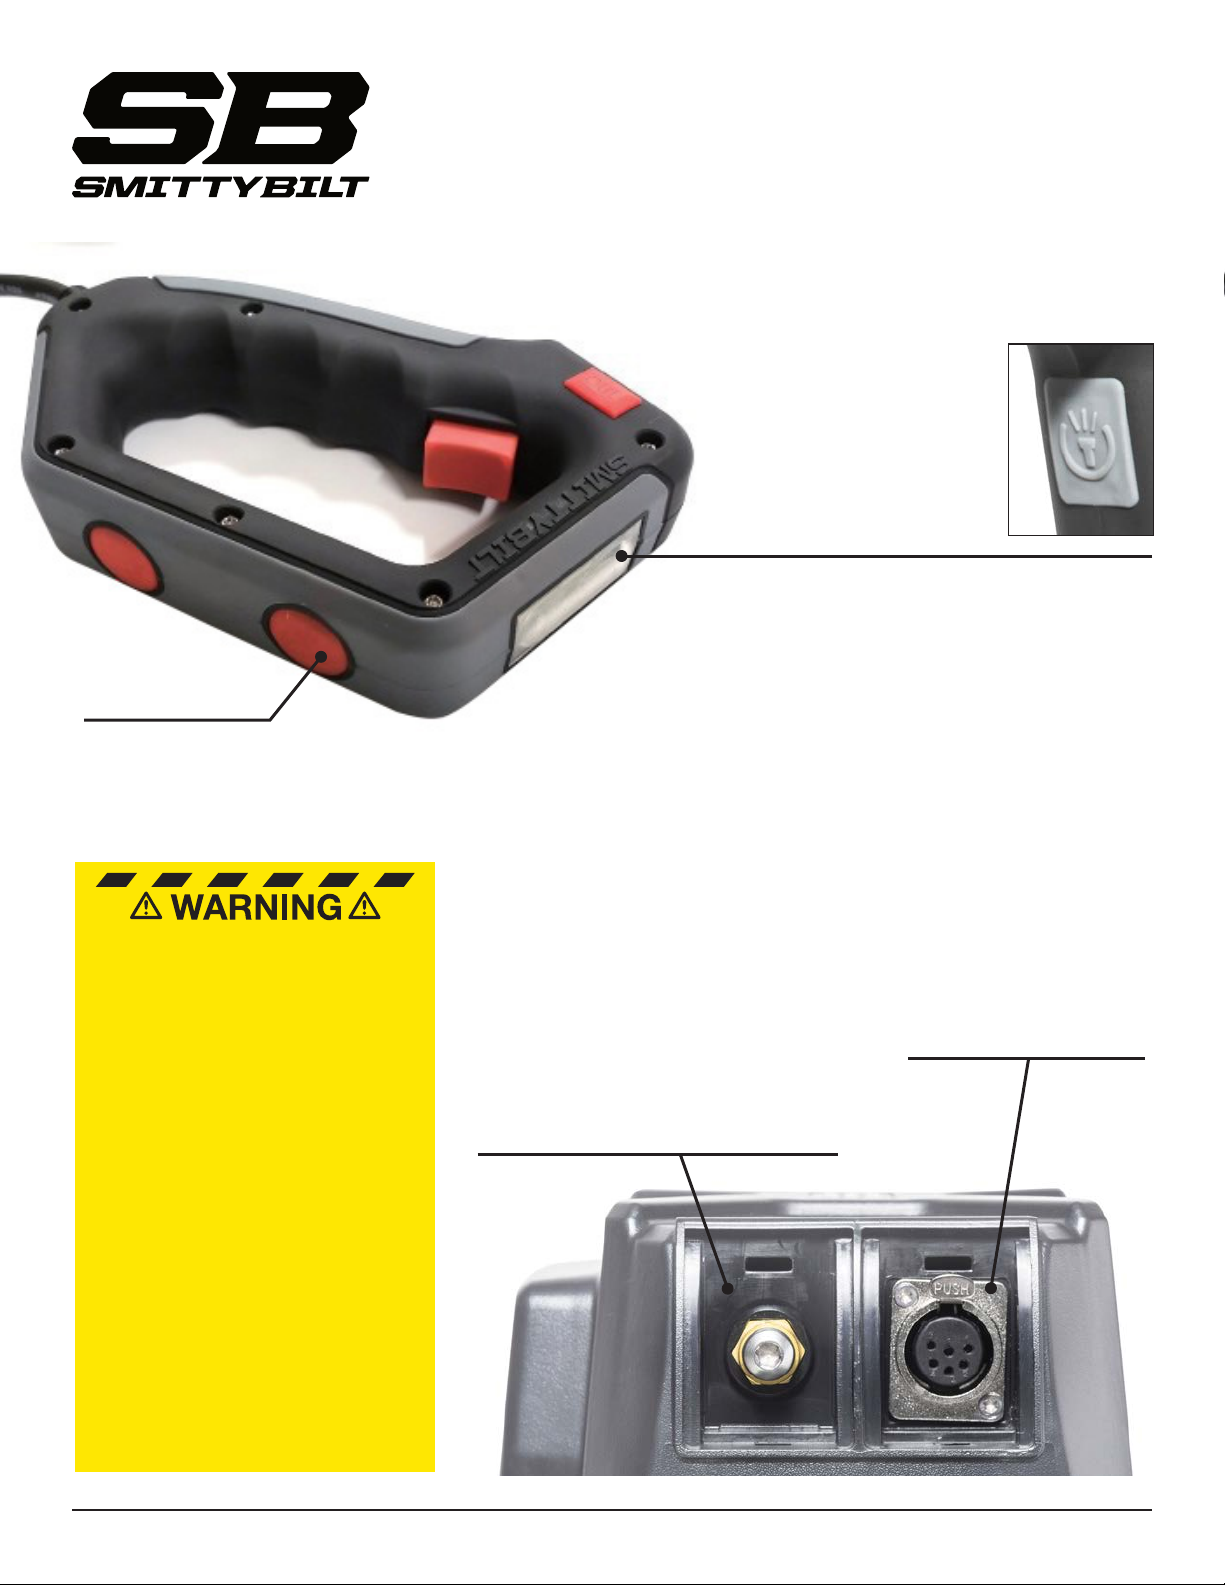
Magnetic
Mounting Pads
Strong neodymium magnets
enable remote to be secured to
any ferromagnetic material
LED Flashlight
To use LED light in the
remote, ensure remote is
plugged in and then press
the LED light switch to
power the light on and o.
Control Box Socket
Connect the remote to the
Control Box by lining up
the arrow on top of the plug
with the extended Push Tab
on the control box. Push
plug straight into socket
until you feel the push tab
engage and lock the plug
into the socket. The three
blue indicator lights will turn
on, indicating the controller
is connected.
To remove the remote
controller, depress the
Push Tab, then pull out
the plug.
Auxiliary 12V
Accessory Power Post
For quick use of 12 volt accessories without
popping the hood. Perfect for powering
small items such as an air compressor.
The power post is protected with a 50-
Amp automatic circuit breaker. In case of
a ground short, or thermal overload, the
breaker will trip, it will automatically reset
itself after a short period of time after the
fault is removed.
To use, open the cover to expose power
post. Attach accessory POSITIVE lead to the
post. Attach accessory NEGATIVE lead to
a suitable ground location on your vehicle.
NOTE: you may remove the button head bolt
to connect a power wire with an eyelet.
NEVER operate winch with less than 10 wraps
of Synthetic rope around the drum. The terminal
end is to prevent the rope from unraveling, it is
NOT a load bearing attachment point. Improper
installation and/or spooling out to last layer will
put a load on the terminal end and the rope will
release from the terminal. Always re-spool winch
rope under minimum 1000lb. Load before each use.
*For more information see owners manual*
• Inspect rope before each use
• Protect the rope from coming in contact with
sharp or rough objects that may damage, cut or
weaken the rope
• Never use rope over a rough surface without
chafe protection
• Never shock load winch rope
• Never bend rope around unprotected, sharp
corners
• Always use an aluminum hawse fairlead with
synthetic ropes
• Never hook rope back onto itself
• Always wash rope after use
• Manufacturer is not responsible for the results
of misuse, misapplications, faulty installation,
abuse, vehicle condition or modication of the
product in any way.
NEW! XRC Gen3 Winch
Remote/Control Box Features

5
SAFETY PRECAUTIONS
Improper equipment operation may cause
damage to equipment. Observe all safety
precautions for personal safety and the safety
of others. Failure to comply may cause death or
serious personal injury.
Read the following carefully before attempting
to operate your winch. Keep the instructions for
future reference.
1. DRESS PROPERLY.
• DO NOT wear loose clothing or jewelry. They can be
caught in moving parts.
• Wear leather gloves when handling winch cable. Do
not handle cable with bare hands as broken wires can
cause injuries.
• Non-skid footwear is recommended.
2. KEEP A SAFE DISTANCE.
• Ensure that all persons stand well clear of winch
cable and load during winch operation, 1.5 times the
cable length recommended. If a cable pulls loose or
breaks under load, it can lash back and cause serious
personal injury or death.
DO NOT STEP OVER THE CABLE.
• All visitors and onlookers should be kept away from
the work area.
• Keep proper footing and balance at all times.
3. DO NOT ABUSE THE CORD.
• Never carry your winch by the cord or yank it to
disconnect it from the receptacle.
• Keep cord from heat, oil and sharp edges.
4. DO NOT OVERWORK THE WINCH.
• If the motor becomes uncomfortably hot to touch,
stop and let it cool for a few minutes.
• DO NOT maintain power to the winch if the motor
stalls.
• DO NOT exceed maximum line pull ratings shown in
tables. Shock loads must be avoided.
Safety Precautions
5. AVOID UNINTENTIONAL OPERATION.
• Winch clutch should be disengaged and the hook
secured when not in use and fully engaged when in
use.
6. CHECK DAMAGED PARTS.
• Before using, you should check your winch carefully.
Any part that is damaged should be properly repaired
or replaced by an authorized service center.
7. REPAIR YOUR WINCH.
• When repairing, use only identical replacement parts
or it may cause considerable danger for the user.
8. RE-SPOOL THE CABLE.
• Leather gloves must be worn while re-spooling. To
re-spool correctly, it is necessary to keep a slight load
on the cable. See item 16 of operational warnings
section.
• Do not allow the cable to slide through your hand
and do not approach the winch too closely.
• Turn o the winch and repeat the procedure until all
the cable except for approximately 1 meter (3 feet) is
in.
• Disconnect the remote control switch and nish
spooling in cable by rotating the drum by hand with
clutch disengaged.
• On hidden winches, spool in cable under power but
keep hands clear.

6
OPERATIONAL WARNINGS
Read the following carefully before attempting
to operate your winch and keep the instructions
for future reference. Smittybilt electric winches
are intended for recreational self-recovery usage
only.
1. The uneven spooling of cable, while pulling a load, is
not a problem, unless there is a cable pile up on one
end of the drum. If this happens reverse the winch to
relieve the load and move your anchor point further
to the center of the vehicle. After the job is done, you
can unspool and rewind for a neat lay of the cable.
2. Store the remote control switch inside your vehicle
where it will not become damaged, inspect it before
you plug it in.
3. When ready to begin spooling in, plug in remote
control switch with clutch disengaged, do not engage
clutch with motor running.
4. Never connect the hook back to the cable, this
causes cable damage. Always use a sling or chain of
suitable strength.
5. Observe your winch while winching, if possible
while standing at a safe distance. Stop the winching
process every meter or so to assure the cable is not
pulling up in one corner. Jamming the cable can
break your winch.
6. Do not attach tow hook to winch mounting plate, they
must be attached to vehicle frame.
7. The use of a snatch block will aid recovery operations
by providing a doubling of the winch capacity and
a halving of the winching speed, and the means to
maintain a direct line pull to the center of the rollers.
When double loading during stationary winching, the
winch hook should be attached to the chassis of the
vehicle.
8. Ensure "D" or bow shackles with adequate load rating
are used in conjunction with an approved tree trunk
protector to provide a safe anchor point.
9. When extending winch cable, ensure that at least ve
wraps of cable remain on drum at all times. Failure
to do this could result in the cable parting from the
drum under load. Serious personal injury or property
damage may result.
10. All winches are provided with a red cable marking to
identify that 5 cable wraps remain on the winch drum
when this mark appears at the rollers (10 wraps for
synthetic rope). No recovery should be attempted
beyond this marking (wire rope only).
11. Since the greatest pulling power is achieved on the
inner most layer of your winch, it is desirable to pull
o as much line as you can for heavy pulls (you must
leave at least 5 wraps minimum on the drum--red
cable). If this is not practical use a snatch block and
double line arrangement.
12. Draping a heavy blanket or similar object over the
extended winch cable is recommended as it will
dampen any back lash should a failure occur.
13. Neat, tight spooling avoids cable binding, which
is caused when a load is applied and the cable
is pinched between the others. If this happens,
alternatively power the winch in and out. Do not
attempt to work a bound cable under a load, free by
hand.
14. To prevent vehicle rollback, apply blocks behind
wheels when vehicles are on an incline.
15. Battery
• Be sure that the battery is in good condition. Avoid
contact with battery acid or other contaminants.
• Always wear eye protection when working around a
battery.
• Have the engine running when using the winch, to
avoid attening the battery.
16. Winch cable
• Be sure that the cable is in good condition and is
attached properly.
• Do not use the winch if cable is frayed.
• Do not move the vehicle to pull a load.
• Do not replace the cable with a cable of lesser
strength.
• The life of the cable is directly related to the use and
care it receives. Following its rst and subsequent
Operational Warnings

7
uses, a cable must be wound on to the drum under a
load of at least 500Ibs (230kgs) or the outer wraps will
draw into the inner wraps and severely damage the
cable during winching. The rst winch use should be
a familiarization run while in a relaxed, non recovery
situation. Spool out the cable until the red cable mark
appears(about 5 wraps on the drum),then rewind the
cable on the drum under a load of 500Ibs (230kgs)
or more. This will slightly tension and stretch the new
cable and create a tight cable wrap around the drum.
Failure to do so may result in cable damage and
reduced cable life.
• When the cable is replaced, be sure to apply Loctite,
or an equal compound, to the cable clamp thread.
Tighten the clamp screw properly but do not over
tighten. The Loctite will prevent loosening of the
screw in arduous conditions. Loctite 7471 primer and
222 threadlocker are recommended.
17. Do not attempt to exceed the pulling limits of this
winch.
18. Do not drive your vehicle to assist the winch in any
way. Vehicle movement in combination with winch
operation may overload the cable, the winch itself or
cause damaging shock loads.
19. Shock loads when winching are dangerous! A shock
load occurs when an increase force is suddenly
applied to the cable. A vehicle rolling back on a slack
cable may induce a damaging shock load.
20. The winches shown in this manual are solely
for vehicle and boat mounted, non-industrial
applications.
21. Do not use winch in hoisting applications due to
required hoist safety factors and features.
22. Do not use the winch to lift, support or otherwise
transport personnel.
WINCH OPERATION
The best way to get acquainted with how your
winch operates is to make a few test runs before
you actually need to use it. Plan your test in
advance.
Remember you can hear your winch as well as
you can see it operate. Get to recognize the
sound of a light steady pull, a heavy pull, and
sounds caused by load jerking or shifting. Soon
you will gain condence in operating your winch
and its use will become second nature to you.
STANDARD OPERATING
PROCEDURE
1. Ensure the vehicle is secure by applying the parking
brake or chocking the wheels.
2. Pull out the winch cable the desired length and
connect to an anchor point. The winch clutch allows
rapid uncoiling of the cable for hooking onto the load
or anchor point. The shifter tab located on the gear
housing of the winch operates the clutch as follows:
a. To disengage the clutch, move the clutch shifter
tab so that the "FREE SPOOL" text is facing
forward. Cable may now be free spooled o the
drum.
b. To engage the clutch, move the clutch shifter tab
into the "ENGAGED" position. The winch is now
ready for pulling.
c. Line the tab on the inside of the remote socket
end with the groove on the remote plug on the
control box.
You should always “Free spool” the winch outward.
d. Push the switch on the side of the remote to
select the direction you want the winch to
operate, then pull the trigger to operate the
winch.
e. The remote features a magnet on the front which
enables you to keep the remote o of the ground
by having it placed on your vehicle, bumper, etc.
Winch Operation

8
Winch Mounting
After turning on the winch or plugging in the
remote you must always select a direction in
order for the trigger to operate.
3. Recheck all cable rigging before proceeding.
4. Plug in the winch hand control. It is recommended
that the winching operation takes place from the
driver's position to ensure safe operation.
5. To commence winching operation, start vehicle
engine, select neutral in transmission, maintain engine
speed at idle.
6. Operate the remote control switch to the IN or OUT
position until the vehicle has been retrieved. Regularly
check the winch to ensure cable is winding onto the
drum evenly.
WINCH MOUNTING
The tment of winches and/or a frontal
protection system may aect the
triggering of SRS airbags. Check that the
mounting system has been tested and approved
for winch tment in the airbag-equipped vehicle.
Failure to comply may cause death or severe
personal injury.
The winch is to be mounted into a suitable steel
mounting frame using the 4-pont foot mounting system
either a horizontal or vertical plane. It is very important
that the winch be mounted on a at surface so that the
three sections (motor, cable drum and gear housing) are
properly aligned.
Winch mounting frames and/or frontal protection systems
are suggested to suit most popular vehicles. Winch
frames are packaged with detailed tting instructions.
The winch should be secured to the mounting with the
M10x 32mm bolts and spring washers provided. Winch
plate must be at least 6mm thick. Thicker winch plates
may require longer bolts (not included). Ensure winch
mounting bolts protrude past the top surface of the
square nut.
The roller fairlead is to be mounted so as to guide the
rope onto the drum evenly.
NOTE: The gear box and motor assembly are
not clockable. Attempting to do so can cause
damage to the winch and voids warranty.
DO NOT FORCE CLUTCH HANDLE.
Rotate drum to align gear in order to free spool if
needed.
ROPE IS NOT COVERED UNDER THE
MANUFACTURER WARRANTY. THIS IS A
NORMAL WEAR AND TEAR ITEM.
Inspect rope before rst use during the
mandatory pre-stretching. Any defects must be
noted before initial use.
Improper use, inadequate fairlead to bumper
clearances, abuse, neglect, chang damage are
not covered by any warranty.
9
INSTALLATION INSTRUCTIONS
10
WARNING: Do not alter,change or amend and winch wiring/connections. Doing so can cause property
or bodily injury and voids warranty.
Electrical Connections
WARNING: Do not alter, change or amend winch wiring/connections.
Doing so can cause property or bodily injury and voids warranty.
Ce manuel convient aux modèles suivants
6
Table des matières
Autres manuels Smittybilt Treuil