Skyhawk Hub Lite Mode d’emploi
Hub Lite & Hub Pro
Installation & User Manual
Please setup and register this device FIRST!
In order to receive alerts, the Skyhawk Hub must be used in conjunction with a
Skyhawk Sensor (sold separately) and the Skyhawk CE smartphone app.
See the specic Skyhawk Sensor users manual for additional information
on connecting your devices.


3
Index:
Introduction .......................................................................................................................
Layout Summary.............................................................................................................
Installation .......................................................................................................................
Start-Up Operation ..........................................................................................................
Shut-Down Operation/Reset Operation..............................................................................
Battery Replacement .......................................................................................................
LED Indicators & Sensitivity Adjustment..........................................................................
Safety, FCC and Warranty.................................................................................................
3
4 - 5
6 - 9
10
11
12 - 13
14
16 - 17
Unpacking and Inspection:
Before you begin installation, unpack and verify you have all the correct parts.
(1) Skyhawk Hub
(1) Antenna
(3) AA lithium batteries (pre-installed)
(4) Rubber feet
(1) Screwdriver
(1) Quickstart guide
(1) Warranty card
If you are missing any of these parts STOP, make sure you have your unit’s serial number and request a replacement
on sky-hawk.com/warranty.
In order to receive alerts, the Skyhawk Hub must be used in conjunction with a
Skyhawk Sensor (sold separately) and the Skyhawk CE smartphone app.
See the specic Skyhawk Sensor users manual for additional information
on connecting your devices.
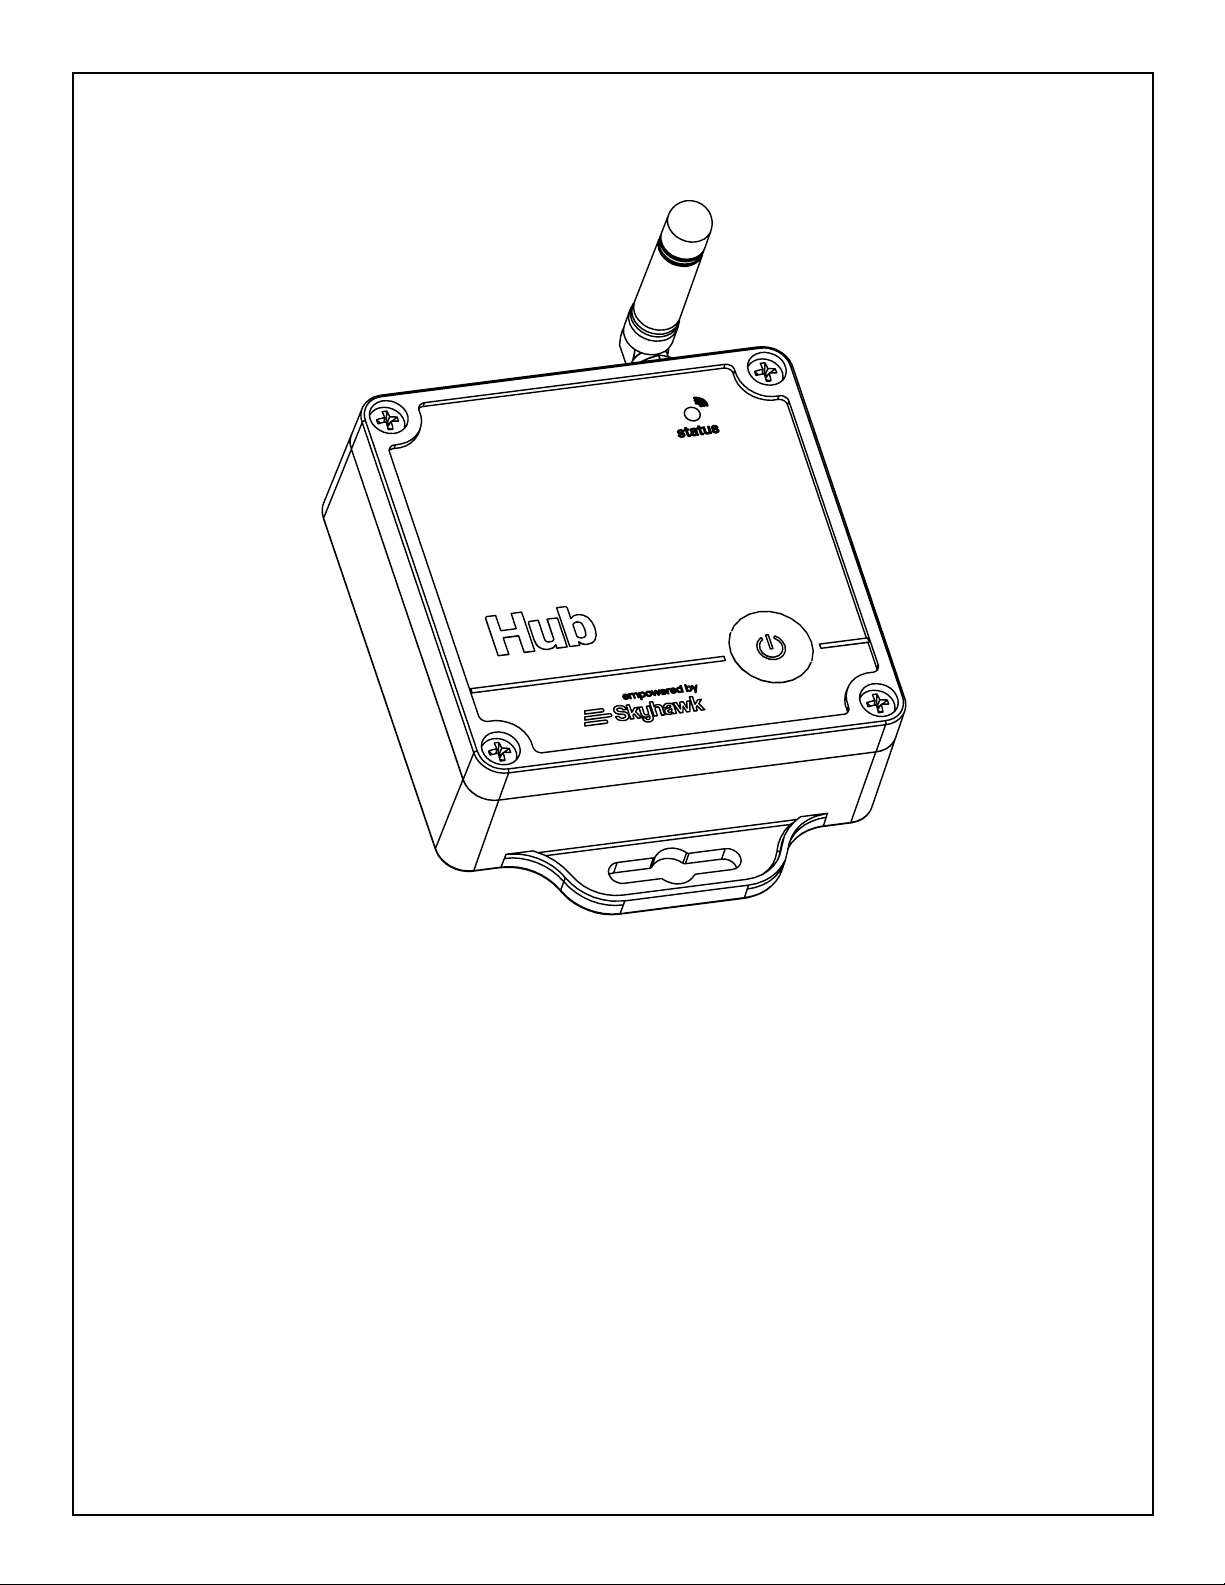
Hub Layout Summary:
Front of Unit
LED Indicator - This multicolored LED indicator will indicate various modes of operation. More details on the
indicator colors can be found on page 14.
Function Button - This multi-use button can be used for various functions. See pages 10 and 11 for more details.
Antenna - This adjustable screw-on antenna is used to receive RF signals from the Skyhawk Sensors.
Cover Screws
Function Button
LED Indicator
Antenna
4
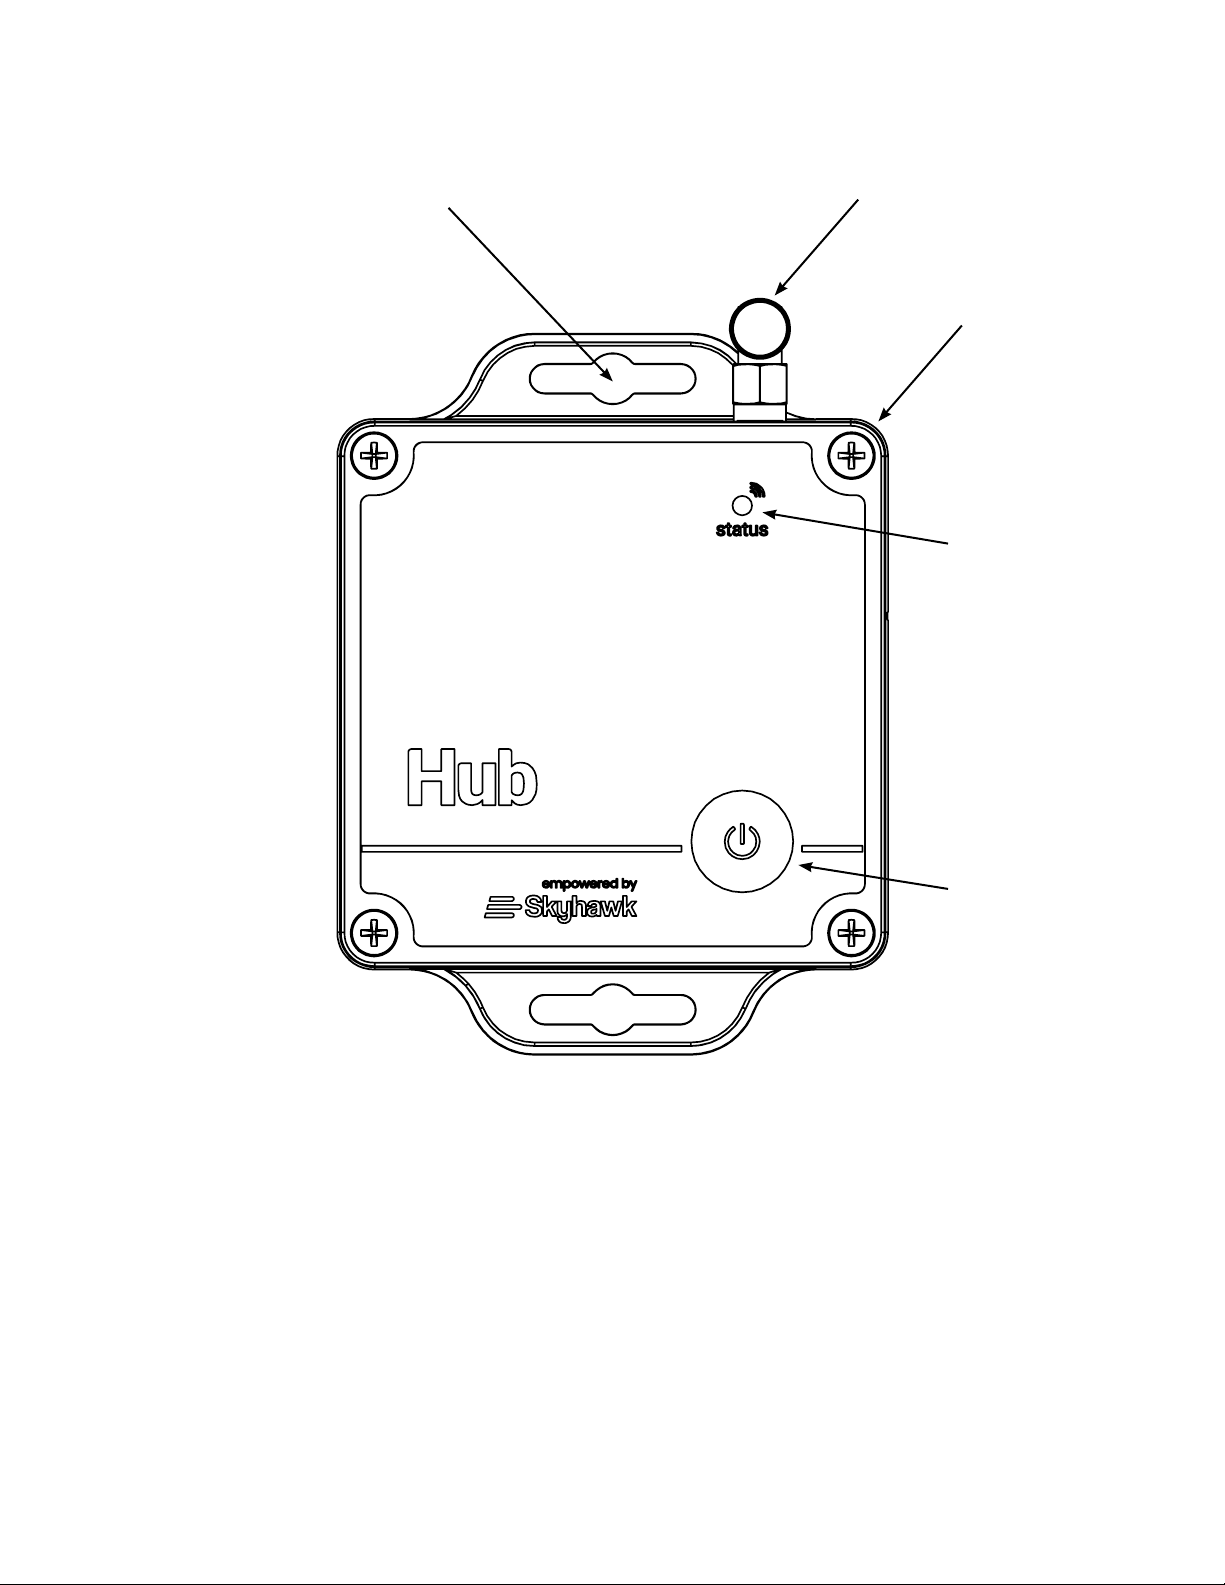
Mounting Cutout
Front of Unit (with cover removed)
Cover Overlay
Connector
Battery
Holder
Cover Overlay Connector - This connector is used to connect the cover’s overlay 6-pin connector.
Battery Holder - The battery holder accommodates 3 x AA batteries. It is suggested that 1.5 volt lithium batteries
are used for extended life.
5
Hub Installation:
The Hub can be installed using various methods including, but not limited to, dual-lock strips, magnets or rubber
feet. Some of these mounting accessories may be included with the Hub accessory kit.
Method 1 : Dual-Lock Strips (if included)
Step 1: In the accessory kit, locate the two sets of dual-lock strips. Keep these strips together and do not separate
them at this time!
Step 2: Clean the rear surface of the Hub with 70% isopropyl alcohol for proper bonding of the strips.
Step 3: Peel one side only of each set of strips to expose the adhesive and ax to the rear of the unit.
Step 4: Make sure the area where the Hub will be attached has a clean surface for proper bonding of the strips. Do
not separate the strips from the back of the unit at this time!
Step 5: Peel the remaining side of each of the strips to expose the adhesive and position it on the object and press
down on the whole Hub. Do not remove the Hub at this time - give the dual-lock adhesive about 30-minutes to
bond.
Attach
to
Object
6
Attach to
Iron
or
Steel
Hub Installation (continued):
Method 2 : Self-Stick Mounting Magnets (if included)
Step 1: In the accessory kit, locate the two self-stick mounting magnets.
Step 2: Clean the rear surface of the Hub with 70% isopropyl alcohol for proper bonding of the magnets.
Step 3: Peel o the paper to expose the adhesive and ax magnets to the rear of the unit.
Step 4: The Hub is ready to be mounted. Make sure the area where the Hub will be attached is ferrous iron or steel.
7
Hub Installation (continued):
Method 3 : Self-Stick Rubber Mounting Feet (if included)
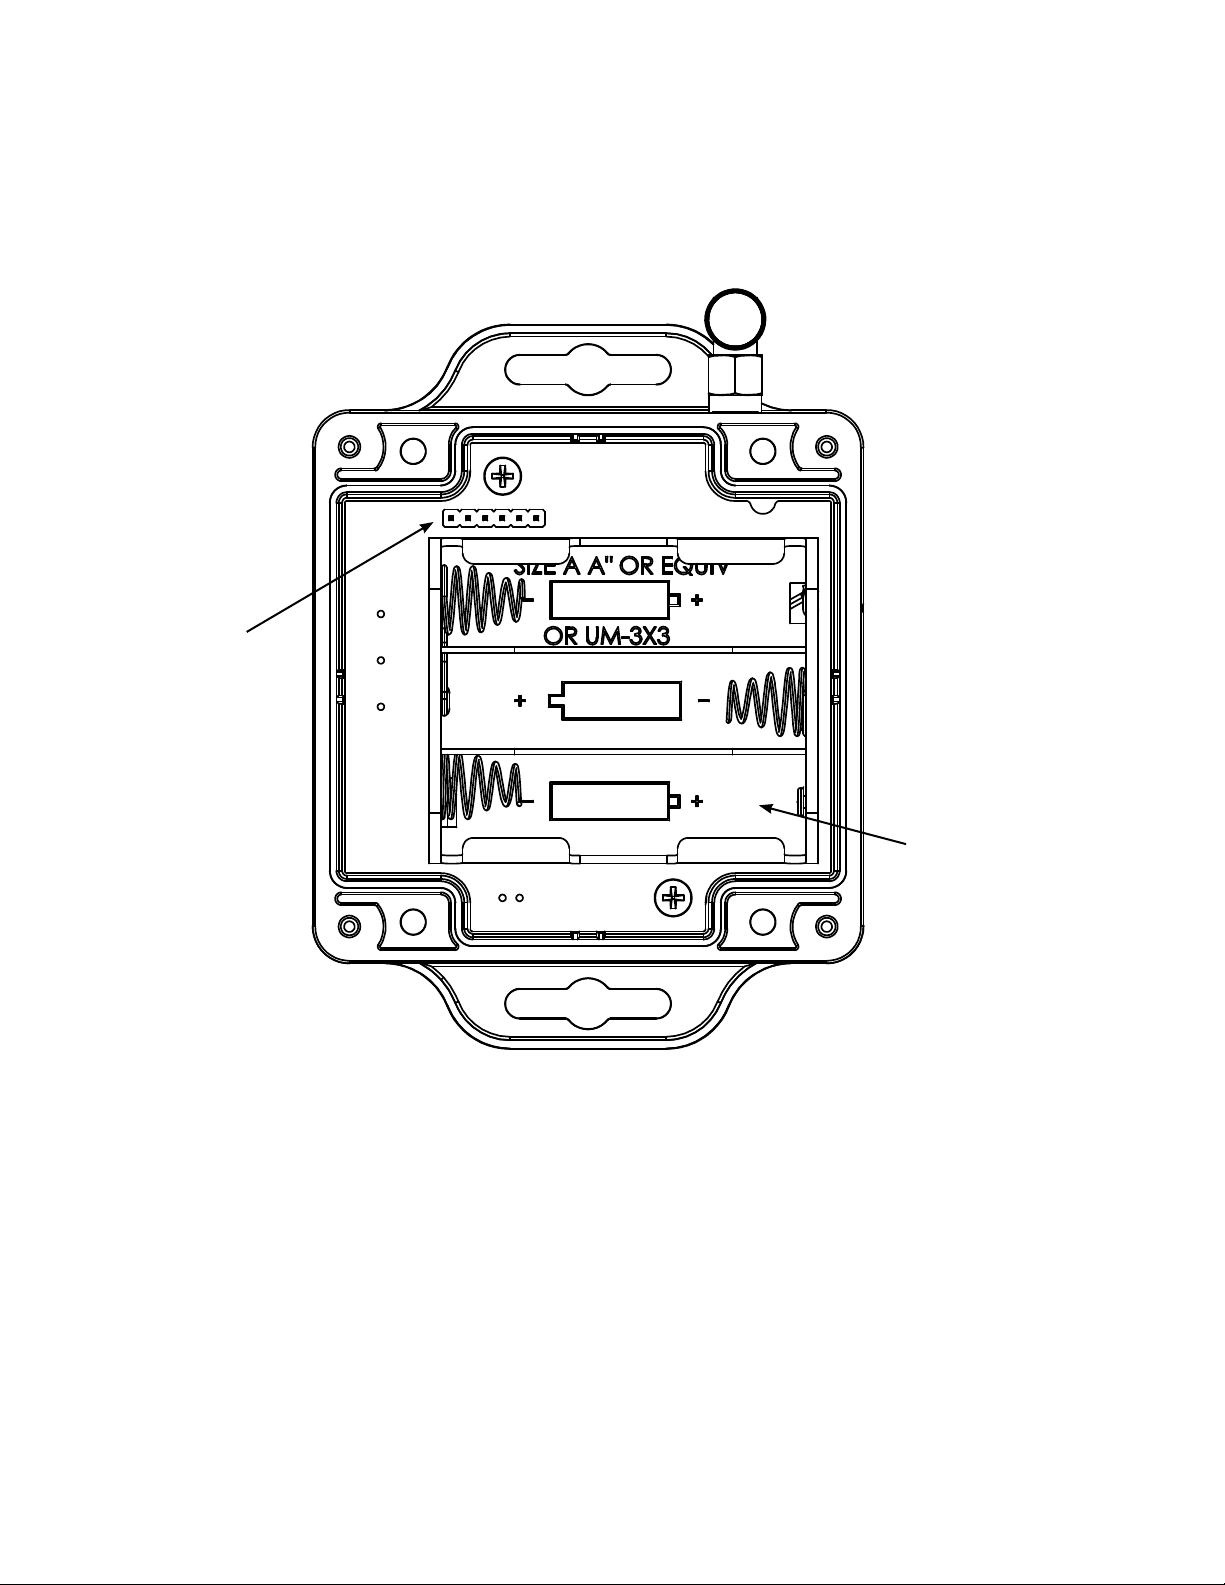
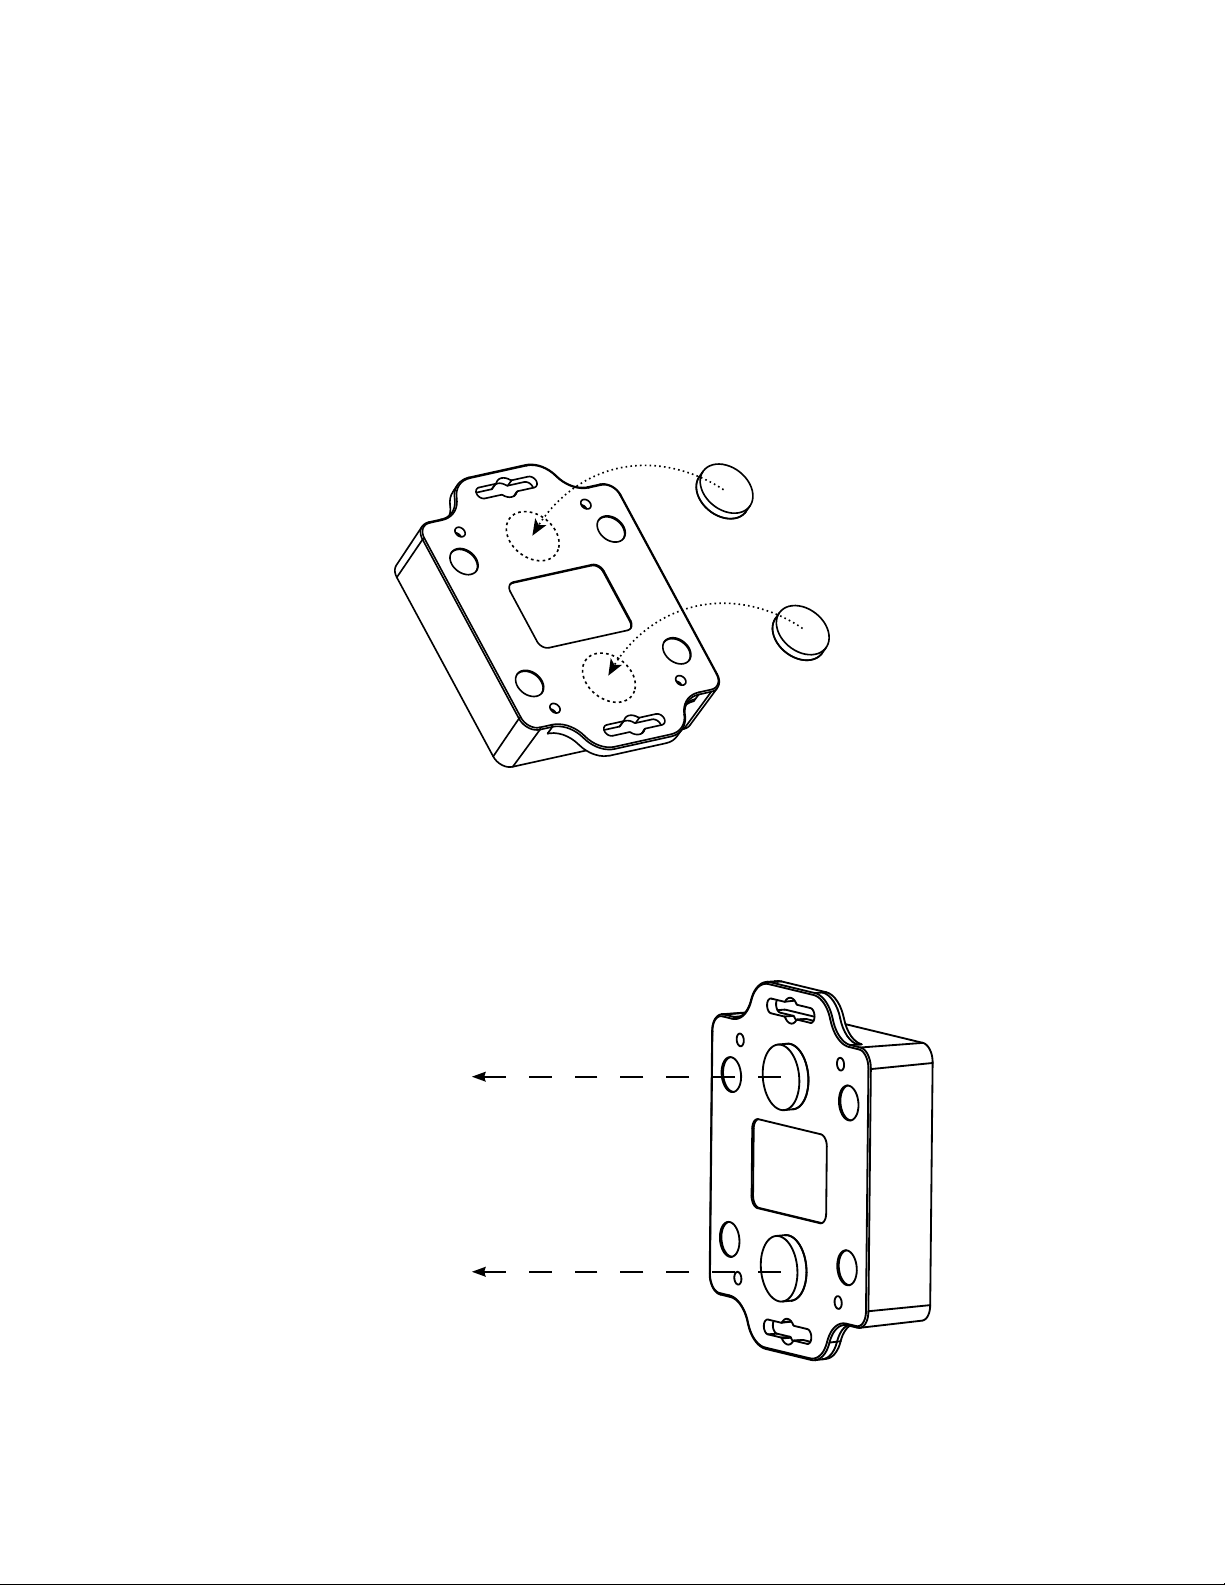
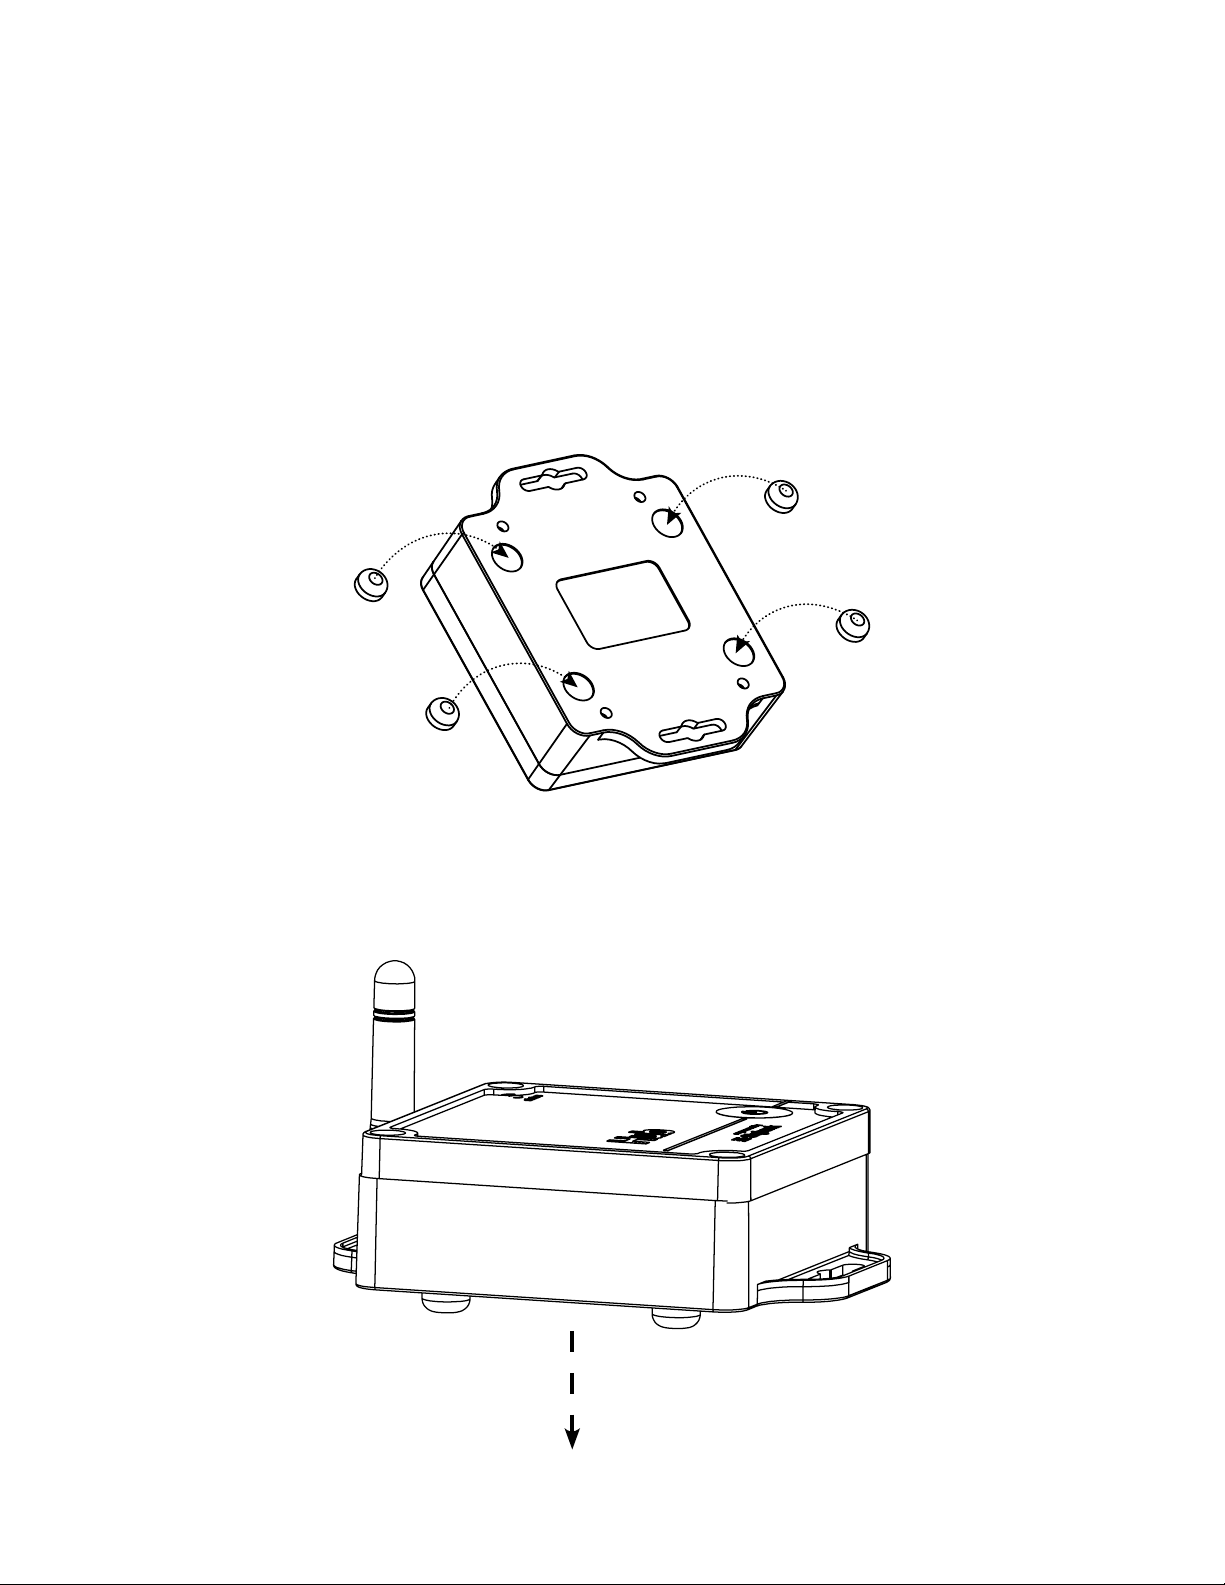
Step 1: In the accessory kit, locate the four self-stick rubber mounting feet.
Step 2: Clean the four circular recessed areas on the back of the Hub with 70% isopropyl alcohol for proper
bonding of the feet.
Step 3: Peel back the paper on the rubber feet to expose the adhesive and ax them to the designated areas on
the back of the unit.
Step 4: The Hub is ready to be mounted. Place the Skyhawk on a at surface, such as a table or shelf.
8
Hub Installation (continued):
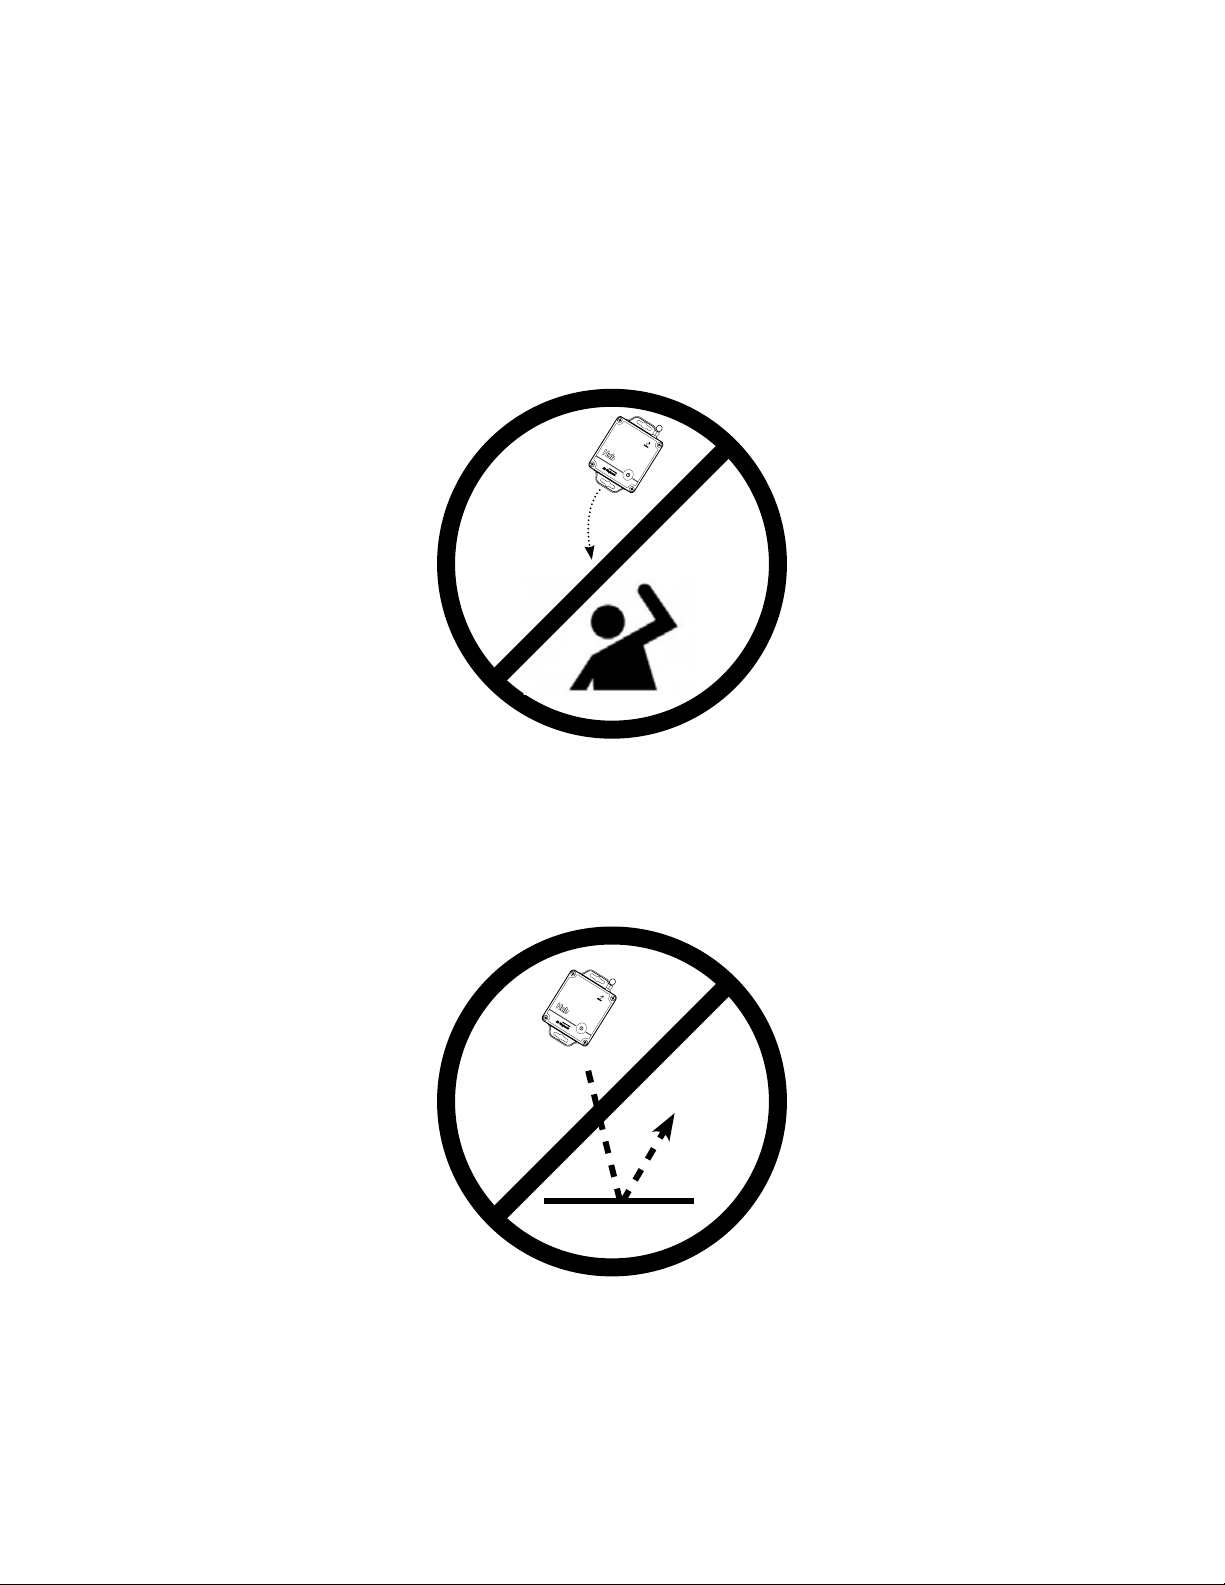
Prevent Falling Hazard
Prevent Unit Fall Damage
Installation - Safety Guidelines:
Make sure when placing the Hub on an object that it is securely attached and cannot fall o and injure someone
or fall onto a hard surface and damage the unit.
Make sure that when placing the Hub that it will not interfere with other equipment.
9
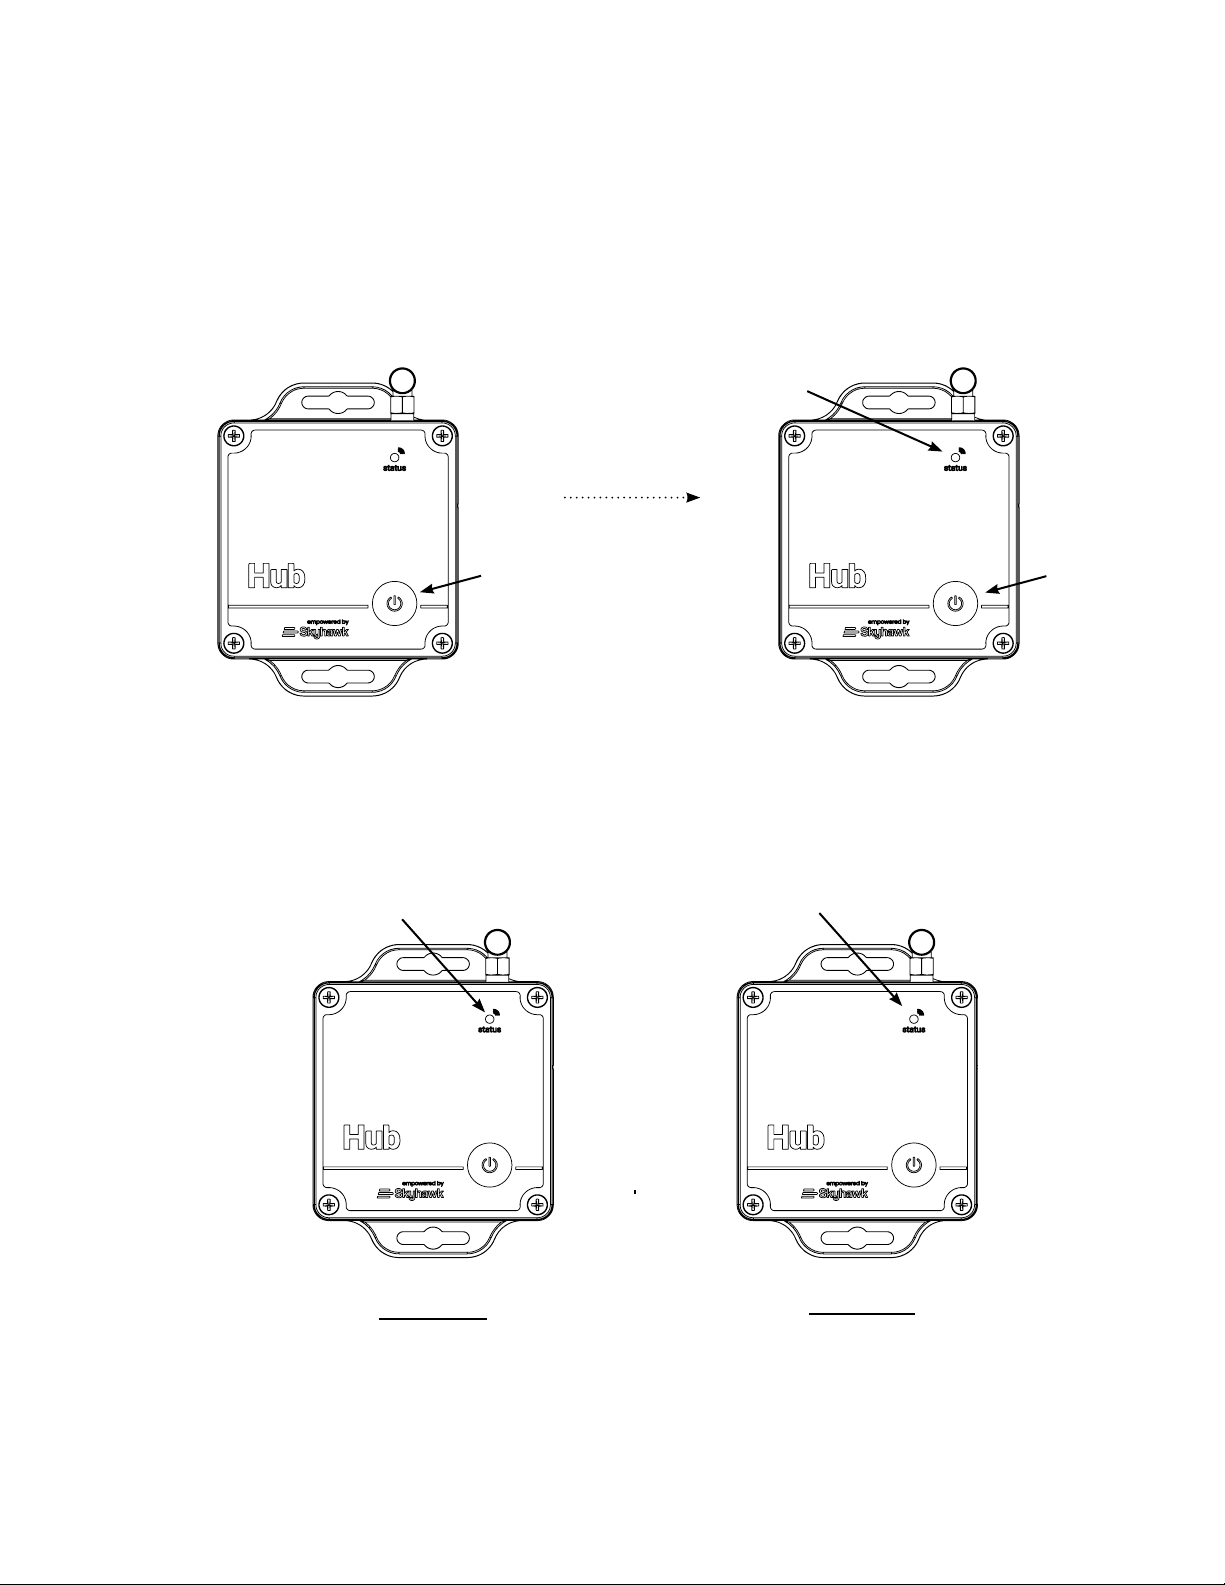
Press and Hold
Blinking GREEN
Setup
SUCCESS
Hub Start-Up Operation:
Before moving forward with the unit operation you must download the Skyhawk CE app onto your smart device
and sign up for an account.
Step 1: Download and install the Skyhawk CE app from the Apple or Google Play store onto your compatible
smart device. Go to sky-hawk.com for more detailed information on which devices are supported.
Step 2: Power ON the Hub by pressing and holding the function button; release when GREEN LED starts blinking.
Unit will continue to power ON by blinking the GREEN LED for about 30 to 60 seconds.
Step 3: After unit nishes the power ON process, the GREEN LED will blink twice and the unit will automatically
send a power ON alert to the Skyhawk CE app via the cellular network. If the connection is unsuccessful, then the
Skyhawk CE will not acknowledge any communication and the LED will blink RED twice. Any communication
failure will place the unit into a timed retry mode, and after several retries it then will give up.
Two GREEN LED blinks
Step 4: The Hub now automatically goes into listening mode (very fast GREEN LED ash every 5s). Whenever
the Hub receives an RF signal from any of its supported Skyhawk Sensors, then the LED will blink GREEN twice
and relay this information to the Skyhawk app via the cellular network.
Setup
FAILURE
Release
Two RED LED blinks
10
Ce manuel convient aux modèles suivants
1
Table des matières


