SimCom R500 Manuel utilisateur

R500
R500 3G Wireless Router User Guide
1

R500
Content
Content............................................................2
Chapter 1 Installation...................................3
1.1 Overview...........................................................................................................................3
1.2 Package list ......................................................................................................................3
1.3 Dimension and installation hole.....................................................................................4
1.4 Indication LED..................................................................................................................4
1.5 Adapter,Antenna and SIMCard......................................................................................5
Chapter 2 Configuration..............................6
2.1 Setup .................................................................................................................................6
2.2 Configuration....................................................................................................................7
2.2.1 IP address setting.................................................................................................7
2.2.2 Configuration page...............................................................................................7
2.3 Management and Configuration....................................................................................8
2.3.1 Network setting.....................................................................................................8
2.3.2 Wireless network setting ...................................................................................17
2.3.3 NAT configuration...............................................................................................21
2.3.4 Save Config.........................................................................................................22
2.3.5 System management.........................................................................................23
2

R500
Chapter 1 Installation
1.1 Overview
R500 should be installed correctly to get good
performance. Generally, the installation should be guided
with the help of our engineer.
※Note
Don’t install Router device with power on.
1.2 Package list
Recommend you reserve the package box, in order to
re-use when transfer. The box is environment protected
material.
※ R500, 1 unit
※ 3G antenna, 2 units (option)
※ WiFi antenna, 1 unit (option)
※ 6V/2A adapter, 1 unit
※ User manual, 1 unit
3

R500
1.3 Dimension and installation hole
1.4 Indication LED
Please refer to following description for status of LED.
LED Status Description
On Normal
Power
Off Power off or problem
Every 1 second
on
Normal
System
Off problem
Every 3 seconds
on
Registered without data
transmission
Every 1 second
on
Registered with data
transmission
NET
Off un-registration
4

R500
Always on device available
Every 3 seconds
on
Data is on transmission
LAN
Off device is not available
Always on WAN port normal
Every 3 seconds
on
data transmission
WAN
Off WAN port disconnection
Always on WiFi on
WIFI
Off WiFi off
1.5 Adapter,Antenna and SIMCard
Adapter in box is 6V/2A. But customer could choose
different one according to the wide range of R500 router, the
input range is from DC5V to DC24V, 2A peak.
R500 router requires 2 units of 3G antenna, standard female
SMA connector, 50 ohm impedance; WiFi 2.3G antenna,
standard male SMA connector, 50 ohm impedance.
R500 uses Push-button simcard holder, supports 1.8V/3V
sim/usim card, ESD protection inside.
5
R500
Chapter 2 Configuration
2.1 Setup
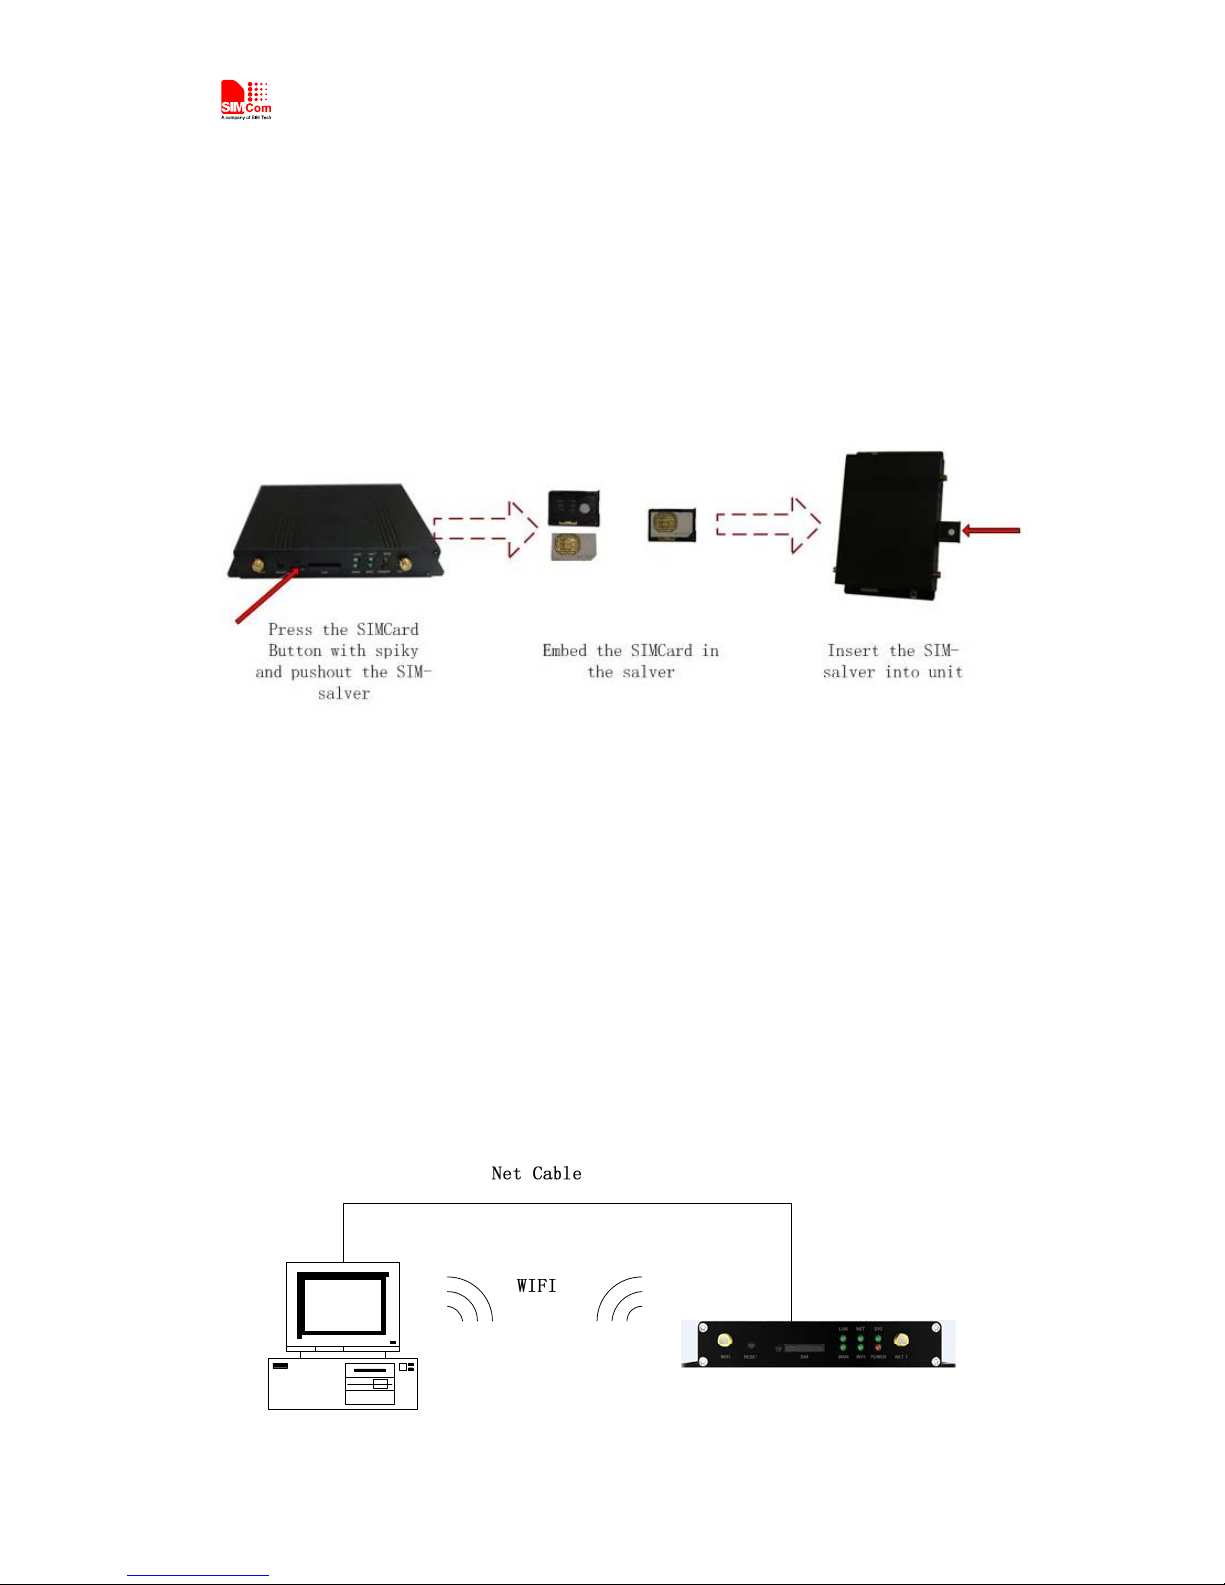
Insert the SIM card into the SIM card slot beneath the R500.
Press carefully until it ‘clicks’ into place.
Figure 1-1 Insert the SIM card
Plug the power adapter into the AC mains and plug the DC
cable firmly into the 5V DC input of the R500. Power light is
working. It will start to work automatically.
Before configuration, R500 should be connected to PC via
Ethernet cable or Wi-Fi network.
1) With Ethernet cable. One end of cable insert to one of
“Local Network” ports (named “LAN” port), another
end connects to PC Ethernet port.
2) With Wi-Fi network. SSID of R500 is “SIMCOM” default
without password.
6
R500
2.2 Configuration
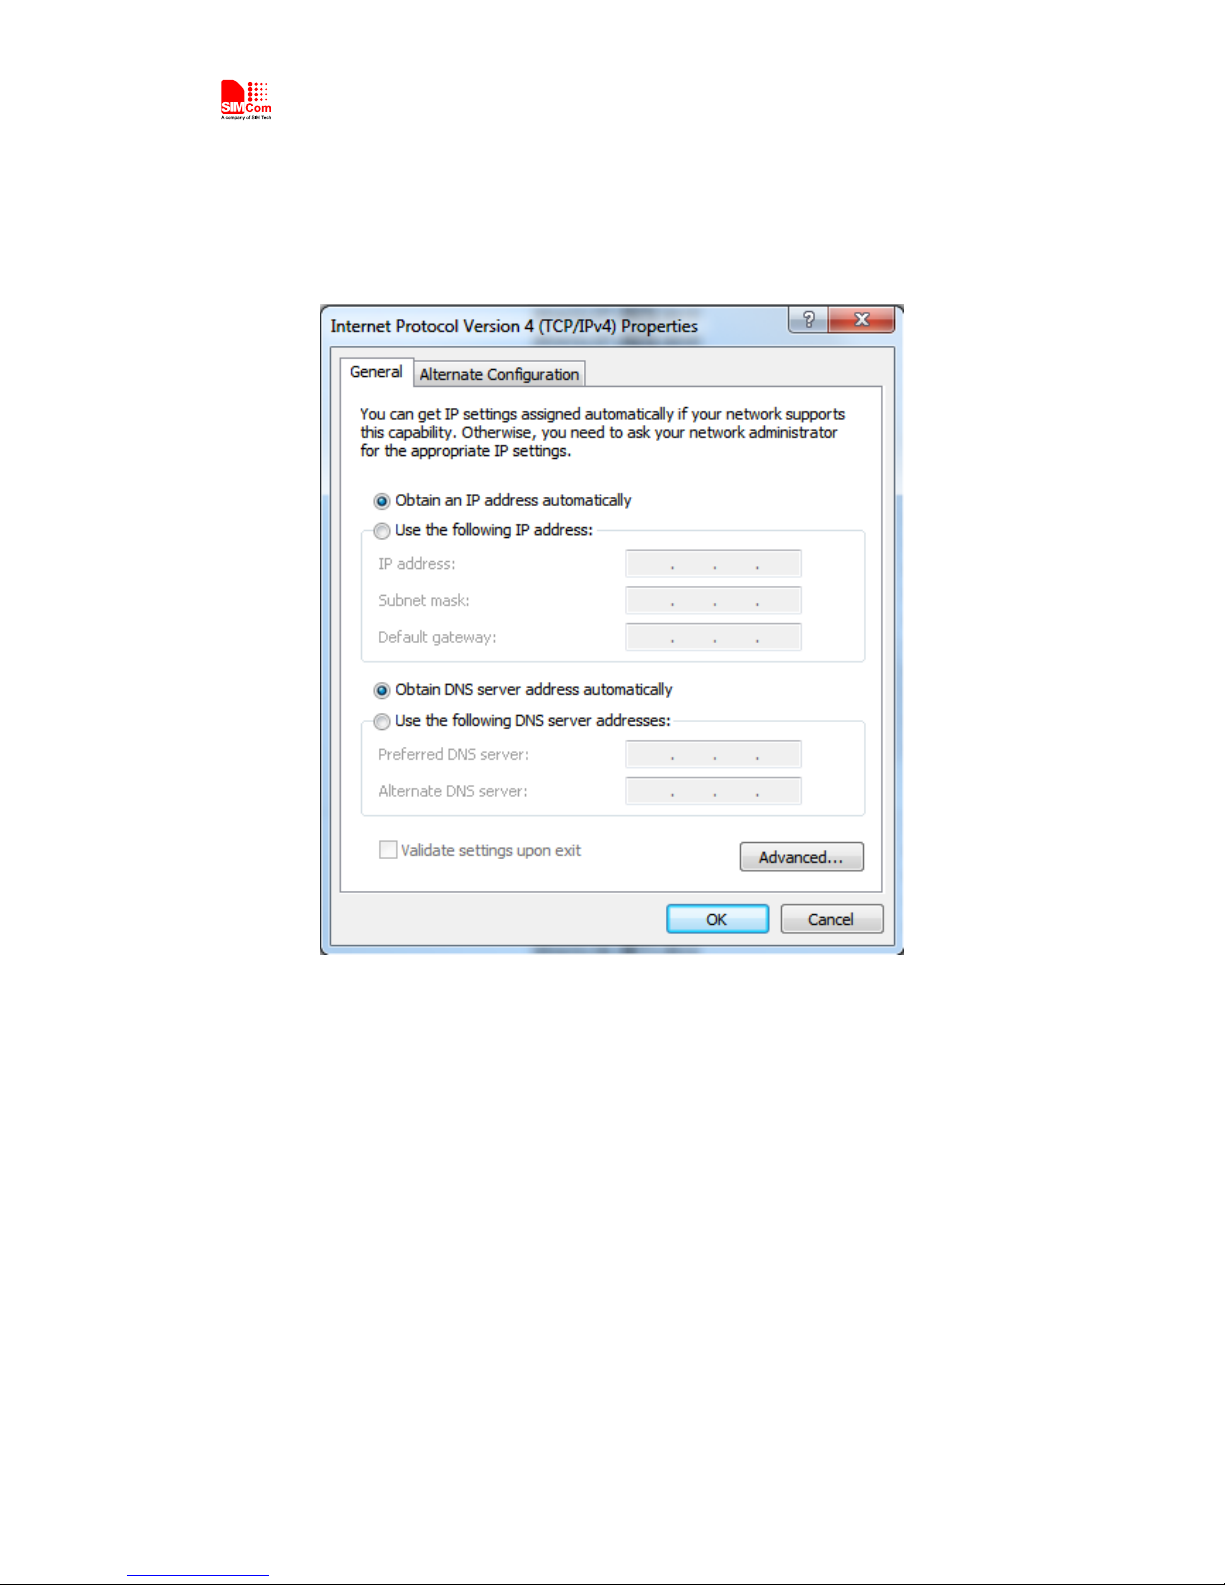
2.2.1 IP address setting
2.2.2 Configuration page
PC could access the configuration pages after connect to
R500 router via IE explorer or other browser tools.
There have 11 pages for setting, antenna,service,VPN,
security, access limit,NAT,QoS, application, management
and Status pages. You can get detail for each page.
Default user name is admin and the default password is
admin
7

R500
2.3 Management and Configuration
2.3.1 Network setting
2.3.1.1 WAN connection type
WAN connection type includes: static IP, dynamic IP, PPPoE,
PPTP, L2TP, 3G types.
Option 1: Static IP
Normally fiber-optic network will use this option. Service
provider will provide IP address, subnet mask, gateway and
DNS info. These parameters should be configured same on
R500
IP Address:user owner ip adress
Subnet Mask:user owner subnet mask
Default Gateway:user owner gateway
Option 2: Dynamic IP
8

R500
Connect Ethernet cable to WAN port, configure as following.
Router uses this dynamic IP as WAN connection type.
Option 3: PPPoE
Usually ADSL service from China telecom and China
Netcom will use this option. PPPoE connection requires
username, password, provider name from ISP for router
configuration.
User Name: the user name for log in internet
Password: the user password for log in internet
9
R500
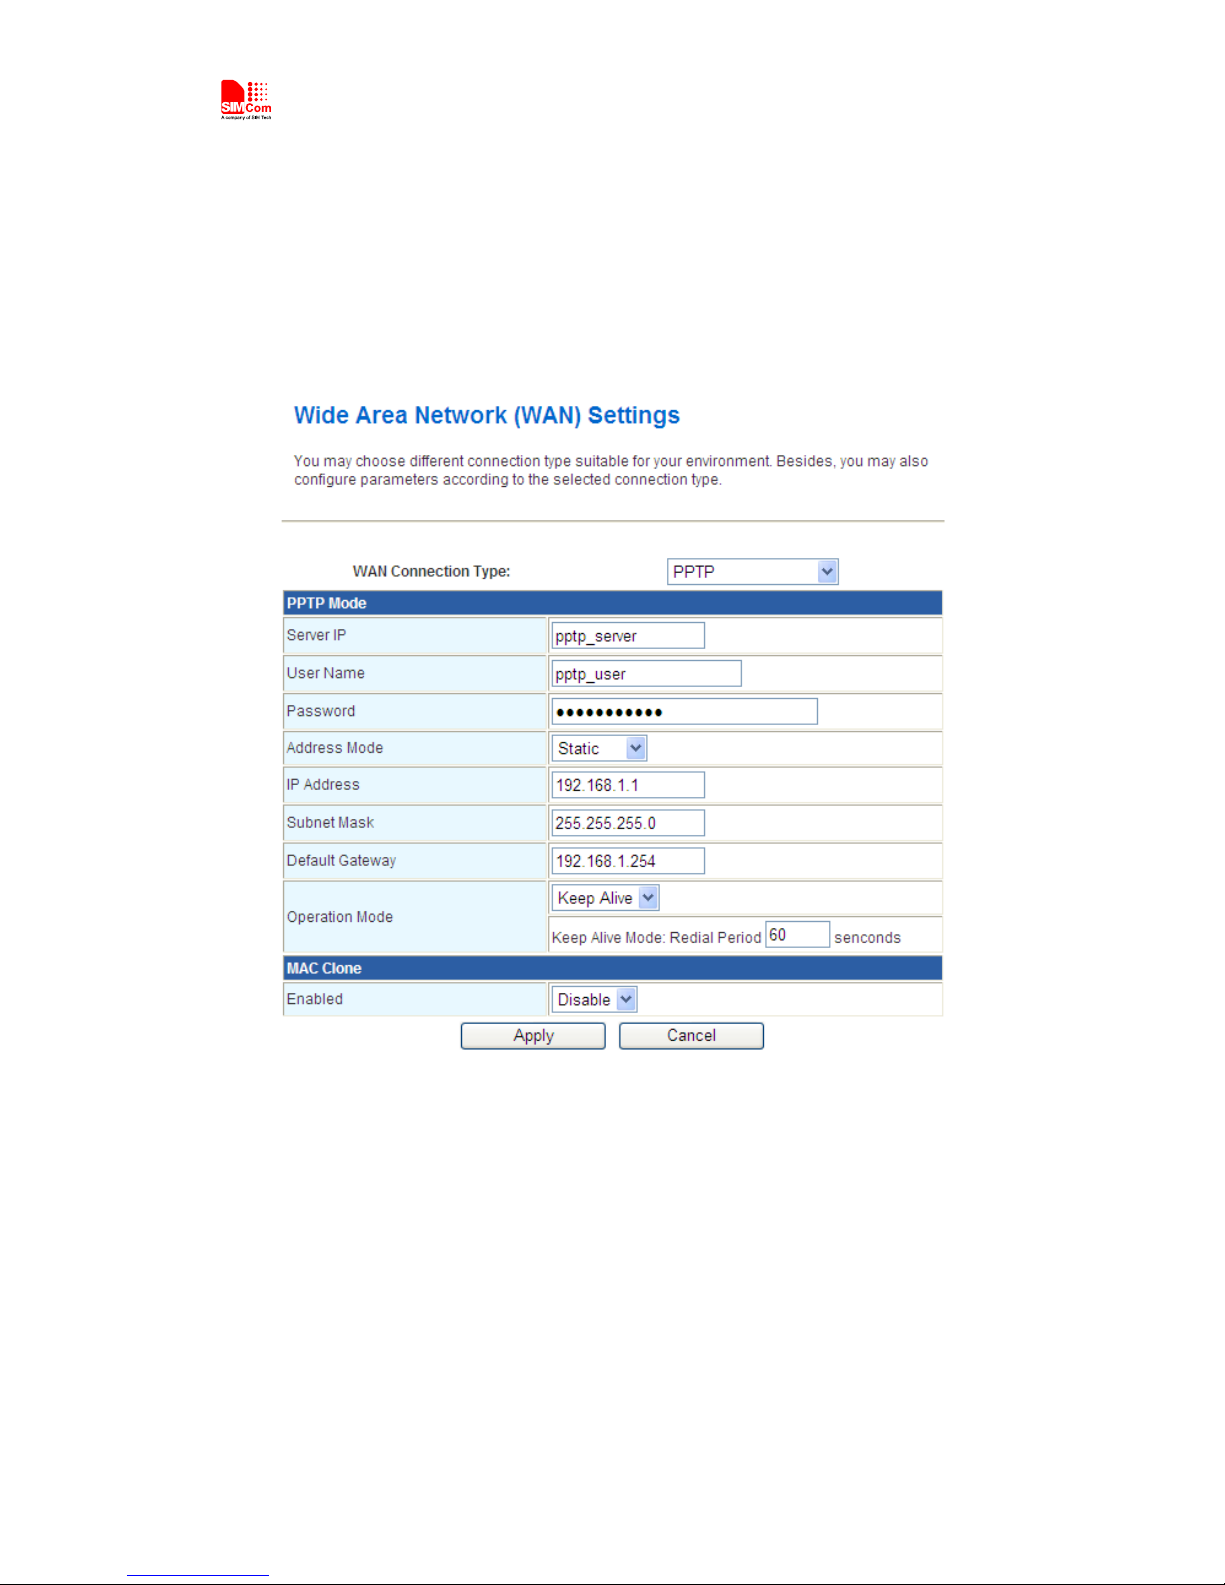
Option 4: PPTP
PPTP, Point to Point Tunneling Protocol, is a new enhanced
encryption protocol developed based on PPP protocol. PPTP
supports VPN, PAP and EAP, etc.
Remote user is allowed to access safely local network via
ISP, internet or other network.
Option 5: L2TP
In computer networking, Layer 2 Tunneling Protocol (L2TP) is
a tunneling protocol used to support virtual private networks
(VPNs) or as part of the delivery of services by ISPs. It does not
provide any encryption or confidentiality by itself. Rather, it
relies on an encryption protocol that it passes within the
tunnel to provide privacy.
10
Table des matières


