
Saab 12 787 151 Manuel utilisateur

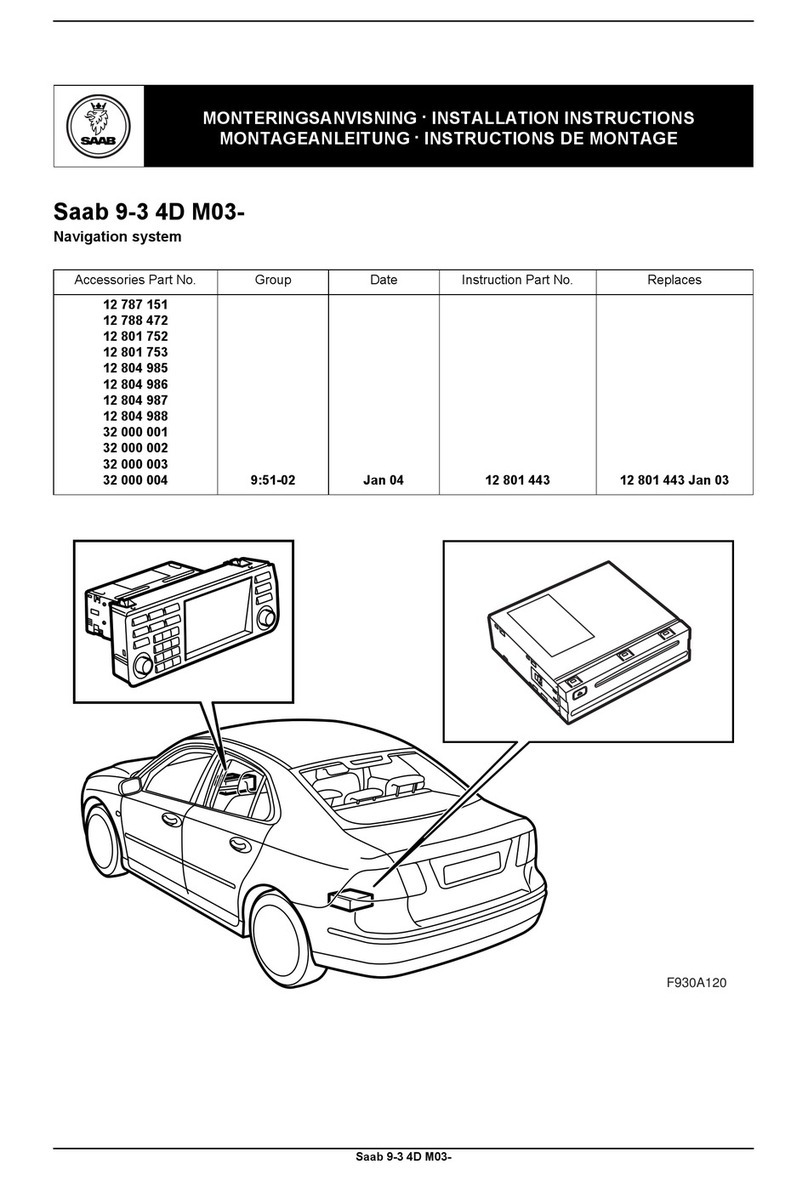
Saab 9-3 M03-
900 Installation instructions
SCdefault
MONTERINGSANVISNING ·INSTALLATION INSTRUCTIONS
MONTAGEANLEITUNG ·INSTRUCTIONS DE MONTAGE
SITdefault
Saab 9-3 M03-
Navigation system
Accessories Part No. Group Date Instruction Part No. Replaces
12 787 151
12 788 472
12 801 752
12 801 753 9:51-02 Jan 03 12 801 443
F930A120

2 12 801 443
Saab 9-3 M03-
1 DVD player
2 Control panel
3 Fibre optic cable
(x 2 in kit 12 787 151 and 12 788 472)
(x 1 in kit 12 801 752 and 12 801 753)
4 Wiring harness
5 Anti-rattle tape
(only in kit 12 787 151 and 12 788 472)
6 Optical cable connector, 2-pin
(x 2 in kit 12 787 151 and 12 788 472)
(x 1 in kit 12 801 752 and 12 801 753)
7 Optical cable connector, 2-pin
(x 3 in kit 12 787 151 and 12 788 472)
(x 1 in kit 12 801 752 and 12 801 753)
8 Wiring harness
(only in kit 12 787 151 and 12 788 472)
9 Telematics unit
(only in kit 12 787 151 and 12 788 472)
10 Bolt (x4)
(only in kit 12 787 151 and 12 788 472)
11 Cable tie
In addition, the following items are required
(ordered separately)
·Bracket for baggage compartment equipment
(certain cars), comprising:
–Bracket
– Screw (x3)
–Nut
– Clip nut
– Side trim
·Optional antenna kit (certain cars) comprises:
– Antenna GPS/GSM
– Antenna cable GPS/GSM
– Cable tie (x2)
·Microphone (certain cars)
F930A121
1
11
7
10
9
2
6
43
85

12 801 443 3
Saab 9-3 M03-
Bus Communication
Many parts of the car's electrical system communi-
cate using a bus. There are three types of bus com-
munication: P-bus (Powertrain Bus), I-bus (Instru-
ment Bus) and O-bus (Optical bus). The audio system
communicates via the O-bus together with the naviga-
tion system, the telephone system and others.
The O-bus is optical and is a ring bus. Two fibre opti-
cal cables are connected to each control module on
the bus, one fibre optical cable for receiving and one
for sending. Messages received are converted by
each control module from a fibre optic signal to elec-
trical and then converted back to optical for sending.
The O-bus data transfer rate is 25 Mbit/s.
AMP1 is an amplifier below the left-hand front seat
AMP2 is an amplifier by the rear fuse box
CDC is a CD changer by the rear fuse box
DVD is a DVD player by the rear fuse box
When fitting new equipment to be connected to the
O-bus it is important that it is connected into the cor-
rect side of the existing equipment.
Important
It is very important that everything connected to the
O-bus is connected in a specific order, see illustra-
tion, and that the ring is closed the whole time.
Connection in any other way than that described in
these fitting instructions may result in several of the
car's systems failing to work.
F930A100
1
2
CDC
1
2
DVD
1
2
AMP2
1
2
1
2
AMP2
CDC
1
2
1
2
AMP2
DVD
1
2
1
2
DVD
CDC
1
2
1
2
1
2
AMP2
DVD
CDC
2 1
Important
Handle the fibre-optic cables with care or the
signal may be distorted.
·It is very important that the two leads in the
connector are not confused with one another.
·Do not splice the cables.
·Do not bend the cable in a radius smaller than
25 mm.
·Do not expose the cable to temperatures
exceeding 85 °C.
·Keep the cable ends free from dirt and grime.
·Do not expose the cable to impact as this may
cause the transparent plastic to whiten, thereby
reducing the intensity of the light and causing
possible communication interruptions.
·The cable should not lie against any sharp edg-
es as this may cause increased signal reduc-
tion.

4 12 801 443
Saab 9-3 M03-
1 Connect the diagnostic tool and disconnect the
infotainment system control panel from the car.
Go into the menu “Al” and choose the control
module under “Add/Remove”. Then choose
“Remove” and follow the instructions. The igni-
tion key must be in the ON position. TIS 2000
may need to be used. When the control module
is separated from the car the ignition key must be
turned to the OFF position. Following which the
control module can be removed.
2 Open the hatchback.
3 Remove the battery's minus cable and take
the key from the ignition.
Important
In cars where the left-hand front seat is electrically
adjustable and there is no bracket at the rear fuse
box, the left-hand front seat must be positioned in
its most forward position and with the backrest fold-
ed forwards.
Important
The control module is sensitive to electrostatic dis-
charges. To avoid damaging the internal compo-
nents in the control module, a replacement must be
made with care in the following way:
·Never touch the pins on a control module with
hands or clothes.
·Ground yourself by touching the car's body/
engine. Remove the connector on the car's con-
trol module.
·Ground yourself by touching the car's body/
engine. Connect the connector on the car's con-
trol module.
·Deposit the replaced control module in the
returns packaging without touching its pin.
·Keep the new control module in its packaging
as long as possible.

12 801 443 5
Saab 9-3 M03-
4 Fold the luggage compartment floor forwards.
5 In the luggage compartment, remove the hatch in
the left-hand side trim and lower the hatch on the
right-hand side.
6 Remove the clips for the left-hand side trim and
fold the trim away. Do the same on the right-hand
side.
7 Lower the rear seat backrest.
8 Detach the clips holding the parcel shelf trim.
9 Pull the parcel shelf trim straight out.
10 Check if there is an antenna cable connection at
the hole in the centre of the parcel shelf and if
there is an electronic unit fitted in the centre of the
parcel shelf.
No antenna cable connection: Continue with
step 11.
Antenna cable connection present but no
telematics unit: Continue with step 29.
Antenna cable connection and telematics
unit present: Continue with step 11.
11 Remove the cover washer from the C-pillar trim.
Use removing tool 82 93 474.
12 Undo the screw from the C-pillar trim. Do not
unscrew it completely as an expander is fitted to
the screw which can be lost.
13 Remove the C-pillar trim by carefully pulling the
trim forwards, together with the screw.
9
13
13
12 11 8
F930A122
5
6 6

6 12 801 443
Saab 9-3 M03-
14 Remove the high-level brake light cover by care-
fully drawing the cover downwards and back-
wards.
15 Remove the clip at the rear edge of the
headlining by turning it 90°.
16 Remove the end pieces on the rear courtesy han-
dle. Use 82 93 474 Removal tool and prise out-
wards.
17 Draw the courtesy handle straight out.
18 Undo the ceiling trim from the weatherstrip by
the rear doors.
19 Carefully lower the ceiling at the rear edge so
that the antenna can be reached.
F930A123
16,17
15
14 19

12 801 443 7
Saab 9-3 M03-
20 Remove any antenna cable from the roof
antenna.
21 Remove the antenna.
22 Take the antenna kit, guide the antenna cables
down through the hole in the roof and fit the
antenna.
23 Tighten the antenna nut.
Tightening torque 2 Nm (1.5 lbf ft)
24 Cars without antenna cable: Connect the
antenna cable from the kit and fit the clips on the
cable in the holes in the rear edge of the roof.
Cars with antenna cable continuing forwards
in the car: First connect the existing antenna
cable and then the kit's antenna cable to the
antenna. Guide the antenna cable alongside the
existing antenna cable towards the right-hand
C-pillar. Affix both antenna cable and remaining
connectors with cable ties.
Cars with antenna cable continuing to the
parcel shelf: Connect the kit's antenna cable to
the antenna. Guide the antenna cable alongside
the existing antenna cable towards the right-hand
C-pillar. Affix both antenna cable and remaining
connectors with cable ties.
25 Guide down the antenna cable alongside the
C-pillar to the centre of the parcel shelf. The cable
must be secured in the existing cable clamps.
Cars with telematics unit in centre of parcel
shelf: Connect the antenna cable to the telemat-
ics unit.
F930A124
22
24
21,23 20

8 12 801 443
Saab 9-3 M03-
26 Fit the ceiling trim above the rear doors'
weatherstrip.
27 Press and fasten the rear courtesy handle
securely into the end pieces.
28 Fit the high-level brake light cover and press
and fasten the headlining clip.
F930A125
27
28
27
26
28

12 801 443 9
Saab 9-3 M03-
29 Cars without telematics unit in the centre of
the parcel shelf: Remove the wiring harness
from the parcel shelf and remove the connection
in the rear fuse box.
30 Cars without telematics unit in the centre of
the parcel shelf: Position the new wiring har-
ness above the centre of the parcel shelf and
connect it. If the car has no bass loudspeaker
then the connectors must be fitted on the under-
side of the loudspeaker cover.
31 Cars without telematics unit in the centre of
the parcel shelf: Guide down the fibre optic
cable on the right-hand side of the car.
32 Cars without telematics unit in the centre of
the parcel shelf: Position the telematics unit on
the parcel shelf and connect the cabling and the
antenna cable (blue connector).
33 Cars without telematics unit in the centre of
the parcel shelf: Fit the telematics unit and
screw it securely in the parcel shelf.
Tightening torque 8 Nm (6 lbf ft)
34 Cars without telematics unit in the centre of
the parcel shelf: Secure the wiring harness to
the cable clamps on the parcel shelf.
Important
Handle the fibre-optic cables with care or the
signal may be distorted.
·Do not bend the cable in a radius smaller than
25 mm.
·Do not expose the cable to impact as this may
cause the transparent plastic to whiten, thereby
reducing the intensity of the light and causing
possible communication interruptions.
·The cable should not lie against any sharp edg-
es as this may cause increased signal reduc-
tion.
F930A126
30
32
31
3034
3333
34 34 34

10 12 801 443
Saab 9-3 M03-
35 Position the C-pillar trim. Make sure that the
screw with expander is in the correct position.
36 Tighten the screw.
Tightening torque 2 Nm (1.5 lbf ft)
37 Fit the cover washer to the C-pillar trim.
38 Slide in the parcel shelf trim. Make sure the lugs
fully engage the mountings in the parcel shelf
plate.
39 Fit the clips to the parcel shelf trim.
40 Raise the backrest. Check that the backrest
is locked.
WARNING
Be careful that the inflatable curtain is not dam-
aged. Damage can result in the inflatable curtain
not providing the intended protection to the occu-
pants in the event of a collision.
F930A127
39
36,37 35
35
38
38 38
Autres manuels pour 12 787 151
1
Ce manuel convient aux modèles suivants
3
Table des matières
Autres manuels Saab Système de navigation automobile

Saab
Saab 12 832 506 Manuel utilisateur

Saab
Saab R4 Manuel utilisateur

Saab
Saab 12 832 506 Manuel utilisateur

Saab
Saab 32 025 681 Manuel utilisateur

Saab
Saab 400 132 239 Manuel utilisateur

Saab
Saab R5 SUPREME MkII Manuel utilisateur

Saab
Saab R5 SUPREME AIS Manuel utilisateur

Saab
Saab R5 SUPREME AIS Manuel utilisateur
Saab
Saab 12 787 151 Manuel utilisateur


