
RSR CL02 Manuel utilisateur

User Manual of CL02
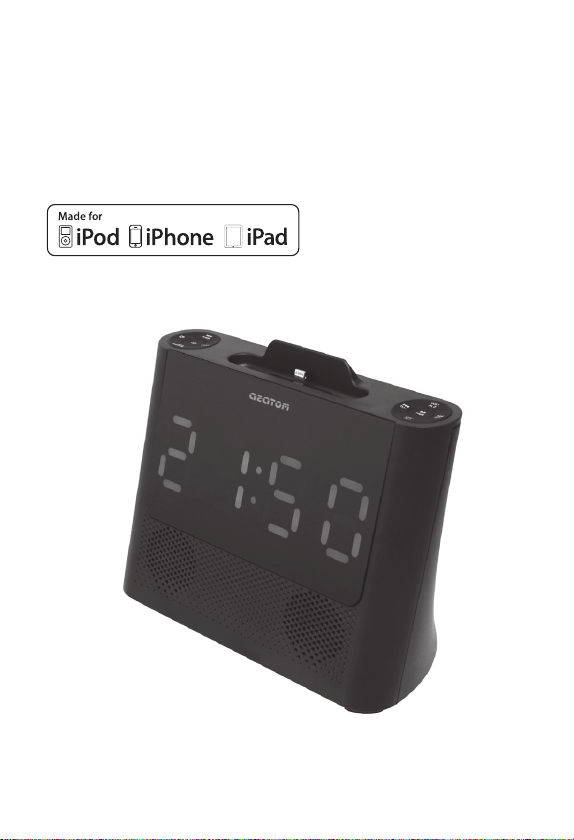
CL02
USER MANUAL
Clock Radio

Contents
Important Safety Instructions..................................................................................2
Safety ............................................................................................................................................................................... 2
Identifying the Parts..................................................................................................5
Connections ...............................................................................................................6
Connect to an external device................................................................................................................................ 6
Set up the FM aerial.................................................................................................................................................... 6
Connect Power............................................................................................................................................................. 6
For First-time use BACKUP Battery:....................................................................................................................... 6
To Replace the BACKUP Battery: ............................................................................................................................ 6
General Operation.....................................................................................................7
Turn ON/OFF ................................................................................................................................................................ 7
Select Modes................................................................................................................................................................. 7
Adjust the Brightness................................................................................................................................................. 7
Set the NAP Timer........................................................................................................................................................ 7
Set the Clock..................................................................................................................................................................7
Set the alarm timer ..................................................................................................................................................... 7
Set the sleep timer ...................................................................................................................................................... 8
LINE IN Operation...................................................................................................... 8
iPod/iPhone Operation .............................................................................................8
Listen to the iPod/iPhone ........................................................................................................................................ 8
Charge the iPod/iPhone............................................................................................................................................ 8
Bluetooth Operation .................................................................................................9
Pair Bluetooth-enabled Devices ............................................................................................................................9
Listen to Music from Bluetooth Device ............................................................................................................... 9
Listening to the FM Radio ......................................................................................10
Auto Scan and Save Preset Station .....................................................................................................................10
Tuning in a Station ....................................................................................................................................................10
Presetting Stations Manually ................................................................................................................................10
Troubleshooting ......................................................................................................10
Specications...........................................................................................................11

2
Important Safety Instructions
This lightning ash with arrowhead
symbol within an equilateral
triangle is intended to alert the user
to the presence of non-insulated
“dangerous voltage” within the
product’s enclosure that may be of
sucient magnitude to constitute a
risk of electric shock.
The exclamation point within an equilateral triangle is intended to alert the user to
the presence of important operating and maintenance instructions in the literature
accompanying the appliance.
Safety
1 Read these instructions – All the safety and operating instructions should be read before this
product is operated.
2 Keep these instructions – The safety and operating instructions should be retained for future
reference.
3 Heed all warnings – All warnings on the appliance and in the operating instructions should be
adhered to.
4 Follow all instructions – All operating and use instructions should be followed.
5 Do not use this apparatus near water – The appliance should not be used near water or
moisture – for example, in a wet basement or near a swimming pool, and the like.
6 Clean only with dry cloth.
7 Do not block any ventilation openings. Install in accordance with the manufacturer’s
instructions.
8 Do not install near any heat sources such as radiators, heat registers, stoves, or other apparatus
(including ampliers) that produce heat.
9 Do not defeat the safety purpose of the polarized or grounding plug. A polarized plug has two
blades with one wider than the other. A grounding plug has two blades and a third grounding
prong. The wide blade or the third prong is provided for your safety. If the provided plug does
not t into your outlet, consult an electrician for replacement of the obsolete outlet.
10 Protect the power cord from being walked on or pinched particularly at the plugs, convenience
receptacles, and at the point where they exit from the apparatus.
11 Only use attachments/accessories specied by the manufacturer.
12 Use only with the cart, stand, tripod, bracket, or table specied by the manufacturer, or
sold with the apparatus. When a cart or rack is used, use caution when moving the cart/
apparatus combination to avoid injury from tip-over.
13 Unplug the apparatus during lightning storms or when unused for long periods of time.
14 Refer all servicing to qualied personnel. Servicing is required when the apparatus has been
damaged in any way, such as power supply cord or plug is damaged, liquid has been spilled or
objects have fallen into the apparatus has been exposed to rain or moisture, does not operate
normally, or has been dropped.

3
Caution:
- Use of controls or adjustments or performance of procedures other than those described
herein, may result in hazardous radiation exposure or other unsafe operation.
- To reduce the risk of re or electric shock, do not expose this apparatus to rain or moisture. The
apparatus must not be exposed to dripping or splashing and objects lled with liquids, such as
vases, must not be placed on apparatus.
- The external adapter is used as the disconnect device, the disconnect device shall remain
readily operable.
- Adapter model: K15S050200U
- Adapter company: Dongguan Guanjin Electronics Technology Co., Ltd
Warning
• Thebattery(batteryorbatteriesorbatterypack)mustnotbeexposedtoexcessiveheatsuchas
sunshine, re or the like.
• Beforeoperatingthissystem,checkthevoltageofthissystemtoseeifitisidenticaltothe
voltage of your local power supply.
• Theventilationshouldnotbeimpededbycoveringtheventilationopeningswithitemssuch
as newspaper, table-cloths, curtains etc. Make sure there is at least 20 cm of space above and at
least 5cm of space on each side of the unit.
• Donotplacethisunitclosetostrongmagneticelds.
• Donotplacetheunitontheamplierorreceiver.
• Donotplacethisunitclosetodampareasasthemoisturewillaectthelifeofthelaserhead.
• Shouldanysolidobjectorliquidfallintothesystem,unplugthesystemandhaveitcheckedby
qualied personnel before operating it any further.
• Donotattempttocleantheunitwithchemicalsolventsasthismightdamagethenish.Usea
clean, dry or slightly damp cloth.
• Whenremovingthepowerplugfromthewalloutlet,alwayspulldirectlyontheplug,never
yank on the cord.
• Nonakedamesources,suchaslightedcandles,shouldbeplacedontheapparatus.
• Changesormodificationstothisunitnotexpresslyapprovedbythepartyresponsiblefor
compliance will void the user’s authority to operate the equipment.
• Themarkinglabelispastedonthebottomoftheequipment.
DO NOT INGEST BATTERY, CHEMICAL BURN HAZARD
The unit supplied with this product contains a coin/button cell battery. If the coin/button cell
battery is swallowed, it can cause sever internal burns in just 2 hours and lead to death. Keep
new and used batteries away from children. If the battery compartment does not close securely,
stop using the product and keep it away from children. If you think batteries might have been
swallowed or placed inside any part of the body, seek immediate medical attention.
This device complies with Industry Canada licence-exempt RSS standard(s). Operation is subject
to the following two conditions: (1) this device may not cause interference, and (2) this device
must accept any interference, including interference that may cause undesired operation of the
device.

4
FCC STATEMENT
This device complies with Part 15 of the FCC Rules. Operation is subject to the following two
conditions:
(1) this device may not cause harmful interference, and
(2) this device must accept any interference received, including interference that may cause
undesired operation.
- “Warning: Changes or modications to this unit not expressly approved by the party responsible
for compliance could void the user’s authority to operate the equipment.”
- “NOTE: This equipment has been tested and found to comply with the limits for a Class B digital
device, pursuant to Part 15 of the FCC Rules. These limits are designed to provide reasonable
protection against harmful interference in a residential installation. This equipment generates,
uses and can radiate radio frequency energy and, if not installed and used in accordance with
the instructions, may cause harmful interference to radio communications. However, there is
no guarantee that interference will not occur in a particular installation. If this equipment does
cause harmful interference to radio or television reception, which can be determined by turning
theequipmentoandon,theuserisencouragedtotrytocorrecttheinterferencebyoneor
more of the following measures:
- Reorient or relocate the receiving antenna.
- Increase the separation between the equipment and receiver.
- Connecttheequipmentintoanoutletonacircuitdierentfromthattowhichthereceiveris
connected.
- Consult the dealer or an experienced radio/TV technician for help.”
FCC ID: Z8M-CR02

5
Identifying the Parts
Front View
1 Buttons
•
Turnonorturnotheunit.
•
Select a source.
• CLOCK
View the current radio frequency.
Press and hold to set the time.
View the time.
• MEM / SLEEP
Press and hold to preset stations manually.
Set the sleep timer.
• NAP/DIMMER
Set the NAP timer.
In Standby mode, adjust brightness level.
2 DOCK
iPod/iPhone Docking
3 Buttons
• BF/PAIR
Play/pause/resume playback.
Press and hold to preset stations automaticly.
Press and hold to Activate the pairing function in Bluetooth mode and disconnect the existing
paired Bluetooth device.
• VOL/AL1, VOL+/AL2
Increases/decrease the volume.
Press and hold the bottons to set the alarm 1/2.
• H/TU, TU+/G
In the dock mode, skip to previous/next track.
In the FM mode, search radio stations manually.
In the clock setting mode, press the buttons to set the clock.
4 Speakers
5 Display
Show current status.
Rear View
1 DC IN 5V Socket
Connect to power cord.
2 LINE IN Socket
Connect to an external audio device.
3 FM Aerial

6
Connections
Phone/Media player
Connect to an external device
- Use a 3.5mm to 3.5mm audio cable
(included) to connect the external audio
device headphone socket to the LINE IN
socket on the unit.
Set up the FM aerial
- Unwind the coiled FM aerial at the back of the docking station.
IMPORTANT: You may need to adjust the position of the FM aerial when
tuning the radio to receive the strongest signal.
Never leave the aerial where it can be pulled by young children.
Connect Power
1. Slot the jack plug on the power adaptor
into the power point in the underside of
the base as shown in the diagram above.
2. Slot the power adaptor into a wall socket
and turn the power on, if required.
Note:
- You need to connect the DC power to turn
on the unit , battery only for back up.
- If the unit does not display or no response,
maybe the battery is low power, that need
to disconnect the DC power and replace a new battery, then reconnect DC power and reset the
clock.
For First-time use BACKUP Battery:
Remove the protective tab to activate the backup
battery.
To Replace the BACKUP Battery:
(1) Press down the ip on the left.
(2) Pull out the battery tray and remove the old
battery.
(3) Place a new CR2032 battery into the battery
tray with correct polarity (+/-) as indicated.
(4) Insert the tray back into the slot.

7
General Operation
Turn ON/OFF
When you rst connect the unit to the mains socket, the unit will be in STANDBY mode.
• Pressthe button to turn on.
• Pressthe buttonagaintoturno.
- Disconnectthemainsplugfromthemainssocketifyouwanttoswitchtheunitocompletely.
- If there is no signal under the DOCK/LINE IN /Bluetooth modes, the unit will automatically
switchowithin15minutes.
Select Modes
Press the button repeatedly to select LINE IN or FM or Bluetooth or DOCK mode.
Adjust the Brightness
In standby mode, press the NAP/DIMMER button to select brightness level.
Set the NAP Timer
- Press the NAP/DIMMER button repeatedly to select time (in minutes):
90 60 30 15 00
- The system is now set to buzzer after the number of minutes you have set.
Set the Clock
In standby mode, The built-in clock shows the correct time in the display.
1 In standby mode, press and hold the CLOCK button to activate the clock setting mode, time
indicator will blink.
2 Set the minute with the TU+/Gbutton.
3 Set the hour with the H/TU- button.
4 Press the CLOCK button to conrm, the built-in clock starts operating and the seconds start
counting from 0.
Tip:
During Time Setup, press the BF/PAIR button to select 12/24 hour format.
• Time Display
- During play, press the CLOCK button to show the current time on the display for a few seconds.
Set the alarm timer
You can settwoalarmswhichwakeupatdierenttime.Howevertheclockmustbesetcorrectly
for the timer function to work.
1 In standby mode, press and hold the AL1 or AL2 button for several seconds, time indicator will
blink.
2 Set the minute with the TU+/Gbutton and set the hour with the H/TU- button.
3 Press the VOL-/AL1 or VOL+/AL2, then press H/Gbuttons to select an alarm sound source:
buzz, FM, iPod.
4 Press the VOL-/AL1 or VOL+/AL2 button, volume indicator will blink. Set the alarm volume with
the H/Gbuttons.
5 Press the VOL-/AL1 or VOL+/AL2 button to conrm.

8
• Activate and Deactivate the Alarm Timer
Press VOL-/AL1 or VOL+/AL2 repeatedly to activate or deactivate the timer.
• Stop Alarm Ring
When the alarm rings, press the button. The alarm stops but the alarm settings remain.
Note:
- For the SNOOZE function, when the alarm is activated, you could press any key except the
ALARM or ON/OFF key to repeat the alarm.
Set the sleep timer
This unit can switch to standby automatically after a set period of time.
1 Press MEM/SLEEP button repeatedly to select a set period of time (in minutes):
90 60 30 15 close up
- When the sleep timer is deactivated, "Zz" disappears on the display.
LINE IN Operation
1 Ensure that the unit is connected to the TV or audio device.
2 Press the button to switch LINE IN mode.
3 Operate your audio device directly for playback features.
4 Press the VOL +/– button to adjust the volume to your desired level.
iPod/iPhone Operation
You can enjoy audio from iPod/iPhone through this unit.
Listen to the iPod/iPhone
Note: This unit does not support apple 30-pin
model.
1. Press the button to switch DOCK mode.
2. Place an iPod/iPhone into the dock.
3. Start to play the connected iPod/iPhone.
- To pause/resume play, press the BF button.
- To skip to a track, press the H/TU- or TU+/G
buttons.
- To search during play, press and hold
H/TU- or TU+/Gbuttons, then release to
resume normal play.
Charge the iPod/iPhone
The docked iPod/iPhone begins to charge while the
unit is connected to AC power.
Table des matières


