
Rausch minCord Manuel utilisateur

2014
minCord Operation
Manual
MINCORD MINIATURE PUSH SYSTEM
RAUSCHUSA

minCam Manual
4
IMPORTANT INFORMATION
Before you use the product, please read and retain the instruction. We do not
assume any liability arising out of improper operation.
1.1 GENERAL INFORMATION
minCord (mini camera system, 2nd generation)
- Professional camera system
- 13mm (0.51”) camera head
Location transmitter (512Hz or 33 kHz) optional
- Media Recorder and Player
- Integrated battery
- 3.5” Extra-wide view angle TFT
Main Features of the recording unit
•Support Mini USB 1.1
•Recorded data can be transferred into PC to play.
•It can play PC media files on TV through DVR.
•Support external memory card –SD-card (Up to 2G)
WARNING
Only 5V adapter is acceptable, please do not connect any other adapter
or it may cause of serious damage.

minCam Manual
5
AV IN
DC IN
AV OUT
1.2 PRODUCT OVERVIEW
SD Port
AV Out
AV In
DC In
USB Port
Previous
Next
OK / Menu
Esc.
LED Control
Recording
Photo
Power

minCam Manual
6
1.3 INTERFACEDESCRIPTION
This device contents three modes:
Preview mode
The DVR (Digital Video Recorder) will be
in preview mode when power is on.
If you switch on the system, the DVR
screen will display the real-time image.
You may start the video recording or snap
photos under this mode.
Review mode
To review recorded files.
Menu mode
DVR settings and file management.
Note: When DVR is in the function mode, it will automatically go back to
preview mode if there is no action taken in 10 seconds.

minCam Manual
7
1.4 BUTTONUSAGE
Function
Key
Preview Mode
Review Mode
Menu Mode
UP
Enter review mode
to review saved
files.
Go to last photo or
video file.
Move cursor up to
select a function.
DOWN
Enter review mode
to review saved
files.
Go to next photo or
video files.
Move cursor down to
select a function.
OK/MENU
Enter menu mode.
Delete photo or video
files.
Enter the selected
function.
ESC
Goback to preview
mode.
Go back to preview
mode.
Go back to preview
mode.
REC
Start and stop
videorecording.
Go back to preview
mode.
Go back to preview
mode.
SNAP
Takephotos.
1.
Whilereviewing
photos, it functions as
“Next.”
2.
While playing video,
it functions as
“Start/Stop playing.
Showsoftware
information(for DVR
maintenanceuse only)

minCam Manual
8
1.5 FUNCTION SELECTION
Menu
Press MENU to enter function selection. Press UP or DOWN to move cursor to
make selection and press OK to enter the selected function.
There are six functions under menu, a brief introduction for each function is as
follow:
DELETE ALL
VIDEO
OUTPUT
DATE/TIME
SETUP
LANGUAGE
VIDEOFORMAT
AUTO POWER OFF
DELETE ALL
When enter the delete function, the
screen will show up a “yes” “no” box,
press UP or DOWN to make yes or no
selection, press OK to delete file or quit.
VIDEO OUTPUT
While the DVR is connected with TV (please use AV out cable), the video
image may be switched between TV and DVR screen under this function.
DATE/TIME SETUP
To setup date and time, please
press UP or DOWN to move
between year / month / date,
and hour / min / sec. Press
REC to adjust the number.
Select the Display ON/OFF for
time to or not to show on the
snapped pictures.
minCam Manual
9
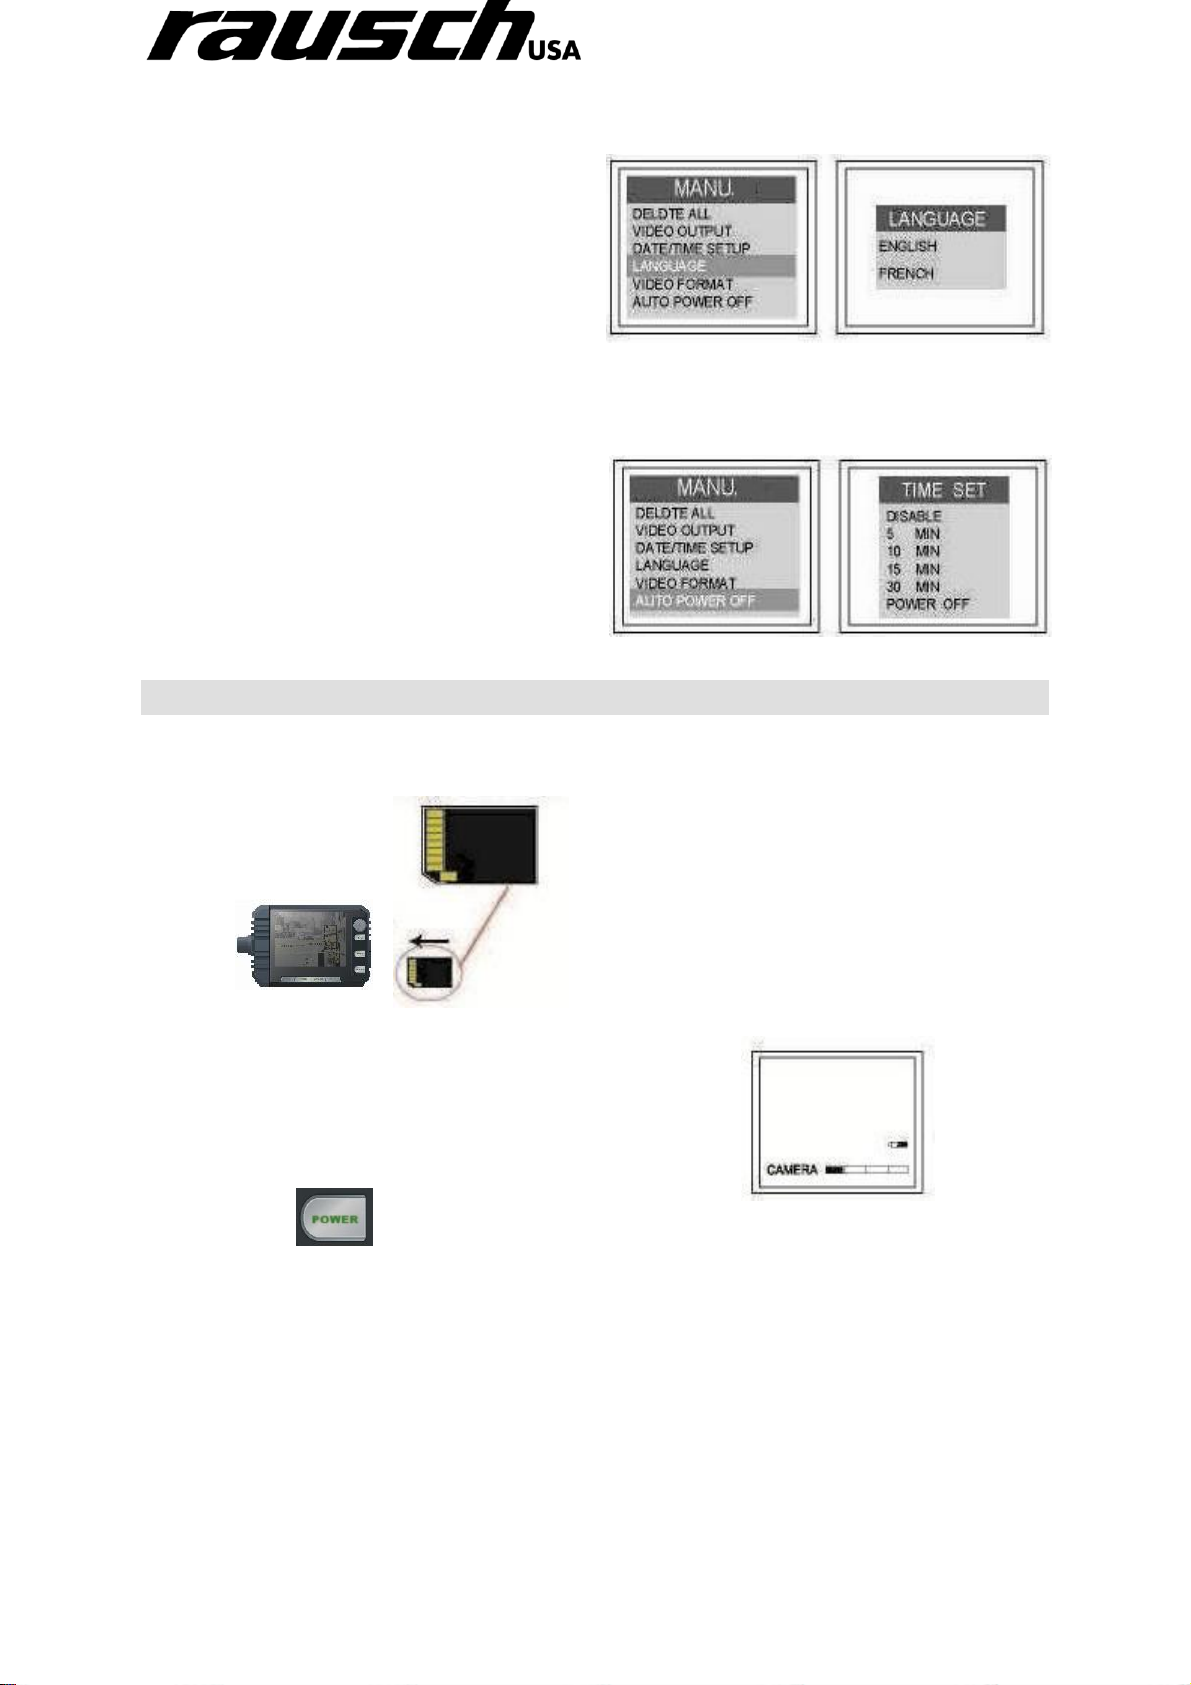
LANGUAGE
Select language for DVR
operation. English,
German, French, Italian,
Spanish.
VIDEO FORMAT
For TV output format setting, NTSC/PAL.
AUTO POWER OFF
To setup a time for auto
shut down for power saving
1.6 OPERATING DVR
BASIC OPERATION
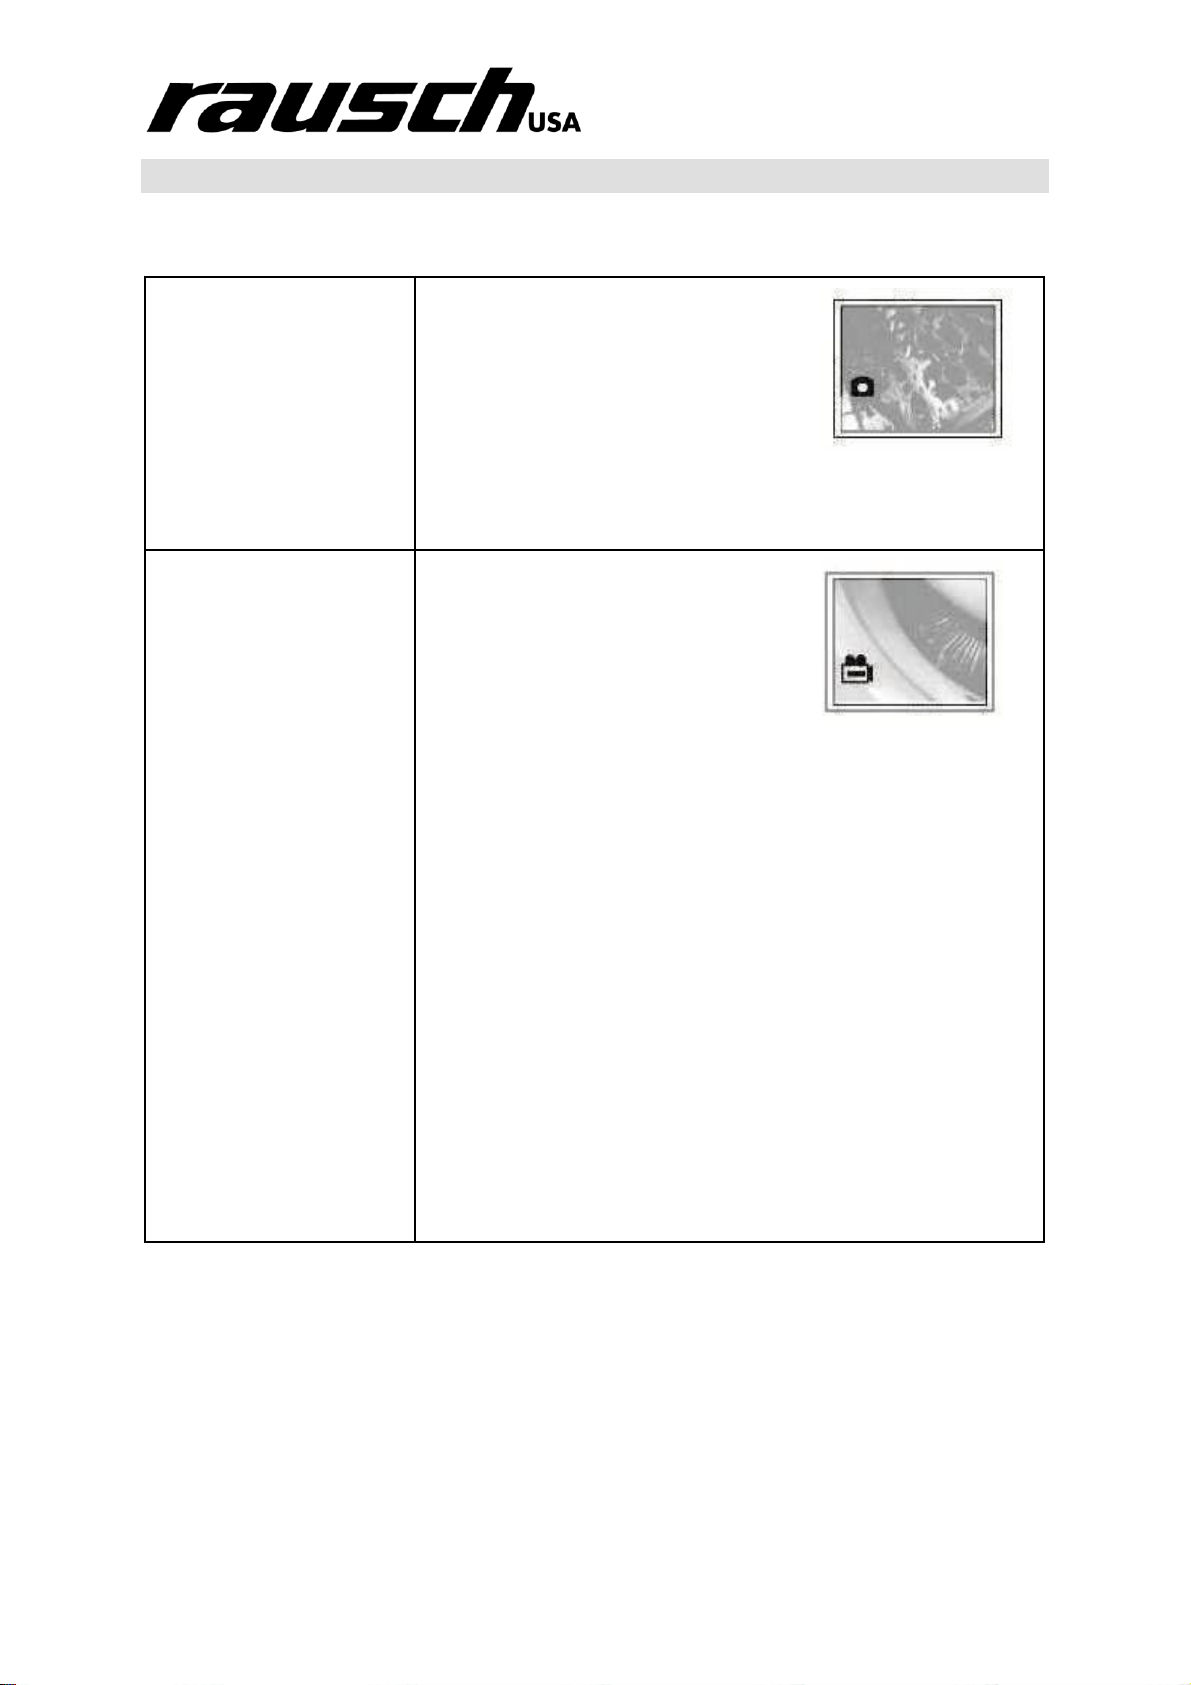
1. Insert SD-card into SD-port, if not already inside
2. Press (power button) 5 seconds to turn on/off. The
SD and power volume will show on the screen while power on
will disappear after 5 seconds.
3. Live picture from the camera should be seen
minCam Manual
10
1.7 OPERATING DVR
SNAP
Under the preview mode, press
“SNAP” button or hold it, the
screen will continually display the
photo.
Status:After finishing snapping, the screen will go back
to preview mode automatically.
REC (Recording)
1. Under the preview mode,
press “REC” button to start
recording.
Status: The recording sign
displayed at the left-bottom
corner shows its recording.
2. Press “REC” again to stop the recording.
Status: The recording sign will disappear at the left
bottom corner while the recoding ends.
Reminder:
No matter it’s under the displaying mode or function
mode, simply just press “REC” button to go back to
preview mode to take a snap shot or record the
video.
Attention:
Press “SNAP” button during the recording, the
recording will be stopped and the file will be saved
immediately, then a snap shot will be taken.

minCam Manual
11
View Photo and Video
1. Under the preview mode, press “UP” or “DOWN” Status:
It will display the previous photo or video.
2. Then, press “UP” or “DOWN” to view the previous or
next photo or video.
Status: The files are arranged in the sequence of
video/photo taken time.
Note: When loading a video file, the DVR will
automatically play the whole video file to the end, and then
go back to next photo or video
Date / Time Setup
1. Press OK.
2. Press “UP” or
“DOWN” to
switch to
DATE/TIME.
3. Press “OK” button.
4. Press “SNAP” (increase) or “REC” (decrease) to adjust
the year.
5. Press “DOWN” to move the blinking square to the next
to-be-adjusted item.
6. Repeat Step 4 and 5 until the DATE/TIME are correct.
7. After finishing the setting, Push “OK” to quit.
minCam Manual
12
Display or Hide
DATE/TIME
1. Press “OK” button
2. Press “UP” or “DOWN” to switch to
“Date/Time”
3. Press “OK”
4. Press “UP” or “DOWN” to switch to
Display Option
5. Press “SNAP” to switch between this
function.
Status: Push “SNAP” once to switch to
“on” and push again to “off.”
6. After finishing setting, Push “ OK “ to end setting.
7. Press “ESC” to go back to preview mode.
PS: When settled time displays on the monitor, the time
information will be showed on the snapped photos as
well.
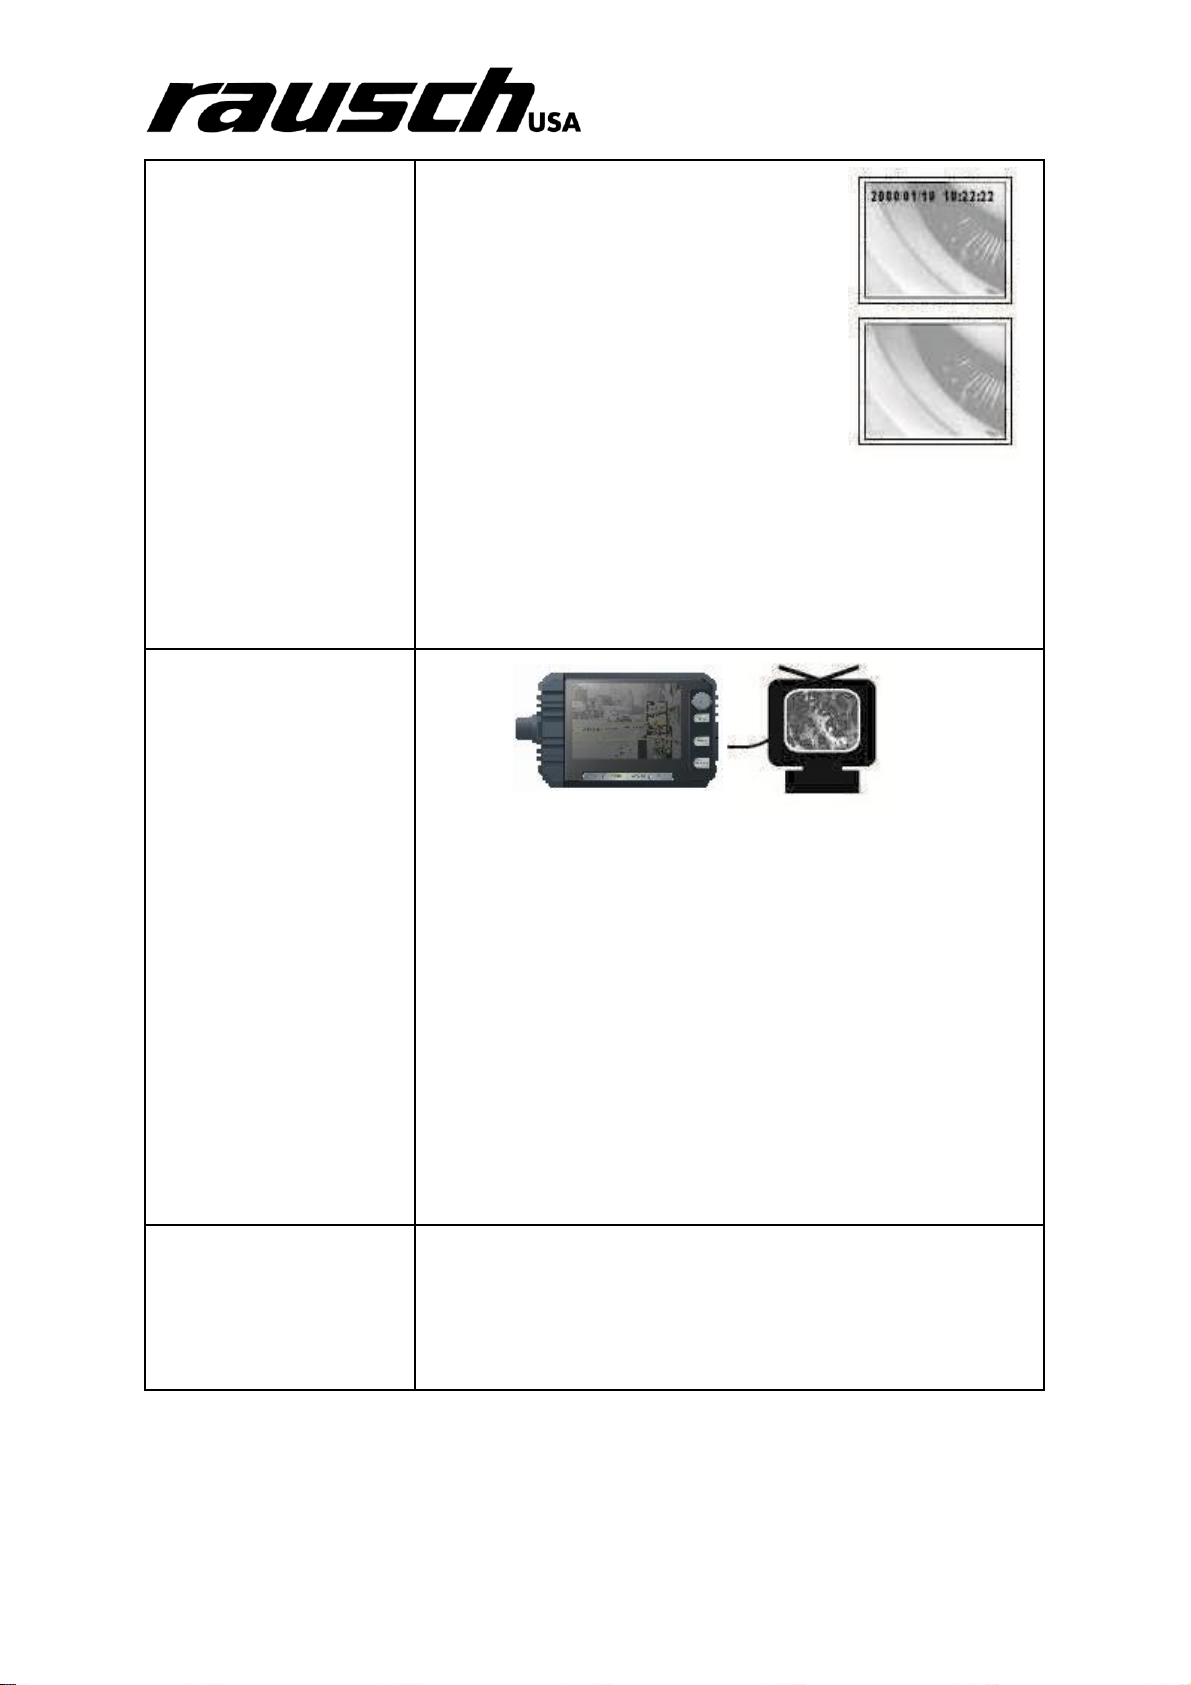
Video Out/In to an
External Monitor
1. Plug AV cable into the AV port on the right side of DVR.
You will also need to plug other end of connector into
an external monitor.
2. Press “OK”
3. Press “UP” or “DOWN” to switch to Video Output
function.
4. Press “OK” - the images will be sent to the external
monitor.
Note: This function will automatically detect whether the AV
cable has been plugged, if the AV cable is not
plugged in, the images will automatically switch back
to the DVR screen.
Adjust Video-Out
Format
1. Press “OK”
2. Press “UP” or “DOWN” to switch to Video Format.
3. Press “OK”
4. Press “UP” or “DOWN” to select NTSC or PAL.
5. Press “OK”
Table des matières


