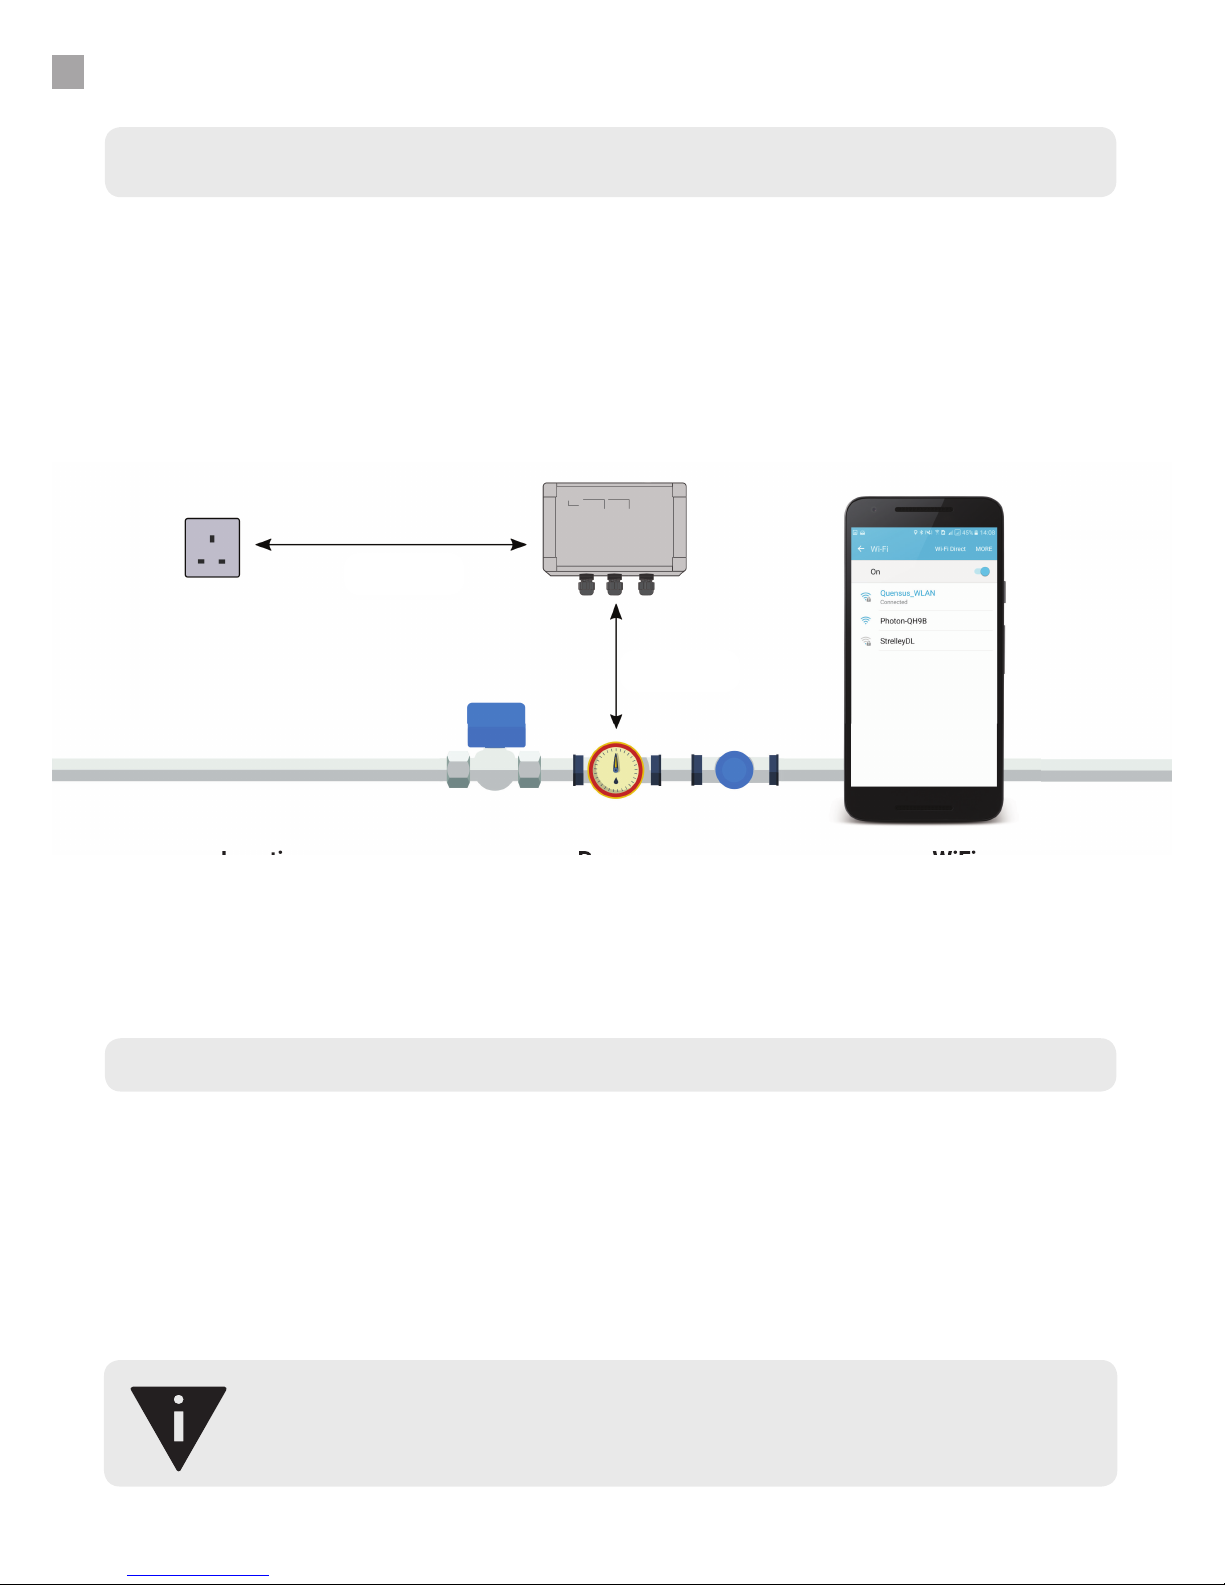
Find the stopcock
Decide where the LeakNet will be placed - this will normally
be just after the stopcock, where the water enters the
building. This will usually be coming up from the ground.
1.
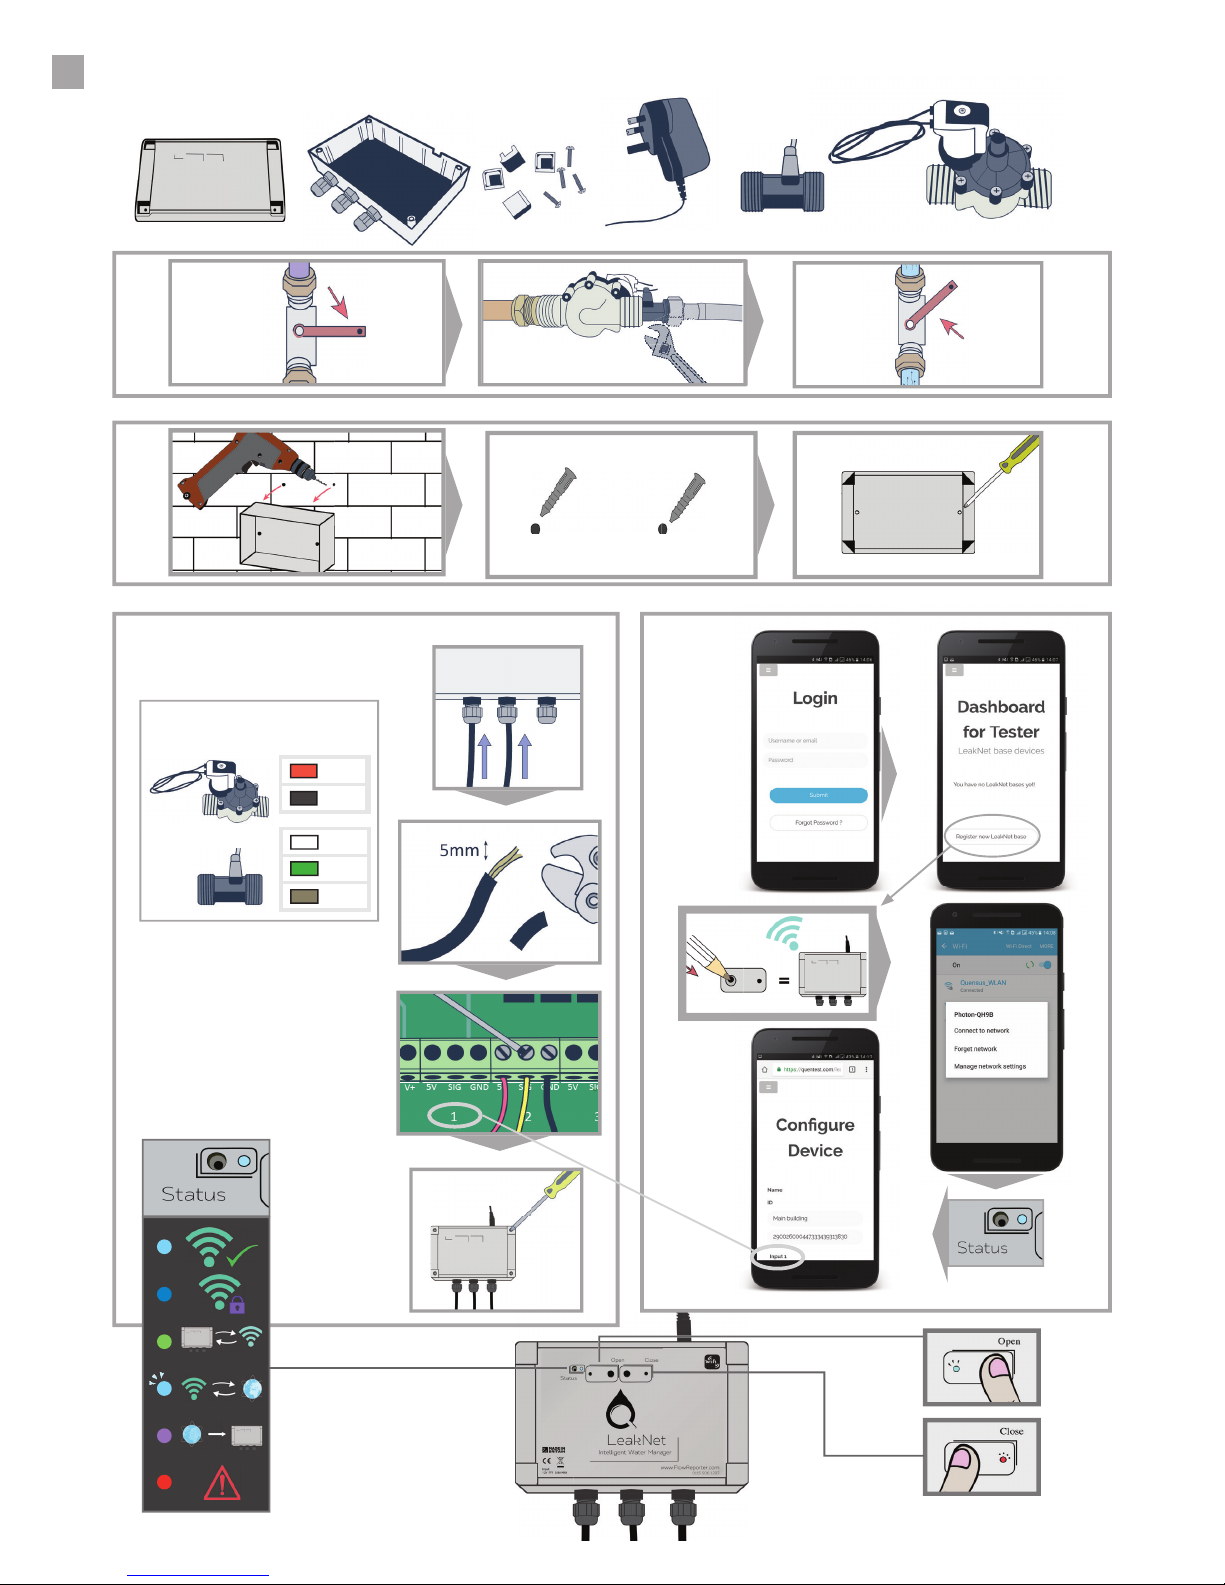
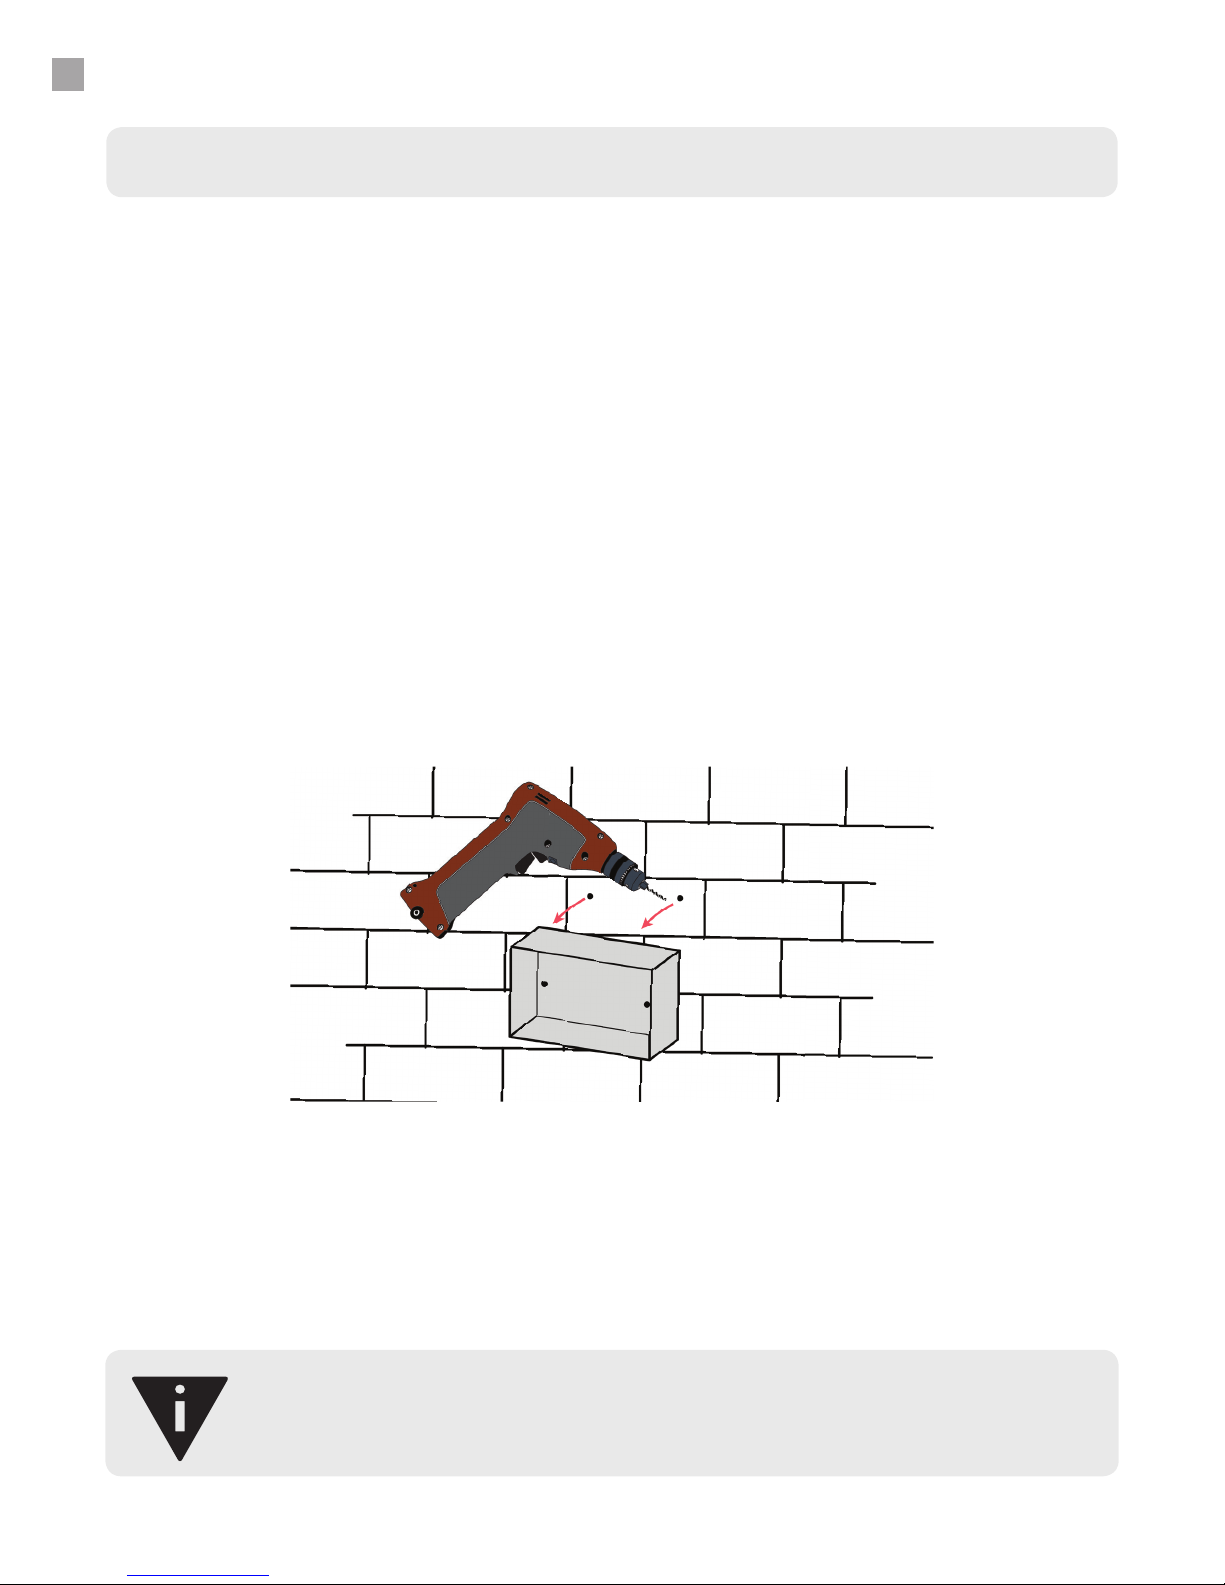
Install the Base
Choose a location to mount the Base and check WiFi
connectivity. Wire the cables from the meter(s) and valve
to the Base, making sure to use the cable glands. Screw
on the front of the Base, clip in the inserts which hide the
screws, and then connect the power adaptor.
3.
Test online
Run a nearby tap. Online, select the name of your new Base,
and then click “Close valve”. A few seconds later, the water
will stop owing. Click the sensor name, then “View” then
“Real time” then “Open valve”. You will see the graph change
as the water is turned on.
5.
Install valve and meter
Make sure the valve (optional) and meter are facing the
correct way (arrow pointing in the direction of ow) and
install in the proposed location. Up to 3 more meters, or up
to 20 temperature sensors can also be installed.
2.
Connect to WiFi
With the “Status” light ashing blue, use your smartphone
or computer to access www.FlowReporter.com online.
Login and select “Register new Base”. Follow the on-screen
instructions. Con gure the Base online by selecting the
ttings used in the above step.
4.
5
INSTALLATION GUIDE
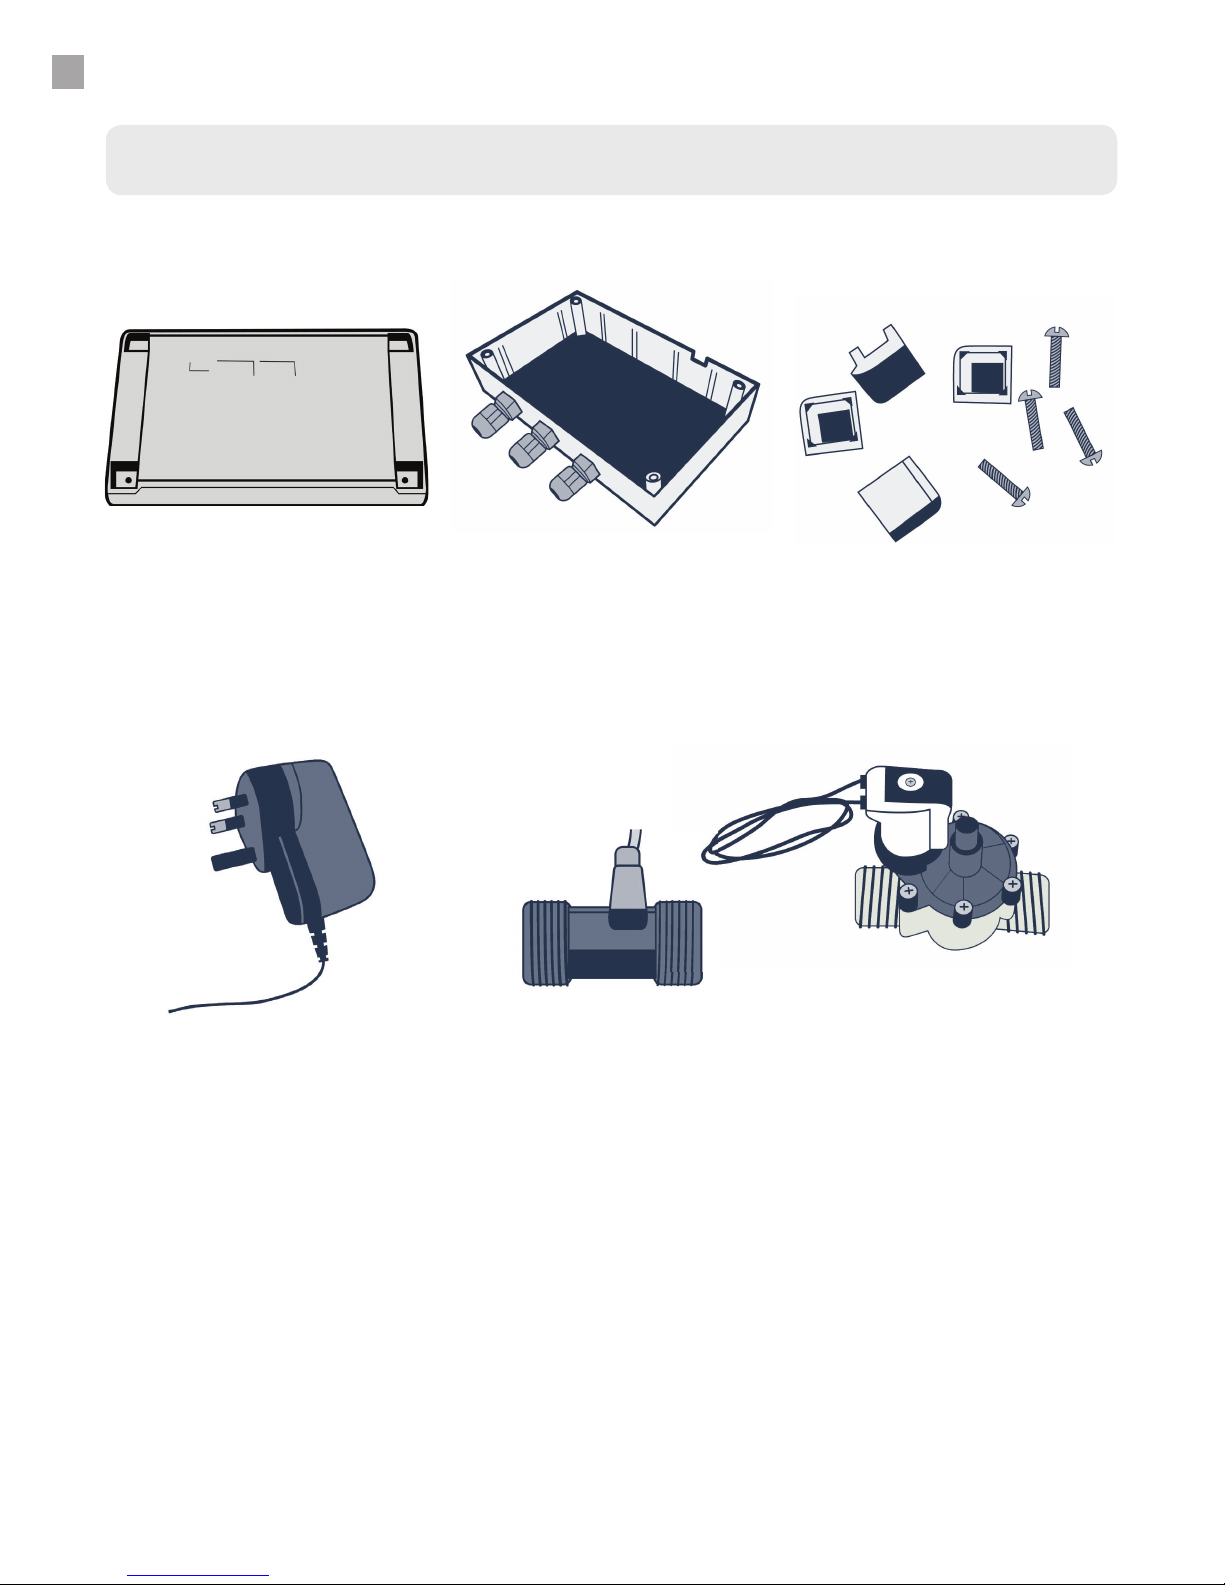
Overview