proTon pack v2 Manuel utilisateur

proTon pack
V2 USER MANUAL (draft 1.0)
patent pEndIng

proTon packV2
page 2
Table of Contents
1. Product Features
A. Main Proton Pack Frame (exterior)
B. Main Proton Pack Frame (interior)
C. Main Proton Pack Frame (sides)
D. Power Pigtail Cables
E. Standard Kit Contents
2. Introduction & Basic Usage
A. General Description
B. Basic Use
3. Power System
A. Power System Introduction
B. 14v Priority swap mode
C. 14v Parallel swap mode
D. 28v mode
E. LED Indicators
F. Circuit Breakers
4. Battery Plates
A. Standard Plates
B. Swapping Battery Plates
C. Using 26v Batteries
5. Peripheral Mounting
A. Using the Velcro pads
B. Proton Pack Hard Mounts
C. Using the Dovetail Spine
D. Using the Center Spine Cheeseplate
6. Proton Pack Accessories
A. Using the Strain Relief Cable
B. Using the Rain Cover
C. Attaching the Waist Belt
D. Attaching the Heavy Lift System
7. Care & Maintenance
A. Removing & Cleaning the Backpack pad
B. Accessing the Internal Electronics Case
C. Replacing Circuit Pop Breakers
D. Replacing Battery Fuses
8. Technical Information
A.ProtonPackSpecications
B. Pin-outs
C. Detailed Dimensions
...................................................................................... page 3
.............................................................................. 3
................................................................................ 4
.................................................................................. 5
..................................................................................................... 6
.................................................................................................... 7
..................................................................... page 8
...................................................................................................... 8
.......................................................................................................................... 8
............................................................................................ page 9
........................................................................................... 9
.................................................................................................. 9
............................................................................................... 9
........................................................................................................................ 9
................................................................................................................ 10
.............................................................................................................. 11
.......................................................................................... page 11
.......................................................................................................... 11
............................................................................................. 11
....................................................................................................... 12
.............................................................................. page 13
................................................................................................. 13
........................................................................................... 13
............................................................................................. 14
........................................................................ 14
....................................................................... page 15
...................................................................................... 15
.................................................................................................... 15
............................................................................................. 16
................................................................................ 16
............................................................................ page 17
............................................................... 17
................................................................... 19
................................................................................. 20
.............................................................................................. 20
............................................................................ page 22
......................................................................................... 22
.......................................................................................................................... 23
.................................................................................................. 24

proTon packV2
page 3
A. Main Proton Pack Frame (exterior)
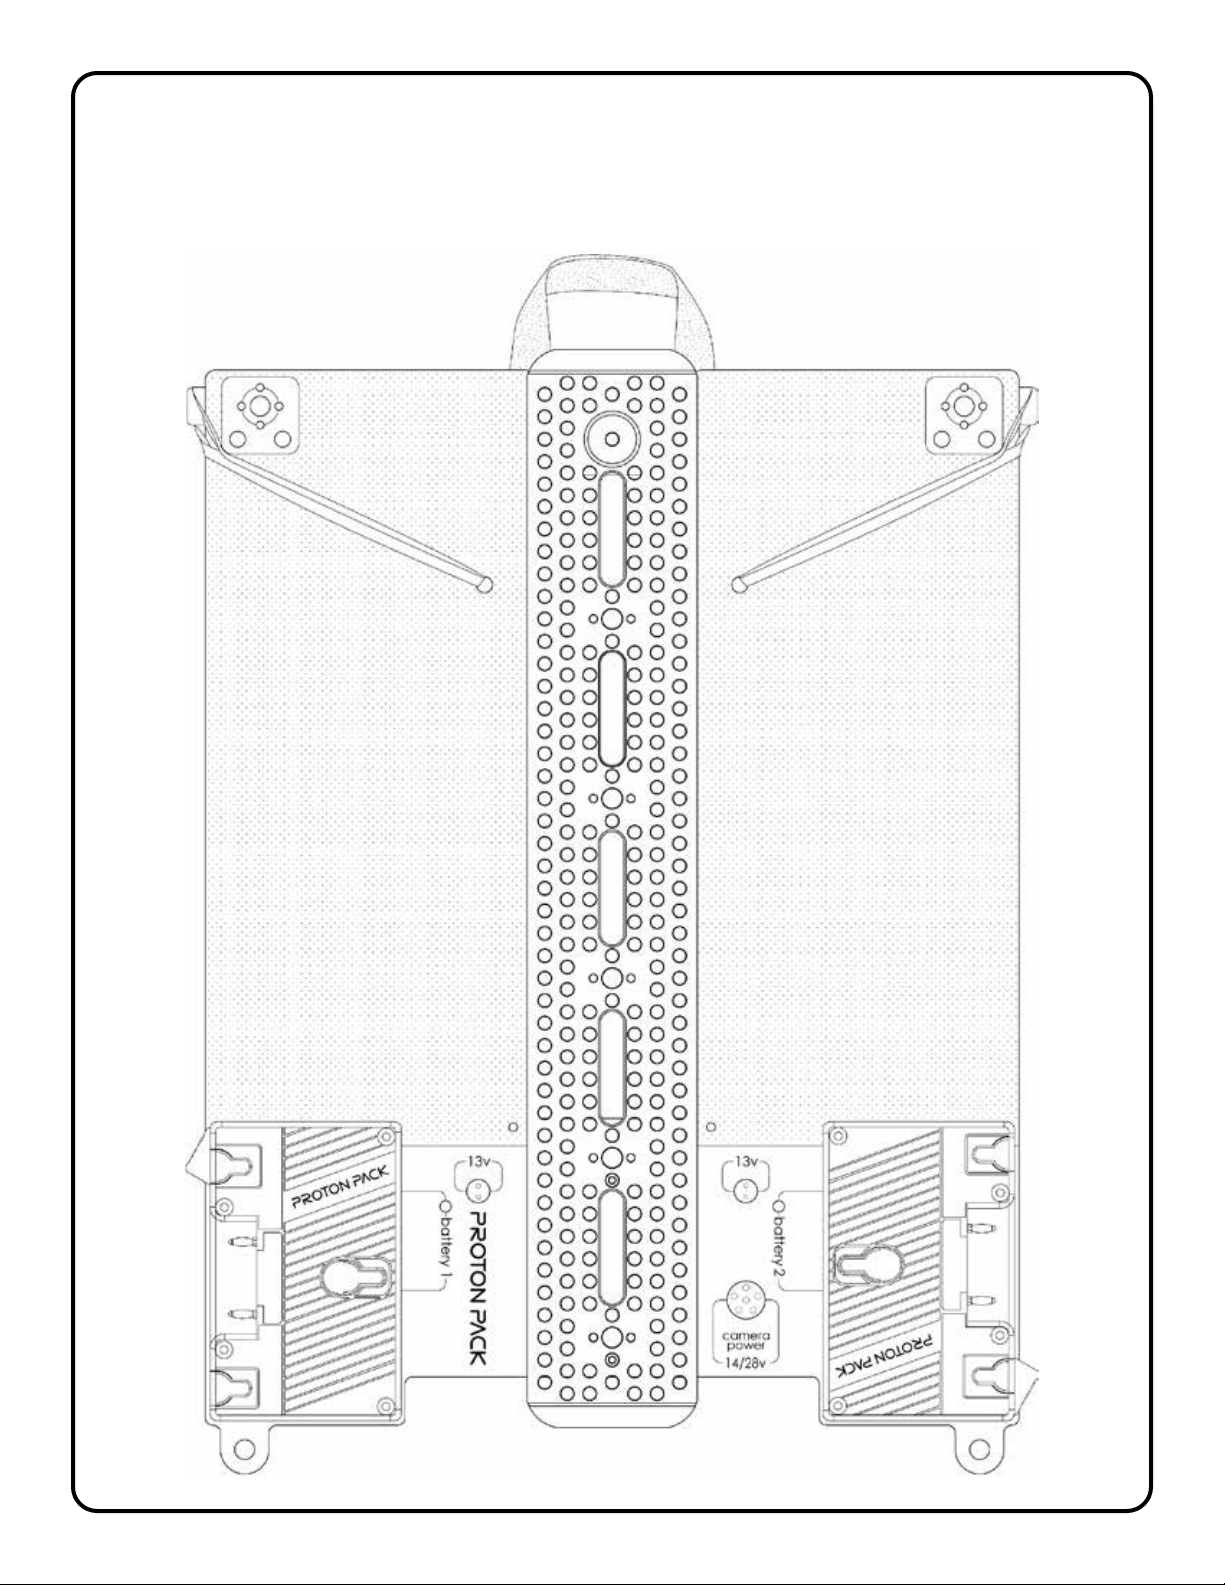
carry strap webbing
6pin Lemo
main camera power port
(battery voltage)
really cool logo
3/8-16 accessory mount
w/ Arri anti-rotation holes
3/8-16 thread
w/ Arri holes
3/8-16 accessory mount
w/ Arri anti-rotation holes
velcro padvelcro pad
15mm rod
1/4-20 thread
15mm rod
1/4-20 thread
rubber
band
center spine
Arri-standard
dovetail &
cheeseplate
5/8” baby pin
1/4-20 thread
1/4-20 thread 3/8 inch
pass-through
channel
13v regulated
P-tap port
13v regulated
P-tap port
battery plate 1
(primary*)
battery 1 LED
indicator
battery 2 LED
indicator
strain relief /
3/8-16 thread
*depending on selected mode
strain relief /
3/8-16 thread
13v regulated
2pin Lemo port
13v regulated
2pin Lemo port
rubber
band
battery Plate 2
(backup*)
1. Product Features

proTon packV2
page 4
battery
1
breaker
aks power
off
-
on
breaker
battery
2
SN 00012
proTon packV2
green:
yellow:
red:
good voltage
low voltage
below cutoff/dead
blue (flash):
red (fast flash):
red (slow flash):
current overdraw
electrical fault
overheat fault
camera power :
aks power:
2pin lemos:
batt. voltage & amps
6A total [2x 2pin & 2x p-tap]
pin1 (
-
), pin2 (+)
proTon pack
proTon pack
B. Main Proton Pack Frame (interior)
carry strap webbing
carbon ber
15mm rod
center spine Arri-standard
dovetail & cheeseplate
rod mounting block
pad
attachment
strap
pad
attachment
plate
pad
attachment
plate
pad
attachment
strap
rod mounting block
15mm rod
1/4-20 thread
15mm rod
1/4-20 thread
5/8” baby Pin
release screw
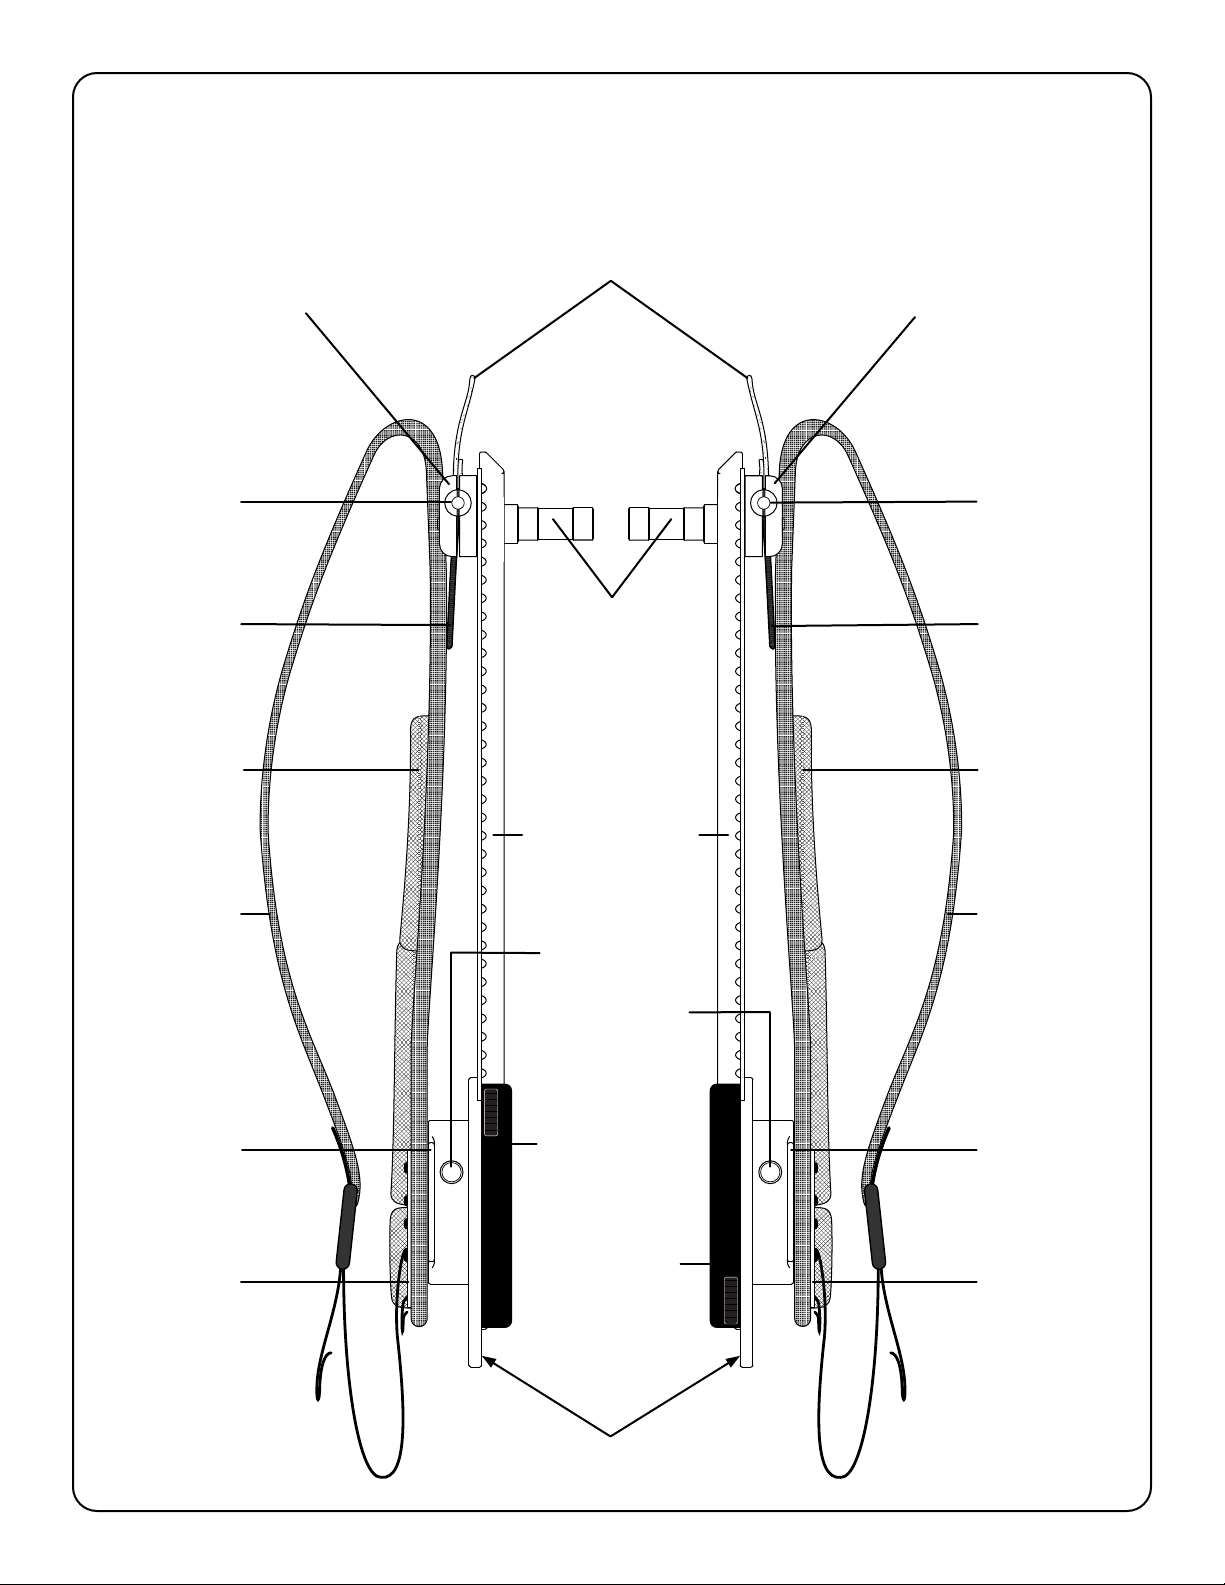
shoulder strap shoulder strap
backpack pad
carbon ber
plate
waist belt
attachment
slot
waist belt
attachment
slot
carbon ber
plate
Strain Relief /
3/8-16 thread
Strain Relief /
3/8-16 thread

proTon packV2
page 5
10
10
C. Main Proton Pack Frame
(left-side) (right-side)
carry strap webbing
center spine Arri-
standard dovetail
& cheeseplate
camera circuit
breaker (10A)
accessory circuit
breaker (5A)
rod mounting block
backpack
pad
backpack
pad
pad
attachment
strap
pad
attachment
plate
pad
attachment
plate
pad
attachment
strap
rod mounting block
15mm rod
1/4-20 thread
15mm rod
1/4-20 thread
5/8” baby Pin
1/4-20 thread
shoulder strap shoulder strap
waist belt
attachment
slot
waist belt
attachment
slot
Strain Relief /
3/8-16 thread
battery plate 1
(primary*)
battery plate 2
(backup*)
*depending on selected mode
510

proTon packV2
page 6
D. Proton Pack Power Pigtail Cables
1
23
41
2
3
1
2
3
14v 4pin XLR Pigtail 14v 3pin XLR Pigtail 28v 3pin XLR Pigtail
Pin#1 (
-
), Pin#2 (+)
Pin#1 (
-
), Pin#4 (+) Pin#1 (
-
), Pin#2 (+)

proTon packV2
page 7
E. Standard Kit Complete Contents
(1x) Proton Pack Backpack Rig
(1x) Hard Shipping Case with Padded Interior and Lid Organizer
(3x) Power Pigtail Cables
(1x) Removable Waist Belt
(1x) Rain Cover
(1x) Strain Relief Cable
(2x) Preston 7pin Motor Cables (straight to right angle)
(1x) 3pin Fischer Run/Stop extension cable (female plug to male plug)
(3x) SDI BNC Cables (straight to right angle)
(1x) 5pin Lemo timecode input cable (to BNC)
(1x) Rangendersensorcable(yourchoice:Cinetape/Sniper/Lightranger)
(1x) Standard four port P-Tap splitter box
(1x) Extra long four port P-Tap splitter box

proTon packV2
page 8
2. Introduction & Basic Usage
A. General Description
ProtonPackisabackpack-worncameraaccessoriesplatform.Itprovidesmountingoptionsfor:
• Batteries (gold mount or v-mount)
• MDR
• Wireless HD Transmitter
• Timecode generator
• Cinetape readout
• Focus Monitor
Handheld shooting and cramped spaces often require cameras to be made as small as possible.
DPs often request that the camera be completely stripped-down. Proton Pack provides a solution to
accomplishthesebuildswithoutcompromisetonormalwork-ow.
Velcro surfaces and cheeseplates allow attachment for all of your professional accessories.
Camera builds can now be reduced to only body, lens, & focus motor. Proton Pack’s power system is
ready for 14v or 28v cameras and provides regulated 13v breakout power (2x p-tap & 2x Lemos) for all
peripherals.
IdealforworkingwithArriAlexaMini,RedDSMC2,andlmcameras,ProtonPackisacomplete
system providing all custom umbilical cables and accessories you will need for any build.
B. Basic Usage
• Begin by choosing the appropriate power pigtail for your camera system. For any camera that can
accept ±12v DC power the “14v” pigtails are always preferred as they maintain hot-swapability when
changing batteries. Pick the “14v” 4pin XLR or 3pin XLR pigtail based on the power cable included with
your camera*. For ±24vcamerasystems(35mmlm,AlexaLF/65,etc.)pickthe“28v”3pinXLRpigtail
• Install the power pigtail into the 6pin 2B Lemo “Camera Power” port on the Proton Pack main chassis.
• Strip down the camera body to the bare minimum of rigging (cage, baseplate, etc.). Leave only
essential accessories for shooting and operating (lens, monitor, focus motor, hand grips, etc.)
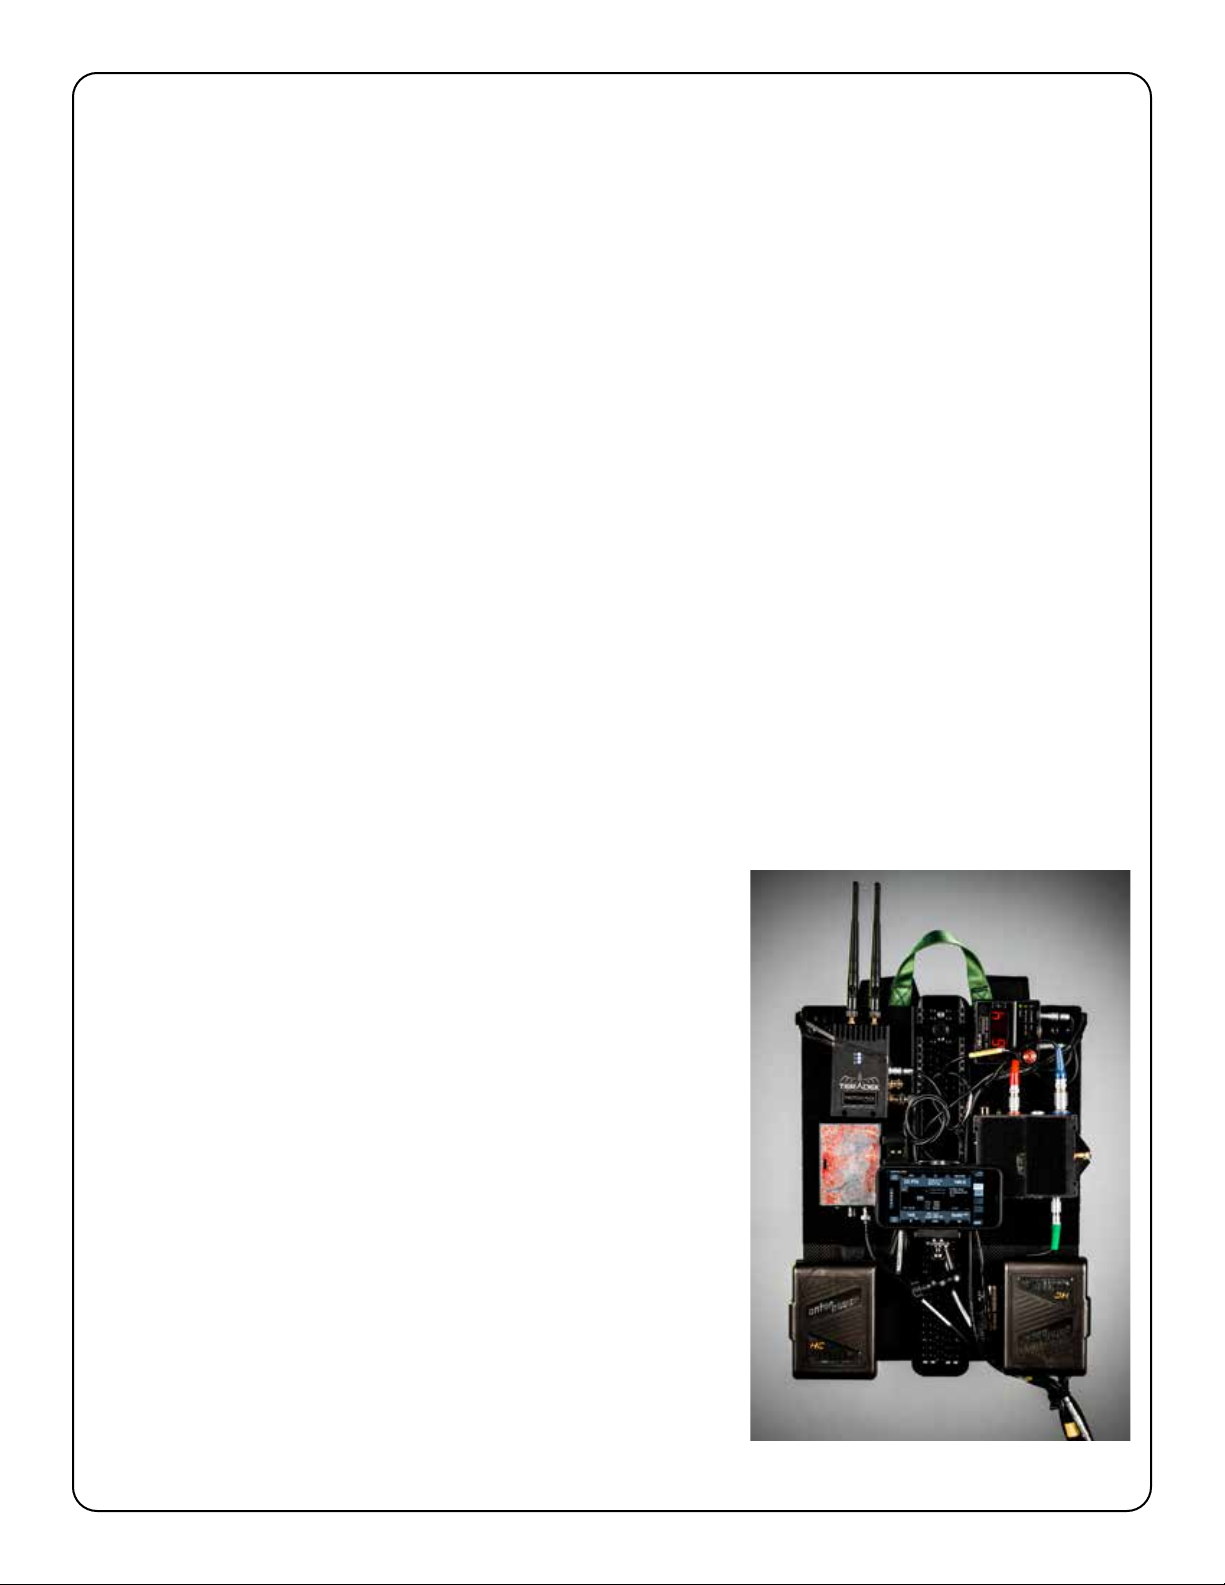
• Using Velcro or other brackets, mount all required peripherals
(Teradek/MDR/Cinetape/etc.) onto the Proton Pack frame
(Seeg.1foratypicalarrangement).
• Run power for all peripherals (using their standard power
cables) from the two 13v p-tap or two 13v 2pin Lemo ports
on the Proton Pack.
• Connect your camera power cable to the Proton Pack
Pigtail you installed earlier.
• Using the included long cables in your kit now make all
other connections between camera and Proton Pack. We
recommend starting at the camera side and taking up any
additional slack in the cables at the Proton Pack frame.
• Once the umbilical is fully assembled, we suggest attaching
the strain relief cable from umbilical to camera cage & also
securing the umbilical to the Proton Pack using the strain
relief loops at the bottom left or right corners.
• Attach batteries to both battery plates.
• Power on the camera and all accessories.
• With the Proton Pack worn by camera operator, AC or grip,
now begin shooting.
• Change batteries as needed when indicated by the yellow
“low voltage” LED.
g.1
*An 8 ft 6 in long camera power cable is ideal

proTon packV2
page 9
3. Power System & Power Modes
A. Power System Introduction
Proton Pack can provide power for both 14v and 28v camera systems from the “camera power”
port on the main chassis. This mode is automatically selected when installing either a 14v or 28v power
pigtail cable. 14v mode has hot swap. In 28v mode there is NOT full hot swap when changing batteries.
Camera power is a direct pass-through from your battery plates. Voltage and ampacity will be
reectiveofthebatteriesinuse.
The system also has four built-in ports for
powering peripherals/accessories. There are
two Anton Bauer type p-tap ports and two
standard 2pin Lemo ports. All four outputs are
regulated at 13v DC and will provide that
voltage regardless of 14v or 24v voltage mode.
Hotswappingcanbeconguredina
“Priority”or“Parallel”protocolbyippingthe
small toggle switch located underneath “battery
plate2”(seeg.2).
g.2
B. 14v “Priority” Power Mode
This is the standard operating mode for your Proton Pack and it will ship to you with this mode pre-
selected. Choose this mode by installing one of the “14v” power pigtail cables and leaving the internal
toggle switch set to “A-->B” (right position).
In this mode your Proton Pack will always prioritize “battery plate 1” (left-hand) when there is a
healthy battery installed on that plate. “Battery plate 2” will constantly be kept in reserve as a backup if
the primary battery should die or be removed.
Only the LED on the battery plate actively supplying power will be illuminated in this mode.
C. 14v “Parallel” Power Mode
If battery plate prioritization is notdesired,yourProtonPackcanbereconguredtodrawfromboth
battery plates simultaneously. Choose this mode by installing one of the “14v” power pigtail cables and
changingtheinternaltoggleswitchto“A&B”(leftposition)(seeg.2).
In this mode the power system will actively favor whichever source has the higher voltage thus
draining both batteries in a relatively symmetrical pattern. Hot swap will function as normal whichever
battery is removed during a swap. It is recommended that batteries of approx. equal charge are used.
Both LEDs on the Proton Pack will be illuminated in this mode.
D. 28v Power Mode
Usethismodeforlmcamerasandlargercamerasystemsrequiring>24v.Choosethismodeby
installing the “28v” power pigtail (internal toggle switch has no effect in this mode). To achieve > 24v
bothbatteriesareconguredinseriessohotswapisNOTavailableinthismode.Make sure to safely
power down digital cameras before swapping batteries in 28v mode.
Both LEDs on the Proton Pack will be illuminated in this mode.

proTon packV2
page 10
E. LED Indicators
There are two multi-color LEDs on the Proton Pack chassis, one for each battery input.
• GREEN = Good voltage ( >13v / >26v)
• YELLOW = Low voltage ( < 13v / < 26v)
• RED = Dead battery
• OFF = Battery not active or no battery present
• BLUE FLASH = Over current warning ( >10A camera, >5A accessories)
• RED FAST FLASH = Electrical system fault
• RED SLOW FLASH = System overheat ( >185 deg. F)
MODE:28v
Drawingfrom:battery1&2
Batteries:dead
28
MODE:28v
Drawingfrom:battery1&2
Batteries:low
28
MODE:28v
Drawingfrom:battery1&2
Batteries:good
28
MODE:14v,Parallel
Drawingfrom:systemoff
Batteries:bothdead
14
MODE:14v,Parallel
Drawingfrom:battery1
Batteries:1good,2dead
14
MODE:14v,Parallel
Drawingfrom:battery1&2
Batteries:1good,2low
14
MODE:14v,Parallel
Drawingfrom:battery1&2
Batteries:good
14
MODE:14v,Priority
Drawingfrom:systemoff
Batteries:bothdead
14
MODE:14v,Priority
Drawingfrom:battery2
Battery:low
14
MODE:14v,Priority
Drawingfrom:battery2
Battery:good
14
MODE:14v,Priority
Drawingfrom:battery1
Battery:low
14
MODE:14v,Priority
Drawingfrom:battery1
Battery:good
14
Table des matières