ProScan PAC100-PL-PDQ Manuel utilisateur

1
User manual
PROSCAN
PAC100-PL-PDQ
“This product is manufactured and sold by Curtis International Ltd.
PROSCAN is are registered trademarks of Technicolor USA used
under license by Curtis International Ltd.
Any other product, service, company, trade or product name and
logo referenced herein are neither endorsed nor sponsored by
Technicolor USA or its affiliates.”

2
Remind:
This user manual contains the most current information we obtained when this user
manual was made. The screen display and illustrations are used in this user manual for
the purpose of introducing details of this digital camera in a more specific and direct
way. Difference may arise between these displays and illustrations and the digital
camera actually available for you due to difference in technological development and
production batch, under which case, the actual functions of this video camera will be
the standard.
Precautions
Please read the precautions carefully before using this video camera for proper and
safe operation, to optimize its performance and extend its life.
Do not expose the video camera to direct sunlight, nor point its lens to sunlight.
Otherwise, the image sensor of the video camera may be damaged.
Take good care of the video camera and prevent water or sand particles from entering
the video camera when it is used on the beach or water, because water, sand particles,
dust or component containing salt may damage the video camera.
Keep the video camera free of dust and chemical materials. Keep it in a cool, dry and
well ventilated environment. Do not keep the video camera in a high temperature,
moist or dusty environment.
Please check if the video camera operates normally before use.
If dirt or stain is accumulated on the video camera or on its lens, use soft, clean and
dry rag to wipe it away gently. If the video camera or its lens is stained with sand
particles, blow them away gently. Do not use a cloth to wipe the surface. Otherwise, it
may scratch the surface of video camera or its lens.
If it is required to clean camera surface, firstly blow away the sand dust accumulated
on this surface, and then wipe the camera gently with rag or tissue applicable to optical
equipment. Please use the cleaning agent of video camera for wiping if necessary. Do
not use organic solvent to clean the video camera.
Do not touch the lens surface with fingers.
Please back up the data if the memory card inside this video camera is used for the
first time.
The externally installed memory cards are manufactured from precise electronic
components. Data may be lost or damaged under the following circumstances:
1. Improper use of the memory card.
2. The memory card is bent, dropped or scratched.
3. Place it under high temperature or moist environment or expose to sunshine
directly.
4. Electrostatic or electromagnetic field exists around the memory card.
5. This memory card is taken out or power supply is interrupted when this video
camera or computer is connected to the memory card (i.e. during reading, writing and
formatting).
6. Touch the metal contact surface of the memory card with fingers or metal
materials.

3
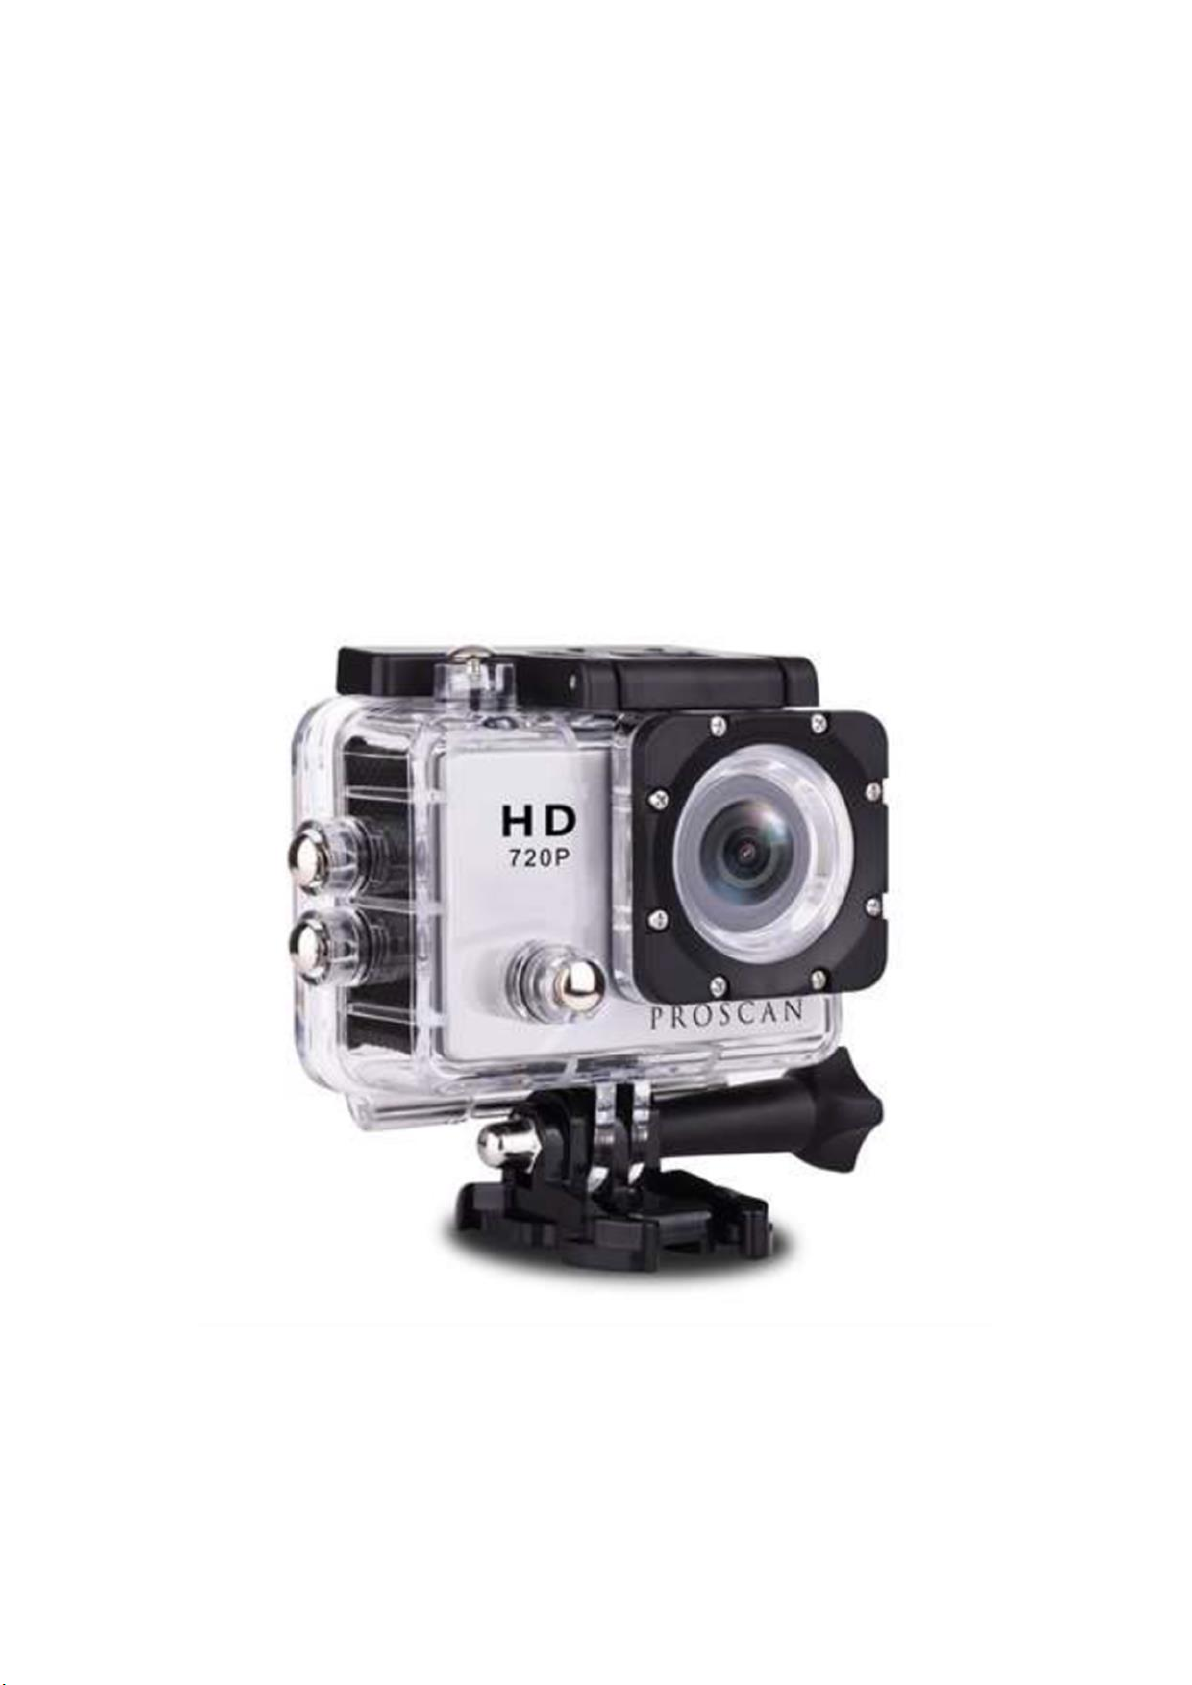
Parts of the Camera

4
Waterproof case open way.
5
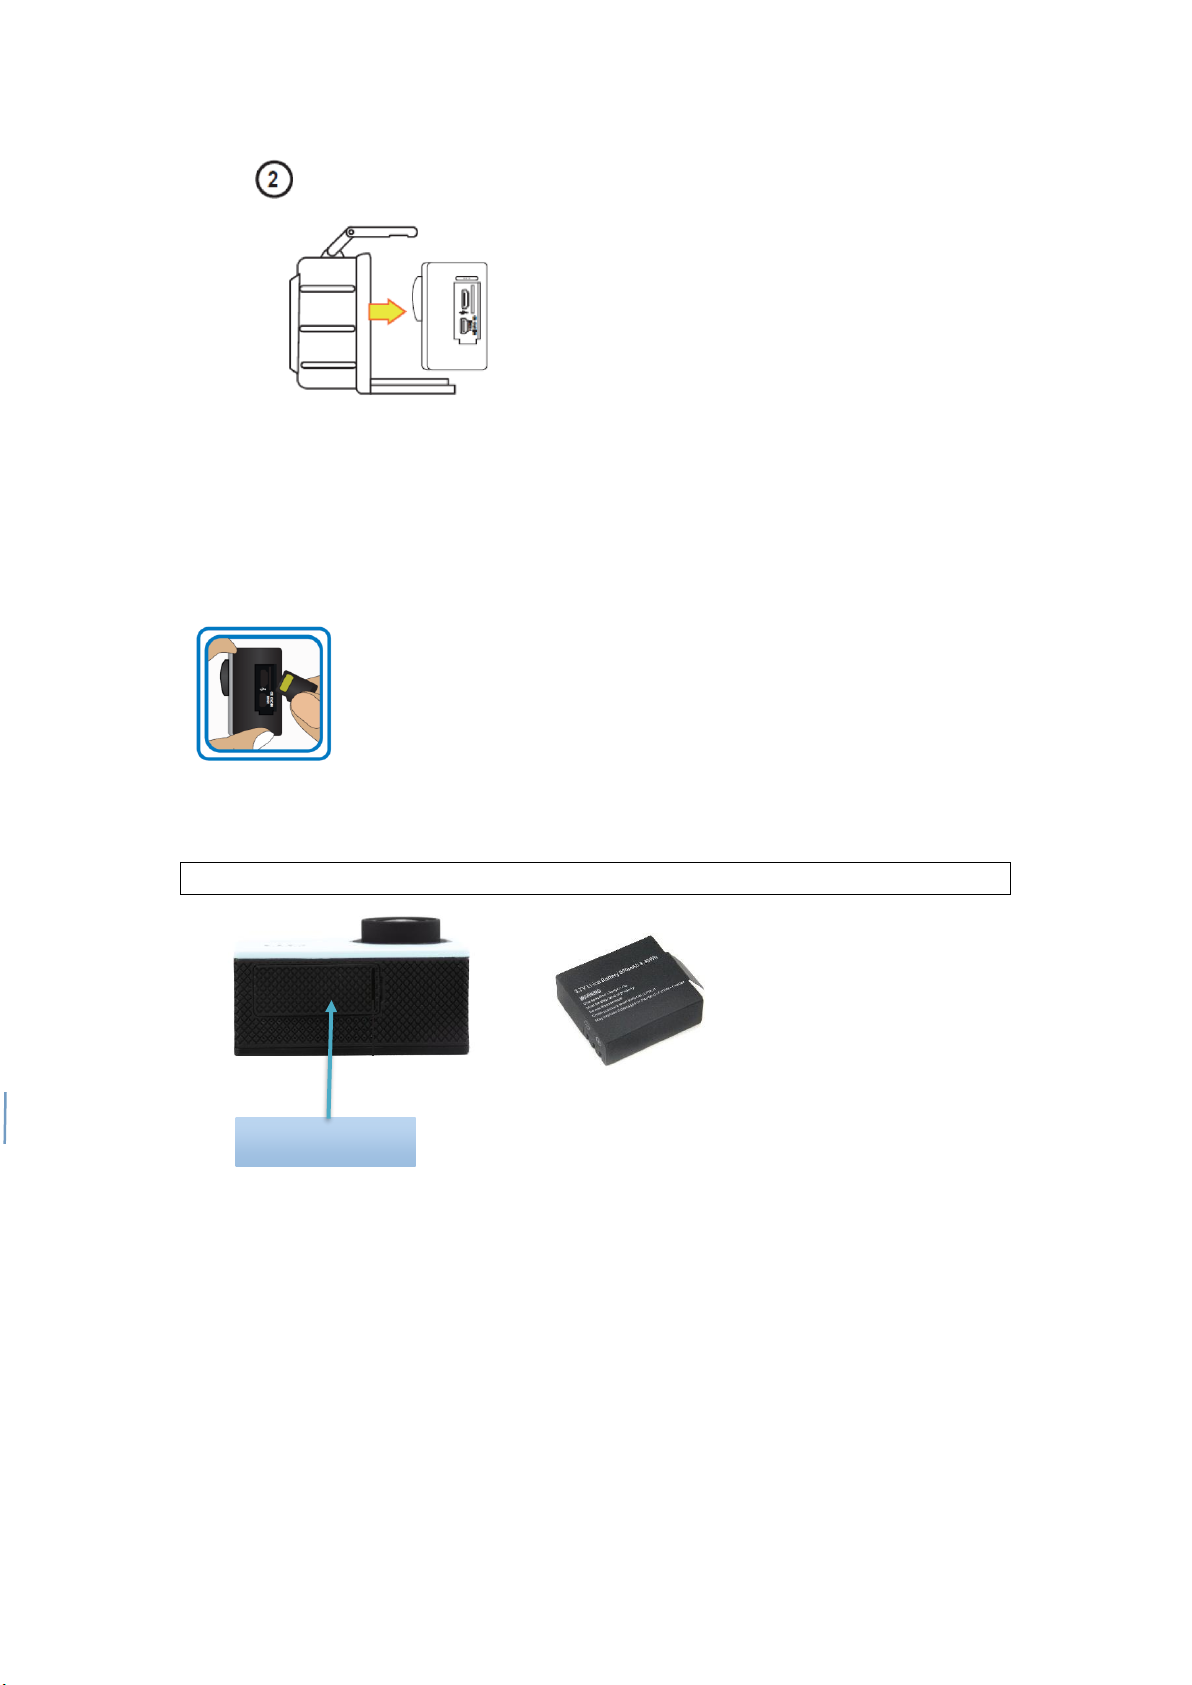
Inserting Micro SD Card
Note: Sometimes when you are using the Micro SD card for the first time in this camera,
it can’t read the data of Micro SD card, please format it on computer or in the setting
menu before using (please do remember to back up your data before formatting the
card). If possible, please choose branded card for a better using experience.
Installing and removing batteries
A Open the battery door as shown in below picture;
B: Insert the battery and close the battery door.
Note: you can reset the camera by pull out the battery, and insert the battery again.
Charging
Charging the battery for at least 5 hours when charging before the first time use and
ensure they are subsequently discharge and charged fully. This aids a long service life
of the battery. Charge the battery directly via the Micro-USB port. Using the supplied
USB cable and your computer for charging under shutdown status. The red charging
indicator will be on when charging, and will be off when the battery is fully charged.
Generally, the battery can be fully charged after about 3-5 hours.
Battery door

6
Function:
1) TF Card Slot
Insert TF Card
2) Up button
In the Select button menu option, adjust the function key upwards.
In playback mode, the selection key upturned.
3) Power/Mode
Short press this button to switch between photo shooting/ video recording / playback;
Long press, turn on/off.
4) Down button
In the select button menu option, adjust the function key downwards.
In playback mode, the selection key downturned.
5) USB port
1, for connecting the PC to transfer data; 2, for connecting an external power supply
to the battery charge or provide power; 3, for connecting the PC when the camera;
6) OK Keys/ Menu
Press the button to record the picture; in the playback mode, press this button to start
playing the image; all the mode long Press to enter/exit the menu
Short press this button in the menu mode to confirm the button;
Turn on/off
Press the power button three seconds to turn on, the blue light will turn on when the
boot;
Press the power button for three seconds to turn off again, then the blue light is off;
Note: Low battery will prompt the battery voltage is low automatically shut down.
Your camera has different modes for the various camera functions. You can switch
modes by short pressing the Mode/Power button after the camera has been
powered on.
To make changes to the camera’s settings, follow the instructions below:
Long press the OK button once to enter the Photo Capture, Video or playback menu.
Long press again to enter the General Camera settings menu. To exit the menu, long
press the OK button.
In general camera settings menu, by up or down button to select the time setting
option, short press OK key to enter, short press OK button, you can switch between

7
year / month / day / hour / minute, by up or down button to adjustment requires a
value.
While in the menu screen, use the up and down buttons to select a setting option.
Press the OK button to enter the setting options. Then, use the Up and Down buttons
to select an option and press the OK button to confirm and save that setting.
Video Capture mode:
Use this mode to capture videos with your camera. This is the default mode when the
camera is powered ON, to take a video, aim your camera as desired and press the
Shutter/OK button to start recording. To stop recording, press the Shutter/OK button
again.
To access the various Video Capture settings, long press the OK button while in Video
capture mode.
Photo Capture mode:
Use this mode to capture pictures with your camera.
After turning on your camera, short press the Power/Mode button once to open the
Photo capture mode. Press the Shutter/OK button to take the photo.
To access the various Photo capture settings, long press the OK button while in photo
capture mode.

8
Playback Mode
Use this mode to view and manage the photos, videos on your camera.
After turning on your camera, short press the power/Mode button three times to open
the Playback Mode, press up or down buttons to scroll through the photo and video
files.
Remark:
1. If you select a video file, press the OK button to start the playback.
2. To stop the playback, press the OK button.
To access the various playback mode settings, long press the OK button while in
playback mode.
Details of the product:
Display
2.0 inch
Language Options
Chinese (Simplified), Chinese (Traditional), English, Korean,
Japanese, Spanish, French, Italian, Portuguese, Deutsche, etc.
Resolution of Video’s
720P, VGA
Video Format
AVI
Video Time
Off/1min/3min/5min
Motion Detect
support
Delay capture
support
Photo Resolution
5MP/3MP/1.3MP
Photo Format
JPG
Memory Card
TF Card (up to 32GB)
Built in Microphone
support
Built in audio
support

10
Manuel utilisateur
PROSCAN
PAC100-PL-PDQ
"Ce produit est fabriqué et vendu par Curtis International Ltd.
PROSCAN est une marque déposée de Technicolor USA utilisée
sous licence par Curtis International Ltd.
Tout autre produit, service, entreprise, nom de commerce ou de
produit et logo référencé dans le présent document ne sont ni
approuvés ni parrainés par Technicolor USA ou ses filiales. "
Ce manuel convient aux modèles suivants
1
Table des matières
Langues :
Autres manuels ProScan Caméra d'action


