PanoMachine V3.1 Guide produit

PanoMachine V3.1
User book
March 008
Summary : 1. Description of the PanoMachine.
2. How to make a 360 panorama.
3. How to make a 160 panorama
(or the angle of your choice..)
4. How to use the PanoMachine as a
turntable.
5. Using intervalometer mode.
6. How to make time-lapse videos with
camera motion.
7. What is the Custom mode ?
8. Warnings
Appendix : 1. How to connect your camera to the
PanoMachine.
2. How to know the number of views needed
for a 360 panorama.
3. Angle of lenses.
4. Remote control of the PanoMachine.
5. Setting power applied to the motor of
PanoMachine.
6. Tips and tricks.
Copyright Gildas Le Lostec - www.panomachine.com Page 1 2008-03-01

1 - Description of the PanoMachine
The PanoMachine is an automatic rotating head designed to rotate and trigger a camera exactly the way you
want. So it can do numerous jobs : the most commons are:
•taking pictures on a 36 ° angle in order to make 36 ° panoramas by stitching.
•taking pictures for making QuickTime VR Object files
•taking pictures to create high definition timelapse videos.
But other uses are possible, as spherical QTVR or doing a job of survey. The limit is your imagination…
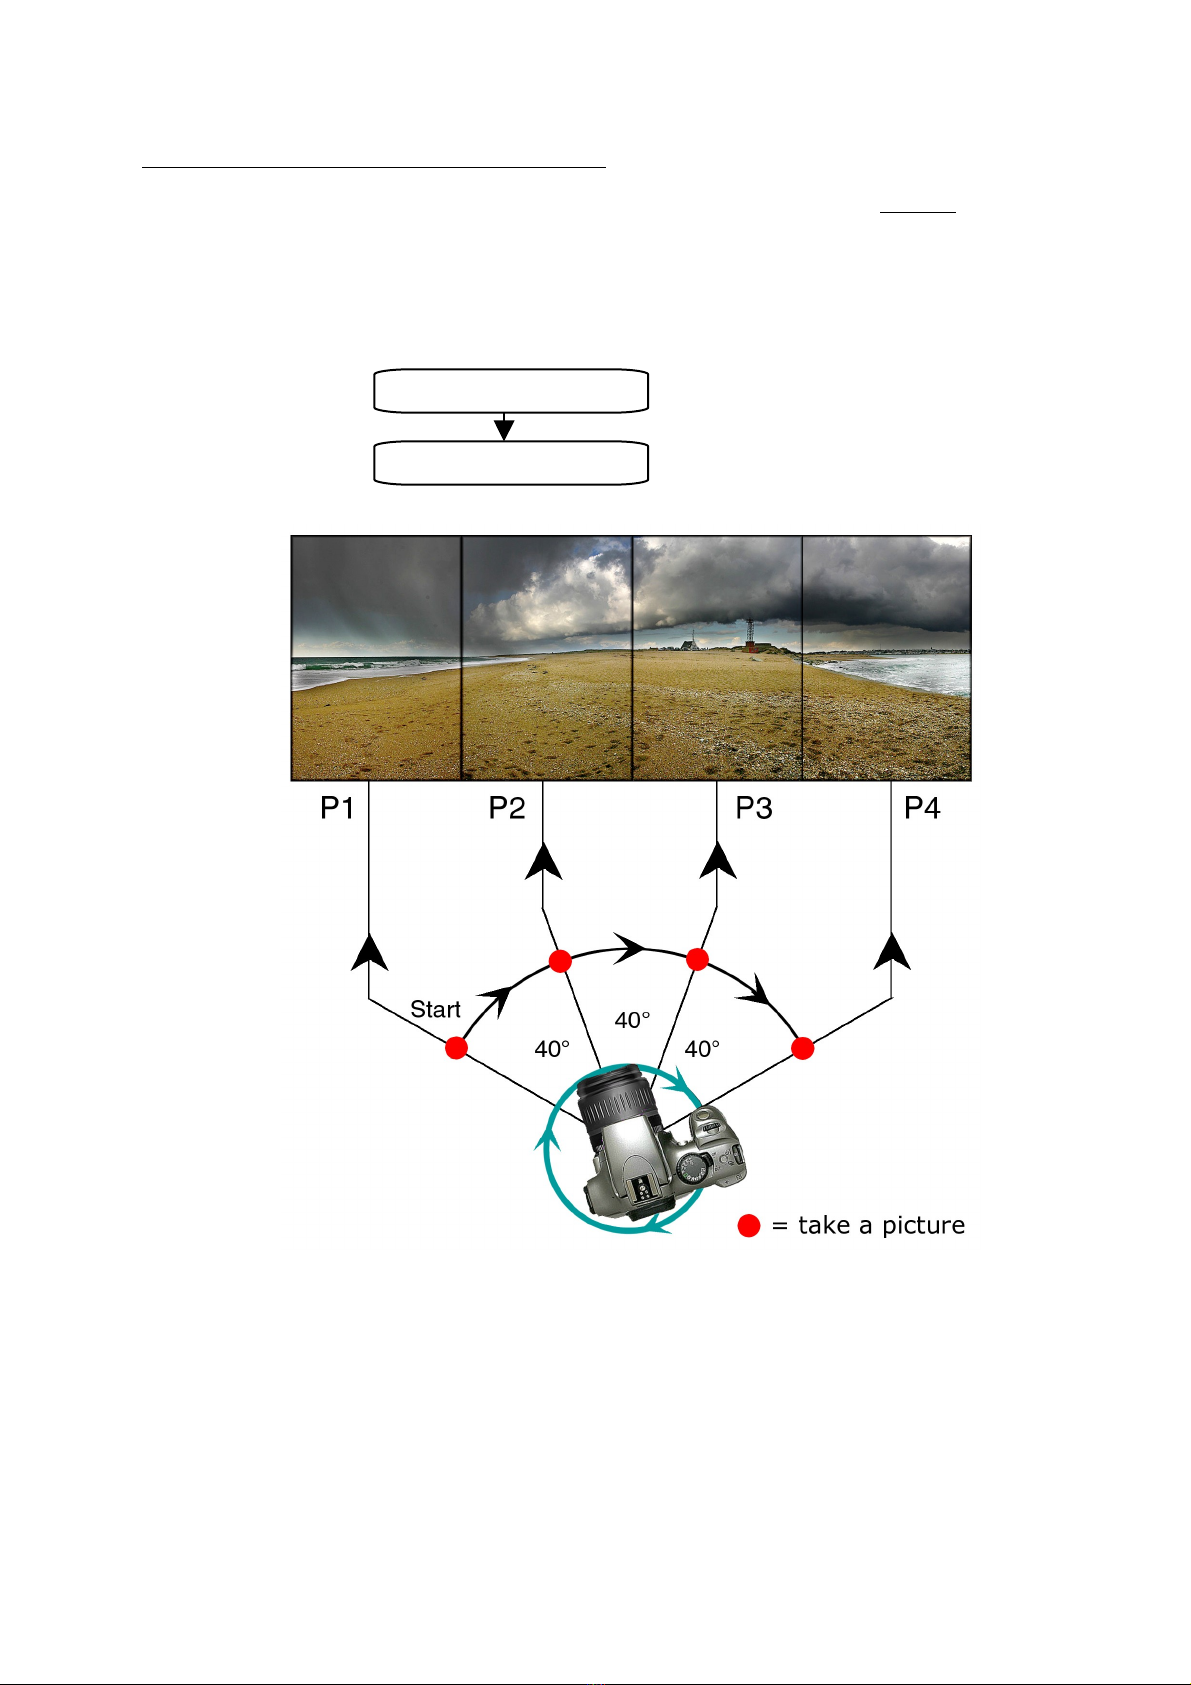
With a PanoMachine, shooting a 36 ° panorama is really fast and reliable. As frequency of shoots can be really
faster than with any other way, moving subjects are not such a problem than when you make a panorama “by
hand”. Multiplying panoramas is very simple: just press the button, all is done by the machine. So taking
several rows with different inclination of the camera in order to built spherical QTVR is easy.
In addition, PanoMachine is much more faster than any human being : it is able to take a 36 ° panorama is 3
secondes !
Shooting objects for QuickTime object files is as simple than making panoramas. Just press the button …
All the actual reflex cameras can be used. Triggering of the camera can be done by two ways: by a shutter
release cable or by an infrared signal emitted by the PanoMachine (only for Nikon D5 ,D7 ,D8 and Canon
EOS3 D,35 D,4 D).
There is 7 program modes wich allow to use the PanoMachine on a very simple
way:
•Pano360 ° mode
for making 36 ° panoramas
•Timelapse mode
for making timelapse pictures while panning
•Turntable mode
for QuickTime VR object files
•Custom mode
for customized programming, where you can access all the program
options to control the PanoMachine in details.
•Intervalometer mode
powerfull intervalometer to make series of pictures at a fixed interval of
time.
•360CR mode
making a fast 36 ° panorama with continuous rotation.
•Rotate mode
just rotate the head at a specified speed
Custom mode :
You can program the PanoMachine for repeating takes of view automatically with intervals of time given in
seconds, minutes or hour. For example, it can makes a complete panorama, each hour, during 1 hours,
without any human action. It can work alone for hours, or for days if you connect it to an external power
source.
The PanoMachine is designed to work as an automatic device but you can also use it as a semi-automatic
device : rotation is automatic but shooting can be manual. The PanoMachine will wait for you to take each
picture.
Almost all can be programmed on the PanoMachine :
Angle of rotation from 1 ° to 72 °
Number of positions from 1 to 5
Time between shoots from to 25 (1 ' of
sec, sec, min, hrs)
Number of panoramas from 1 to 5
Time between panoramas from to 25 (sec,
min or hrs)
Direction of rotation.
Speed of rotation (up to 1 minutes for 36 °)
Triggering of the camera : cable or infrared
(Canon or Nikon)
Auto and semi-auto mode ...
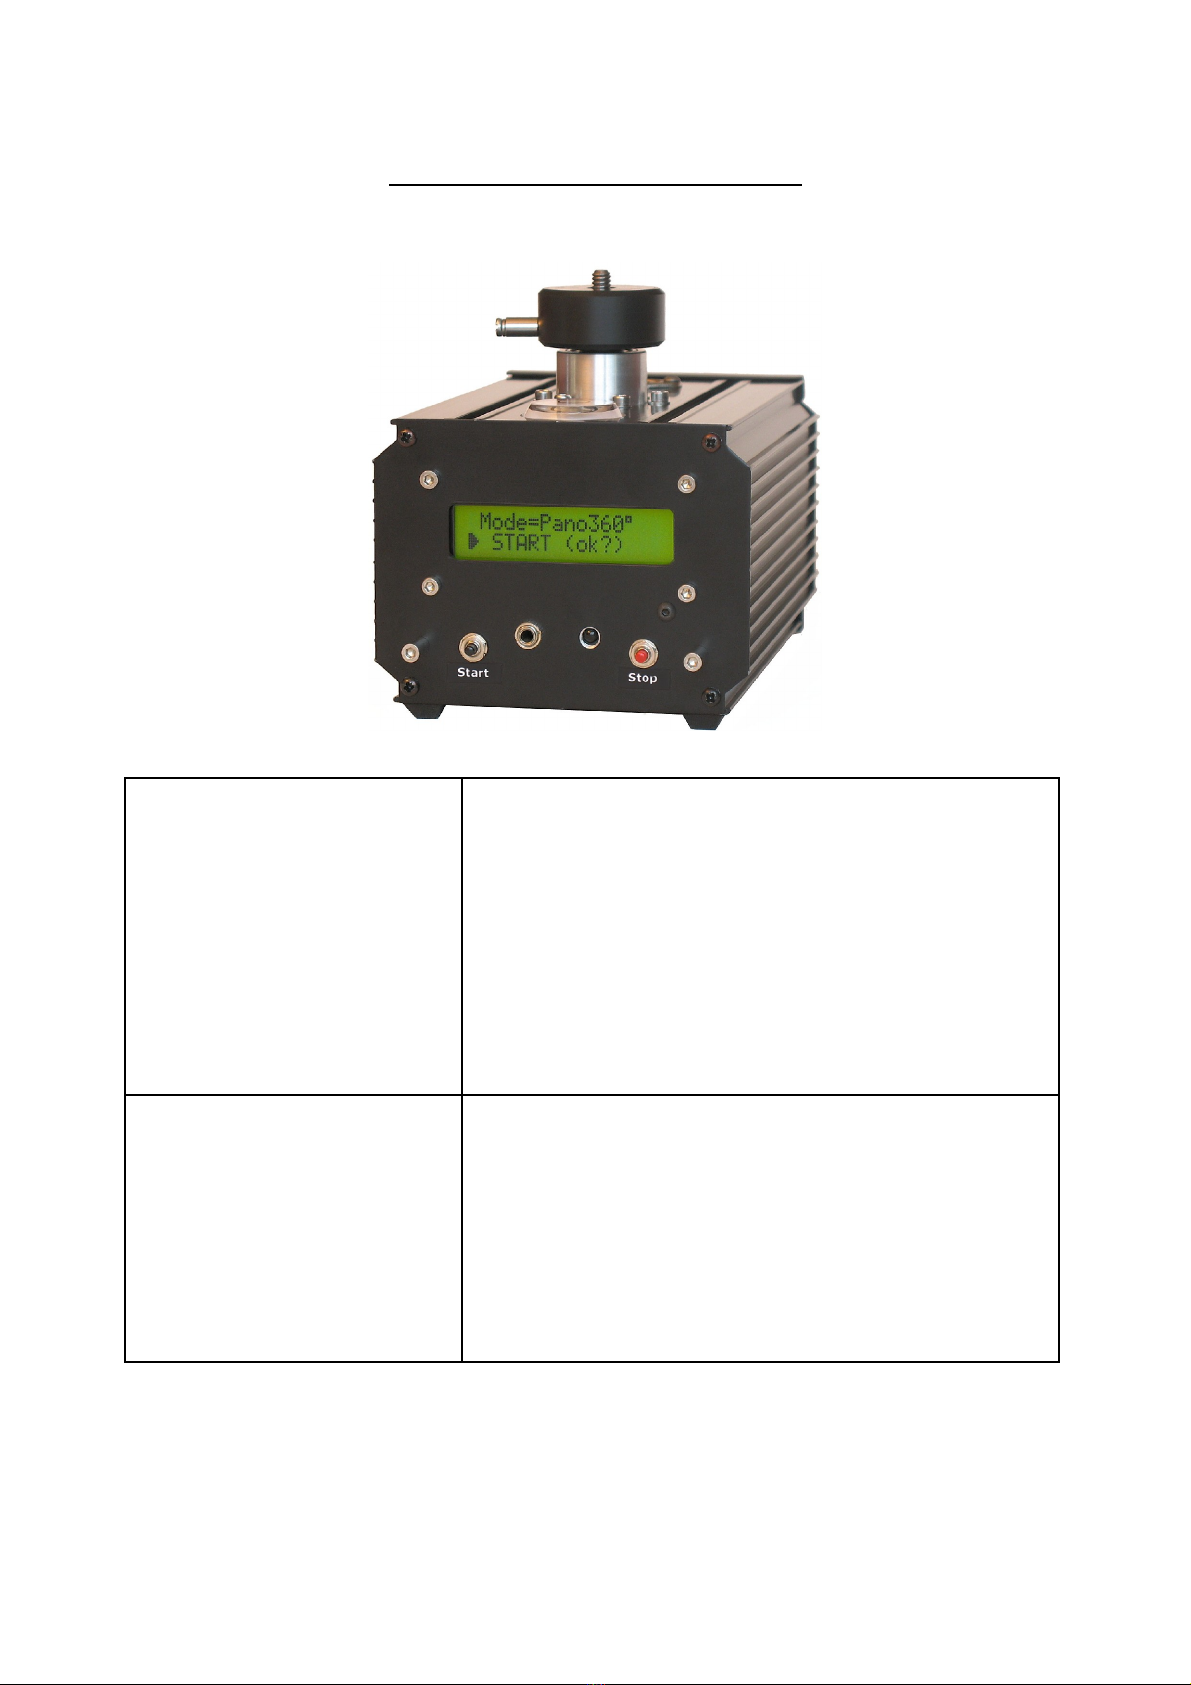
Easy use :
START and STOP buttons for fast action
Green display with backligth (blue display on
demand)
Release cable for START : the PanoMachine
can be started from several meters with a
cable, a radio control or any other electric
device.
The head can be turned easily by hand, to
begin process at the position of your choice. At
the end of the process, the head will go back
to its initial position if needed.
Rotating head is with ¼ thread ,
Connectable to an external power source.
Copyright Gildas Le Lostec - www.panomachine.com Page 2 2008-03-01

The Pano achine is delivered with theses devices :
•a Canon EOS3 /35 /4 D release cable
•a infra-red emitter to trigger NikonD5 /D7 /D8 cameras and Canon EOS3 /35 D/4 D cameras.
•a infra-red control unit to program and control the PanoMachine
Power source : 6 AA batteries or external power source (7.5 volts – 5 mA).
Weigth: 1.2 kg (with six AA batteries).
Dimensions: 12cm x 12cm x 16cm
The PanoMachine is controlled by a IR Remote control
unit :
Base for tripod : ¼ and 3/8 screws
Copyright Gildas Le Lostec - www.panomachine.com Page 3 2008-03-01

2- How to make a 360 panorama
Making a 36 ° panorama is rather simple but there is several ways to do it :
1. First way is using PANO360° mode : the PanoMachine will turn on 36 °, stopping at each position for
camera trigger. This works in all cases, even with very slow exposure time.
2. Second way is using 360CR mode (CR is for Continuous Rotation) : the PanoMachine will not stop at
each position : it will turn continuously and it will trigger the camera at all the positions without
stopping : obviously, as the camera is moving, the exposure time must be sufficiently fast to avoid
blurring : from 1/5 s to 1/4 s depending on resolution and rotation speed. Making a 36 °
panorama is really faster : 5 seconds with a 1 mm lens !
3. Third way is using 360CRC mode (Continuous Rotation) with Continuous Shooting. Your camera must
be setted to continuous shooting so it will shoot pictures at a high rate (from 2 to 8 frames/seconds,
depending on your camera) and you will adjust the rotation speed of PanoMachine to get the good
number of pictures in a complete turn. With a 1 mm lens, it is now possible to take a 36 ° panorama
is 3 seconds ! Really fast ...
Copyright Gildas Le Lostec - www.panomachine.com Page 4 2008-03-01

2.1 - PANO360 mode
First step is programming of the PanoMachine : you just need to make it one time. Once this is done, you don’t
have to do it again since you change your camera or your intentions. The PanoMachine will keep all the settings
in memory even if you change batteries.
Second step is take of view. Set the camera, install your tripod at the good place and press the button START.
Here are the informations you must give to the PanoMachine processor :
If you are not familiar with 36 ° take of view, before making pictures, you will read on the tables given in
Appendix3 the number of views needed for covering a 36 ° turn with your own camera and its lens. This
number will depend on your camera type, on the focal length of your lens and on the position you will shoot the
pictures (vertically or horizontally).
For example, with a Nikon D7 (D5 ) or a Canon Digital Rebel (Eos3 D or Eos35 D) fixed vertically and the
zoom lens on 18mm focal length, you will need 12 positions to cover 36 °.
In this case, overlapping between views will be 4 %. This overlap is necessary for stitching software to join
pictures with best quality. Depending on your software and your needs, this overlapping could varies from 2 %
to 5 %. 3 or 4 % seems to be a good compromise for most of people and most of software's.
Then, programming of the PanoMachine is simple :
1. select Mode=PANO360
2. select the number of positions needed : in our example, Npos=12
3. select the type of release in Trigger :
- if your camera is a D7 , D7 s, D5 , D8 , select Trig=NikonIR1
- if you prefer to use a cable release, select Trig=CABLE
- if your camera is a Canon Digital Rebel (Eos), you can select Trig=CanonIR1
4. select Tshoot=2 seconds if your camera is a little lazy (as Canon 3 D) or Tshoot=0 second if your
camera is a recent one with big muscles and a big buffer (as Canon 35 D)
5. To get pictures easy to join with your panorama software, the camera position must be adjusted so the
camera will rotate around the nodal point of the lens. The axis of rotation must be place under the nodal
point of the lens. This adjustment is important if there are some close objects on the pictures. If not (as a
panorama of mountains or the skyline), this adjustment is not necessary (for more information about this
technical point, just look at the web).
The location of the nodal point is depending of the focal length of the lens. For a fixed focal lens, this
position is placed at a same distance of the film (or sensor) (for a 55mm lens, it will be 55mm in front of
the sensor). So you must adjust the sliding fixation point of your bracket to 55mm.
If you use a zoom lens, its is really easier : the rotation position is just under the front of lens.
6. If you choose infra-red triggering, be sure that you have selected the infra-red remote control option on
your camera.
Then, just fix the PanoMachine on a tripod and press START button.
Nota : At each position, the PanoMachine will trigger the camera :12 positions will give 12 pictures. But we
took in account the suggestions of ours customers and we added an extra picture at the end of the processes
when making a 36 ° panorama. This last picture is at the same position than the first (because the camera has
made a complete turn) but some seconds has been flown since the first picture so it can have changed a little.
This picture could be useful if a Photoshop work is necessary to join the start and the end of the 36 °
panorama. So 12 positions gives 13 pictures and the last picture is (almost) the same than the first !
This extra picture is added only if angle of panorama is 36 °)
Copyright Gildas Le Lostec - www.panomachine.com Page 5 2008-03-01

Here is a example for Npos=8 .
Nota : If you choose infra-red control to release the camera, verify that the emitter is well oriented to the
camera. On most of cameras, the infra-red receiver is a tiny black surface on front side of the camera. Although
the PanoMachine standard emitter have a wide angle, it must not be oriented at the opposite direction of the
receiver …
Nota : By changing options in Custom mode (see Appendix 1), you can use the PanoMachine differently. For
example :
-At each position, the PanoMachine will trigger the camera. But if you want the camera to be triggered
several times at each position, it is possible (see NbrShoot value).
-The PanoMachine is able to shoot several panoramas with a time interval between each panorama : for
example, each hour during 1 hours, it can shoot automatically a panoramas, without any action from you.
-At each position, the camera will be triggered automatically. But if you want to trigger the camera by
yourself, it is possible : at each position, the PanoMachine will wait for you and will ask for pressing the OK
button on remote control. (See Appendix 1)
Nota : Focus can be done by two ways. You can use autofocus. But it is often more convenient to focus your
camera before shooting the panorama and to keep this focus adjustment for the whole panorama. Then you will
be sure that focus is the same on all the pictures. (In this case, if you are using a cable release, you can specify
a Tfocus value of zero (Tfocus= on Custom mode) , and you will have a faster take of view.
Nota : Be careful when shooting with low light conditions or great exposure time. Tshutter value must be
greater than exposure time of the camera (have a look to CUSTOM mode chapter and chronograms for more
details).
Copyright Gildas Le Lostec - www.panomachine.com Page 6 2008-03-01

2.1 - 360CR mode
What means 360CR ?
360 is for 36 °
CR is for Continuous Rotation
In this mode, the PanoMachine will trigger the camera at each position but the PanoMachine will not stop at
each position : it will rotate and trigger simultaneously. So shooting is made faster than when stopping for each
picture.
Of course, the exposure speed must not be too slow to avoid bluring. So select a high exposure time, at least
1/1 s (the higher the resolution, the higher the exposure time).
Rotation speed depends on the weight of your camera, the vibrations thats it can occur and the resolution that
you need. For heavy cameras and spherical bracket , you can also use POWER options in Custom mode to set
maximum power.
Tshutter can be modified depending on your camera. Recent cameras can be triggered with a short duration (as
2 ms).
An example with a Canon EOS35 D and a 1 mm Sigma zoom lens:
Npos=7
Trig=Cable
Speed=5s/36 °
Power=Auto
Tshutter=2 ms
Press START and a panorama is made in 5 secondes.
Nota : it can be necessary to use manual focus to speed up the shooting rate of your camera.
You can also use the CONTINUOUS SHOOTING mode of your camera:
The camera will shoot pictures at the higher possible rate (from 2 to 8 frames/seconds, depending on
your camera) . The rotation speed of the head must be adjusted so there will be the good number of
pictures at the end of rotation.
As a example :
If you want 8 pictures for a 36 ° panorama and if your camera shoot pictures at 2 frames/second in continuous
mode, then the rotation speed must be 8/2 = 4 seconds/36 °.
That is a really fast way to make panoramas but remember that exposure time must be fast enough to avoid
blurred pictures. So it could be difficult to use this mode indoor and when light is poor...
Copyright Gildas Le Lostec - www.panomachine.com Page 7 2008-03-01

3 - How to make a 160 panorama (or the angle of your choice..)
Making a panorama which total angle is different from 36 ° is easy. Simply by using the CUSTOM mode, you
can specify the value of your choice for ANGLE option.
As with a 36 ° angle panorama, the number of pîctures will depend on the angle of your lens. To know this
angle, just look at the tables given in Appendix 5. For example, with your Nikon D7 or your Canon EOS35 D,
and using the 18mm focal length, the table gives 45° for vertical position pictures.
So you will change the number of pictures (Npos option on PanoMachine board) until the angle shown by the
screen between parenthesis (it is the angle between two pictures) will be less than the 45° of your lens. Then
you will have a overlap between pictures. Here is the screens of the PanoMachine :
And here is what will be done by the PanoMachine :
For the rest, the PanoMachine works exactly the same than in PANO360 mode.
Copyright Gildas Le Lostec - www.panomachine.com Page 8 2008-03-01
ANGLE = 160
Npos=4 (40 )

4 - How to use the PanoMachine as a turntable.
The Turntable mode is almost the same than the PANO36 ° mode the camera and the subject are switched.
You will place a object on the rotating head to make it turn while the camera shoot it at each position.
Fix a plate on the rotating head and place the object on
its center. The camera will be put on a tripod, aiming the
object. Triggering the camera would be done by cable or
by the infared remote system of the PanoMachine.
Infra-red emitter of the PanoMachine can be remove from
the PanoMachine and put at a more convenient place for
triggering the camera.
For the rest, the PanoMachine works exactly the same
than in PANO360 mode.
Making 12 pictures or 64 pictures is not really different :
the PanoMachine will do it for you.
Most of your job will be lightning of the scene. By using a
white plate and a white background, the object will be
more present . By removing background with Photoshop,
the will seem to float in the air : the effect is really good.
You can also do this using light boxes or by over-exposure
of a white background.
Copyright Gildas Le Lostec - www.panomachine.com Page 9 2008-03-01

5 - Using intervalometer mode.
In Intervalometer mode, the PanoMachine will not rotate. It is only a simplified mode to use intervalometer
extended possibilities of the PanoMachine without the obligation to think about rotation options. (You can also
use the PanoMachine as a extended intervalometer with rotation possibilities using the Custom mode).
Here are the values you will specify :
A number of take of views (Nviews)
A interval of time between views
A number of cycles (Ncycle)
A interval of time between cycles
The PanoMachine will shoot like this :
In this example, there is 3 pictures by cycles (Nviews=3).
The PanoMachine will continue to shoot until the number of cycles is reached (Ncycle).
Time between shoots from 1 to 25 (tenth of second, seconds, minutes or hours)
Number of cycles from 1 to 5
Time between two cycles from 1 to 25 (seconds, minutes or hours)
6 - Making Time-lapse videos with camera motion .
The Pano achine can be used to shoot automatically a great number of pictures (up to 5000) . So it is easy to
create time-lapse videos with these pictures. In addition, as the Pano achine is capable of moving on very
small angle between 2 pictures, you will have the possibility to move your camera during take of view and the
result will be a time-lapse video with a smooth camera motion. This motion can be adjusted precisely, which can
be useful to a lots of jobs video: why not following the sun during a whole day ?
Using a camera instead of a camcorder will give you a better quality, higher resolution (and the ability to create
very high definition video) , the use of Photoshop to modify pictures, etc etc .. .
For this, select TI ELAPSE mode. Choose a large number of pictures and the angle of your choice if you want
the camera to move during sequence (if you want a video without panning during take of view, choose 0
degrés).
For example, 600 pictures (Npos=600) and 90° (Angle=90°).
The resulted video would last 20 secondes at 30 frames/seconde (600/30=20) with a panoramic motion of the
camera on a 90° angle.
Copyright Gildas Le Lostec - www.panomachine.com Page 10 2008-03-01
Table des matières


