OPTi Aura Manuel utilisateur

Product Manual
Designed and Manufactured in the UK by Optikinetics

Switching On/Switching Off
Dimming the Image
Using the Timer
Using the App
Contents
Product Overview
Getting Started
Mounting the Projector
Inserting the Effect Wheel
Focussing the Image
Cleaning the Focussing Lens
Operating the Projector
Safety Instructions
Additional Accessories
Guarantee
7
8
8
9
1
2
2
3
6
6
7
12
13
13
.................................................................
......................................................................
..........................................................
....................................................
.............................................................
................................................
.......................................................
..................................................
...............................................................
.....................................................................
........................................................................
...............................................................
.......................................................
...............................................................................
Aura
Designed and Manufactured in the UK by Optikinetics

1
Designed and Manufactured in the UK by Optikinetics
Product Overview
The [Opti] Aura LED is an ideal home sensory projector with Wi-Fi
Connectivity, a dimmer function and off timer capabilities.
1x [Opti] Aura LED Projector
1x Power Supply
1x Effect Wheel*
1x Table Stand
1x Wall Mount (with xtures and ttings)
Power Rating : 6W
Operating Voltage : 9V AC
Product Size: 20 x 20 x 20 cm
Product Weight: 889g
Packed Product Size: 30 x 30 x 26 cm
Packed Product Weight: 2kg
*Effect Wheel Varies.
Aura
Packed Box Contents:

Getting Started
Mounting the Projector
The projector can be mounted using the
provided table stand (foam ring) or wall
mount.
The wall mount should be screwed to a wall in a vertical position so
that it supports the bottom and top of the projector. Fixtures and ttings
are provided.
Note:
When wall mounting, the safety cord
should be tted to the projector. To
do this, attach the spring clip on the
safety cord onto the side of the
projector as per the image left.
2
Designed and Manufactured in the UK by Optikinetics
Aura

3
Designed and Manufactured in the UK by Optikinetics
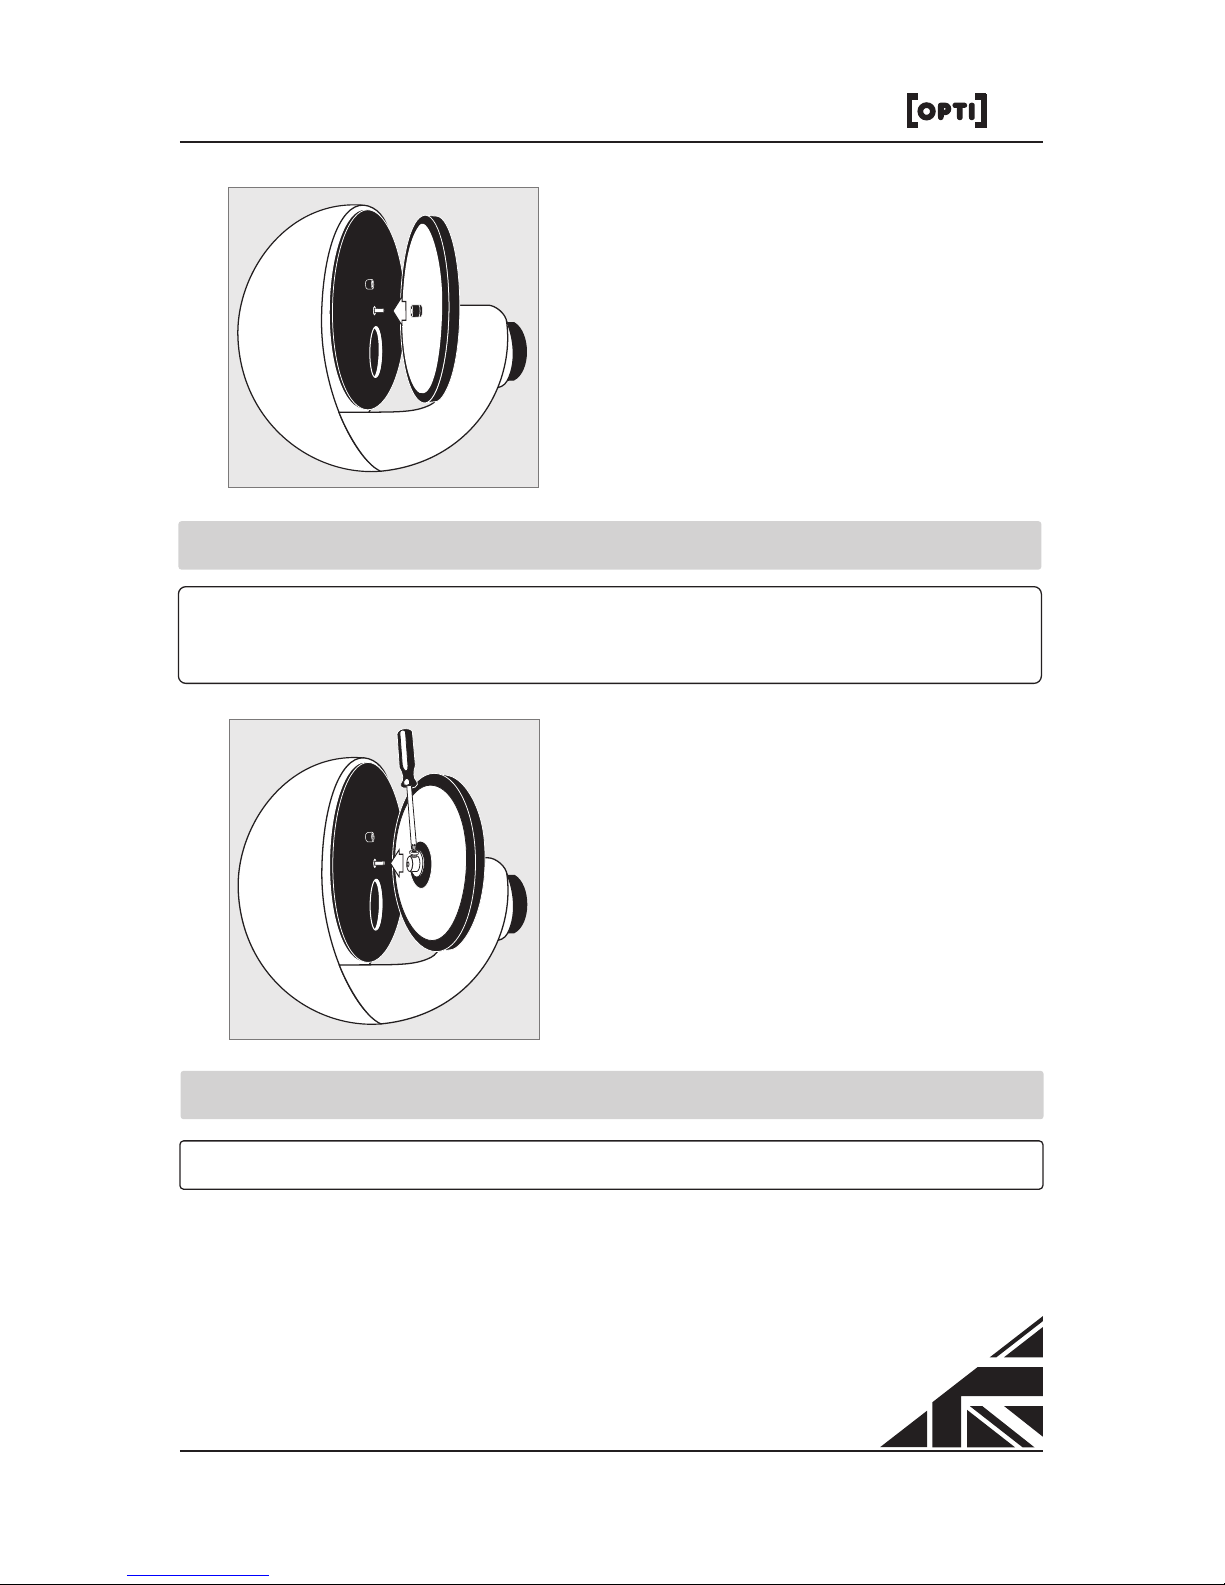
Position the magnetic wheel onto the
magnetic adaptor on the projector.
For Magnetic Effect Wheels
Note:
To remove the wheel simply lift it off.
The [Opti] Aura has been designed to
accommodate 4” and 6” effect wheels.
For 6” effect wheels the slide on the left
of the magnetic adaptor should be at the
top as per the image left.
Inserting the Effect Wheel
For this projector Optikinetics recommend selected wheels, these
can be found at:
www.optiaura.co.uk/wheels-packages.
Aura

Bossed Push On Effect Wheels
For this projector Optikinetics recommend that customers use
magnetic wheels. The Aura does also allow the use of bossed push on
wheels. To use these wheels you will be required to remove the
magnetic adapter from the projector. To do this, use the small allen key
provided and place this in the hole on top of the magnetic adapter.
Twist the allen key anticlockwise and the adapter will loosen and
detatch from the projector.
You may have to turn on the projector
to move the rotator. The hole on the
top of the magnetic adaptor must
face the top of the projector.
To reattach the magnetic adapter, make sure that the at of the shaft is
facing the top of the projector. Place the magnetic adaptor onto the
shaft and twist the allen key clockwise in the hole on the magnetic
adaptor. The adaptor will subsequently tighten and attach to the
projector.
Note:
4
Designed and Manufactured in the UK by Optikinetics
Aura
To attach glass bossed effect wheels
such as liquid wheels, tighten the cross
headed screw on the shaft of the wheel
rotator as per the image left.
To detach a bossed push on wheel, unscrew the wheel if need be and
make sure the wheel is vertical and straight. Then use both hands to
pull the wheel off the shaft.
To attach plastic bossed push on effect
wheels, simply push the wheels onto
the shaft of the wheel rotator as per the
image left.
Note:
A slight twist when attaching the plastic bossed push on effect wheel
will help.
5
Designed and Manufactured in the UK by Optikinetics
Aura
Note:
The screw needs to be aligned to the at of the shaft.

The Aura projects a moving image of any size, however it is
recommended that the maximum image projected is 4m in diameter.
An image can be projected onto any medium. For best results, use the
projector in a dark environment.
Cleaning the Focussing Lens
Use a soft tissue or lens cloth with a
little methylated spirit or pure alcohol.
Focussing the Image
The Aura projector uses the same projection lens as Optikinetics' larger
projectors [Opti] 100 LED, [Opti] Solar 250 LED and [Opti] Solar
Sensory LED. This means that the quality of the image will be the
same as those in any sensory room.
To focus the projected effect, twist the
slide on the lens forward and
backwards until your desired focus is
achieved.
6
Designed and Manufactured in the UK by Optikinetics
Aura

Operating the Projector
Switching On/Switching Off
To turn the projector on simply connect
the power supply cable to the inlet
socket on the right hand side of the
projector. The projector will turn on as
you power up the projector.
If you leave the projector on standby, the next time you turn the
projector on without the app, press the 'DIM - OFF - TIMER' button
above the inlet socket.
To turn the projector off without the app, press and hold the 'DIM - OFF
- TIMER' button until the light turns off.
DIM - OFF - TIMER
9V AC 750Ma CE
7
Designed and Manufactured in the UK by Optikinetics
Aura

Dimming the Image
The projector has a bright dimmable light that is perfect in a bedroom.
To dim the image without the app, press and hold down the 'DIM - OFF
- TIMER' button until you reach your desired light output level.
Note:
It may take up to 15 minutes for liquid wheels to start to work as
they contain oil that will ow freely once heated. This heat will
come from the projector.
Using the Timer
Utilising the timer is ideal for those who want to automatically turn the
projector off after a certain time unsupervised.
Turn on the projector and wait 10 seconds. To start the timer double
click the 'DIM - OFF - TIMER' button. To indicate the timer starting, the
projected light will icker. The timer automatically sets to 30 minutes,
dims down then turns off. The timer settings can be varied and set to
up to 60 minutes by using the projectors app.
8
Designed and Manufactured in the UK by Optikinetics
Aura
Table des matières
Autres manuels OPTi Projecteur


Manuels Projecteur populaires d'autres marques


Panasonic
Panasonic PTL735NTU - LCD PROJECTOR-NETWORK IB Manuel utilisateur

NEC
NEC NP600S EDU Manuel utilisateur

BenQ
BenQ SH753P Manuel utilisateur

Eiki
Eiki EK-623U series Manuel utilisateur

Epson
Epson PowerLite Pro Cinema 6020UB Manuel utilisateur

Epson
Epson PowerLite Home Cinema 705HD Manuel utilisateur


