Network Smartware NSAC1200RZ Manuel utilisateur

NetworkSmartware – with Rezrv
User Guide
16th February 2021
Version 3.0

Table of Contents
1.Product Overview 3
1.1 Top View 3
1.2 Back View 4
2.Setting-Up Basics 5
2.1 How to install your router 5
3. Rezrv Mobile Apps 7
4. Rezrv Mobile App Usage 7
4.1 Login Or Sign-up 7
4.2 Device On-boarding 8
4.3 Dashboard 8
4.3.1 Router Status 8
4.3.2 Users 9
4.3.3 Devices 9
4.3.4. Speed Test 9
4.3.5 Parental Controls 10
4.3.6 Notifications 10
4.3.7 Priority Control 11
4.4 Analytics 12
4.5 User Profile 12
4.6 Settings 13
4.6.1 Router Settings 13
4.6.2 FAQ’S & Help 13
4.6.3 Advanced Settings 13
5. Rezrv using Alexa 14
5.1 Rezrv Amazon Alexa Skill 14
5.2 Adding Rezrv skill to Alexa 14
5.3 Parental Control and Bandwidth Control Commands 15
6. Rezrv using Google Assistant 16
6.1 Rezrv Google Assistant Skill 16
6.2 Adding Rezrv skill to Google 16
6.3 Parental Control and Bandwidth Control Commands 16
7. Rezrv Videos 17
2
1.Product Overview
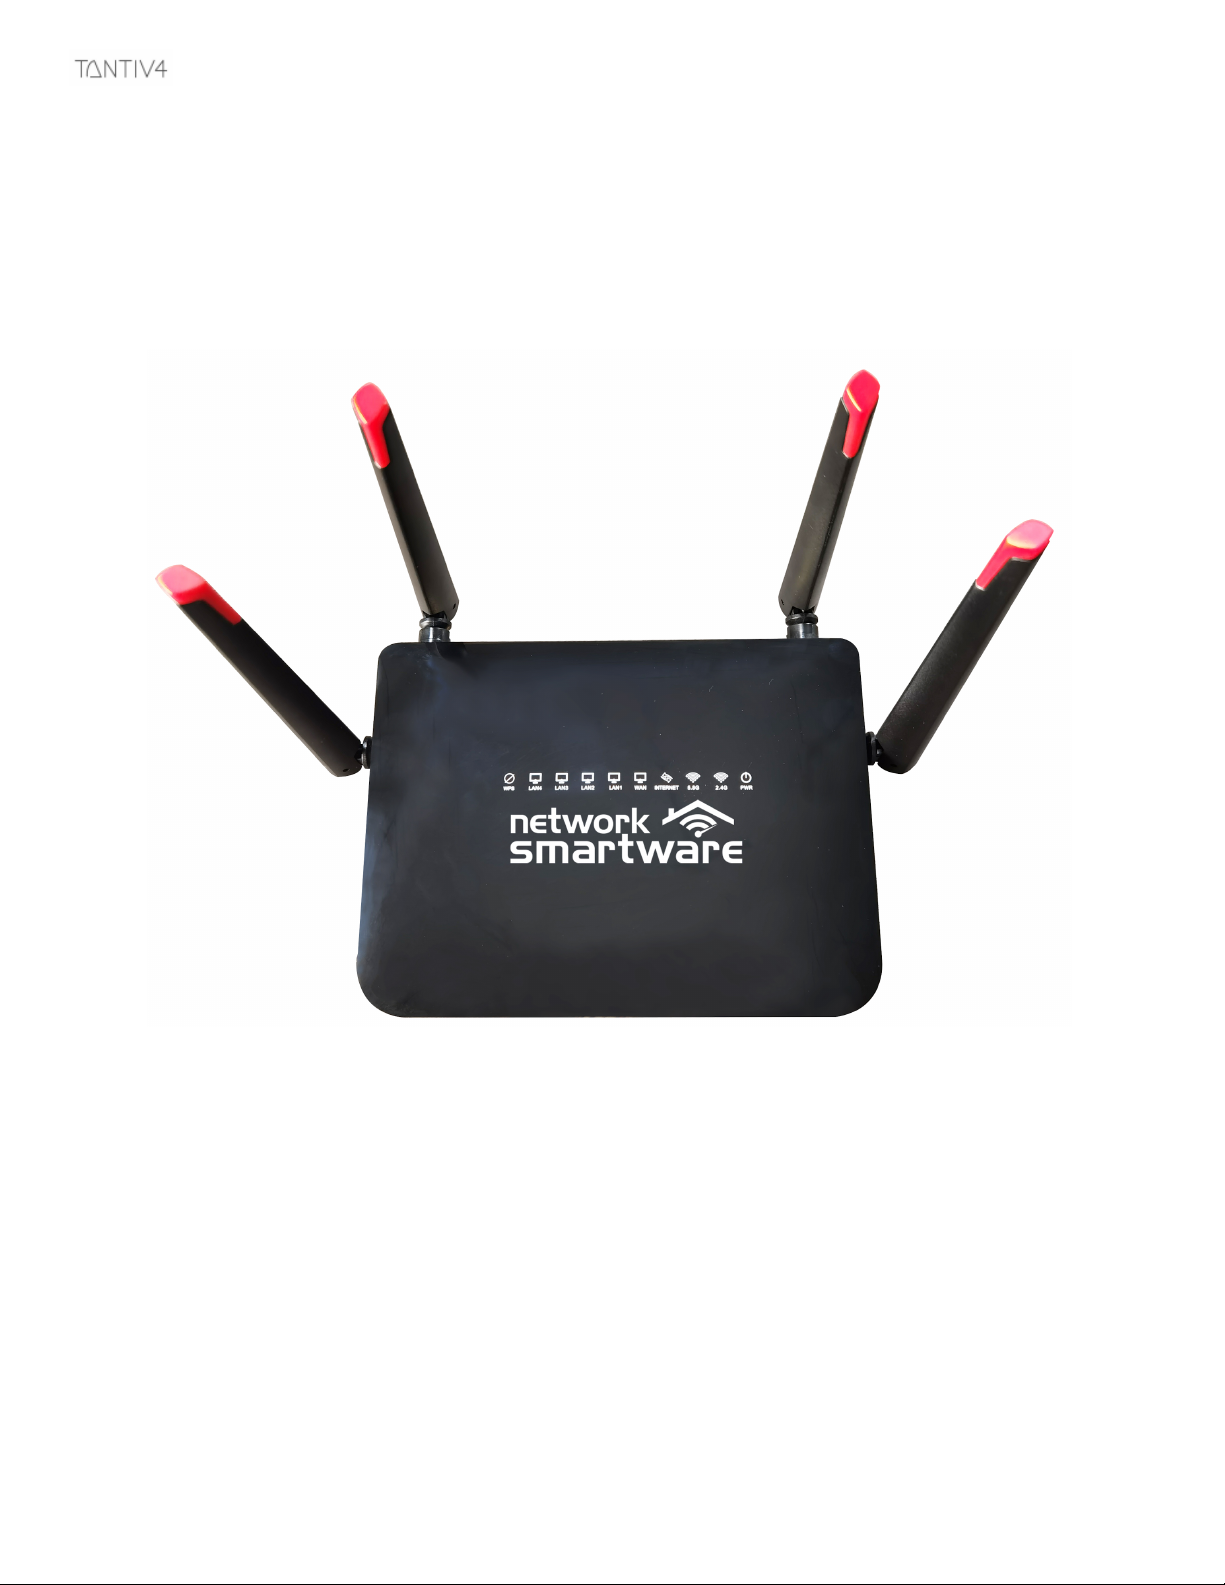
1.1 Top View
Led Indicators (Right to Left)
1. Power indicator: The icon LED is solid green while the router is powered on. It will blink when
the router goes through its self-diagnostic mode during every boot-up.
2. 2.4 GHz Indicator: The Wireless LED is solid green when one or more clients are connected to
the 2.4 GHz network. If the LED is blinking green, the router is sending or receiving data over the
2.4 GHz network.
3. 5 GHz Indicator: The Wireless LED is solid green when one or more clients are connected to the
5GHz network. If the LED is blinking green, the router is sending or receiving data over the 5 GHz
network.
4. Internet Indicator: The Internet LED blinks green while the router works to establish a
connection.
5. WAN Indicator: The Internet LED is solid green when connected to the Internet. If the LED is
blinking green, the router is sending or receiving data.
3

6. LAN 1 through 4: These numbered LEDs correspond with the numbered ports on the router’s
back panel. If the green LED is solid, the router is connected to a device through that port. A
flashing green LED indicates network activity over that port.
1.2 Back View
Ports (Right to Left)
1. Power port: Connect the included AC power adapter.
2. Reset button: Press and hold for 10 seconds (until the power LED starts flashing) to reset the
router to factory settings.
3. Internet port: Connect an Ethernet cable between the blue gigabit (10/100/1000) port and a
broadband Internet cable/DSL or fiber modem.
4. LAN ports—Connect Ethernet cables to these yellow gigabit (10/100/1000) ports and wired
devices on your network.
5. Adjustable antennas—This router ships with four adjustable external antennas that should be
positioned vertically, as shown in the picture above before powering it on.
4

2.Setting-Up Basics
2.1 How to install your router
If replacing an existing router, disconnect that router first.
1. Turn the antennas so they are positioned straight up, and plug in your router to a power source.
2. Connect the Internet cable from your modem to the blue WAN port on your router. Wait until the
indicator light on your router is solid.
3. Connect to the secure wireless name shown in the Quick Start Guide that came with your router.
(You can change the network name and password later.)
Note—You will not have Internet access until the router setup is complete.
5

4. Open your computer’s web browser (preferably Chrome). Go to 10.3.12.1 to begin the Setup
process.
5. Select your language and click Next
6. Set-up an administrator login and password.
7. Click Submit to finish the Set-up Process.
Note: If you would like to Set-up separate SSIDs for 2.4GHz and 5GHz select the option here. This can
be done later, as well.
6

3. Rezrv Mobile Apps
You can configure your router from anywhere in the world by using Rezrv Mobile App available
in iOS App Store and Google Play Store.
Name of the app: REZRV
●iOS App Store: https://apps.apple.com/us/app/rezrv/id1529166831
●Google Play Store:
https://play.google.com/store/apps/details?id=com.reservdemo&hl=en_US&gl=US
4. Rezrv Mobile App Usage
4.1 Login Or Sign-up
7

1.Login if you already have an existing account or Sign-up by creating an account.
2.Once account is created , Login using the newly created account.
4.2 Device On-boarding
The first step is to link your router to user account
1.Enter a Name for your Router
Ex: Joe’s Router
2.Enter the router Id manually Or Scan for QR code
(The Router Id which can be found at the back of your router)
3.Click on Link Device , your router should be linked
successfully to the user account.
4.3 Dashboard
4.3.1 Router Status
The top card displays Router’s Name along with Router’s
Online or Offline status.
- Green color dot indicates the Router is online
- Red color dot indicates the Router is offline
- It also displays Active Download and Upload rate.
8

4.3.2 Users
- By default, an admin user will be created with the username of the created account.
- To add more users , click on Users card and in users screen click on ‘+’ icon which will
allow you to add more users .
- Assign a name and link each device to respective users.
- You can add or delete users as well.
4.3.3 Devices
- Click on Devices Card which will display list of connected devices to the Rezrv Router
- The green dot indicated the device is active and connected to the Rezrv router.
- Click on the ‘three dots’
● To view more information about a particular device
● To Rename a device
● To assign a particular device to a different user
4.3.4. Speed Test
- Click on ‘Run Test’ to get the Download and Upload speed
- At the end of the Results a screen will display how good your Internet connection is and what
resolution it can support for video streaming.
9

- Click on the History tab to view the speed results history.
4.3.5 Parental Controls
- Clicking on the Parental Controls will display list of cards associated with each User
- Clicking on the Particular card displays the Sub-user’s Name & associated device Name
● To Block Internet Access for that particular User Click on ‘Pause’ Button
● Clicking on ‘Pause’ again will resume Internet
● To Block Individual applications for that particular user , Click on Filter option
●Filter option will display list of applications which can be block selected
applications
4.3.6 Notifications
Any changes made to Modes such as adding an application, deleting,block or unblocked
information can be viewed in notification centre.
10
Table des matières
Manuels Routeur réseau populaires d'autres marques


NETGEAR
NETGEAR FS526T - Switch Manuel utilisateur

Korenix
Korenix JetNet 5710G Series Manuel utilisateur

Automated Logic
Automated Logic ZN551 Manuel du propriétaire

Cisco
Cisco ASR 1000 Series Manuel de l'opérateur

EnGenius
EnGenius ESR-9710 Manuel utilisateur

Cisco
Cisco 805 Series Instructions d'utilisation et de sécurité