3Instructions TRAIL & GAME 2022
TABLE OF
Fitting the handlebars....................................................................................................................................................................... 4
Head tube routing......................................................................................................................................................................................... 5
Mounting the Kiox/Intuvia display.................................................................................................................. 6
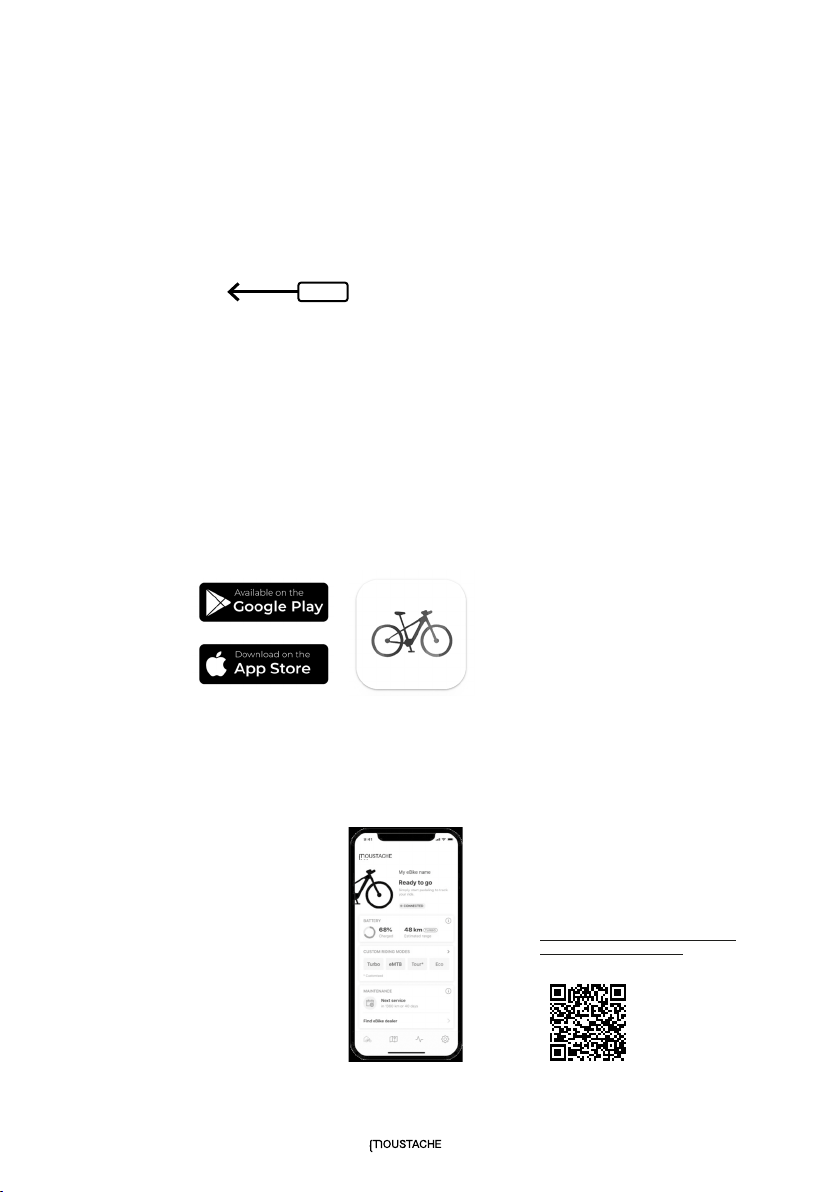
First steps with the Smart System................................................................................................................ 8
Removing the battery......................................................................................................................................................................... 9
Fitting the battery.....................................................................................................................................................................................10
Adjusting the battery lock................................................................................................................................................11
Mounting the battery clip...................................................................................................................................................12
Setting the rear suspension........................................................................................................................................13
Introduction to the rear suspension......................................................................................................................................... 13
Rear shock air pressure setting...................................................................................................................................................... 14
Setting shock rebound................................................................................................................................................................................... 15
Setting the fork...............................................................................................................................................................................................16
Marzocchi........................................................................................................................................................................................................................... 16
Rockshox............................................................................................................................................................................................................................. 17
Fox 36........................................................................................................................................................................................................................................ 18
Fox 38........................................................................................................................................................................................................................................ 19
Setting the tyre pressure.....................................................................................................................................................20
Removing the front wheel.................................................................................................................................................21
Removing the rear wheel....................................................................................................................................................21
Using the derailleur SHADOW RD+ system................................................................................................................ 21
Good practices before first use.......................................................................................................................22
Adjusting the dropper seatpost height................................................................................................................................ 22
Setting the saddle angle and height........................................................................................................................................ 24
Setting the brake lever/shifter angle and stroke.................................................................................................. 25
Good practices before each use...................................................................................................................26
Good practices after each use............................................................................................................................27
Glossary..............................................................................................................................................................................................................................28
My settings.................................................................................................................................................................................................................29
My maintenance and repairs....................................................................................................................................30