Mosaic FSMVPT5019 Manuel utilisateur
42” Rectangular Gas Fire Pit
Please keep this instruction manual for future reference
Assembly Instructions
& User’s Manual
READ INSTRUCTION MANUAL BEFORE ATTEMPTING TO ASSEMBLE OR
OPERATE THIS PRODUCT.
Adult assembly required.
Keep screws and parts out of reach of children.
Customer Service: (866) 814-0585, 8:00am to 8:00pm,
Monday thru Friday Eastern Standard Time
Customer Service: (888) 922-2336 7:00 am to 12:00 am CST (daily)
Live Chat at: www.academy.com
Email: [email protected]
(Made in China)
Warning:
--------------------------------------OR-------------------------------------
Item# FSMVPT5019
Model# SRGF11666
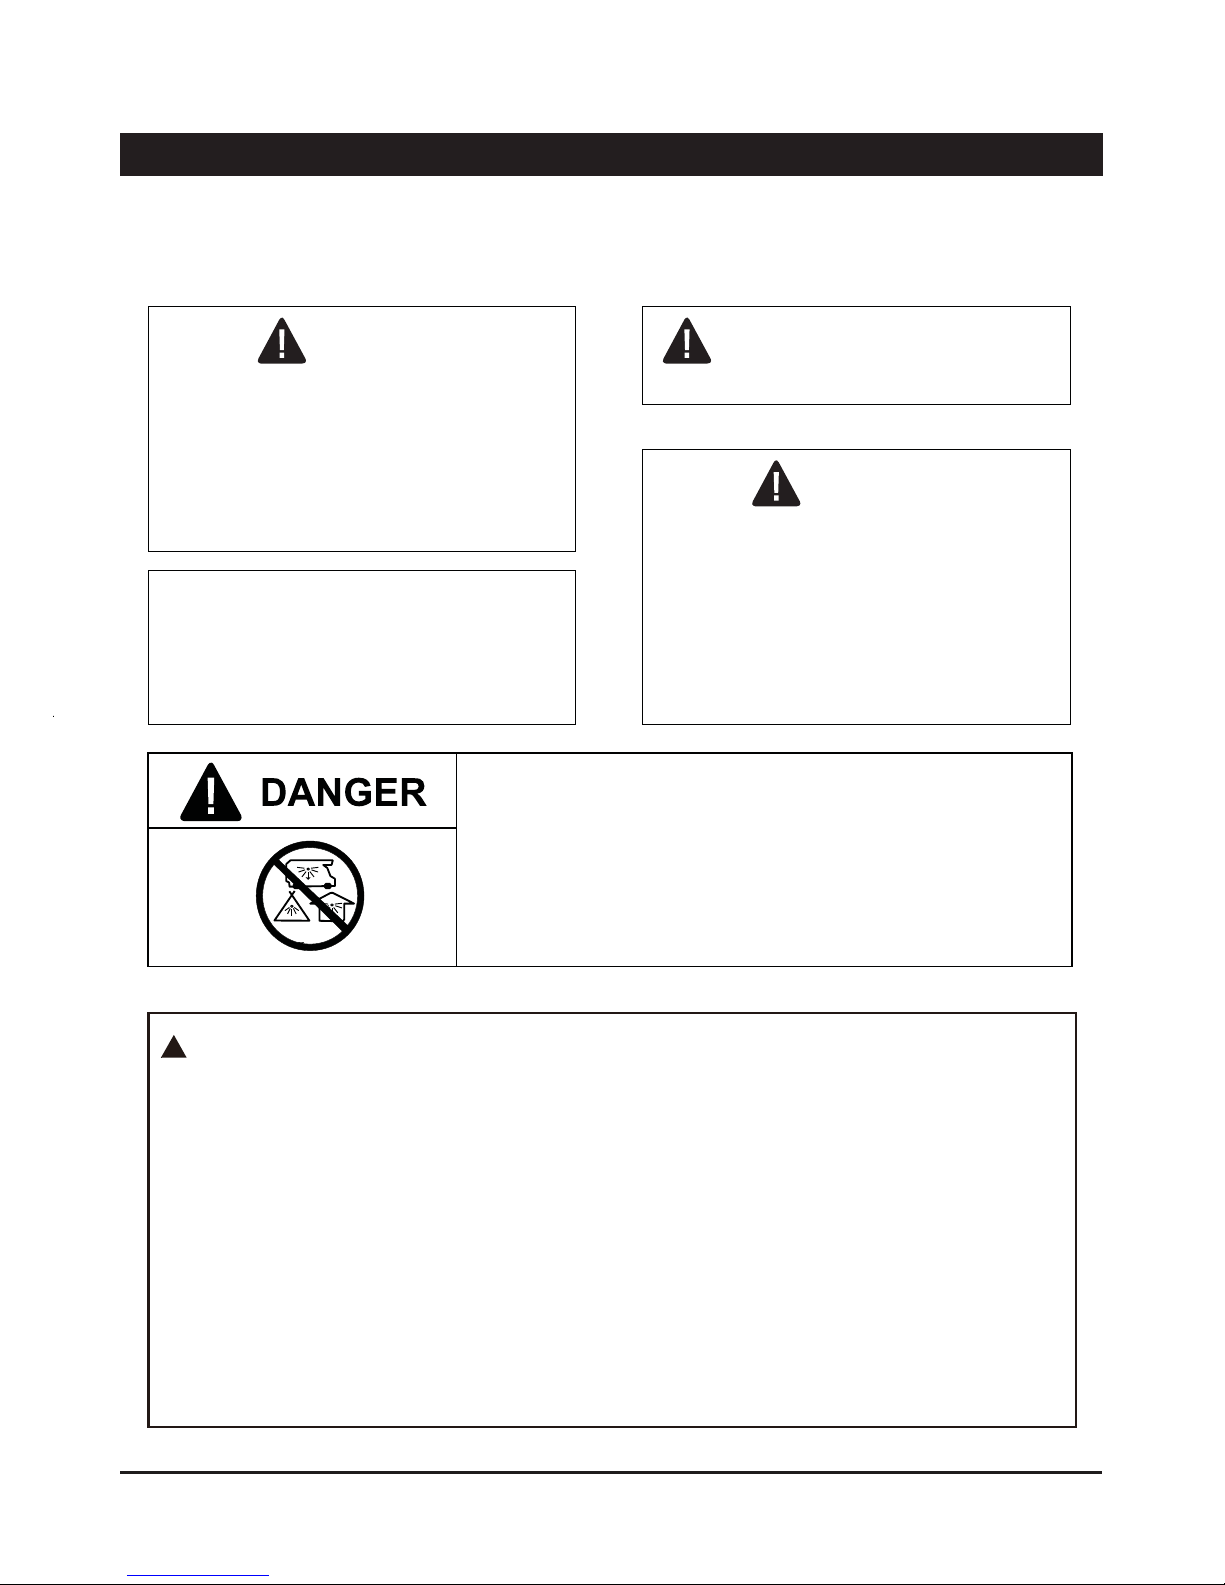
If you smell gas:
1. Shut off gas to the appliance.
2. Extinguish any open flame.
3. If odor continues, keep away from
the appliance and immediately call
your gas supplier or fire department.
DANGER WARNING: For Outdoor Use
Only.
CAUTION:
Installer: Leave the instruction manual
to the user for future use.
Consumer: Please keep this manual
for future reference.
Do not store or use gasoline or
other flammable vapors and liquids
in the vicinity of this or any other
appliance.
WARNING
An LP-cylinder not connected for use
shall not be stored in the vicinity of
this or any other appliance.
WARNINGS AND CAUTIONS
Read the instructions before use. This appliance must be installed in accordance with such
regulations as are enforced.
tDo not try to light the appliance.
tDo not touch any electrical switch; do not use any phone in the vicinity of this product.
tImmediately call your gas supplier from a neighbor’s phone. Follow the gas supplier’s
instructions.
tIf you cannot reach your gas supplier, call the fire department.
WARNING:
CARBON MONOXIDE HAZARD
Improper installation, adjustment, alteration, service or maintenance can
cause injury or property damage. Read the installation, operation and
maintenance instructions thoroughly before installing or servicing this
equipment.
WHAT TO DO IF YOU SMELL GAS?
Installation and service must be performed by a qualified installer, service agency or gas
supplier.
This appliance can produce carbon monoxide which has
no odor.
Using it in an enclosed space can kill you.
Never use this appliance in an enclosed space such
as a camper, tent, car or home.
Page 2 of 19
TABLE OF CONTENTS
Warnings and Cautions...................................................................2,4-5
Table of Contents..................................................................................3
Tools and Parts...................................................................................6-7
Assembly Instructions.......................................................................8-11
Installation Instructions ........................................................................12
Operation........................................................................................13-15
Locating Heater For Use......................................................................16
Maintenance and Storage...............................................................17-18
Trouble Shooting..................................................................................19
Warranty Information............................................................................19
REMINDER
BEFORE ASSEMBLY
Verify that all parts are included with your heater BEFORE you begin assembly by checking the Parts and
Hardware List. For your convenience, some parts may be pre-assembled or attached to heater components.
If all parts are not included, do not attempt to assemble heater. Call the toll free number on the cover
page for replacement parts.
Leave hardware installed HALF-TIGHTENED on the heater during assembly until unit is completely
assembled, then finish tightening all hardware installed.
YOUR OWNER’S MANUAL
Keep and store this Owner’s Manual for future reference – it contains important instructions and
procedures for safety and maintenance.
Page 3 of 19

WARNINGS AND CAUTIONS
NOTE:PLEASE READ THE FOLLOWING SAFETY RULES
WARNING:
!
The installation must comform with local codes or, in the absence of local codes, with the
CAN/CGA-B 149.2, Propane Installation Code.
This appliance requires 20 lb (9 kg) LP gas supply cylinder.
The burner must be replaced prior to the appliance being put into operation if it is evident that the
burner is damaged. The replacement burner shall be that specified by the manufacturer.
Installation and repair should be done by a qualified service person. The appliance should
be inspected before use and at least annually by a qualified service person. More frequent
cleaning may be required as necessary. It is imperative that control compartment, burners,
and circulating air passageways of the appliance be kept clean.
Always place the appliance on a firm and level surface.
Do not burn solid fuels in this gas appliance.
Use the appliance outdoors in a well-ventilated space only, not in a building, garage, or any other
enclosed area.
When using the appliance, keep the appliance area clear and at least 50 inches from combustible
materials, gasoline and other flammable liquid and vapors. Certain items or materials, when stored
under the appliance or nearby, will be subjected to radiant heat and could be seriously damaged.
Inspect the gas connections of appliance prior to each use. Do not operate the unit if there is gas
leak. A qualified service person should inspect the appliance annually.
Alert children and adults to the hazards of high surface temperatures and keep them away
to avoid burns or clothing ignition.
Carefully supervise children and pets when they are near the appliance.
Replace and guard or other protective device removed for servicing.
Do not hang clothing or other flammable materials on or near the appliance.
Do not use the appliance if any part has been under water. Immediately call a qualified service
technician to inspect the appliance and to replace any part of the control system and any gas
control which has been under water.
The LP-gas supply cylinder to be used must be: Constructed and marked in accordance with the
Specifications for LP-gas cylinders of the U.S. Department of Transportation (DOT); or the
Standard for Cylinders, Spheres and Tubes for Transportation of Dangerous Goods and
Commission, CAN/CSA-B339, as applicable;
The LP-gas supply cylinder to be used must be provided with a listed overfilling prevention device;
and provided with a cylinder connection device compatible with the connection for the appliance.
Use only a cylinder supply system arranged for vapor withdrawal, and the cylinder must include a
collar to protect the cylinder valve.
Page 4 of 19
This appliance is designed to operate with a standard 20 Ib propane cylinder with Approved
Cylinder Connection.
NOTE: PLEASE READ THE FOLLOWING SAFETY RULES:
Before beginning assembly of product, make sure all parts are present. If any part is missing or
damaged, do not attempt to assemble the product. Contact customer service for replacement parts.
Perform a leak test with a soapy solution:
1. To check gas connections.
2. After connecting a new cylinder.
3. Upon re-assembly after disassembly.
WARNINGS AND CAUTIONS
WARNING:
This product can expose you to chemicals including lead, which is known to the State of
California to cause cancer, and carbon monoxide, which is known to the State of California to
cause birth defects or other reproductive harm. For more information, go to:
www.P65Warnings.ca.gov.
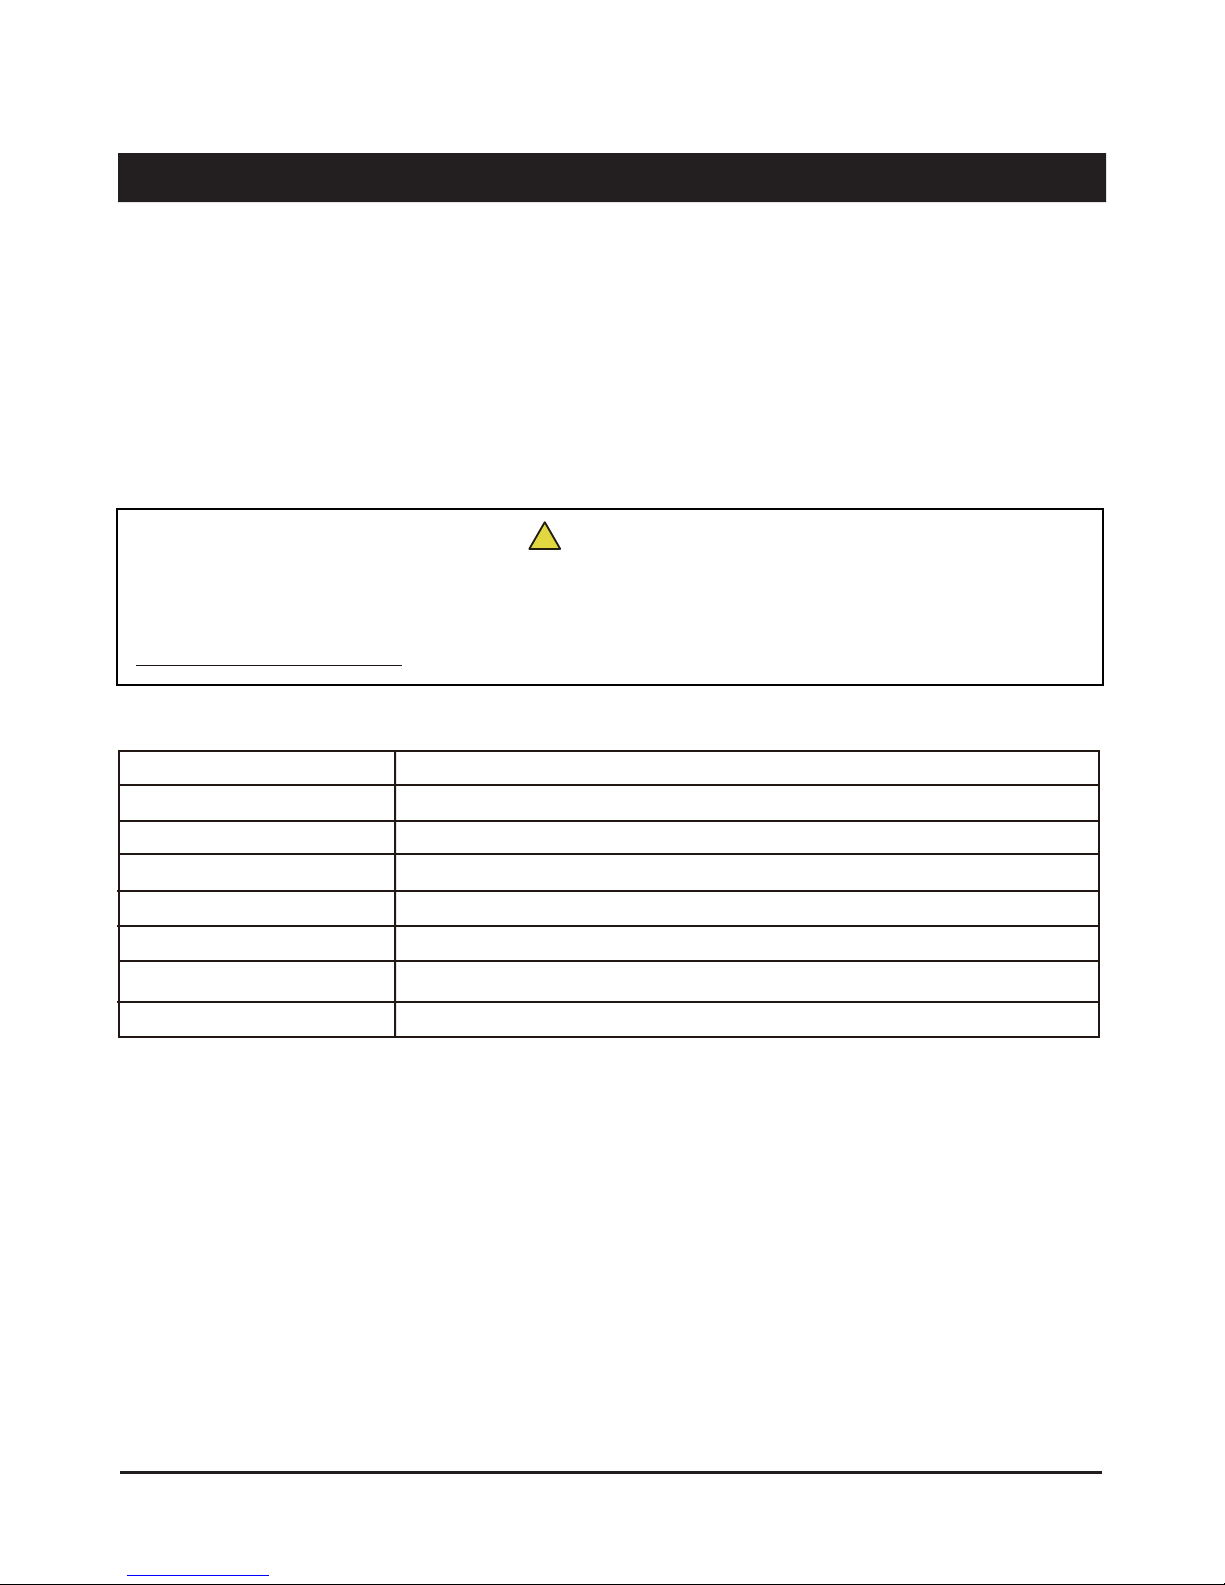
SPECIFICATION
Certification CSA
Rated Heat Input 60000 BTU/HR
Fuel LP
Gas Supply 20 lb (9 kg) LP gas cylinder
Manifold Pressure 11” W.C.
Injector Size(diameter) 2.7mm
Gas Supply Pressure
M
Battery Size AA, 1 piece(not included)
ax. 250PSI, Min. 5PSI
Page 5 of 19
B
A
C
D
E
G
H
F
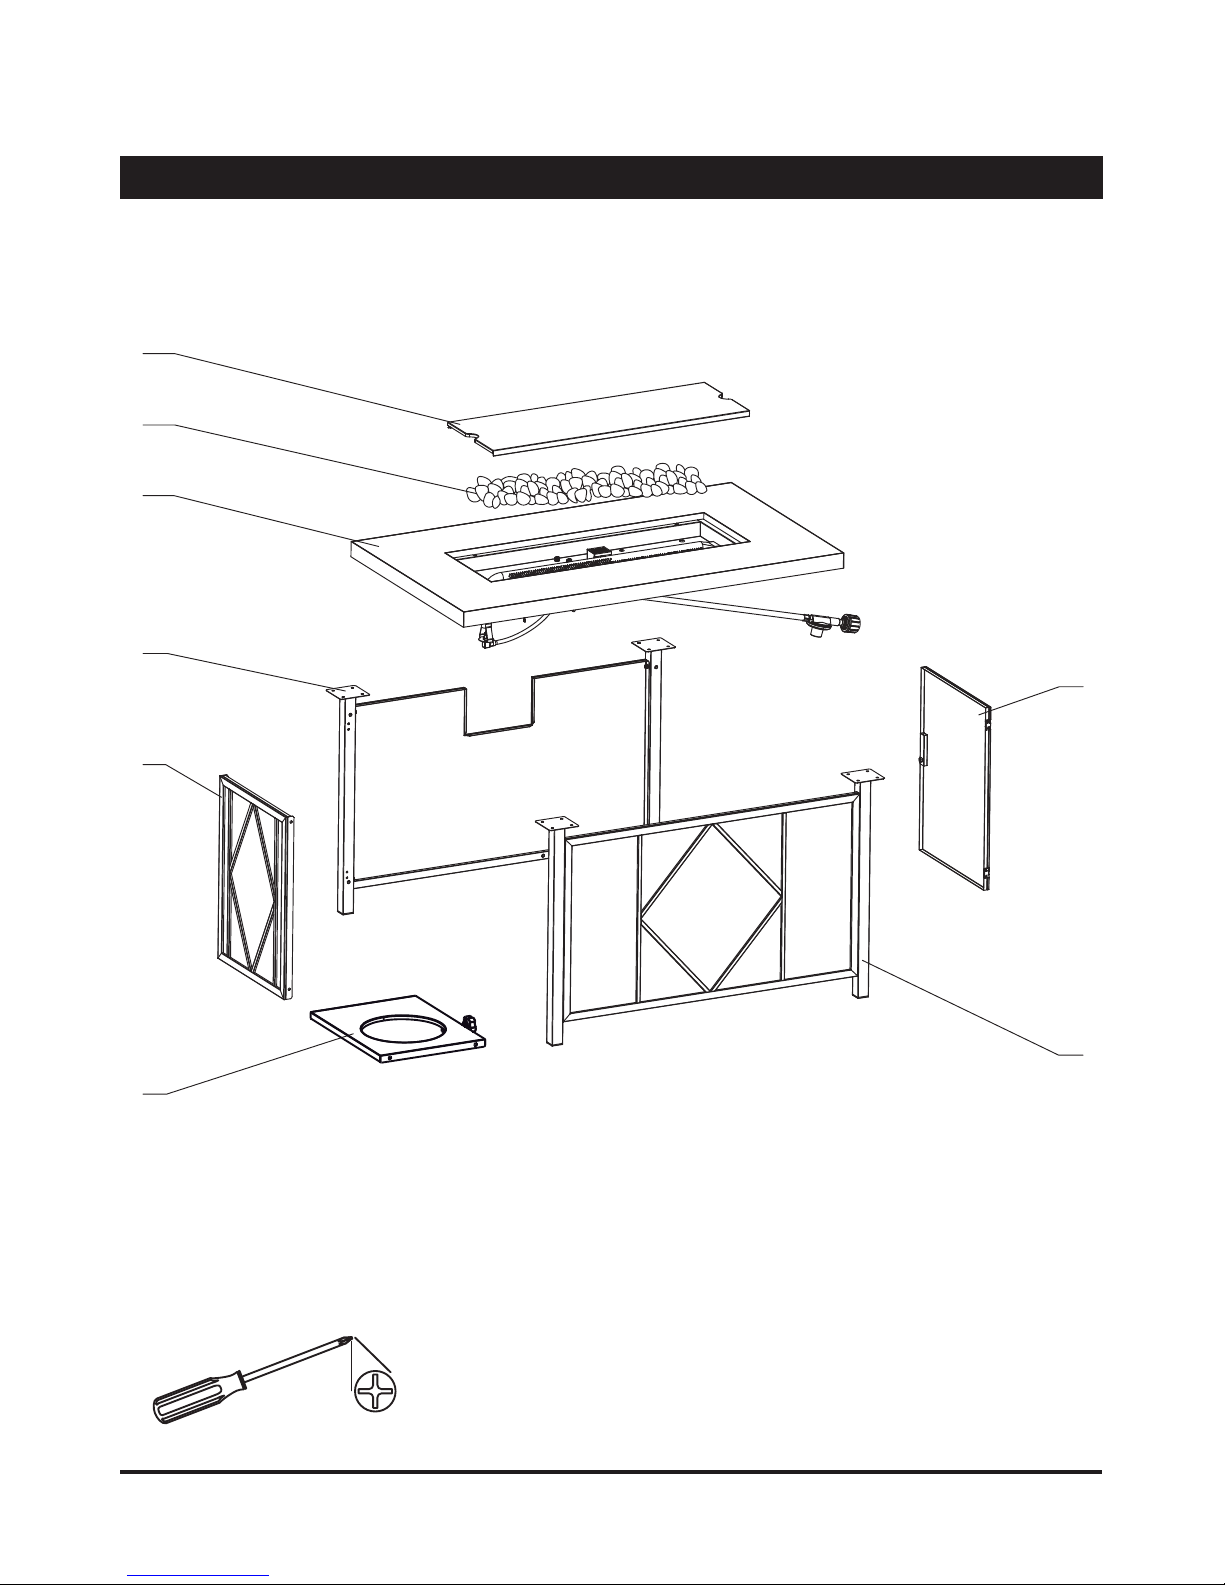
TOOLS AND PARTS
Page 6 of 19
TOOLS NEEDED: (NOT INCLUDED)
Philips screwdriver
Estimated time for assembly: 30 minutes.
Please check the contents of the packaging to ensure all parts are included. If missing parts
please contact customer service.
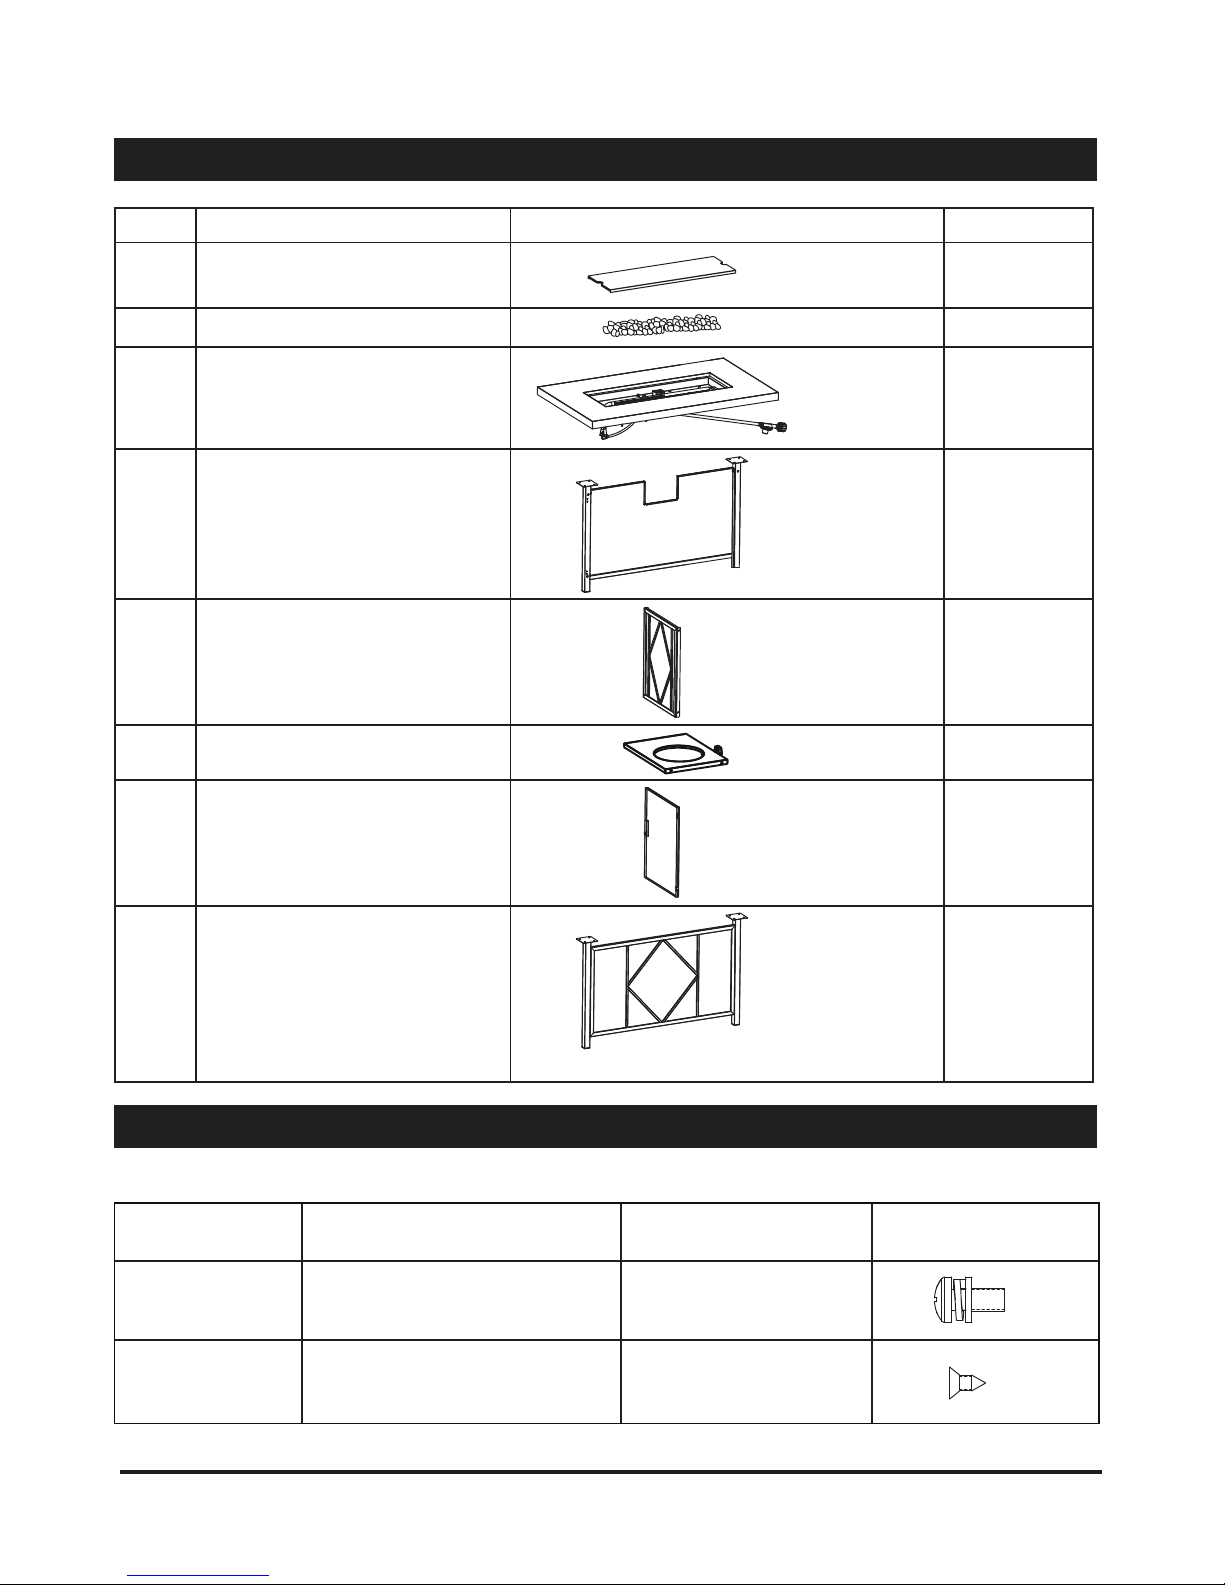
42tloB41x6MAA
BB ST4.2 x 9.5 Screw 4
Parts Description Quantity Picture
Cover lid
Lava rocks
Table top
Front panel
Right panel
Cylinder holder assembly
Door
Rear panel
A
B
C
D
E
F
G
H
QuantityDescription
Please check the contents of the packaging to ensure all parts are included.
Part
1 pc
1 pc
1 bag
1 pc
1 pc
1 pc
1 pc
1 pc
TOOLS AND PARTS
HARDWARE
Page 7 of 19
Picture
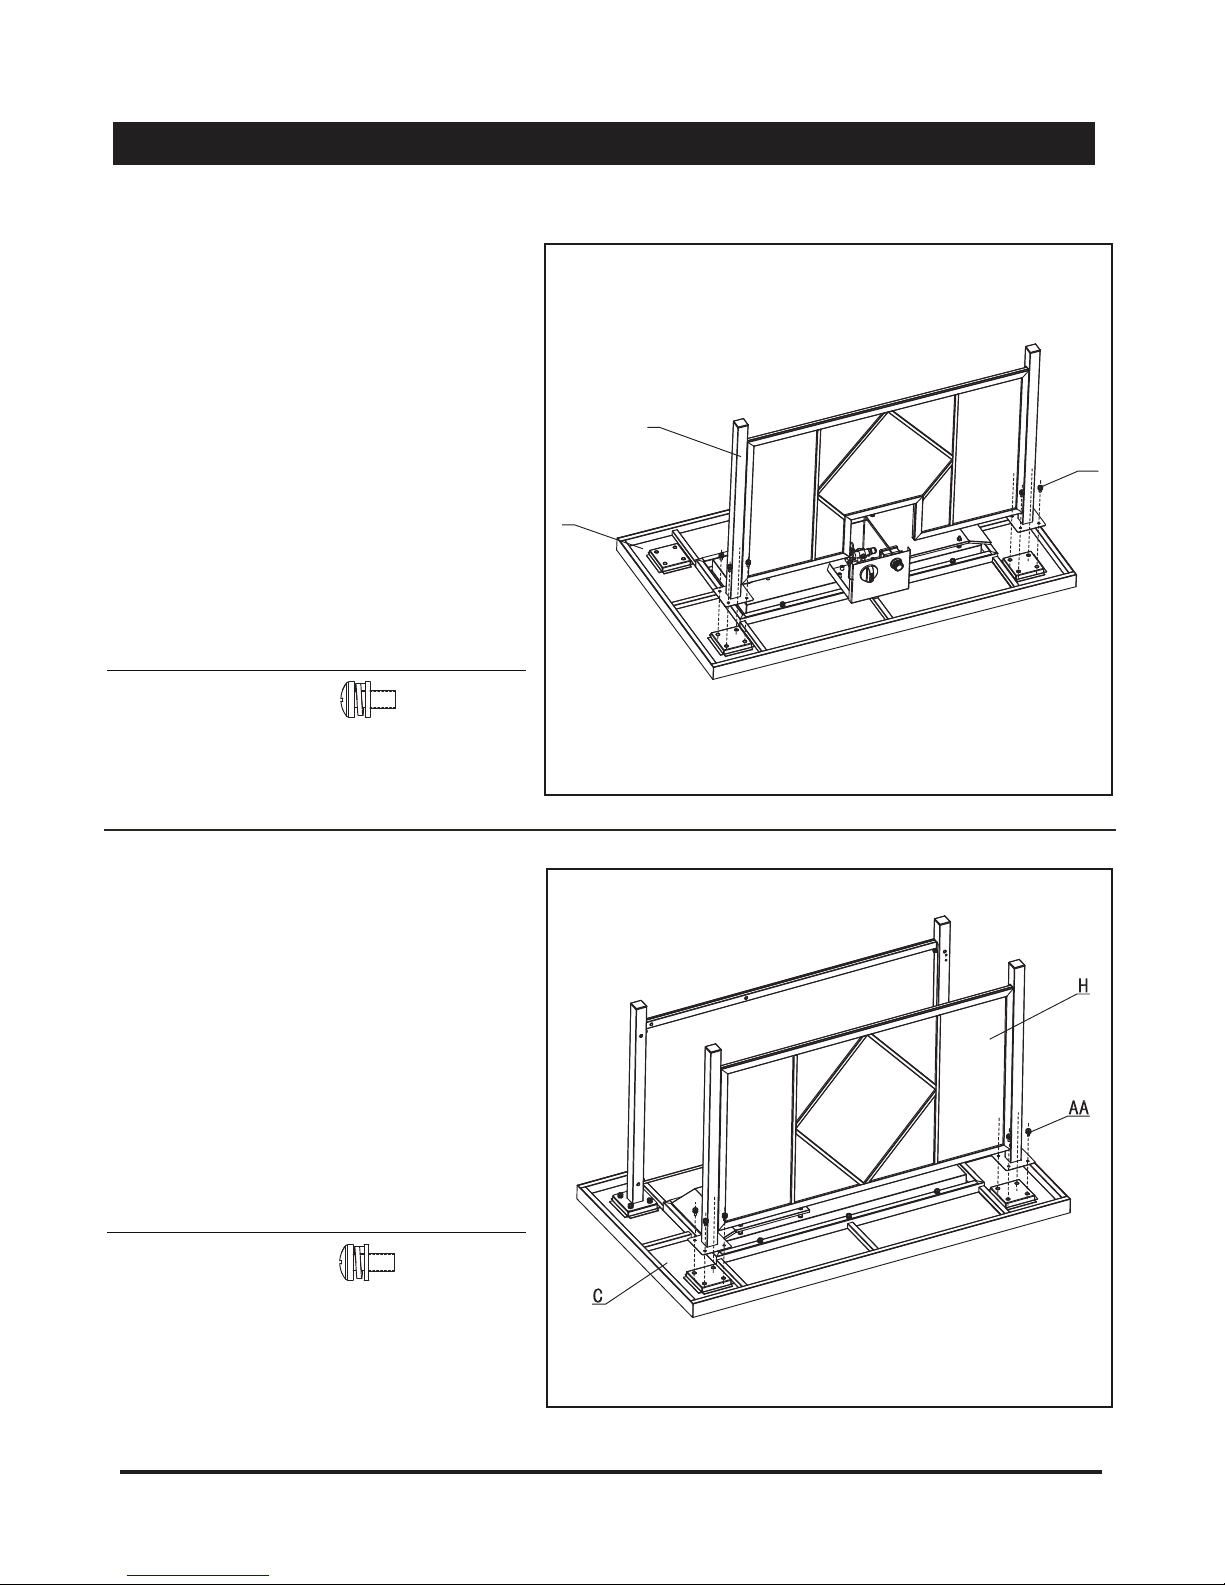
Step 1
Place the table top (C) upside down to the
soft,level surface, attach front panel (D) to
the table top (C) with (8) M6 x 14 bolts
(AA) as illustrated.
Note: With the help of a friend,turn the
table top upside down to begin assembly.
Step 2
Attach rear panel (H) to the table top (C)
with (8) M6 x 14 bolts (AA) as illustrated.
Choose a good,cleared assembly area and get a friend to help you put your gas fire pit together. Lay
cardboard down to protect gas fire pit finish and assembly area.
AA
D
C
ASSEMBLY INSTRUCTIONS
Page 8 of 19
AA M6 x 14 bolt 8 pcs
Hardware Used
AA M6 x 14 bolt 8 pcs
Hardware Used
Step 1
Step 2

Step 3
Attach right panel (E) to front panel (D) and
rear panel (H) with (4) M6 x 14 bolts (AA)
as illustrated.
Step 4
Attach (2) hinges of the door to the rear panel(H)
with (4) ST4.2 x 9.5 screws (BB) as illustrated.
AA
E
H
G
BB
D
H
ASSEMBLY INSTRUCTIONS
BB ST4.2 x 9.5 Screw 4 pcs
Page 9 of 19
AA M6 x 14 bolt 4 pcs
Hardware Used
Hardware Used
Step 3
Step 4
Step 5
Step 6
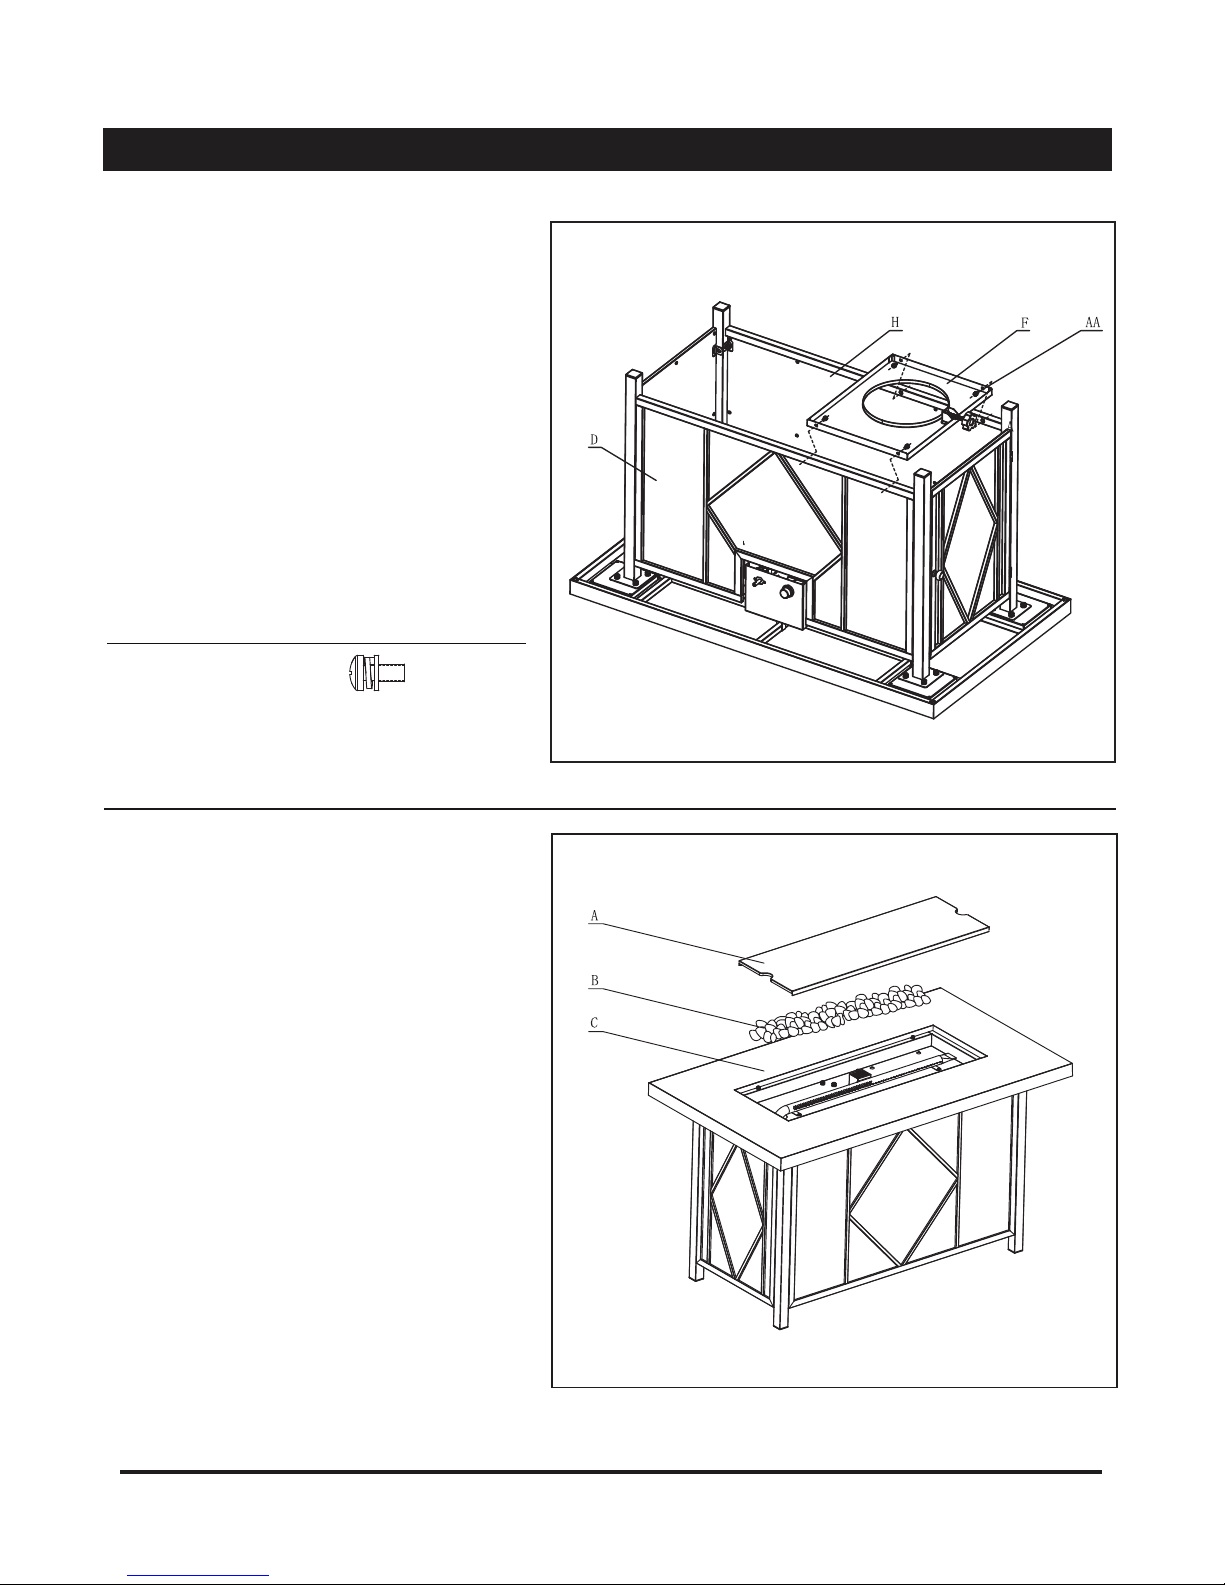
Step 5
Attach cylinder holder assembly (F) to front
panel (D) and rear panel (H) with (4)
M6 x 14 bolts (AA) as illustrated.
Note: With the help of a friend,turn the gas
fire pit into upright position after this step
finished.
Step 6
Put the lava rocks (B) on the burning area
of table top (C).
Place the cover lid (A) onto the table top
(C) when no use.
ASSEMBLY INSTRUCTIONS
Page 10 of 19
AA M6 x 14 bolt 4 pcs
Hardware Used
Table des matières


