MAGICVIEW OC-300 Manuel utilisateur
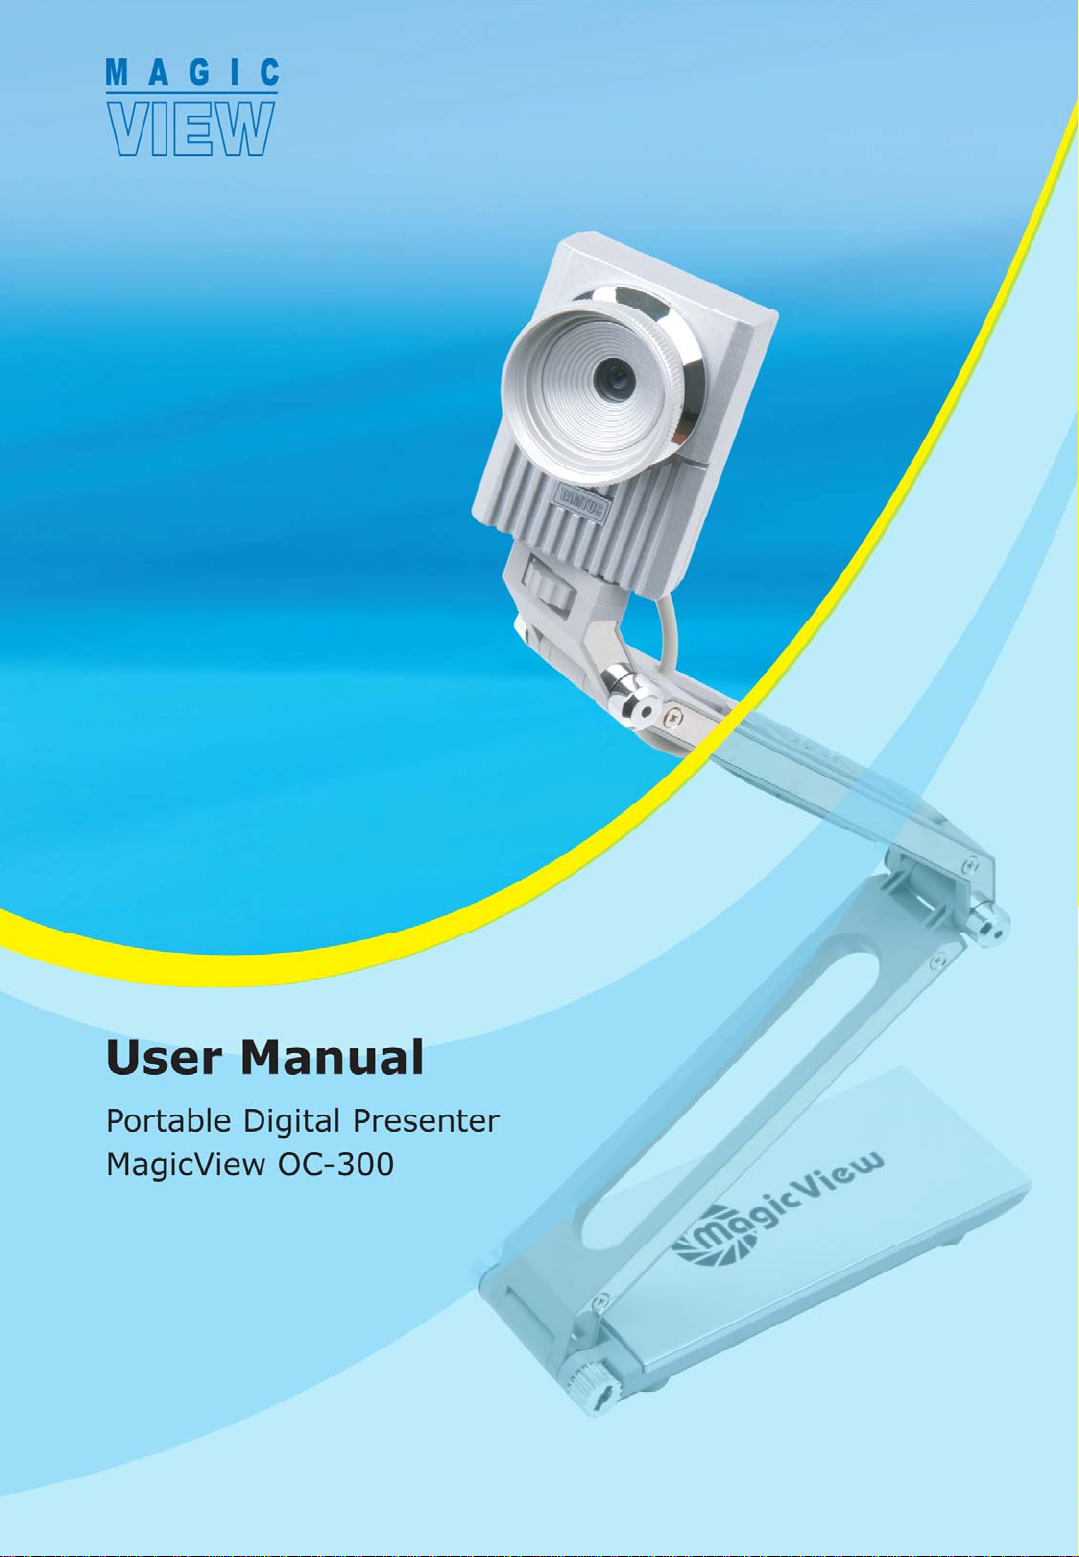
MagicView OC-300 User Manual

MagicView OC-300 User Manual
1__Introduction ------------------------------------------------------2
1-1 Specifications ------------------------------------------------------------------------2
1-2 Setting Up the Digital Presenter ------------------------------------------------3
2__Installation -------------------------------------------------------5
2-1 The Installation Process ----------------------------------------------------------5
2-2 How to Install the Driver & the Viewer Programs---------------------------6
2-3 How to Install the Hardware -----------------------------------------------------8
2-4 How to Install the DirectX 9.0 & WM Encoder -----------------------------10
2-5 Precautions ------------------------------------------------------------------------11
2-6 How to Verify Proper Driver Installation ------------------------------------12
3__Using the Viewer Program --------------------------------14
3-1 Getting Started -------------------------------------------------------------------14
3-2 Menu --------------------------------------------------------------------------------15
3-3 Key Features ----------------------------------------------------------------------16
4__Troubleshooting ----------------------------------------------23
5__Precautions --------------------------------------------------- 25
6__Did you know? ------------------------------------------------26
Contents
1
MagicView OC-300 User Manual
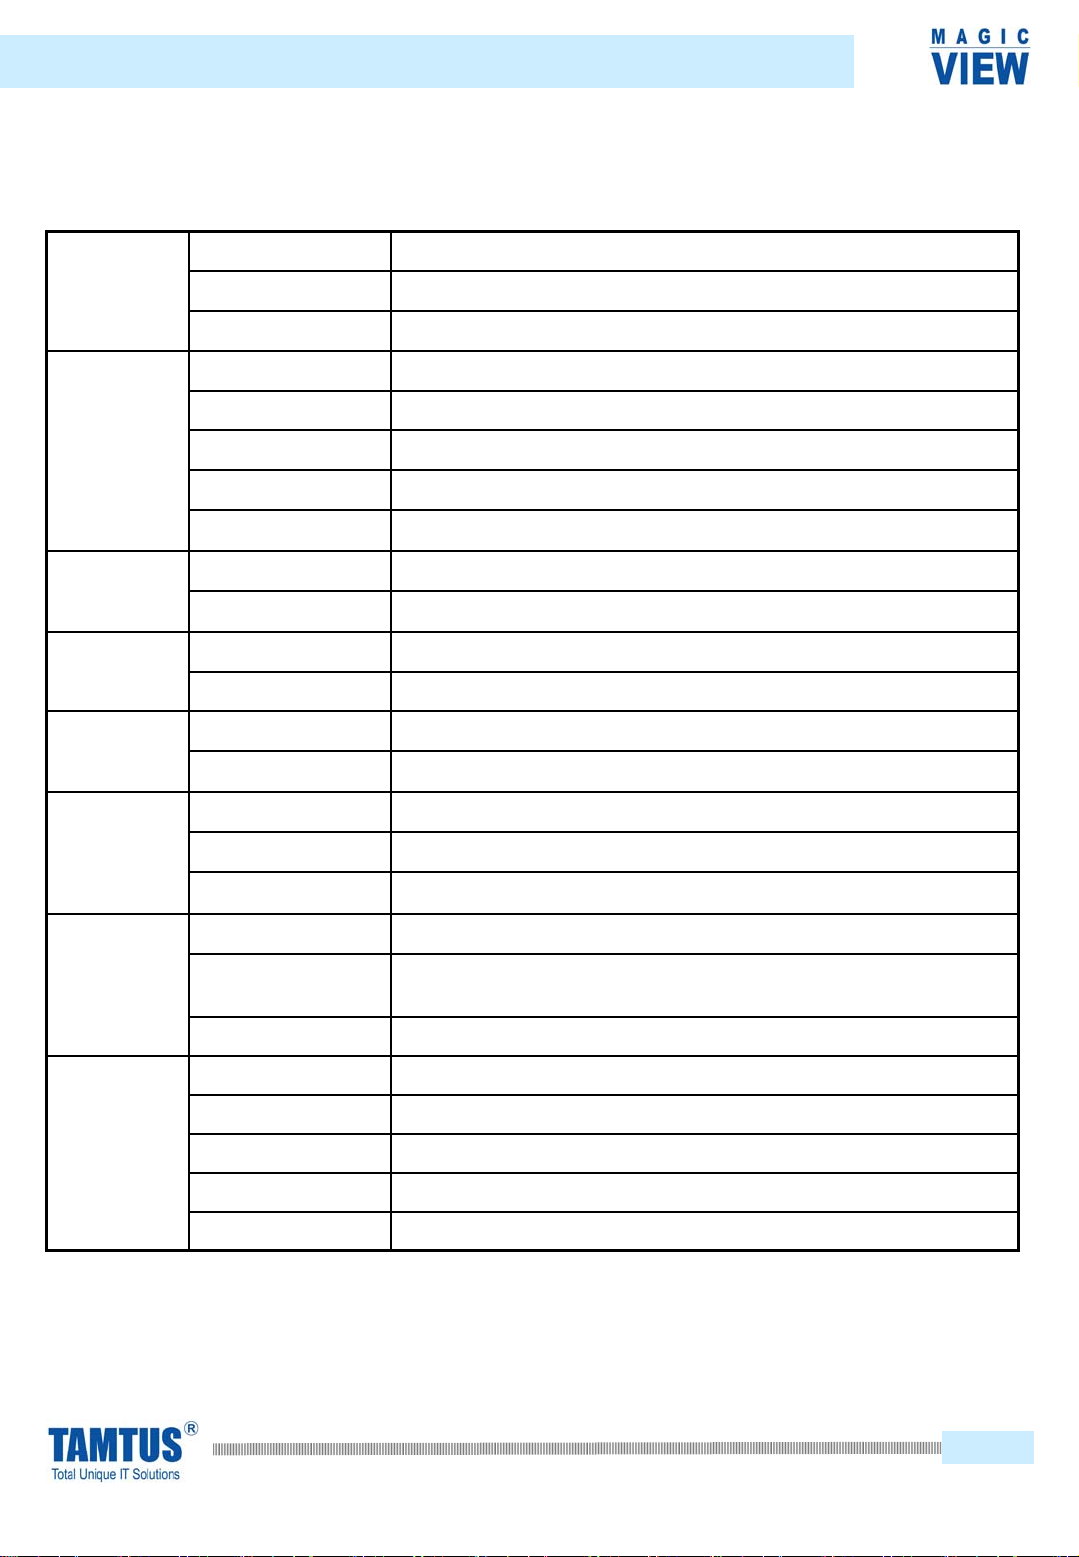
1-1 Specifications
2
1__ Introduction
Lens Z#3.0, Focus Distance 8.4MM
Focus Powered Focus
Exposure (IRIS) Auto
Image Sensor 1/2” CMOS
Frame Rate 7.5 fps at 2048 X 1536, 20 fps at 1024 X 768, 30 fps at 1024 X 510
Resolution Max. QXGA (2048 x 1536)
S/N Ratio 46dB
Lens Holder 37MM Standard Size
Resolution 7.5 fps at QXGA, 20 fps at XGA, 30 fps at DV, 8 fps at HF
Storage Format WMV
Lighting Built-in Super Bright White LED / 10,000mcd
Power / Switch USB Power, Manual On & Off Switch
Body Three-axis Articulated Body
Height About 330MM – After Extension
Video Shooting 20 fps at XGA (1024 x 768)
Camera Video and Camera Control
Adjustment /Editing Resolution Adjustment and Image Editing
Operating Systems Windows 2000 SP2, Windows XP SP1 or Higher
Minimum
Specifications Pentium IV 1.8 GHz, 256MB RAM , 10GB HDD or Higher
Interface USB 2.0, 480Mbps
Operating Ambience Temperature 0℃to + 40℃, Humidity 30% to 90%
Power Consumption Ghost Power, PC USB 5 Volts, Consumption Max. 400mA
Net Weight 900 grams
Dimensions 65MM(W) x 110MM(H) x 175MM(D) When Folded
Miscellaneous
Accessories Included Digital Presenter, Hard Carrying Case, Lens Cover, Set-up CD, User Manual
PC Interface
Viewer
Body
Lighting
Video
Camera
Optics

MagicView OC-300 User Manual
1-2 Setting up the Digital Presenter
The ‘Powered Focus’ switch of the MagicView OC-300 allows focusing adjustments
to be made according to an object’s height and depth.
1-2-1 The three-axis articulated arm
The angle and height of the
extendable/foldable arm easily adjusts to the
object.
1-2-2 The buttons
SHOT LIGHT POWERED FOCUS
MANUAL FOCUS ZOOM
3
1__ Introduction

MagicView OC-300 User Manual
There is an ultra-bright 10,000mcd LED light on the upper arm of the main unit. This
light enables the user to use the MagicView in dark environments . There is an on &
off switch on the back of the lighting panel.
The ‘SHOT’ button on the back of the camera head is for shooting. When the button
is pressed for the first time, it enters the ready mode, then, when the button is
pressed for the second time, the shooting is done. Shooting can be done under the
basic menu of the OC-300 Viewer program. Please refer to section 3 for details.
1-2-3 The hard carrying case
There is a strong magnetic stick inside the inclusive aluminum carrying case. You
can place the digital presenter on the case when capturing A4 size documents.
The red square indicates where the digital
presenter should be positioned on the
case.
Place the Digital Presenter on the carrying case
as shown in this picture.
4
1__ Introduction

MagicView OC-300 User Manual
The following steps will lead you through the auto installation process, which
installs the driver and viewer software automatically for you. Also, you can install
or uninstall the individual programs manually as necessary.
The set-up CD contains the following:
DirectX 9.0 DirectX 9.0 Runtime Software
MagicView Driver MagicView OC-300 Driver Software
MagicView MagicView Viewer Software
WM Encoder Window Media Encoder
MagicView Manual.pdf MagicView Software User Manual
(PDF Acrobat Reader file)
2-1 The Installation Process
3. Install the DirectX 9.0 Software & WMEncoder
2. Install the MagicView 3.0 Viewer Program
1. Install the MagicView OC-300 Driver
4. Reboot the PC
5. Connect the USB cable of the digital presenter to a PC
Contents of the Set-up CD
5
2_Installation

MagicView OC-300 User Manual
1. After inserting the MagicView OC-300 Set-up CD, the auto-installation program
will start automatically. Click the auto-installation button to continue the installation.
2-2 How to Install the Driver & the Viewer Programs
2. After the MagicViewer 3.0 program InstallShield Wizard appears select ‘Next’ to
complete the installation.
6
Do not connect the USB cable to a PC before installing the driver
and viewer programs. Otherwise, improper installation may result. When
inserting the Set-up CD into the CD-Rom, the MagicView OC-300 Viewer
Program will be installed first, then the MagicView OC-300 Driver will be
installed.
Note
2_Installation

MagicView OC-300 User Manual 7
3. After the driver installation is finished, the MagicView 3.0 Viewer installation program
will start running. Type in a username and click ‘Next’ to continue with the installation.
4. Choose a folder to install the software in and click ‘Next’ to continue with the installation.
5. Installation is finished once this progress window is displayed .
2_Installation

MagicView OC-300 User Manual
1. After installing the MagicView OC-300 Viewer Program, connect the USB cable
of the Digital Presenter to the USB port at the front or the rear of your PC.
USB ports at the rear
of the PC.
2. When the ‘Found New Hardware Wizard’ comes up choose the ‘No, not this
time (T)’ option, and then click ‘Next’ to continue with the installation.
The MagicView OC-300 digital presenter can only be used with
USB 2.0. Check if the PC supports USB 2.0.
2-3 How to Install the Hardware
8
Note
2_Installation

MagicView OC-300 User Manual
3. In the ‘Found New Hardware Wizard’ window, select the ‘Install the software
automatically (Recommended)’ option and click ‘Next’.
4. A security warning window will come up. Click the ‘Continue’ button.
5. When the ‘Install Complete’ dialogue window comes up click ‘Finish’ to complete
the installation.
9
2_Installation
Table des matières
Manuels Présentateur numérique populaires d'autres marques


Samsung
Samsung SDP-850 Manuel utilisateur

Dukane
Dukane DV-P303A Manuel utilisateur

RemotePoint
RemotePoint Presenter Global Manuel utilisateur

Kensington
Kensington Wireless Presenter with Laser Pointer Mode d'emploi

NEC
NEC DS1-MP10RX2 Manuel d'utilisation

Logitech
Logitech R800 - Professional Presenter Presentation Remote... Manuel utilisateur