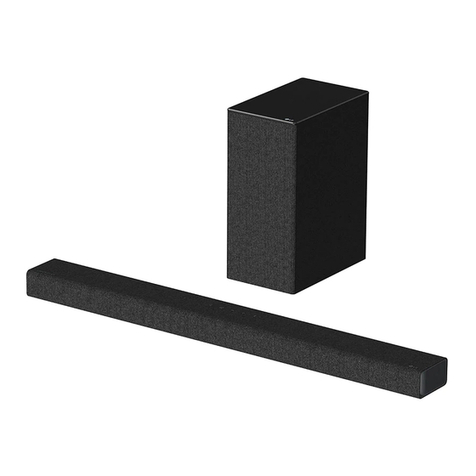
LG SH2 Manuel utilisateur

OWNER’S MANUAL
Sound Bar
Please read this manual carefully before operating
your set and retain it for future reference.
MODEL
SH2 (SH2, SPH2B-P)
*MFL69483101* www.lg.com

1 Getting Started
Getting Started
2
Getting Started
1
Safety Information
CAUTION
RISK OF ELECTRIC SHOCK
DO NOT OPEN
CAUTION: TO REDUCE THE RISK OF ELECTRIC
SHOCK DO NOT REMOVE COVER (OR BACK) NO
USER-SERVICEABLE PARTS INSIDE REFER
SERVICING TO QUALIFIED SERVICE PERSONNEL.
This lightning ash with arrowhead
symbol within an equilateral
triangle is intended to alert the
user to the presence of uninsulated
dangerous voltage within the
product’s enclosure that may be of
sufcient magnitude to constitute
a risk of electric shock to persons.
The exclamation point within an
equilateral triangle is intended to
alert the user to the presence of
important operating and
maintenance (servicing)
instructions in the literature
accompanying the product.
WARNING: This product contains chemicals known
to the State of California to cause cancer and birth
defects or other reproductive harm. Wash hands
after handling.
WARNING: TO PREVENT FIRE OR ELECTRIC SHOCK
HAZARD, DO NOT EXPOSE THIS PRODUCT TO RAIN
OR MOISTURE.
CAUTION: The apparatus shall not be exposed to
water (dripping or splashing) and no objects lled
with liquids, such as vases, shall be placed on the
apparatus.
WARNING: Do not install this equipment in a
conned space such as a book case or similar unit.
CAUTION: Do not use high voltage products around
this product. (ex. Electrical swatter) This product may
malfunction due to electrical shock.
CAUTION: No naked ame sources, such as lighted
candles, should be placed on the apparatus.
CAUTION: Do not block any ventilation openings.
Install in accordance with the manufacturer’s
instructions.
Slots and openings in the cabinet are provided for
ventilation and to ensure reliable operation of the
product and to protect it from over heating. The
openings shall be never be blocked by placing the
product on a bed, sofa, rug or other similar surface.
This product shall not be placed in a built-in
installation such as a bookcase or rack unless proper
ventilation is provided or the manufacturer’s
instruction has been adhered to.
CAUTION concerning the Power Cord
Most appliances recommend they be placed upon a
dedicated circuit;
That is, a single outlet circuit which powers only that
appliance and has no additional outlets or branch
circuits. Check the specication page of this owner’s
manual to be certain. Do not overload wall outlets.
Overloaded wall outlets, loose or damaged wall
outlets, extension cords, frayed power cords, or
damaged or cracked wire insulation are dangerous.
Any of these conditions could result in electric shock
or re. Periodically examine the cord of your
appliance, and if its appearance indicates damage or
deterioration, unplug it, discontinue use of the
appliance, and have the cord replaced with an exact
replacement part by an authorized service center.
Protect the power cord from physical or mechanical
abuse, such as being twisted, kinked, pinched, closed
in a door, or walked upon. Pay particular attention to
plugs, wall outlets, and the point where the cord exits
the appliance. The Power Plug is the disconnecting
device. In case of an emergency, the Power Plug must
remain readily accessible
NOTICE: For safety marking information including
product identication and supply ratings, please refer
to the main label on the bottom or the other surface
of the product.

Getting Started
3
Getting Started
1
This device is equipped with a portable battery or
accumulator.
Safety way to remove the battery from the
equipment: Remove the old battery or battery pack,
follow the steps in reverse order than the assembly.
To prevent contamination of the environment and
bring on possible threat to human and animal health,
the old battery or the battery put it in the
appropriate container at designated collection points.
Do not dispose of batteries or battery together with
other waste. It is recommended that you use local,
free reimbursement systems batteries and
accumulators. The battery should not be exposed to
excessive heat such as sunshine, re or the like.
IMPORTANT SAFETY
INSTRUCTIONS
1. Read these instructions.
2. Keep these instructions.
3. Heed all warnings.
4. Follow all instructions.
5. Do not use this apparatus near water.
6. Clean only with dry cloth.
7. Do not block any ventilation openings. Install in
accordance with the manufacturer’s instructions.
8. Do not install near any heat sources such
as radiators, heat registers, stoves, or other
apparatus (including amplifiers) that produce
heat.
9. Do not defeat the safety purpose of the polarized
or grounding-type plug. A polarized plug has two
blades with one wider than the other. A grounding
type plug has two blades and a third grounding
prong. The wide blade or the third prong are
provided for your safety. If the provided plug does
not fit into your outlet, consult an electrician for
replacement of the obsolete outlet.
10. Protect the power cord from being walked on
or pinched particularly at plugs, convenience
receptacles, and the point where they exit from
the apparatus.
11. Only use attachments/accessories specified by
the manufacturer.
12. Use only with the cart, stand, tripod, bracket, or
table specified by the manufacturer, or sold with
the apparatus. When a cart is used, use caution
when moving the cart/apparatus combination to
avoid injury from tip-over.
13. Unplug this apparatus during lightning storms or
when unused for long periods of time.
14. Refer all servicing to qualified service personnel.
Servicing is required when the apparatus has
been damaged in any way, such as power-supply
cord or plug is damaged, liquid has been spilled
or objects have fallen into the apparatus, the
apparatus has been exposed to rain or moisture,
does not operate normally, or has been dropped.
Symbols
~Refers to alternating current(AC).
0Refers to direct current(DC).
Refers to class II equipment.
1Refers to stand-by.
!Refers to “ON” (power).
Refers to dangerous voltage.

Getting Started
4
Getting Started
1
FCC Compliance Statement
This device complies with part 15 of the FCC rules.
Operation is subject to the following two conditions:
(1) This device may not cause harmful interference,
and
(2) This device must accept any interference received,
including interference that may cause undesired
operation.
NOTE: This equipment has been tested and found to
comply with the limits for a Class B digital device,
pursuant to Part 15 of the FCC Rules. These limits
are designed to provide reasonable protection
against harmful interference in a residential
installation. This equipment generates, uses, and can
radiate radio frequency energy and, if not installed
and used in accordance with the instructions, may
cause harmful interference to radio communications.
However, there is no guarantee that interference will
not occur in a particular installation.
If this equipment does cause harmful interference to
radio or television reception, which can be
determined by turning the equipment off and on, the
user is encouraged to try to correct the interference
by one or more of the following measures:
yReorient or relocate the receiving antenna.
yIncrease the separation between the equipment
and receiver.
yConnect the equipment into an outlet on a circuit
different from that to which the receiver is
connected.
yConsult the dealer or an experienced radio/TV
technician for help.
CAUTION : Any changes or modications not
expressly approved by the party responsible for
compliance could void the user’s authority to operate
this equipment.
FCC WARNING: This equipment may generate or
use radio frequency energy. changes or modications
to this equipment may cause harmful interference
unless the modications are expressly approved in
the instruction manual. The user could lose the
authority to operate this equipment if an
unauthorized change or modication is made.
FCC RF Radiation Exposure Statement : This
equipment complies with FCC radiation exposure
limits set forth for an uncontrolled environment. This
equipment should be installed and operated with
minimum distance 20 cm between the radiator and
your body. End users must follow the specic
operating instructions for satisfying RF exposure
compliance. This transmitter must not be co-located
or operating in conjunction with any other antenna
or transmitter.
CAUTION: Regulations of the FCC and FAA prohibit
airborne operation of radio-frequency wireless
devices because their signals could interfere with
critical aircraft instruments.
Responsible Party :
LG Electronics USA, Inc. 1000 Sylvan Avenue
Englewood Cliffs, NJ 07632
TEL. : +1-800-243-0000

Table of Contents
5
1
2
3
4
5
Table of Contents
1 Getting Started
2 Safety Information
6 Unique features
6 Introduction
6 – Symbols used in this manual
6 Accessories
7 Remote control
8 Front panel
9 Rear panel
10 Installing the sound bar
11 Mounting the main unit on a wall
13 Connecting the subwoofer
13 – Attaching the subwoofer to the unit
13 Connecting to your TV
13 – Using an Optical cable
2 Connecting
14 Optional equipment connection
14 – Optical In connection
14 – Portable In connection
3 Operating
15 Operations
15 – DRC (Dynamic Range Control)
15 – Turn off the sound temporarily
15 – Auto LED Off
15 – Using your TV remote control
16 – AUTO POWER On/Off
16 – Auto function change
17 – LG Sound Sync
18 Using BLUETOOTH®technology
18 – Listening to music stored on the
BLUETOOTH devices
19 Using BLUETOOTH App
19 – Install “Music Flow Bluetooth” App onto
Your BLUETOOTH Device
20 – Activate Bluetooth with
“Music Flow Bluetooth” App
21 Sound adjustment
21 – Setting sound effect
21 – Adjust the woofer level settings
4 Troubleshooting
22 Troubleshooting
23 NOTES to use wireless
5 Appendix
24 Trademarks and licenses
25 Specifications
26 Maintenance
26 – Handling the unit

Getting Started
6
Getting Started
1
Unique features
Auto power down
This unit will turn off by itself for energy saving
consumption.
Portable In
Listens to music from your portable device.
(MP3, Notebook, etc.)
LG Sound Sync
Controls volume level of this unit by the remote
control of your LG TV that is compatible
with LG Sound Sync.
Introduction
Symbols used in this manual
, Note
Indicates special notes and operating features.
> Caution
Indicates cautions for preventing possible damages
from abuse.
Accessories
Please check and identify the supplied accessories.
Designs and specications of the accessories are
subject to change without prior notice.
Remote control (1) Batteries (2)
Wall bracket (2) Wall bracket install
guide (1)
Screws (2) Optical cable (1)

Getting Started
7
Getting Started
1
Remote control
Replacement of Battery
Remove the battery cover on the rear of the remote
control, and insert battery with and matched
correctly.
1 (Power): Switches the unit ON or OFF.
F : Changes input sources.
ASC : Selects ASC(Adaptive Sound Control) sound
effect.
STANDARD : Selects STANDARD sound effect.
CINEMA : Selects CINEMA sound effect.
(Mute) : Mutes the sound.
VOL o/p: Adjusts speaker volume.
DRC ON/OFF :
-Turns on or off DRC function.
(Refer to the page 15.)
-Controls this unit using TV remote.
(Refer to the page 15.)
WOOFER LEVEL o/p: Adjusts sound level of
Subwoofer.
AUTO POWER ON/OFF :
-Turns on or off AUTO POWER function.
(Refer to the page 16.)
-Turns on or off Auto LED Off function.
(Refer to the page 15.)
C/V (Skip) : Skips Fast backward or Forward
on Bluetooth function.
d/M (Play/Pause) : Starts Playback / Pauses
Playback on Bluetooth function.

Getting Started
8
Getting Started
1
Front panel
C D E F G
BA
ARemote sensor
BF (Function)
Selects the function and input source.
p/o (Volume)
Adjusts volume level.
1 (Power)
Switches to power on or standby mode.
Precautions in using the touch buttons
yUse the touch buttons with clean and dry
hands.
- In a humid environment, wipe out any
moisture on the touch buttons before using.
yDo not press the touch buttons hard to make
it work.
- If you apply too much strength, it can be
damaged the sensor of the touch buttons.
yTouch the button that you want to work in
order to operate the function correctly.
yBe careful not to have any conductive
material such as metallic object on the touch
buttons. It can cause malfunctions.
, Note
COPTICAL LED
DBLUETOOTH LED
ELG TV LED
FPORTABLE LED
GStandby LED
It lights up in red on standby mode.
yYou can check current function through the
LED.
yThis unit turns off LED If there is no key input
for 20 seconds. To display LED, press any
button (except Power button).
yStandby LED quickly blinks when you press
any button.
yBluetooth LED blinks when you select
Bluetooth function. if you connect
Bluetooth device, LED will turn on.
yWhen this unit reaches maximum or
minimum volume, Standby LED turns on for
2 seconds.
yWhen you press (Mute) button, Standby
LED blinks slowly.
yOptical LED blinks twice and turns on when
LG Sound Sync (optical) function is selected.
, Note

Getting Started
9
Getting Started
1
Rear panel
C D
A
B
APower cord
BSUBWOOFER(4Ω)Connector
COPT. IN : Optical input
DPORT. IN : Portable input

Getting Started
10
Getting Started
1
Installing the sound bar
You can hear the sound by connecting the unit to the
other device : TV, Blu-ray disc player, DVD player, etc.
Place the unit in front of the TV and connect it to the
device you want. (Refer to pages 13 - 14.)
yFor best performance of wireless connection
such as Bluetooth, do not install the unit on
Metallic furniture because the wireless
connection communicates through a module
positioned on the bottom of the unit.
yBe careful not to make scratches on the
surface of the Unit/Subwoofer when
installing or moving them.
yUse caution when handling the Subwoofer.
The speaker on the rear is exposed. Avoid
making contact with the exposed speaker.
> Caution
Autres manuels pour SH2
8
Ce manuel convient aux modèles suivants
1
Table des matières
Autres manuels LG Système de haut-parleurs