IP EDH-01 Manuel utilisateur

1/43
User Manual
Video Transceiver
EDH-01

2/43
WARINGS
TO REDUCE THE RISK OF FIRE OR ELECTRIC SHOCK, DO NOT EXPOSE THIS
PRODUCT TO RAIN OR MOISTURE.
DO NOT INSERT ANY METALLIC OBJECT THROUGH VENTILATION GRILLS.
CAUTION
CAUTION
RISK OF ELECTRIC SHOCK
DO NOT OPEN
CAUTION:TO REDUCE THE RISK OF ELECTRIC SHOCK.
DO NOT REMOVE COVER (OR BACK).
NO USER-SERVICEABLE PARTS INSIDE.
REFER SERVICING TO QUALIFIED SERVICE PERSONNEL.
COPYRIGHT
THE TRADEMARKS MENTIONED IN THE MANUAL ARE LEGALLY REGISTERED
TO THEIR RESPECTIVE COMPANIES.

3/43
Content
PREFACE ..............................................................................................................................................................4
I.
PRODUCT SPECIFICATIONS.................................................................................................................4
II.
PRODUCT INSTALLATION.....................................................................................................................6
A.
M
ONITOR
S
ETTING
.....................................................................................................................................6
B.
H
ARDWARE
I
NSTALLATION
........................................................................................................................7
C.
IP
A
SSIGNMENT
.........................................................................................................................................8
D.
I
NSTALL
A
CTIVE
X
CONTROL
:...................................................................................................................11
III.
LIVE VIDEO.........................................................................................................................................12
IV.
VIDEO TRANSCEIVER CONFIGURATION ..................................................................................14
A.
S
YSTEM
I
NFORMATION
.............................................................................................................................16
B.
N
ETWORK
................................................................................................................................................19
C.
A/V
S
ETTING
...........................................................................................................................................25
D.
E
VENT
......................................................................................................................................................36
V.
NETWORK CONFIGURATION.............................................................................................................40
VI.
FACTORY DEFAULT ..........................................................................................................................43
VII.
PACKAGE CONTENTS......................................................................................................................43
APPENDIX I........................................................................................................................................................43
2007/12/27

4/43
PREFACE
VIDEO TRANSCEIVER provides function which is a combination of Video Server
and Video decoder with IE built-in.
It encodes analogue signals of traditional cameras to digital signals; user can
monitor real-time video via IE browser. MPEG4 /JPEG compression format
support smooth video quality.
VIDEO TRANSCEIVER supports SD card backup to save video files and playback
on any PC.
User can use VIDEO TRANSCEIVER to connect any Video Transceiver via IE
browser within Internet or Intranet. It can decode MPEG4 or JPEG compression
format and transfer analogue signals to TVs, CRT monitors or DVR systems.
I. Product Specifications
Support MPEG4 and JPEG compression format.
RS-485 interface
SD card backup.
Two-way audio
Support Cell Phone/PDA/3GPP
Support Dual Streaming
Wireless network connection (Optional)
Online firmware upgrade.
Support to connect with 10 Video Transceivers.

5/43
Hardware
CPU ARM 9 ,32 bit RISC
RAM 64MB
ROM 8MB
Image sensor
Network
Ethernet 10/ 100 Base-T
Wireless 802.11b/g (Optional)
WEP 64/ 128 bit
Network Protocol HTTP, TCP/ IP, SMTP, FTP, PPPoE, DHCP, DDNS, NTP, 3GPP,
UPnP
System
Video Resolution
(NTSC/PAL)
NTSC: 720x480, 704x480, 352x240, 176x120
PAL: 720x576, 704x576, 352x288, 176x144
Video adjust Brightness, Contrast, Saturation, Hue
Image snapshot Yes
Full screen monitoring Yes
Compression format MPEG-4, MJPEG
Video bitrate adjust CBR, VBR
Motion Detection Yes, 3 different areas
Triggered action Mail, FTP, Save to SD card
Pre/ Post alarm Yes, configurable
Security Password protection
Firmware upgrade HTTP mode, can be upgraded remotely
Simultaneous connection Up to 10
SD card management
Recording trigger Motion Detection, Network break down
Video format AVI
Video playback Yes
Delete files Yes
Web browsing requirement
OS Windows 2000, 2003, XP
Browser IE 6.0 or above

6/43
II.Product Installation
A. Monitor Setting
i. Right-Click on the desktop. Select “ Properties”
ii. Change color quality to highest (32bit).
7/43
1 2 3 5 6 7
4
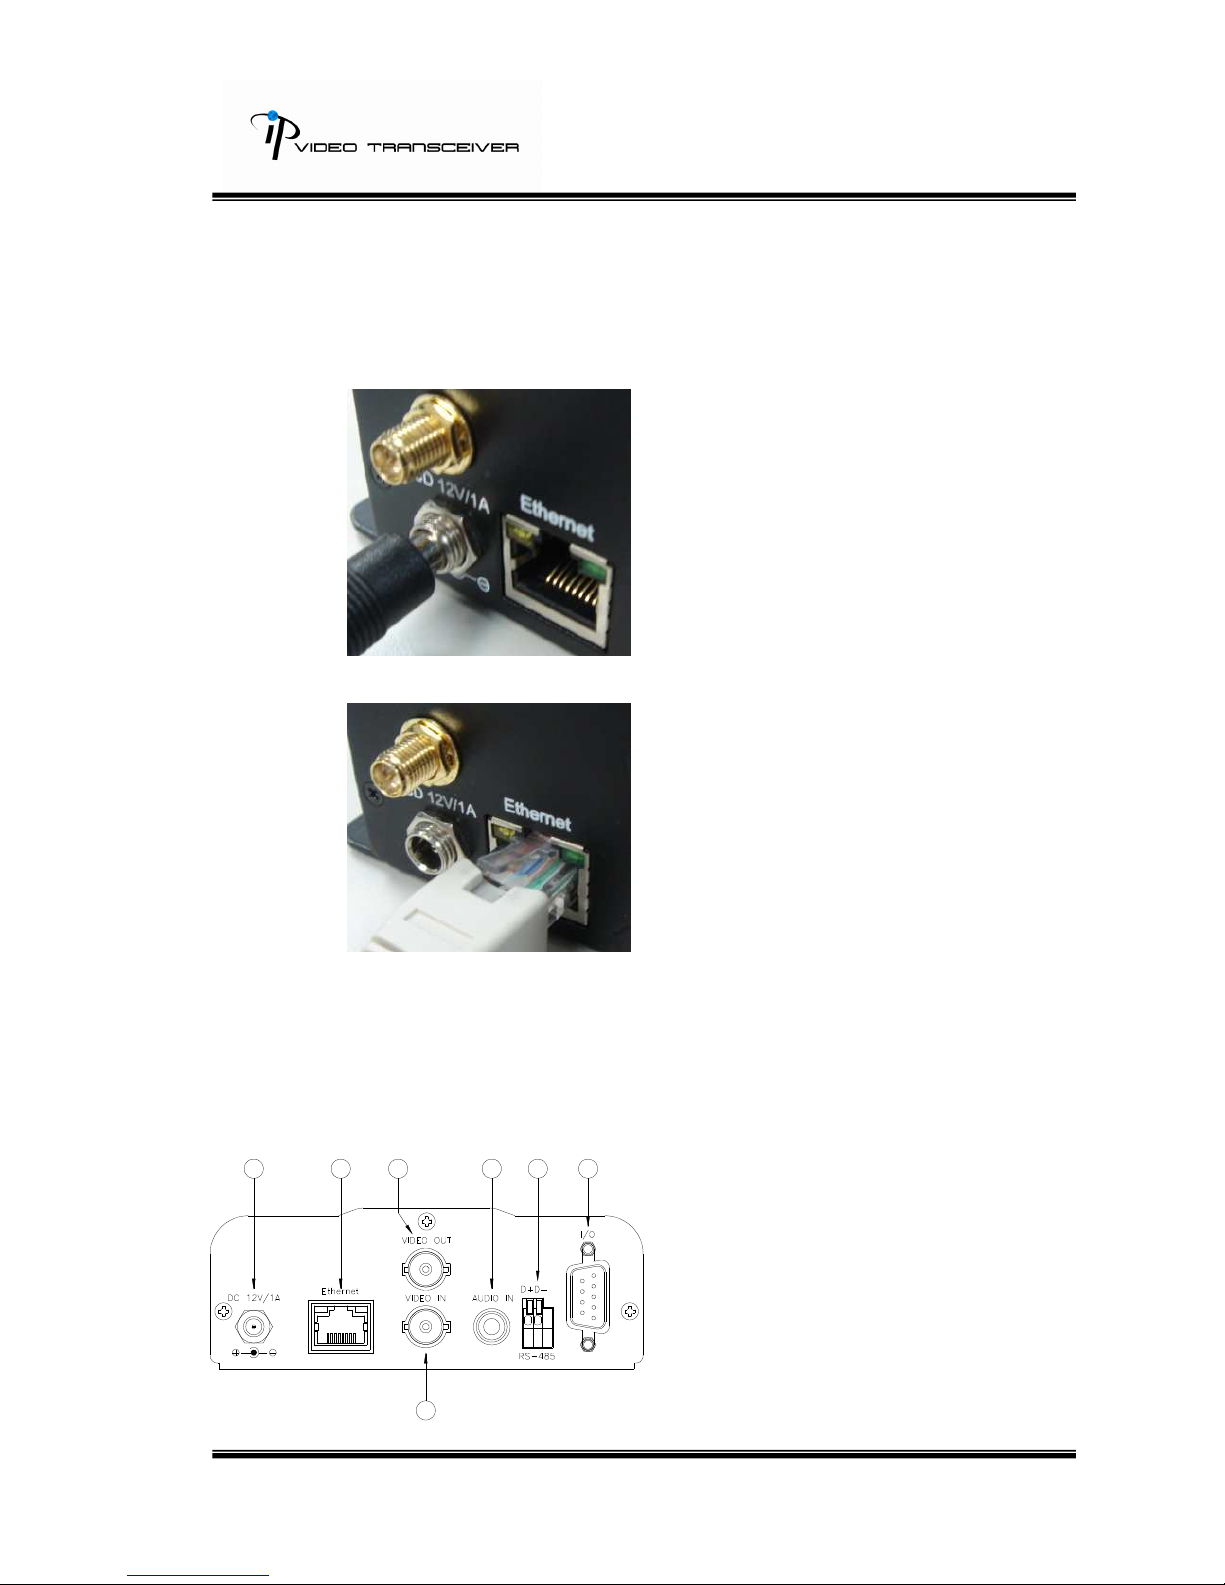
B. Hardware Installation
B-1: Hardware Connection
i. Connect power adaptor
ii. Connect Video Transceiver to PC or network with Ethernet cable
iii. Set up the network configurations according to the network environment.
For further explanation, please refer to chapter VI, “Network
Configuration for Video Server”.
B-2: Front plane assignment
1. Power Supply (DC 12V)
2. Ethernet (RJ-45)
3. VIDEO OUT BNC JACK
4. VIDEO IN BNC JACK
5. AUDIO IN RCA JACK
6. RS-485 / PTZ header.
7. GPIO I/O

8/43
C. IP Assignment
i. Use the software, “IP Installer” to assign the IP address of Video
Transceiver. The software is in the attached software CD.
ii. There are two languages for the IP installer
i. IPInstallerCht.exe:Chinese version
ii. IPInstallerEng.exe:English version
iii. There are 3 kinds of IP configuration.
i. Fixed IP (Public IP or Virtual IP)
ii. DHCP (Dynamic IP)
iii. Dial-up (PPPoE)
iv. Execute IP Installer
v. For Windows XP SP2 user, it may popup the following message box.
Please click “Unblock”.

9/43
vi. IP Installer configuration:
vii. IP Installer will search all IP Devices connected on Lan. The user can
click “Search Device” to search again.
viii. Click the Video Transceiver listed on the left side. The network
configuration of this Video Server will show on the right side. You may
change the “name” of the Video Server to your preference (eg: Office,
warehouse). Change the parameter and click “Submit” then click “OK”. It
will apply the change and reboot the Device.
ix. Please make sure the subnet of PC IP address and Video this IP
product IP address are the same.
The same Subnet:
IP product IP address: 192.168.1.200
PC IP address: 192.168.1.100
Different Subnets:
IP product IP address: 192.168.2.200
PC IP address: 192.168.1.100
To Change PC IP address:
Control PanelNetwork ConnectionsLocal Area Connection
PropertiesInternet Protocol (TCP/IP) Properties

10/43
Please make sure this IP product and PC have the same Subnet. If not,
please change this IP product subnet or PC IP subnet accordingly.
x. A quick way to access remote monitoring is to left-click the mouse twice
on a selected IP products listed on “Device list” of IP Installer. An IE
browser will be opened.
xi. Then, please key in the default “user name: admin” and “password:
admin”.
Table des matières


