Signal Jamming Detect Period 30s
Device Not Reporting 1hr max
Deleting
ALL
the
User
Remotes
:
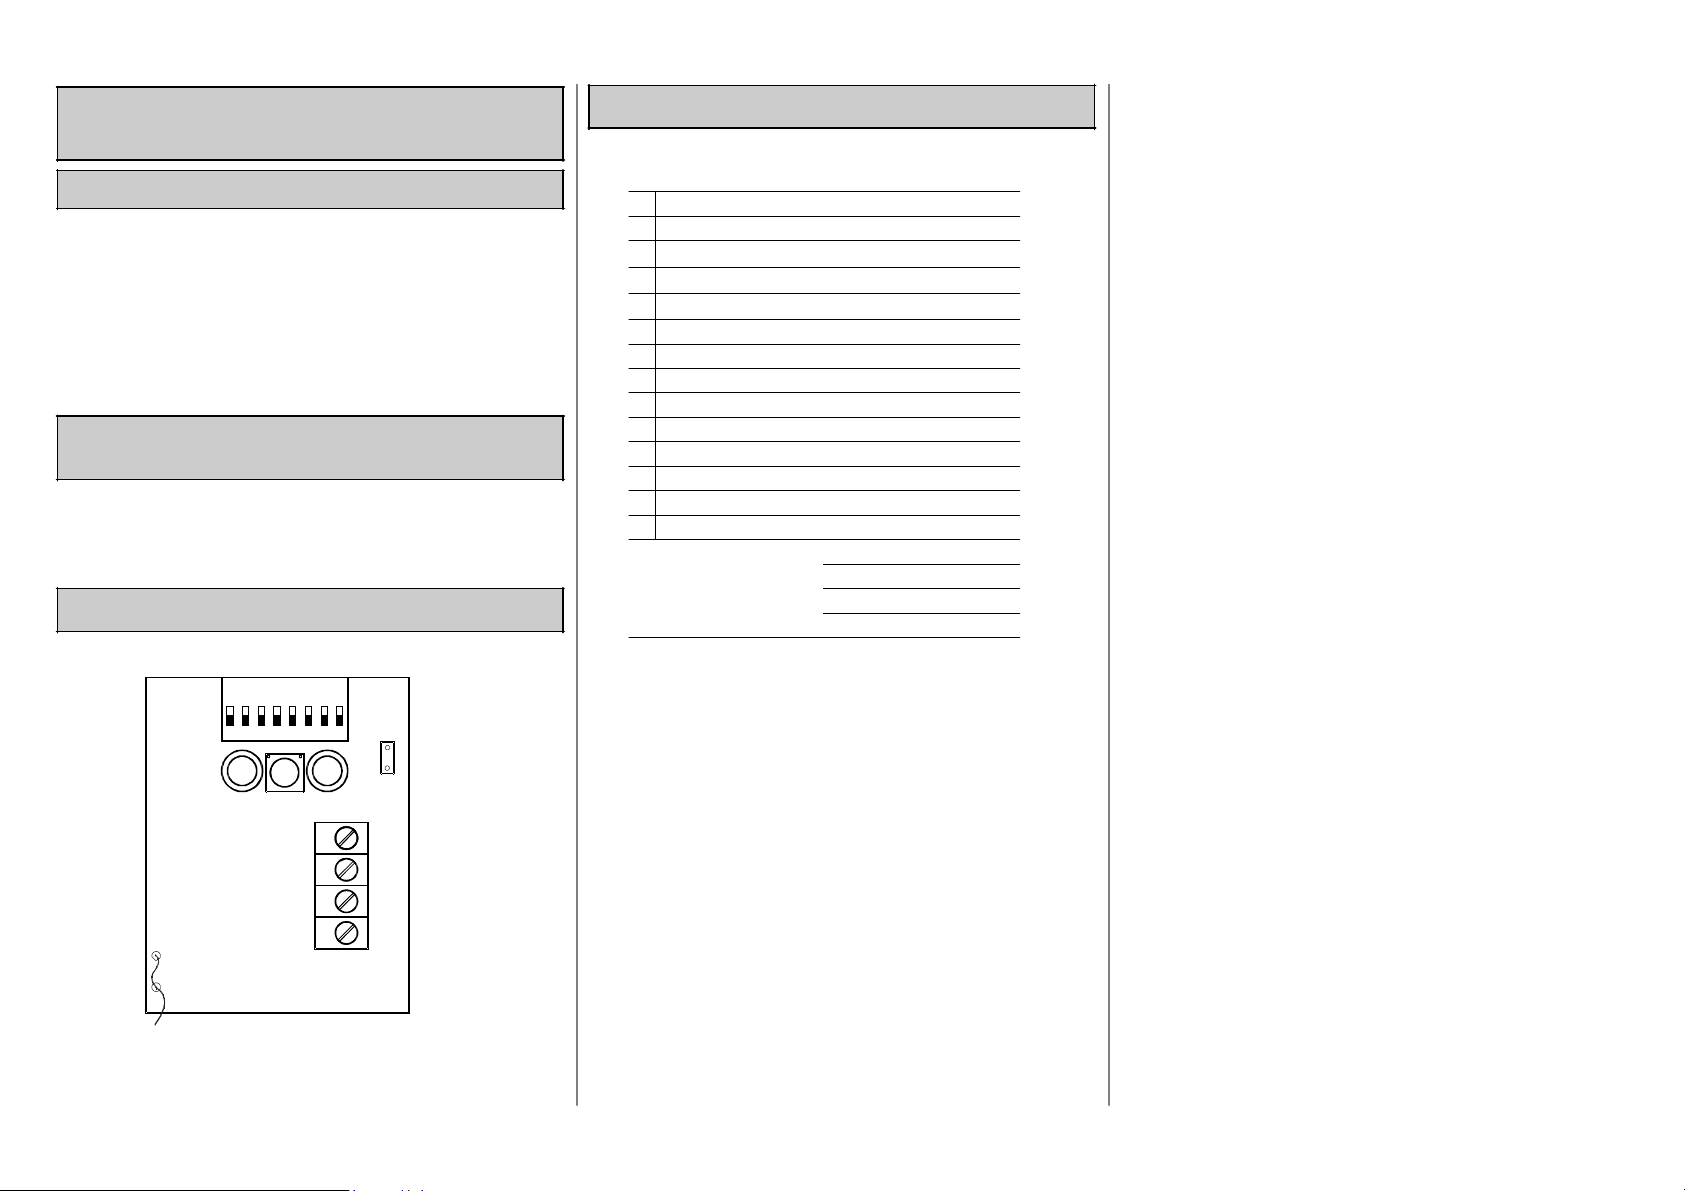
1. Remove power from the unit by removing jumper
J1 and switch all Dip switches OFF.
2. Switch Dip switches 2, 5, 6, 7and 8ON
3. Restore Power to the Unit by replacing J1
4. Switch Dip Switch 8OFF
5. Wait for the LED’s to start alternating
6. Switch ALL Dip switches OFF.
7. When the LED’s stop flashing the unit is in the
normal operating mode
Deleting
all
Supervised
RF
Devices
(e.g.
RF
Passive
IR's)
:
normal operating mode
Assigning
an
Arm
/
Disarm
Button
on
a
Remote
:
N.B. This Function will affect ALL remotes.
1. Remove power from the unit by removing jumper
J1 and switch all Dip switches OFF.
2. Switch Dip switches 3and 8ON
3. Restore Power to the Unit by replacing J1
4. Press the button on aknown remote that
become the Arm /Disarm button.
5. Switch Dip switch 8OFF.
6. Wait for the LED’s to start flashing alternately.
7. Switch ALL Dip switches OFF.
8. When the LED’s stop flashing the unit is in
normal operating mode.
Assigning
a
Stay
Arm
Button
on
a
Remote
:
1. Switch Dip switch 2ON to enable retrigger
protecting.
To indicate the Ambient Noise Level :
N.B. This function must be disabled during normal
operation
This function allows the testing of ambient noise in
environment surrounding the receiver durin
installation.
1. Switch Dip switch 4ON to enable noise level
testing.
2. ONLY install the receiver in an environment with
Normal or Better Noise Levels.
During Noise Testing the LED’s indicate the following:
J1 and switch all Dip switches OFF.
2. Switch Dip switches 3, 5, 6, 7and 8ON
1. Remove power from the unit by removing jumper
J1 and switch all Dip switches OFF.
LED
LED
LEVEL
VERY
LOW
4. Switch Dip Switch 8OFF
5. Wait for the LED’s to start flashing alternately.
6. Switch ALL Dip switches OFF.
7. When the LED’s stop flashing the unit is in
normal
operating
mode
3. Restore Power to the Unit by replacing J1
4. Press the button on aknown remote that
become the Stay Arm button.
5. Switch Dip switch 8OFF.
6. Wait for the LED’s to start flashing alternately.
7. Switch ALL Dip switches OFF.
OFF
SLOW
FAST
ON
FAST
ON
ON
ON
NORMAL
HIGH
VERY
HIGH
POSSIBLE
JAMMING
N.B. This Function will affect ALL remotes.
1. Remove power from the unit by removing
J1 and switch all Dip switches OFF.
2. Switch Dip switches 4and 8ON
3. Restore Power to the Unit by replacing J1
normal operating mode.
Programming
the
Unit
in
Stand
-
Alone
Mode.
(Normal
Settings)
1. Switch Dip Switch 6ON
2. Press any button on the remotes to be learned.
3. Switch Dip switch 6OFF to exit the learn
become an instant panic button.
5. Switch Dip switch 8OFF.
6. Wait for the LED’s to start flashing alternately.
7. Switch ALL Dip switches OFF.
operation and it is not necessary to power the unit
down for the settings to take effect.
ALL remotes switch Dip switch 7ON.