HddSurgery Seagate 7200.10 Manuel utilisateur

Page 1of 27
HDDSURGERY
Lomina 33, 11 000 Belgrade, Serbia
phone +381 11 361 43 43
www.hddsurgery.com
Tools for data recovery experts
Guide for using HddSurgery™ tool:
HDDS Spindle Replacement Tool
Seagate 7200.10/.11

Page 2of 27
HDDSURGERY
Lomina 33, 11 000 Belgrade, Serbia
phone +381 11 361 43 43
www.hddsurgery.com
Table of contents:
1. Introduction ..............……………………………………………….. page 3
2. HddSurgery™spindle replacement tool ..……………………. page 4
Parts of the tool ........................................................ page 5
3. Spindle replacement process
Extracting the donor bearing .…………..........…………… page 6
Preparing the patient hard drive ……...................………... page 9
Placing the patient drive on the tool .......................…. page 10
Pushing out the bearing from a patient hard drive ......... page 14
Using “the puller” ........................................................ page 15
Placing the donor bearing in a patient hard drive .......... page 16
Dismounting patient hard drive from the tool ............... page 18
4. Appendix ............................................................................ page 20
4.1. Check the patient heads ................................... page 21
4.2. Use longer screws ............................................. page 22
4.3. Tighten the hard drive casing ......................... page 23
4.4. Clean the donor bearing ................................... page 24
4.5. Check the height of the platters ......................... page 25
4.6. Adjust the height of the platters ......................... page 26
4.7. Use “Edit HDD ID” function ................................... page 27

Page 3of 27
HDDSURGERY
Lomina 33, 11 000 Belgrade, Serbia
phone +381 11 361 43 43
www.hddsurgery.com
1. Introduction
This guide is intended as a short course in handling of our tools for professionals in
data recovery. It is assumed that the user is experienced in data recovery and familiar with
"traditional" ways of saving data. This manual should not be taken as a guide for training.
Using these tools without adequate software support is not recommended. It is
recommended to use some of the proven systems for cloning, such as Ace Lab, Salvation
Data, Copy-r and other products.
The general idea behind HddSurgeryTM tools was to make sure that the process of
data recovery from damaged hard drives goes with no errors. With some basic procedures
and short training it is possible to let junior data recovery technicians handle complex tasks.
With the development of these tools, we are trying to eliminate the element of luck that
usually accompanies the process of data recovery.
Experienced data recovery technicians or engineers can have great success even
without our tools, but they can have absolute security only by using HddSurgeryTM tools.
If you have questions about compatibility, you can send them to HddSurgeryTM
support team on support@hddsurgery.com
HddSurgeryTM is not responsible for any eventual damage caused by usage of our tools.
HddSurgeryTM is not responsible for the data stored on the patient or donor hard drives.

Page 4of 27
HDDSURGERY
Lomina 33, 11 000 Belgrade, Serbia
phone +381 11 361 43 43
www.hddsurgery.com
2. HddSurgery™spindle replacement tool
The process of data recovery from hard drives with jammed motors is usually done
by transplanting the platters into another hard drive with a motor that’s working, and then
transplanting the heads and electronics.
On older hard drives, only problems were how to keep the synchronization between
the platters and how to transplant the heads. But on new hard drives there is another
problem. On new drives we must notice two types of synchronization: one is vertical, one is
horizontal. The vertical one is responsible for synchronization between platters like on the
older drives. Now we have a horizontal problem as well because the inner diameter of the
platter and the platter carrier (the hat) outer diameter have a big tolerance during
production. Those two diameters are not the same so the platter can’t always be centered
right. That leads to impossibility of putting the platter in the same place after once it has
been taken off the platter carrier. That is why platter fixation lid needs to keep
synchronization at all times. Many of new hard drives also have spacers between the
platters made of metal or plastic. In process of platter transplantation, you must move these
spacers along with the platters and make sure that they don’t touch each other. If these
spacers touch the platters, they could damage them and make data recovery impossible.
HddSurgeryTM Spindle Replacement Tool uses the whole new approach to hard
drives with jammed motors. Instead of transplanting the platters to a new hard drive, only
the bearing is replaced on a patient hard drive. This way of functioning implies that the
heads, spacers and platters remain in place, while only the bearing is being replaced, which
eliminates almost all of the difficulties that go with the platter transplantation process.
New Seagate hard drives belong in the category of disks that “park heads” above the
magnetic platters and that have spacers between the platters. This implies that all of the
above mentioned problems with platter transplantation are present on these hard drives.
With HddSurgeryTM Spindle Replacement Tool for Seagate hard drives we can
eliminate all of the problems mentioned. This tool can be used to replace the bearing on
Seagate 7200.10 and Seagate 7200.11 hard drives.

Page 5of 27
HDDSURGERY
Lomina 33, 11 000 Belgrade, Serbia
phone +381 11 361 43 43
www.hddsurgery.com
Parts of the tool
Spindle-pushing screw Bottom cylinder Platter holder
Clamping nut “The puller” Cocoon Piston
Needle-screw Upper cylinder Needle

Page 6of 27
HDDSURGERY
Lomina 33, 11 000 Belgrade, Serbia
phone +381 11 361 43 43
www.hddsurgery.com
3. Spindle replacement process
Extracting the donor bearing
To prepare the bearing that will be used in the spindle replacement process, the
whole working bearing must be first removed from a donor hard drive.
1. Best way to remove the bearing from donor hard drive is to first remove the heads from
a donor, then remove the platters along with spacers between the platters. This means
to remove all internal parts of the hard drive except the platter carrier –“the hat” and
the bearing on which it stands.
2. When the hard drive is prepared in this way, place it in the tool so that the bottom hole
of the tool is precisely under the bottom side of the hard drive spindle. To place the
drive correctly, use the needle on the upper side of the tool. Push the needle down and
place the drive so that the needle points to the top side of the spindle.
Placing the donor drive in the tool
3. When the hard drive is positioned correctly, use 6 butterfly-screws to fix the hard drive
in place. Pull the needle up by unscrewing the needle-screw.

Page 7of 27
HDDSURGERY
Lomina 33, 11 000 Belgrade, Serbia
phone +381 11 361 43 43
www.hddsurgery.com
4. Turn the tool upside-down and screw the bottom cylinder in the hole on the bottom
side until it hits the drive itself.
5. Through the bottom cylinder, screw the spindle-pushing screw to start pushing out the
bearing from the hard drive case. Since this screw is not long enough to push out the
bearing completely, we must use the piston.
6. Remove the spindle-pushing screw, place the piston inside the bottom cylinder, and
then screw the spindle-pushing screw again to push out the bearing completely.
Pushing out the bearing from hard drive casing
After pushing out the bearing, it comes out along with the platter carrier - “the hat”.
7. Turn the tool upside-down again and remove the hard drive casing.
8. Position “the hat” with bearing above the bottom hole on the tool the same way like
when placing the hard drive (using the needle).
Pushing out the bearing from “the hat”

Page 8of 27
HDDSURGERY
Lomina 33, 11 000 Belgrade, Serbia
phone +381 11 361 43 43
www.hddsurgery.com
9. Screw the needle-screw to push out the bearing from “the hat”. After this, the donor
bearing is extracted and prepared.
The whole donor bearing

Page 9of 27
HDDSURGERY
Lomina 33, 11 000 Belgrade, Serbia
phone +381 11 361 43 43
www.hddsurgery.com
Preparing the patient hard drive
10. Remove the lid on a patient hard drive.
11. Place the provided hard drive lid with a hole on a patient hard drive and tighten it with
the screws previously removed from the original lid.
12. Remove 4 screws from the platter fixation lid that’s holding the platters in place. Be sure
to remove screws two by two from opposite sides so that the two screws on the
opposite sides remain.
13. Use 4 screws previously removed to screw the platter holder to the platter fixation lid.
Make sure to screw these screws tightly because these screws will suffer a great amount
of pressure when pushing out the bearing.
Mounting the platter holder on a patient hard drive

Page 10 of 27
HDDSURGERY
Lomina 33, 11 000 Belgrade, Serbia
phone +381 11 361 43 43
www.hddsurgery.com
Placing the patient hard drive on the tool
14. Place the patient drive on the tool so that the platter holder coincides with the upper
cylinder of the tool. The needle in the upper cylinder must also coincide with the central
hole in the platter holder.
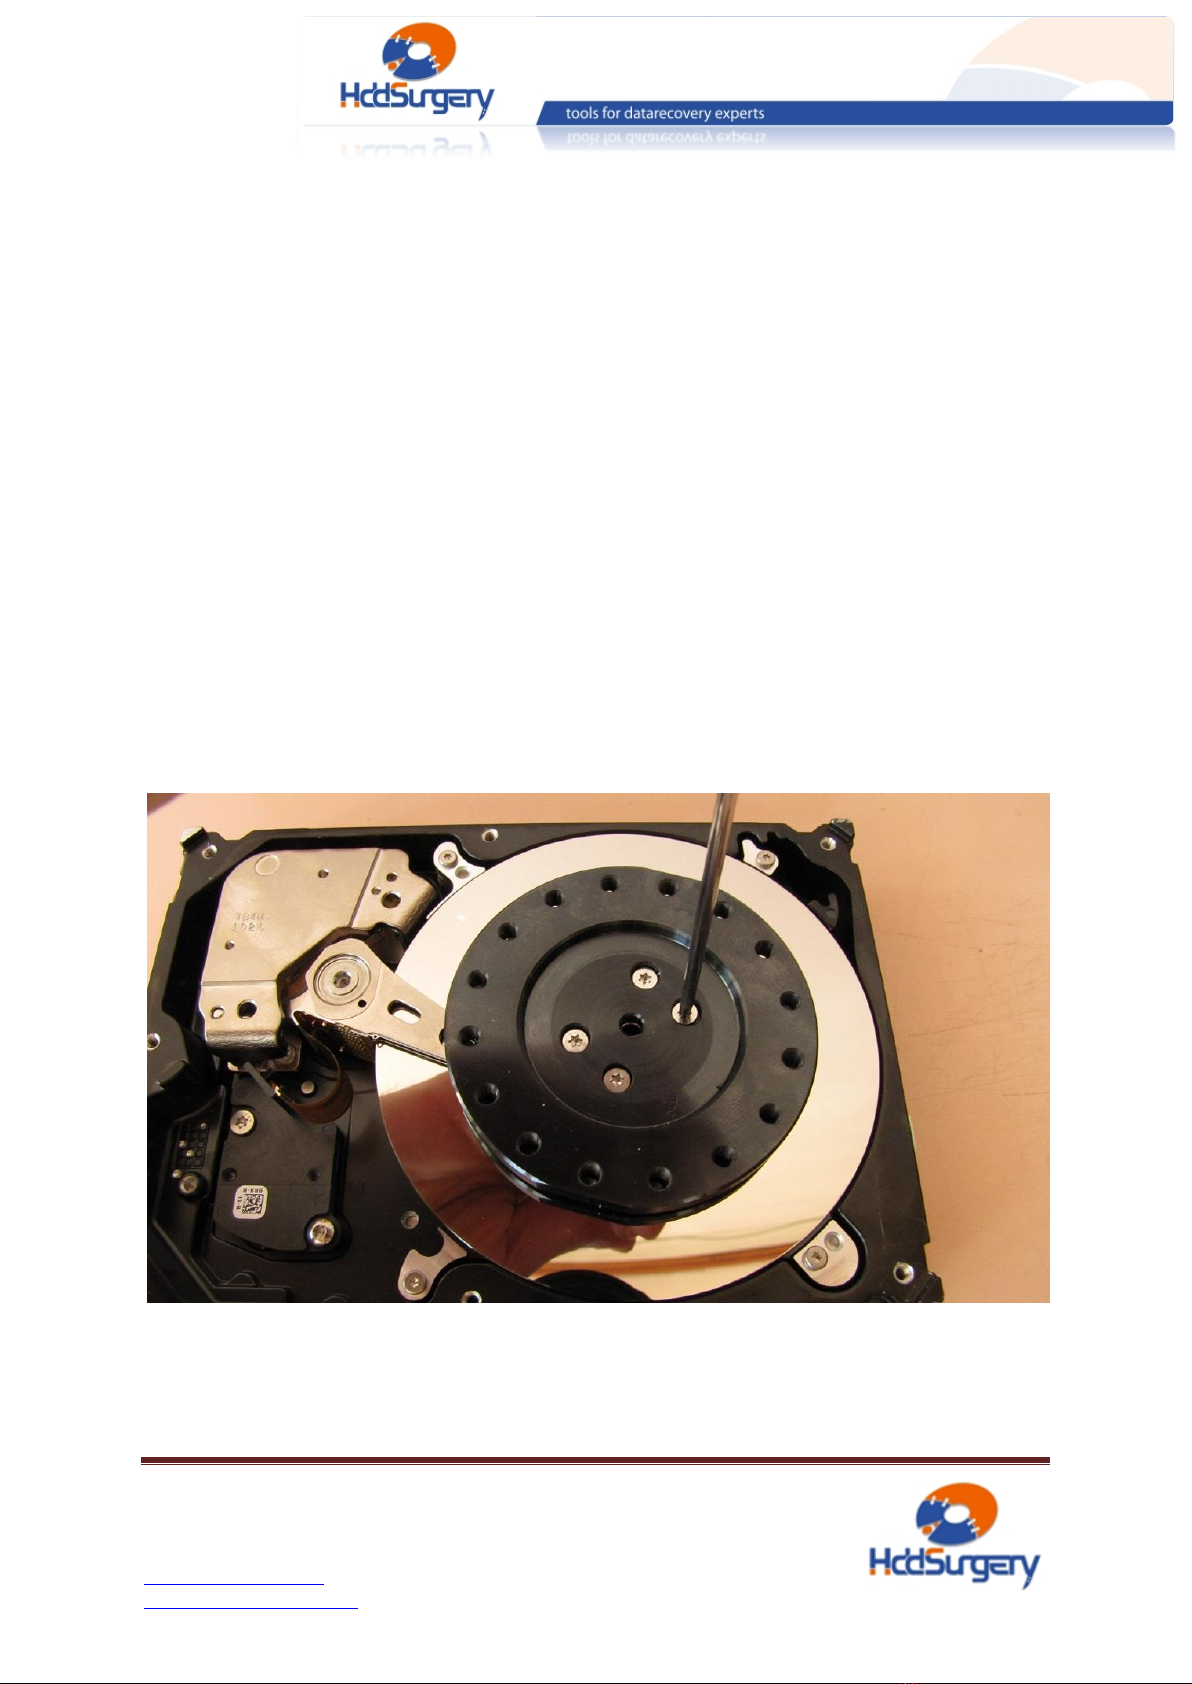
Screwing the upper cylinder
15. Pull the needle all the way up (unscrew the needle-screw) and then screw the upper
cylinder (by hand) until it touches the platter holder.
Affixing the upper cylinder to the platter holder
Ce manuel convient aux modèles suivants
1
Table des matières
Manuels Stockage populaires d'autres marques

Spectra Logic
Spectra Logic T-Series Spectra T50e Manuel utilisateur

Panasonic
Panasonic LKM-F931-1 Manuel utilisateur

Tabernus
Tabernus Enterprise Erase E2400 Manuel utilisateur

Rocstor
Rocstor COMMANDER 3F series Manuel utilisateur

HP
HP P9000 Manuel utilisateur

Western Digital
Western Digital Ultrastar Data60 Manuel utilisateur