GME TX6100 Manuel utilisateur

5 watt handheld UHF CB radio
INSTRUCTION MANUAL
GLOSS white art stock - 130gsm
TRIMMED document size: 100mm (w) x 136 mm (h) 24 pages
BOOK to be saddlestiched in 2 places
PRINTED in CMYK throughout with gloss Aq Varnish

PAGE 2 INSTRUCTION MANUAL TX6100
WARNING: SAFETY INFORMATION
CONTENTS
ACCESSORIES SUPPLIED
• Removable exible antenna
• Li-Ion battery pack 1700 mAh
• Desktop fast Charger
• Carry case
• AC Adaptor
• Instruction manual
The TX6100 is a radio frequency
transmitting device.
• When transmitting, keep the antenna
more than 25 mm from any part of the
head or body.
• Do not transmit near electrical
blasting equipment or in explosive
atmospheres.
• Do not allow children to operate a
radio transmitter unsupervised.
ACCESSORIES SUPPLIED . . . . . . . . . . . 2
WARNING-SAFETY INFORMATION . . . 2
IMPORTANT INFORMATION . . . . . . . . . 3
Possible Issues . . . . . . . . . . . . . . . 4
TELEMETRY CHANNELS . . . . . . . . . . . . 4
FEATURES ...................... 5
CONTROLS ..................... 5
LCD INDICATORS . . . . . . . . . . . . . . . . 6
POWERING THE RADIO . . . . . . . . . . . . 7
GENERAL OPERATION ............. 9
Power On/Off . . . . . . . . . . . . . . . 9
Adjusting the Volume . . . . . . . . . 9
Display Lighting . . . . . . . . . . . . . . 9
Receiving signals . . . . . . . . . . . . . 9
Transmitting . . . . . . . . . . . . . . . . 9
Selecting Channels . . . . . . . . . . 10
SQL Key .................. 10
Duplex Button . . . . . . . . . . . . . . 10
Scan Key .................. 11
Keypad Lock Function . . . . . . . . 12
Mode Key. ................. 12
1. CTCSS Code Selection . . . . . . 12
2. Digitally Coded Squelch . . . . . 13
3. Transmitter Power . . . . . . . . . 14
4. VOX Settings . . . . . . . . . . . . . 14
5. Dual Watch Settings . . . . . . . . 15
6. Squelch Settings . . . . . . . . . . 15
7. Roger Beep Tone Settings . . . 16
8. Button Beep Tone Setting . . . . 16
9. Call Alarm Selection . . . . . . . . 16
CTCSS TONE FREQUENCIES . . . . . . . . 17
DCS TONE FREQUENCIES . . . . . . . . . 18
UHF CB OPERATING FREQUENCIES . . 19
SPECIFICATIONS . . . . . . . . . . . . . . . . 21
SC CONTRACT WARRANTY
AGAINST DEFECTS . . . . . . . . . . . . . . 22

TX6100 INSTRUCTION MANUAL PAGE 3
IMPORTANT
READ ALL INSTRUCTIONS carefully
and completely before operating your
radio and retain this manual for future
reference.
NEVER connect the radio to a power
source other than the supplied battery.
This may damage your product.
DO NOT place your radio in front of a
vehicle airbag.
DO NOT use your radio with a damaged
antenna.
DO NOT attempt to modify your radio
in any way.
ALWAYS charge your radio at normal
room temperature.
ALWAYS switch off your radio where
notices restrict the use of two-way radio
or mobile telephones.
ONLY use GME approved rechargeable
batteries with the supplied charger.
AVOID exposing your radio to water. It
is not waterproof.
AVOID storing or charging your radio in
direct sunlight.
AVOID storing or using your radio where
temperatures are below -20°C or above
+60°C.
The use of the Citizen Band radio service
is licensed in Australia by the ACMA
Radio communications (Citizens Band
Radio Stations) Class Licence and in New
Zealand by the Ministry of Economic
Development New Zealand (MED). A
General User Radio Licence for Citizens
Band radio and operation is subject to
conditions contained in those licences.
The class licence for users and equipment
operating in the CB/PRS 477 MHz band
has been amended. This radio meets the
new 80 channel standard.
In simple terms the same amount of
spectrum is available; however,
radio
transceivers can now operate in a
narrower bandwidth and hence use less
spectrum. These radios are generally
referred to as narrowband or 12.5
kHz radios. By using 12.5 kHz channel
spacing instead of 25 kHz, the 40
channels originally allocated can now
be expanded to 80 channels thereby
doubling the channel capacity and
relieving congestion in the UHF
CB/PRS band.
Original 40 channel wideband Radios will
continue to operate on the original 40
channels, however they will not be able to
converse on the newer channels 41 – 80.
IMPORTANT INFORMATION CONCERNING UHF CB RADIO

PAGE 4 INSTRUCTION MANUAL TX6100
The newer narrowband radios will be
able to converse with all older 40 channel
wideband radios on all channels 1 to 40
as well as the newer channels allocated
from 41 to 80.
The mixing of narrowband and
wideband radios in the same spectrum
can cause some possible operating
issues of interference and varying levels
of received volume.
When a new narrowband radio receives a
transmission from an older wideband radio
the speech may sound loud and distorted
– simply adjust your radio volume for best
performance. When an older wideband
radio receives a signal from a new
narrowband radio, the speech may sound
quiet - simply adjust your radio volume for
best performance.
Depending on how close your receiving
radio is to another transmitting radio, there
can be interference from the transmitting
radio if it is using a channel adjacent to
the channel you are listening to. Simply try
going up or down a few channels from the
currently selected channel.
The above situations are not a fault of
the radio but a symptom of operating
wideband and narrowband radios in the
same bandwidth. This possible interference
will decrease over time as the population
of wideband radios ages and decreases.
Further information and updates
are available from the Australian
Communications and Media Authority
(ACMA) at www.acma.gov.au and the
Ministry of Economic Development (MED),
Radio Spectrum Management at:
www.rsm.govt.nz
The ACMA has allocated channels 5/35
for emergency use only. Channel 5 is the
primary Simplex Emergency Channel.
Where a Channel 5 repeater is available,
you should select Duplex on CH 5.
NOTE: Channel 35 is the input channel for
the Channel 5 repeater therefore Channel
35 should also not be used for anything
other than emergency transmissions.
Possible issues
ACMA regulations have allocated channels
22 and 23 for telemetry only applications
and have prohibited the transmission of
speech on these channels. Consequently
the TX6100 has a transmit-inhibit applied
to channels 22 and 23.
In the event that additional telemetry/
telecommand channels are approved
by the ACMA, these channels shall be
added to those currently listed where
voice transmission is inhibited. Currently
transmissions on channels 61, 62 and 63
are also inhibited and these channels are
reserved for future allocation.
TELEMETRY CHANNELS

TX6100 INSTRUCTION MANUAL PAGE 5
FEATURES
•5/1 watt RF power
•80 Channels
•Removable flexible antenna
•Desktop fast charger
•Power save mode
•Keypad lock
•DCS
•Backlit LCD display
•Calling tone
•Roger beep
•Dual watch
•Signal strength indicator
•Memory scan
•Duplex
•CTCSS
•VOX (voice activated transmit)
1. Battery
2. Scan
3. Squelch/CTCSS Key
4. Battery Release Clip
5. Push-To-Talk (PTT) Switch
6. Mode Key
7. Microphone
8. Indicator LED
9. Antenna
10. Duplex/Keypad
Lock Button
11. Volume On/Off
12. External Speaker/Mic
13. Speaker
14. LCD Display
15. Channel Up
16. Channel Down
CONTROLS
TX6100
5 Watt
4
3
2
1
5
9
8
7
6
10
11
12
13
14
15
16

PAGE 6 INSTRUCTION MANUAL TX6100
1. Dual Watch Icon: Appears when the
Dual Watch mode is active.
2. Voice Activated Transmission (VOX)
Icon: Appears when the VOX mode
is activated.
3. Keypad Lock Icon: Appears when the
keypad is locked.
4. Button Beep Tone Icon: Appears
when the button beep conrmation
tone is selected.
5. High Power Icon: Appears when High
transmitter power is selected.
6. Low Power Icon: Appears when Low
transmitter power is selected.
7. Channel Memory Indicator: Appears
when selected channel is stored in
Scan Memory.
8. Scan Indicator Icon: Appears
when SCAN is enabled and the radio
is scanning.
9. Battery Level Icon: Indicates battery
charge level. Flashes when battery is
almost empty.
10. Channel Display: Indicates the
channel number in use.
11. CTCSS (CTC) Icon: Indicates that
CTCSS tones are enabled on the
selected channel.
12. CTCSS Tone: Displays the selected
CTCSS tone (from 00 – 38) on the
selected channel.
13. DCS Icon: Indicates Digital Coded
Squelch is enabled.
14. Roger-Beep Tone Icon: Appears
when the Roger-Beep tone is
enabled.
15. Squelch/Monitor Icon: Appears
when the Monitor function is
activated. (Squelch is open)
16.
Transmit Icon: Appears when
transmitting.
17. Duplex Icon: Indicates that Duplex
communication has been enabled.
LCD INDICATORS
1 2 3 4 5 6 7 8 9
10 11 12 13 14 15 16 17

TX6100 INSTRUCTION MANUAL PAGE 7
Your TX6100 is powered by a 7.4 volt
1700 mAh Li-Ion battery pack. When the
battery pack is new, it should be fully
charged before being used for the rst
time. If left unused, your TX6100’s battery
pack will discharge itself within a few
months. If you have not used your TX6100
for some time, you will need to recharge
the battery pack before use.
WARNING: Use only the approved
GME charger. The use of other types may
be dangerous and will void your GME
warranty.
To fit the battery pack
1. Locate the bottom of the battery pack
into the two slots in the base of the
radio frame.
2. Press the top of the battery pack in to
place against the radio until it ‘clicks’.
To remove the battery pack
1. Slide the battery retaining clip
downward while pulling the top of the
battery away from the radio.
2. Lift the battery pack upward to clear
the slots at the bottom of the radio.
POWERING THE RADIO
To Remove Battery Pack
Swing
Away
Slide
Down
To Refit Battery Pack
Press Press

PAGE 8 INSTRUCTION MANUAL TX6100
Charging the battery pack
Your TX6100 is supplied with an AC
adaptor and desktop fast charger. The
charger will charge a fully discharged
1700 mAh battery pack to full capacity in
around 1-2 hours.
1. Plug the charger into a standard 240
volt AC outlet.
2. Plug the lead from the charger into the
charging cradle.
3. Place the TX6100 into the cradle.
The RED LED will light to indicate the
battery is charging.
4. When the battery has charged, the
LED will change to GREEN.
Battery low alert
When the battery icon blinks on the
display, the battery level is low and the
battery pack should be recharged. If the
battery is not charged, an audio tone
will then sound to warn the user that the
battery is almost discharged.
Battery usage
The time taken to discharge the battery
pack will depend on how you use the
TX6100. The 1700 mAh battery pack
supplied is powerful enough for a full days
use under average conditions.
Conserving battery power
The TX6100 has built-in power saving
features to help you get the maximum
amount of time between charges from
your Li-Ion battery pack. If you need to
operate your TX6100 in a situation where
you require maximum battery life (e.g. a
remote site where there is no convenient
recharging facility nearby) the following
hints can greatly reduce the amount of
power drawn from the battery pack.
Standby mode
The TX6100 will automatically enter
‘Standby’ mode when it is inactive (i.e.
not transmitting or receiving signals.
While in Standby mode it will still check
for incoming signals but it will draw
considerably less power from the battery
pack. As soon as a signal is heard or the
keys are pressed the TX6100 will ‘wake
up’ again. This Standby mode is automatic
and by itself can extend the battery life by
many hours.
Using CTCSS
If you are expecting to receive signals on
a busy channel, you can program that
channel for CTCSS operation and get the
other person to call you using the same
CTCSS tone. Your radio will then remain
in Standby and ignore all other signals
until your selected CTCSS tone is received.
Scanning
The TX6100 draws more power from
the battery pack when scanning than
when monitoring a single channel. This
is because it must ‘wake up’ more often
to monitor each channel for activity. You
can squeeze that extra bit of life from the
battery pack by avoiding any unnecessary
scanning. In addition, scanning increases
the chance of nding a signal thereby

TX6100 INSTRUCTION MANUAL PAGE 9
keeping the receiver ‘awake’ and the
squelch open more often.
Low Transmit Power Settings
The transmitter has both high and
low power settings. If you are only
operating over short distances, are in
a reasonably high location or are close
to a local repeater, try using the Low
transmitter power setting. This reduces
the transmitter power from 5 watts to 1
watt effectively doubling the talk time
available.
GENERAL OPERATION
Power on/off
Rotate the Volume control clockwise past
the ‘click’ to turn the radio on. Rotate the
control counter-clockwise past the click to
turn the radio off again.
Adjusting the Volume
With the unit powered on, rotate the
Volume control clockwise to increase the
volume and counter-clockwise to decrease
the volume.
disPlAy lighting
The LCD backlighting activates
automatically whenever a key is pressed
and turns off automatically after about 5
seconds.
receiVing signAls
While the TX6100 is not receiving signals,
it will remain in the Standby mode to
conserve battery power.
When a signal is received, the LED
indicator on the upper edge of the radio
will light GREEN and the icon will
appear on the display. Adjust the volume
control for a comfortable listening level.
If the incoming signal is encoded with a
CTCSS tone that matches the one set in
your radio, the LED indicator will light
ORANGE and you will be able to hear the
signal in the speaker.
If the LED indicator lights green and the
icon appears but you cannot hear
the signal, it is likely that your radio has
CTCSS enabled and the incoming signal
is not using your selected CTCSS tone
(see Mode Settings on page 12 for more
details on CTCSS settings).
If no further signals are received, the unit
will return to standby mode.
trAnsmitting
To transmit, press and hold the Push-To-
Talk (PTT) switch. The other radio you
are talking to must be set to the same
channel (and CTCSS code if applicable).
Hold the TX6100 approximately 5 to 8
cms from your mouth with the antenna
vertical and speak into the built-in
microphone.
While the PTT switch is pressed, the LED
indicator on the upper edge of the radio
will light RED and the icon will appear
on the LCD.
When you have nished speaking, release
the PTT switch to receive incoming signals
(it is not possible to transmit and receive

PAGE 10 INSTRUCTION MANUAL TX6100
at the same time). If no further signals are
received, the unit will revert to standby
mode.
TIP: The PTT switch can also be used to
transmit a Call Alarm melody. When the
Call Alarm melody is enabled (see Mode
settings on page 16 for more details),
pressing the PTT switch TWICE quickly will
call another party on the same channel
and play the Call Alarm melody in their
radio’s speaker. When this happens, the
icon will appear and the LED indicator
will light RED for about 3 seconds.
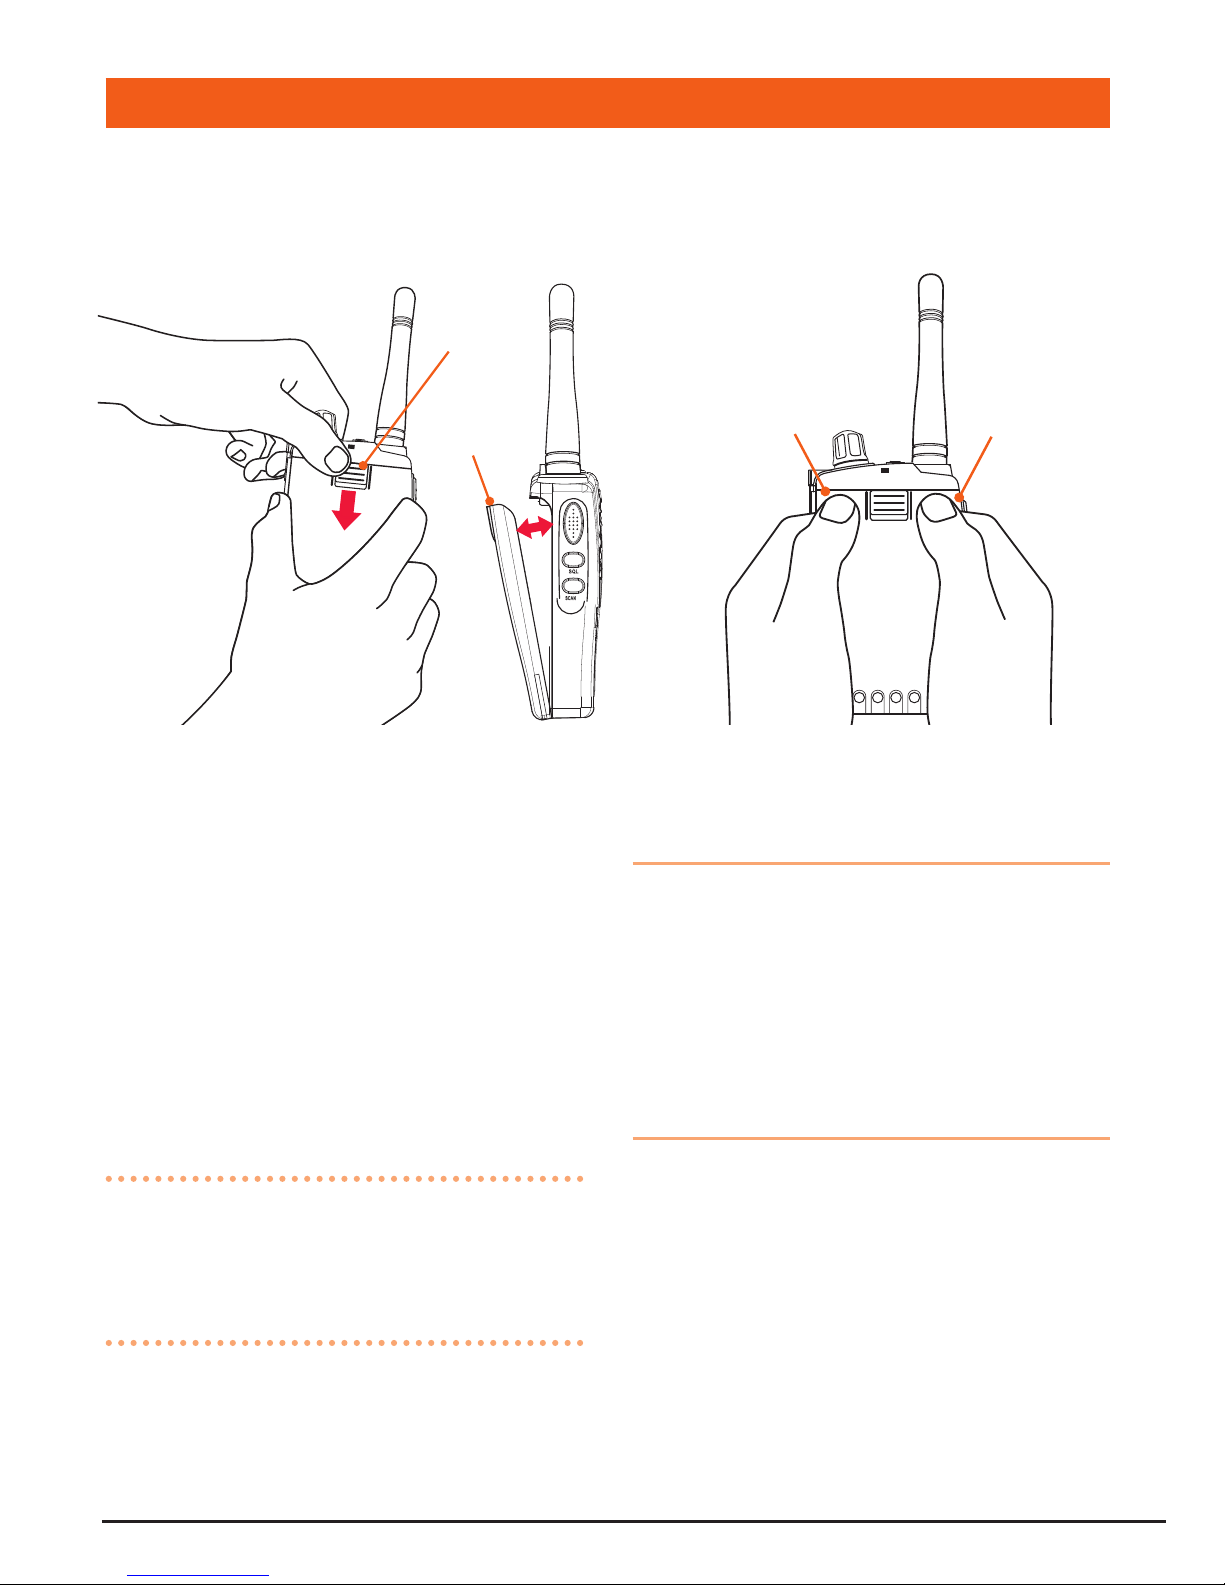
selecting chAnnels
In the ‘Standby’ mode, press the key to
step up one channel or the key to step
down one channel.
Press and hold the or keys to quickly
scroll through the channels.
sQl key
The SQL key is a dual function key that
controls both the Squelch and CTCSS
Squelch
To open the squelch, briey press the
SQL key. This will allow you to check
the current channel for activity before
transmitting, particularly if you have
CTCSS enabled. When the squelch is
open, the LED indicator on the upper
edge of the radio will light GREEN, the
icon will appear on the display and
you will hear static or hiss if the channel
is clear. Do not transmit if you hear any
conversations. Briey press the SQL key
again to close the squelch.
CTCSS
Press and hold the SQL key to activate
or deactivate CTCSS. When activated,
the ‘CTC’ icon will appear on the display,
along with the selected CTCSS code.
NOTE: To activate or deactivate CTCSS,
the current channel must have a CTCSS
code selected via the MODE key (See
page 12 for more details).
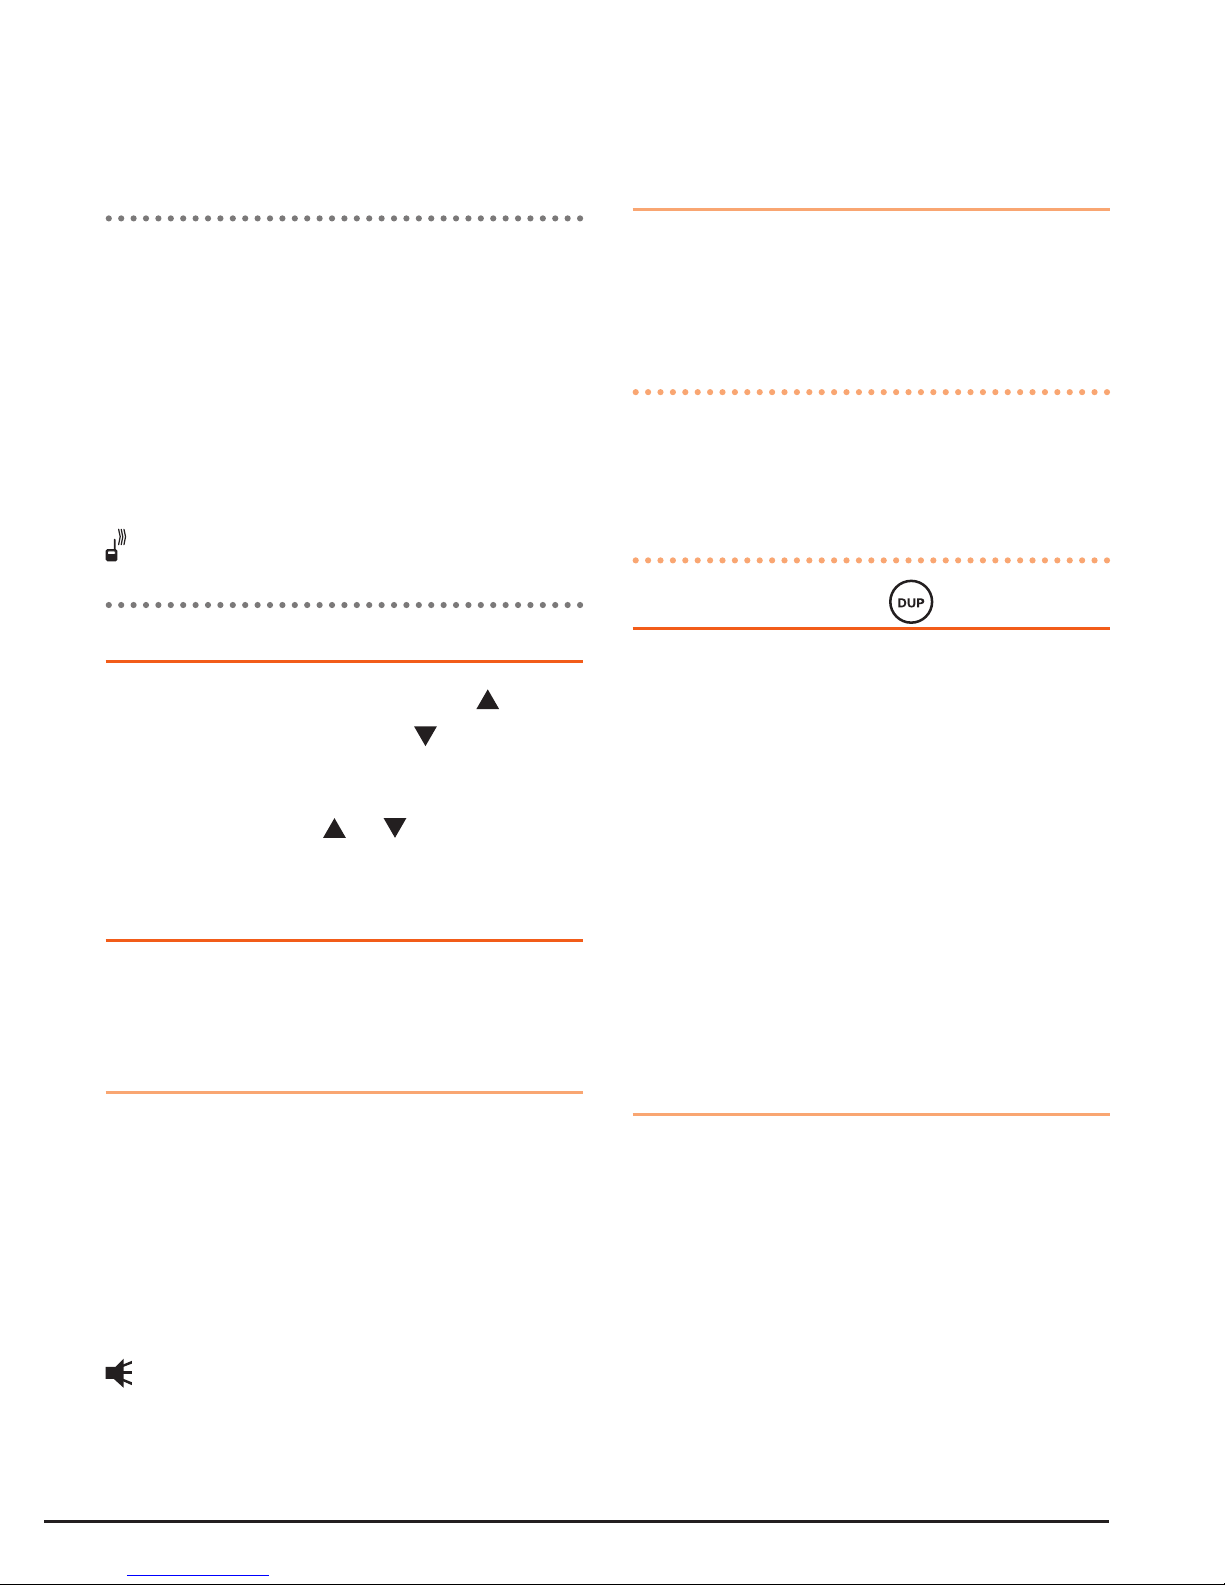
duPlex button
Duplex operation allows the TX6100 to
transmit on a different frequency to that
which it receives. This allows operation
through repeater stations in your area.
Repeaters automatically re-transmit your
signal over a much wider area, providing
greatly increased range. The Duplex mode
only works on channels 1 – 8 and 41 –
48. With Duplex selected, your TX6100
actually transmits 30 channels higher than
it receives.
To activate the Duplex mode
Select a duplex channel (1 – 8 or 41
– 48). Briey press the DUP button to
toggle duplex on or off on that channel.
When Duplex mode is enabled on the
selected channel, ‘DUP’ appears on the
display.
Duplex can be enabled or disabled
separately on individual channels.
Autres manuels pour TX6100
1
Table des matières
Autres manuels GME Émetteur-récepteur

GME
GME TX6200 Manuel utilisateur

GME
GME AIST120 Manuel utilisateur

GME
GME GX600 Manuel utilisateur

GME
GME Commercial CP40 Series Manuel utilisateur

GME
GME CP50 Manuel utilisateur

GME
GME GX560 Manuel utilisateur

GME
GME GX290 Manuel utilisateur

GME
GME TX835 Manuel utilisateur

GME
GME G COM GX400 Manuel utilisateur

GME
GME GX558 Manuel utilisateur


