Garment Printer Ink Pearl Lite Manuel utilisateur
PEARL LITE
Use & Care Guide
If you have any problems or questions, visit us at www.pearlptm.com
For Commercial Use Only
1

Table of Contents
1. IMPORTANT SAFET INSTRUCTIONS .................................................................................................... 3
2. PARTS AND FEATURES ........................................................................................................................... 4
3. REQUIRED TOOLS AND ACCESSORIES ................................................................................................5
4. POWERING THE PEARL LITE .................................................................................................................. 6
5. PRIMING THE PEARL LITE ....................................................................................................................... 7
6. ADJUST DENSIT SETTING ..................................................................................................................... 8
7. LOADING THE GARMENT......................................................................................................................... 9
8. SPRA C CLE .......................................................................................................................................... 9
9. FLUSHING PRETREAT SOLUTION .......................................................................................................... 10
10. KEEPING THE PEARL LITE CLEAN ....................................................................................................... 12
11. ROUTINE MAINTENANCE & ADJUSTMENTS .......................................................................................12
12. TROUBLESHOOTING ............................................................................................................................. 13
13. WARRANT ............................................................................................................................................. 14
14. ASSISTANCE OR SERVICE .................................................................................................................... 15
2

1. Important Safety Instructions
3
IMPORTANT SAFET INSTRUCTIONS
WARNING To reduce the risk of fire, electric shock, or injury to persons when using the Pre-treament
Machine, follow basic precautions, including the following
Read all instructions before using the Pre-treatment Machine
Do not overload the Pre-treatment Machine with excessive number of garments or large garments.
Do not tamper with controls
Do not repair or replace any part of the Pre-treatment Machine or attempt any servicing unless
specifically recommended in this manual or in published user-repair instructions that you understand
and have the skills to carry out.
Do not reach into the Pre-treatment Machine during a spray cycle.
Do not install or store the Pre-treatment Machine where it will be exposed to the weather.
Do not use gasoline, solvents, acids or other flammable or explosive substances with the Pre-
treatment Machine. These substances give off vapors that could ignite or explode.
Do not place excessive weight on the nozzle cart. This may cause permanent damage to the rail
system.
Always wear the proper protective equipment recommended by the chemical manufacturer when
spraying chemicals.
our safety and the safety of others are very important.
We have provided many important safety messages in this manual. Always read and obey all safety
messages.
This is the safety alert symbol.
This symbol alerts you to potential hazards that can injure you or others.
This symbol will also alert you of potential damage that may occur to the machine if proper
instructions are not followed.
DAMAGE You could cause damage to the machine if you don't properly
follow instructions.
WARNING You can be injured if you don't properly follow instructions.
All safety messages will tell you what the potential hazard is, tell you how to reduce the chance of injury, and
tell you what can happen if the instructions are not followed.

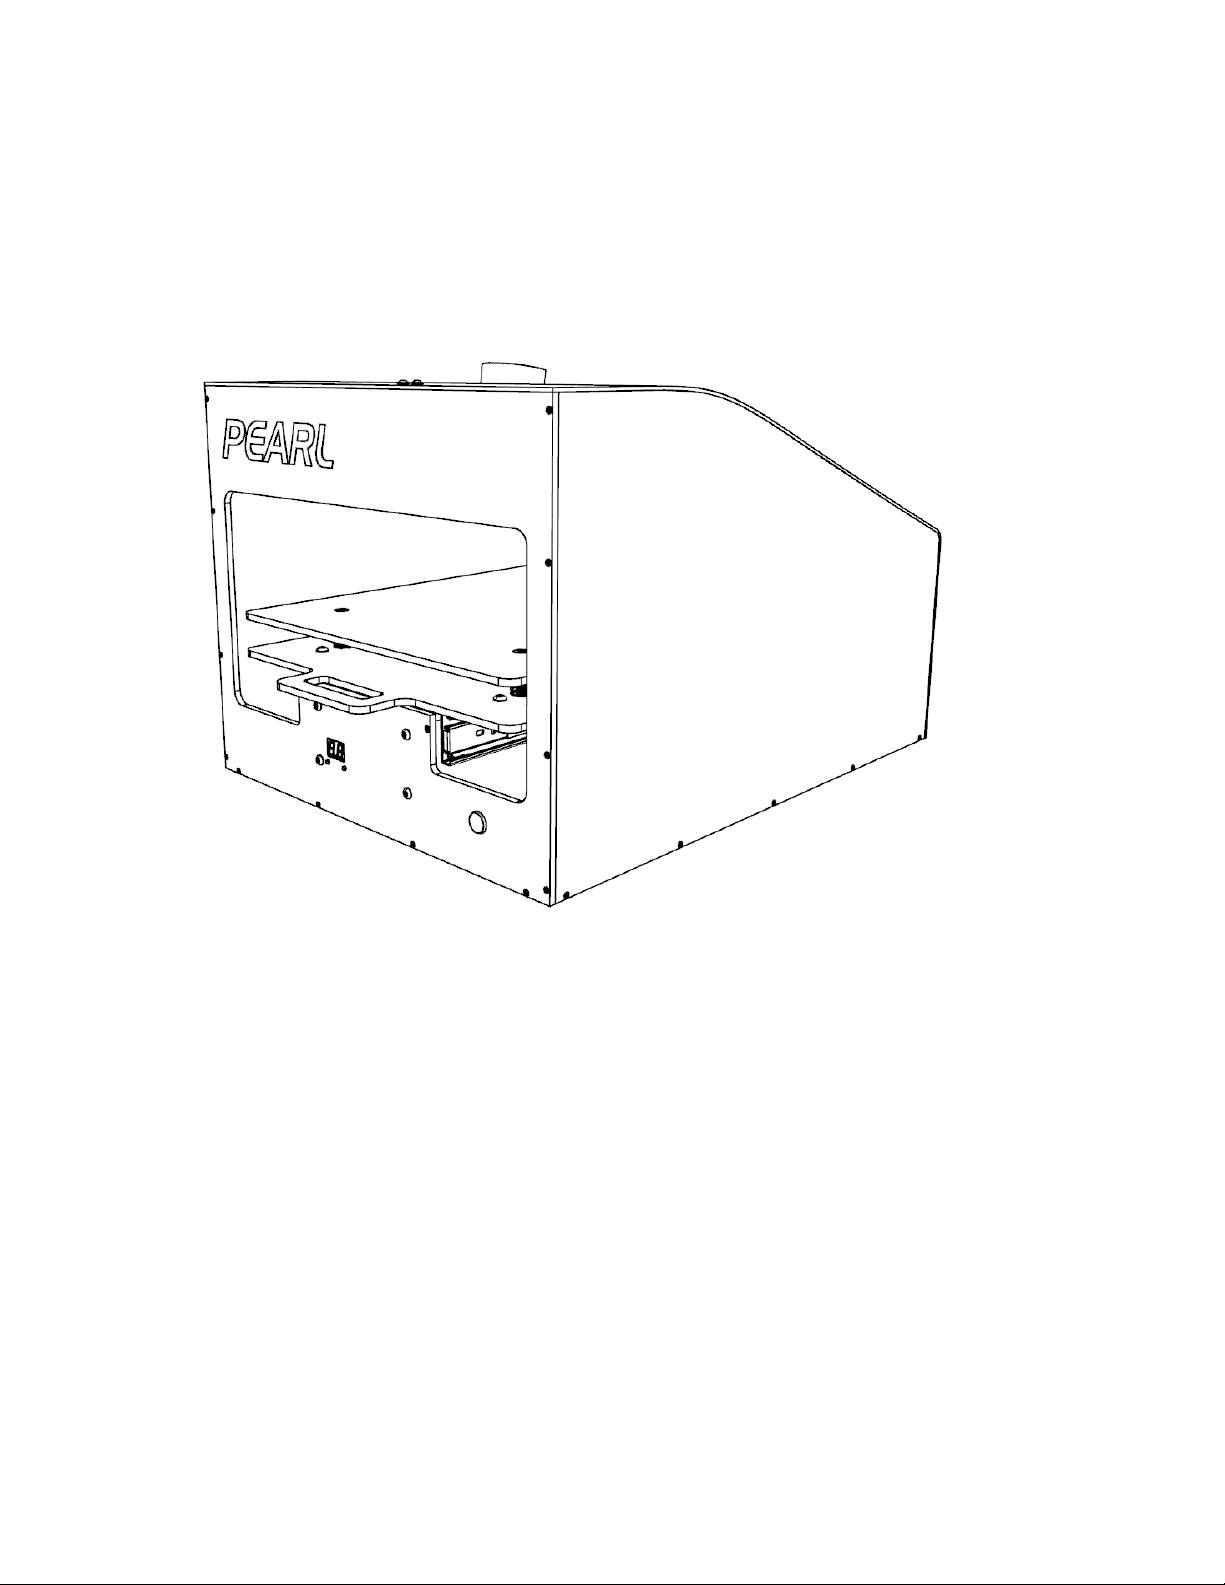
2. Parts and Features
1. Power On/Off Switch
Press ( | ) to power the unit on and press (O) to turn
the power off.
6. Nozzle - TP9501EVS & Nozzle Cap
Stainless steel Nozzle provides the even flat spray
band. Nozzle Cap secures the Nozzle to the Nozzle
Assembly.
2. Hose Inlet
Connect 1/4” OD hose to inlet for pretreatment
solution supply to the Pearl Lite.
7. Shop Vacuum Attachment
Attachment for 2.5” shop vacuum hose.
3. Display
Indicates the Spray Density setting with a range
between 20 – 99.
8. Platen Micro Adjustment
Micro height adjustment for the top platen.
4. Density Up & Down Buttons
Controls the Spray Density setting.
9. Start/Stop Button
Starts and Stops the Spray Cycle.
5. Platen
Place the garment to be pretreated on the Platen
and tuck the excess fabric.
Design & Construction
•Corrosion Proof Body
•Stainless Steel Hardware
•Enclosed Spray Area
Dimensions & Weight
•Platen Size 15” x 20”
•Overall 18.5” x 24” x 15”
•Shipping Weight 35lbs
Spray Specifications
•Spray Area 15” x 18”
•Spray Volume 12ml to 40ml (Full Area)
•Shirts/Min 4 (Full Area, Low Density)
Electrical Requirements
•110V 60hz or 220V 50hz
•Max Power Consumption 150W
Additional Features
•Vacuum Adapter
•Foot Switch
Warranty
•1 year - Limited Warranty, Parts & Labor
•Lifetime - Body Corrosion Warranty
4

3. Required Tools and Accessories
1. All Purpose Cleaner
Used to clean the Pearl Lite after use. See “Keeping
the Pearl Lite Clean”
2. Shop Rags or Towel
Used to clean the Pearl Lite after use. See “Keeping
the Pearl Lite Clean”
3. Distilled Water
Used to clean the Pearl Lite after use.
REPLACEMENT PARTS:
4. Nozzle
TEEJET TP9501EVS
www.flsprayers.com
5

4. Powering the Pearl Lite
The Pearl Lite is powered with either 110V/60Hz or 220V/50z. Please check with distributor to verify the
power requirements for the Pearl Lite in your region.
1. Plug the power cord in to the power connector located in the back of the Pearl Lite.
WARNING Use caution when plugging the
power cord in to the wall outlet.
2. Press the Power Switch (1) to the ON ( | ) position.
3. The Pearl Lite Display (3) will display the last density setting used before the unit was powered off.
6

5. Priming the Pearl Lite
Priming the Pearl Lite is required for proper spray pattern on the garment. If the Pearl Lite is improperly
primed, you may not get an even, flat and consistent spray pattern on the garment.
1. To prime the machine, enter the Prime/Purge mode by pressing the Density Up & Down B ttons (4)
simultaneously. The Display (3) will read “00” to indicate the Prime/Purge mode.
2. Place the inlet hose into the pretreatment container.
3. Attach Nozzle & Nozzle Cap (6) to the Solenoid.
4. Place a cup under the Nozzle (6) to collect pretreatment.
7

5. Press the Start B tton (9) to start the priming sequence.
6. Allow the pressure to build up to ensure proper priming of the machine.
7. Excess pretreatment solution can be poured back into the Pretreatment container.
8. Press the Up and Down Speed Buttons simultaneously to exit the Prime/Purge Mode. The display will
change to the last speed setting used before entering the Prime/Purge Mode.
6. Adjust Density Setting
The Density settings allows the user to control the amount of pretreat solution to apply to the garment.
1. To adjust the Spray Density, press either the Up or Down Density B tton (4).
2. The Spray Density setting will be indicated by the Display. The lower limit is 20 and the upper limit is 99.
3. The Spray Density setting will be stored after the Spray Cycle has been started. This will allow the last
setting used to be reloaded during power on.
NOTE Press and hold the Density B ttons (4) to automatically increment or decrement the setting.
8

7. Loading the Garment
Loading the garment properly will ensure even, consistent spray patterns.
1. Place the garment on the Platen (5) as shown in the figure below with the collar of the garment towards
the top.
2. Tuck the excess fabric under the Platen (5).
3. Push the Platen (5) in to the desired spray length.
8. Spray Cycle
The Spray Cycle is the process the Pearl Lite uses to lay a flat and even layer of pretreatment solution
on to the garment.
1. With the garment loaded to the desired spray length, press the Start B tton (9) to begin the Spray Cycle.
2. The Spray Cycle can be stopped by pressing the Start B tton (9) again during the Spray Cycle.
9

3. After the Spray Cycle is completed, the garment can be removed and the process can be repeated.
WARNING Do not reach into the machine
after the start of the Spray Cycle.
DAMAGE Damage to the machine may
occur if the Platen is obstructed
during the Spray Cycle.
9. Flushing Pretreat Solution
When flushing pretreat solution it is important to follow these steps to ensure proper function the the
Pearl Lite. These steps should be followed prior to switching pretreat solution.
DAMAGE
Failure to follow these
instructions for flushing after use
may damage many components
of the Pearl Lite.
1. To flush the pretreat solution, enter the prime/purge mode by pressing both the Up & Down Density
B ttons (4) simultaneously.
2. Remove the Inlet Hose (2) from the pretreat solution container.
3. Place a cup under the Nozzle (6) to collect the excess pretreat solution.
10
Table des matières
Autres manuels Garment Printer Ink Imprimante


