Fusion Apollo MS-SRX400 Manuel d'instructions

®
FUSIONENTERTAINMENT.COM
Quick Start Manual 2
Manuel de démarrage rapide 7
Manuale di avvio rapido 14
Schnellstartanleitung 20
Guía de inicio rápido 27
Manual de início rápido 34
Snelstartgids 40
Lynstartvejledning 46
Aloitusopas 52
Hurtigstartveiledning 57
Snabbstartshandbok 63
快速入門手冊 69
FUSION®Apollo™MS-SRX400
Quick Start Manual
Apollo™ MS-SRX400
Quick Start Manual
Getting Started
WARNING
See the Important Safety and Product
Information guide in the product box for
product warnings and other important
information.
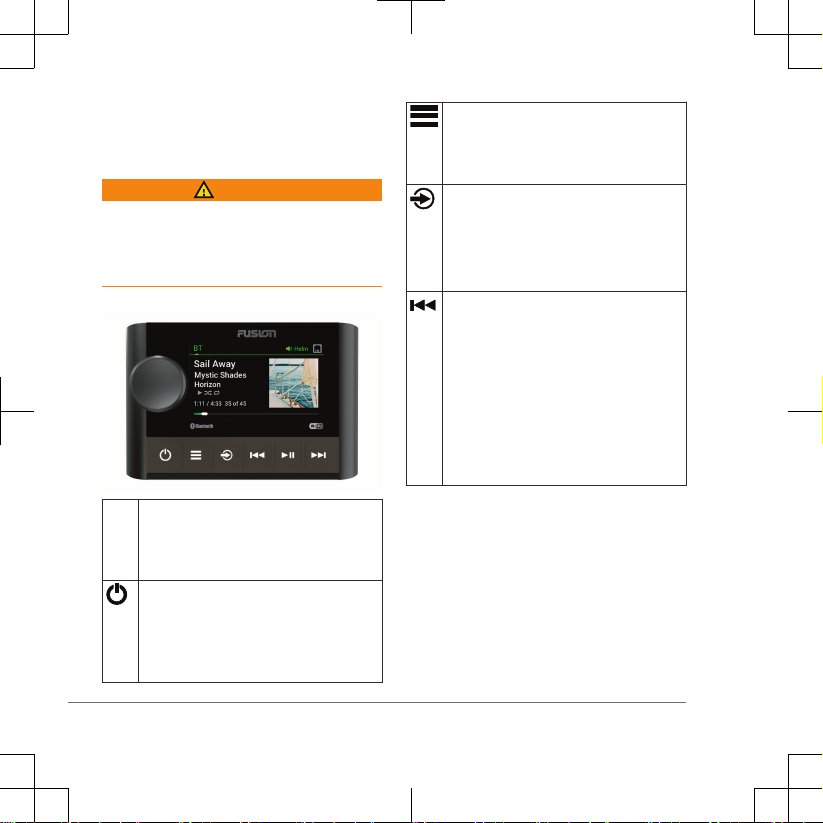
Stereo Controls
Dial • Turn to adjust the volume, move
through the menus, or adjust a
setting.
• Press to select an option or a setting.
• Press to turn on the stereo.
• Press to mute the audio.
• Press and hold to turn off the stereo.
• Press and hold to open the power
menu on networked stereos.
• Press to open the menu.
• Press to return to the previous
screen from the menu.
• Press and hold to exit the menu.
Press to change the source.
TIP: You can turn the dial to browse,
and press the dial to select the source.
Press and hold to open the GROUPS
menu (page 4).
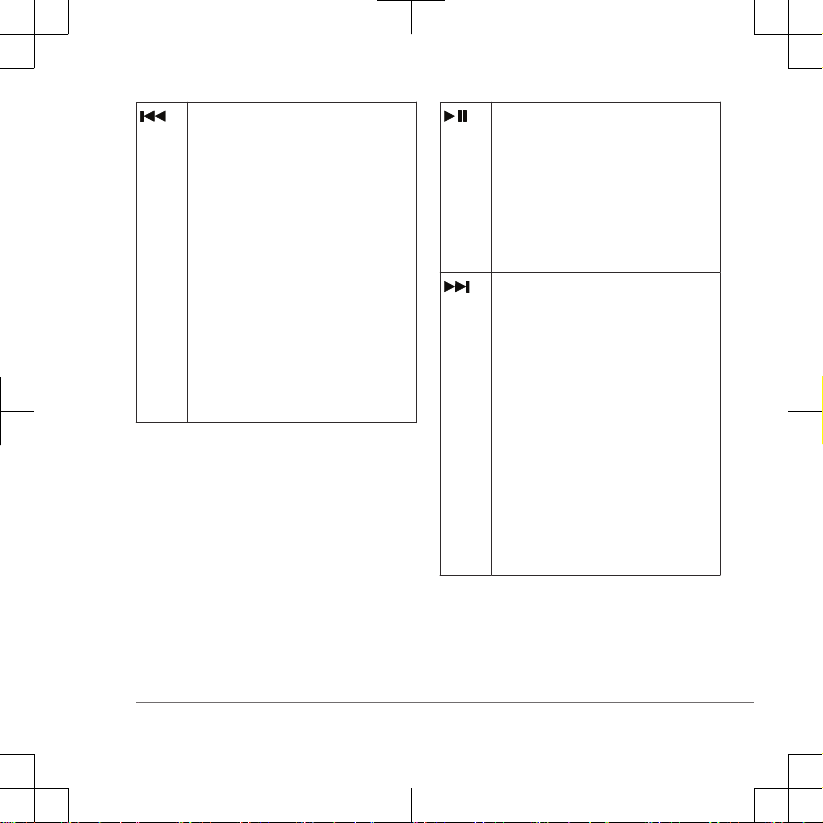
• Press to skip to the beginning of the
track or to the previous track, when
using an applicable source.
• Press and hold to rewind the track,
when using an applicable source.
• AM/FM:
◦ Press to tune to the previous
station or preset.
◦ Press and hold for faster tuning
(manual mode only).
2 Quick Start Manual
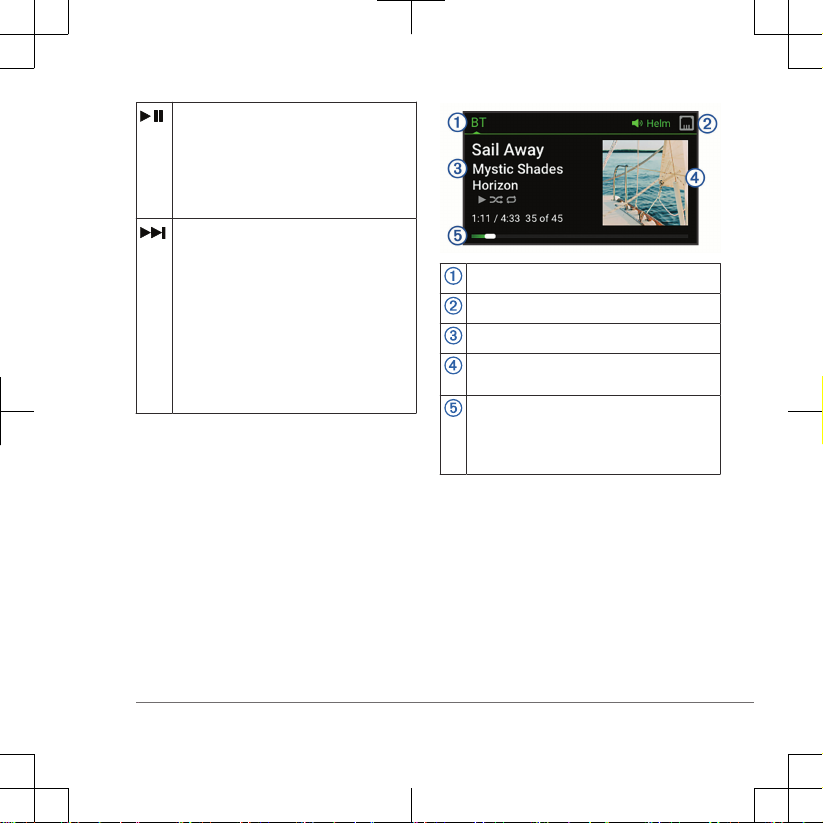
• Press to pause or resume the current
track, when using an applicable
source.
• AM/FM: Press to cycle through the
tuning modes (auto, manual, and
presets).
• Press to skip to the next track, when
using an applicable source.
• Press and hold to fast-forward the
track, when using an applicable
source.
• AM/FM:
◦ Press to tune to the next station
or preset.
◦ Press and hold for faster tuning
(manual mode only).
For information about controlling sources
from a grouped stereo, see that stereo's
owner's manual.
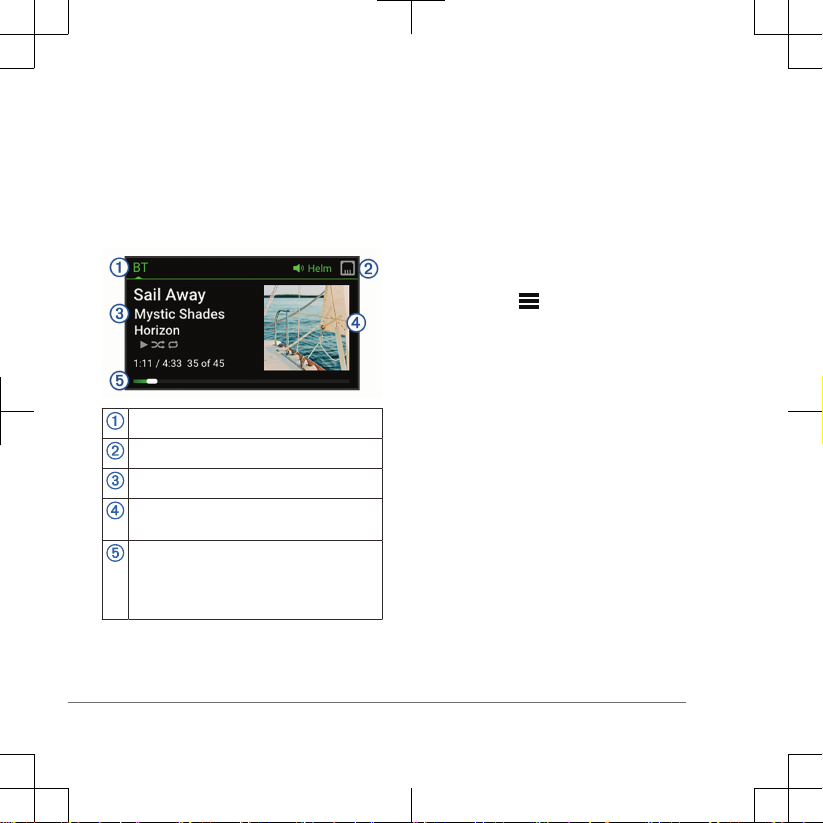
Stereo Screen
The information displayed on the screen
varies depending on the source selected.
This example shows a track playing on a
device connected using Bluetooth®
wireless technology.
Source name
Active zone and status icons
Track details (if available)
Album art (if available from a compatible
source)
Elapsed time, track duration, and the
current track number out of the total
number of tracks in the playlist (if
available)
Naming the Device
You should enter a unique name for this
device so you can easily identify it when
viewing devices on the Fusion PartyBus™
network.
NOTE: You can also name and disable
unused zones and sources on the stereo.
See the owner's manual for more
information.
Quick Start Manual 3

1Select > SETTINGS.
2Select DEVICE NAME, and enter a
unique name for the device.
Adjusting the Volume
You can control the volume of any zone on
any stereo connected to the Fusion
PartyBus network.
1Turn the dial to adjust the volume.
2If the stereo is on the Fusion PartyBus
network, press the dial to switch
between zones.
TIP: You can select ALL to adjust the
volume for all zones at the same time.
TIP: You can press and hold the dial to
adjust the subwoofer level of a zone.
Creating or Editing a Group
Before you can create a group, you must
connect multiple compatible stereos to the
Fusion PartyBus network. See the
installation instructions provided with your
stereo for installing and configuring the
network.
You can combine compatible stereos on
the network into groups. Grouped stereos
can share available sources and control
media playback and volume on all of the
stereos in the group, which allows for a
synchronized audio experience across the
vessel. You can quickly create, edit, and
break up groups as needed from any
compatible stereo or remote control on the
network.
NOTE: You can adjust the volume of any
zone on any compatible stereo on the
network, regardless of whether or not
those stereos are in the group.
A zone stereo, such as the SRX400, can
create or join a group to control and play
sources from other stereos, but it cannot
share its sources with the group.
You cannot change the settings when a
stereo is part of a group.
For additional considerations about groups
and sharing sources, see the owner's
manual.
1Select > GROUPS.
TIP: You can hold from any screen
to open the GROUPS menu.
2Select the name of the stereo you
want to be the primary stereo in the
group, or select the name of an
existing group.
3Select the stereos you want to add to
or remove from the group.
4 Quick Start Manual

4Select DONE.
Selecting a Source
1Select .
2Turn the dial to highlight a source.
NOTE: If the device is part of a group,
continue turning the dial to access the
sources on other devices in the group
(page 4).
If a source cannot be shared with the
group, it will appear gray and you
cannot select it.
3Press the dial to select the source.
Adjusting the Backlight Brightness
NOTE: If you connected the dim wire on
the wiring harness to the boat's
illumination wire, the backlight dims
automatically when the boat lights are on.
This may affect how you adjust the
brightness setting.
1Select > BRIGHTNESS.
2Adjust the brightness level.
Media Player Connection
Connecting a Compatible Bluetooth
Device
You can play media from a compatible
Bluetooth device using the Bluetooth
wireless connection.
You can control the music playback with
the media app on a Bluetooth device or
using the Fusion-Link™ remote control
app.
1Select the BT source.
2Select > BT > CONNECTIONS >
DISCOVERABLE to make the stereo
visible to your compatible Bluetooth
device.
3Enable Bluetooth on your compatible
Bluetooth device.
4Bring the compatible Bluetooth device
within 10 m (33 ft.) of the stereo.
5On your compatible Bluetooth device,
search for Bluetooth devices.
6On your compatible Bluetooth device,
select the stereo from the list of
detected devices.
7On your compatible Bluetooth device,
follow the on-screen instructions to
pair and connect to the discovered
stereo.
Quick Start Manual 5

When pairing, your compatible
Bluetooth device may ask you to
confirm a code on the stereo. The
stereo does not display a code, but it
does connect correctly when you
confirm the message on the Bluetooth
device.
8If your compatible Bluetooth device
does not immediately connect to the
stereo, repeat steps 1 through 7.
The DISCOVERABLE setting is disabled
automatically after two minutes.
NOTE: On some Bluetooth devices,
adjusting the volume on the device affects
the volume level on the stereo.
Connecting an Apple® Device Using
AirPlay®
1From the settings menu on your Apple
device, connect to the same wireless
network as your compatible Fusion®
stereo.
NOTE: You can connect some Apple
devices to the network using a wired
Ethernet connection, if applicable. Go
to the Apple website for more
information.
2On your Apple device, open the music
app you want to stream to the stereo.
3From the music app or program, select
or , and select the name of the
stereo.
4If necessary, start playing music on the
app.
The stereo changes to the AirPlay
source automatically and plays audio
from your Apple device.
NOTE: If your Apple device is using
AirPlay 2 software, you can connect to
multiple stereos on the same network.
NOTE: You cannot stream the AirPlay
source to other stereos on the network
using the Fusion PartyBus network.
Using AirPlay 2 software, you can play
content on multiple stereos on the
network, but the stereos must not be
grouped.
NOTE: On some AirPlay devices,
adjusting the volume on the device
affects the volume level on the stereo.
Playing Music
Setting the Tuner Region
You must select the region you are in to
receive AM and FM stations properly.
1Select > SETTINGS.
2Select TUNER REGION.
6 Quick Start Manual
3Select the region you are in.
Changing the Radio Station
1Select an applicable source, such as
FM.
2Select to select a tuning mode.
You can use AUTO mode to scan
stations, MANUAL mode to manually
tune to a station, and PRESET mode
to select the next preset station.
3Select or to tune to the station.
TIP: You can quickly save the selected
station or channel as a preset by
holding .
DSP Settings
This stereo features digital signal
processing (DSP). You can select pre-
configured DSP settings for Fusion
speakers and amplifiers to optimize audio
reproduction in their installed locations.
The stereo uses the same DSP setting for
the speakers connected to the internal
amplifier and for the line out connection. If
you connected speakers to the internal
amplifier and are using the line out, the
DSP setting might cause the speaker
output to be more limited than necessary.
All DSP settings are configured using the
Fusion-Link remote control app. See the
stereo owner's manual for more
information.
More Information
Registering Your Apollo™ SRX400
Help us better support you by registering
the product online.
• Go to fusionentertainment.com.
• Keep the sales receipt, or a copy, in a
safe place.
Apollo™ MS-SRX400
Manuel de démarrage rapide
Mise en route
AVERTISSEMENT
Consultez le guide Informations
importantes sur le produit et la sécurité
inclus dans l'emballage du produit pour
prendre connaissance des avertissements
et autres informations importantes sur le
produit.
Manuel de démarrage rapide 7
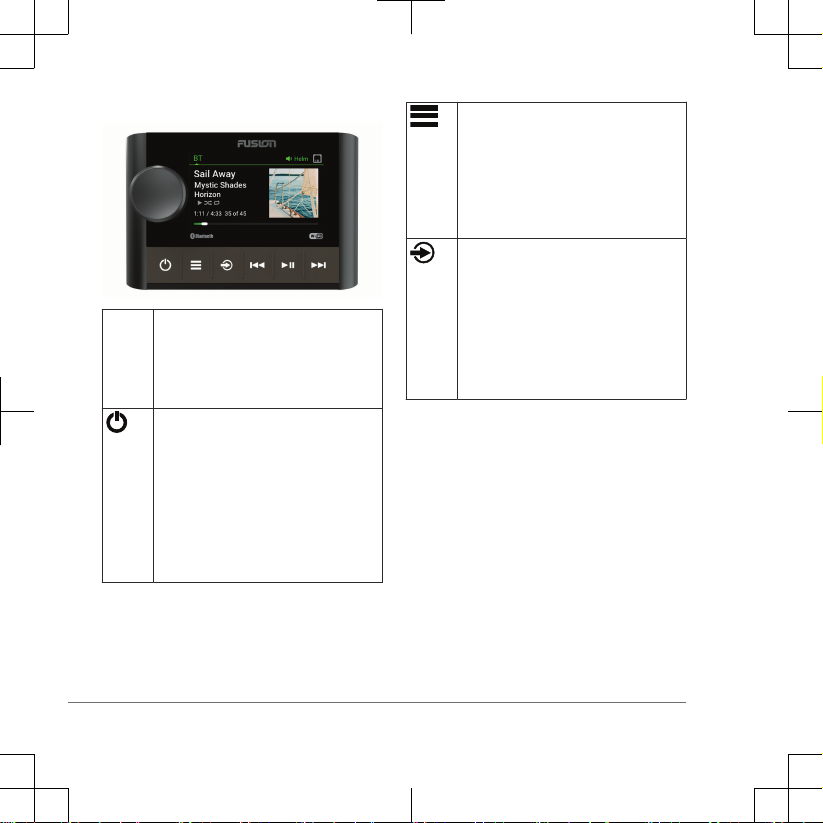
Touches du système stéréo
Molette • Tournez la molette pour régler le
volume, parcourir les menus ou
configurer un réglage.
• Appuyez dessus pour sélectionner
une option ou un réglage.
• Appuyez sur ce bouton pour
allumer le système stéréo.
• Appuyez sur cette touche pour
désactiver le son.
• Maintenez ce bouton enfoncé
pour éteindre le système stéréo.
• Maintenez ce bouton enfoncé
pour ouvrir le menu Marche/Arrêt
sur les chaînes stéréo en réseau.
• Appuyez sur ce bouton pour ouvrir
le menu.
• Appuyez sur ce bouton pour
revenir à l'écran précédent à partir
du menu.
• Maintenez ce bouton enfoncé
pour quitter le menu.
Appuyez sur ce bouton pour modifier
la source.
ASTUCE : Vous pouvez faire tourner
la molette pour parcourir les options
et appuyer dessus pour sélectionner
la source.
Maintenez ce bouton enfoncé pour
ouvrir le menu Groupes (page 11).
8 Manuel de démarrage rapide
• Appuyez sur ce bouton pour
retourner au début d'une piste ou
revenir à la piste précédente, lors-
qu'une source adaptée est
utilisée.
• Maintenez ce bouton enfoncé
pour revenir en arrière dans la
piste, lorsqu'une source adaptée
est utilisée.
• AM/FM :
◦ Appuyez sur ce bouton pour
atteindre la station ou la station
préréglée précédente.
◦ Maintenez cette touche
enfoncée pour parcourir les
stations plus rapidement (mode
manuel uniquement).
• Appuyez sur ce bouton pour
mettre la piste en cours en pause
ou la reprendre là où elle s'était
arrêtée, lorsqu'une source
adaptée est utilisée.
• AM/FM : appuyez sur ce bouton
pour faire défiler les modes de
réglage (auto, manuel et préré-
glages).
• Appuyez sur cette touche pour
passer à la piste suivante, lors-
qu'une source applicable est
utilisée.
• Maintenez ce bouton enfoncé
pour avancer dans la piste, lors-
qu'une source adaptée est
utilisée.
• AM/FM :
◦ Appuyez sur ce bouton pour
atteindre la station ou la station
préréglée suivante.
◦ Maintenez cette touche
enfoncée pour parcourir les
stations plus rapidement (mode
manuel uniquement).
Pour en savoir plus sur le contrôle des
sources à partir d'une chaîne stéréo
groupée, consultez le manuel d'utilisation
de la chaîne stéréo en question.
Manuel de démarrage rapide 9
Écran de la chaîne stéréo
Les informations qui apparaissent à
l'écran varient en fonction de la source
sélectionnée. Dans cet exemple, l'appareil
lit une piste enregistrée sur un appareil
connecté à l'aide de la technologie sans fil
Bluetooth.
Nom de la source
Zone active et icônes d'état
Informations sur la piste (si disponibles)
Pochette de l'album (si disponible à partir
d'une source)
Temps écoulé, durée de la piste et
numéro de la piste en cours de lecture
par rapport au nombre total de pistes
dans la liste de chansons (si disponible)
Nom de l'appareil
Il est conseillé de saisir un nom unique
pour cet appareil afin de pouvoir l'identifier
facilement sur le réseau Fusion PartyBus.
REMARQUE : vous pouvez également
nommer et désactiver les zones et
sources inutilisées sur la chaîne stéréo.
Pour plus d'informations, reportez-vous au
manuel d'utilisation.
1Sélectionnez > Paramètres.
2Sélectionnez Nom de l'appareil, puis
saisissez un nom unique pour
l'appareil.
Réglage du volume
Vous pouvez contrôler le volume de
n'importe quelle zone sur n'importe quelle
chaîne stéréo connectée au Fusion
PartyBus.
1Tournez la molette pour régler le
volume.
2Si la chaîne stéréo se trouve sur le
réseau Fusion PartyBus, appuyez sur
la molette pour passer d'une zone à
une autre.
ASTUCE : vous pouvez sélectionner
Tout pour régler le volume de toutes
les zones en même temps.
10 Manuel de démarrage rapide
Autres manuels pour Apollo MS-SRX400
5
Ce manuel convient aux modèles suivants
1
Table des matières
Langues :
Autres manuels Fusion Système stéréo

Fusion
Fusion STEREOACTIVE Manuel d'instructions

Fusion
Fusion MS-88300 Mode d’emploi

Fusion
Fusion NavNet TZtouch Series Manuel utilisateur

Fusion
Fusion Stereo Retrofit Kit Manuel utilisateur

Fusion
Fusion Apollo MS-SRX400 Manuel utilisateur

Fusion
Fusion Apollo RA770 Manuel d'instructions

Fusion
Fusion MS-RA55 Manuel utilisateur

Fusion
Fusion MS-BB100 black box Manuel utilisateur

Fusion
Fusion MS-RA205 Manuel d'utilisation

Fusion
Fusion MS-RA50 Manuel utilisateur


