Fuel3D SCANIFY F3D2001 Manuel utilisateur

User Manual
SCANIFY F3D2001
Version 1.0
Revision Date: 2015.01.02
3DPE.ir/shop

1
Contents
SCANIFY Profile
2
Set-up
3
-Registering your device and locating your serial
number
3
-Setting up your scanner
3
Taking a scan
5
-Selecting a suitable subject
5
-Utilizing the target holders
6
-Acquiring a scan with Fuel3D Studio
8
Hardware
10
-Connections
10
-Flashes
10
-Cameras
11
-LED Indicators
12
-Caring for your scanner
13
Software
14
-Navigating Fuel3D Studio
14
-Acquiring a scan
16
-Inspecting your scan
17
-Cropping a scan
19
-Exporting your scan
20
Troubleshooting
21
-Target troubleshooting
21
-Cuts in your scans
21
-Inaccurate geometry
21
-Workarounds
21
3DPE.ir/shop

2
SCANIFY Profile
SCANIFY is a handheld, point-and-shoot 3D scanner built to enable consumers and
professionals to 3D scan objects in high-resolution shape and color in a tenth of a second.
Software - SCANIFY comes with Fuel3D Studio software, which allows scans to
be manipulated and exported to popular file formats for 3D printing and on-screen
applications (.STL, .OBJ, .PLY). All versions of Fuel3D Studio are created to be as
easy to use as possible, with a simple, intuitive user interface and can be installed on
both PC (currently available) and Mac (coming in early 2015).
Tech specifications: SCANIFY is tethered via USB to either a PC or a Mac (coming
in early 2015) for convenient indoor scanning. For all versions of Fuel3D Studio, the
minimum hardware specifications are: Mac (TBA), Windows 7 or Windows 8 Pro, 2GB
RAM, 1GB hard disk space, Dual-core processor.
Object specifications:
oSCANIFY is the perfect solution for quickly capturing 3D models of:
The human form
Fabrics
Stone and masonry
Wood carvings
Stone sculptures
Plants and trees
oIdeal objects for scanning include the following characteristics:
Gently contoured surface with soft curves
Varying color
Matte, non-shiny surfaces
Opaque
oObjects with the following characteristics may not be suitable for scanning:
Cavities or protrusions
Very dark
Mono-color with no texture
Reflective or shiny
Transparent
Sharp edges and corners
3DPE.ir/shop

3
Set-up
Registering your device and locating your serial number
The serial number of your scanner can be found on your SCANIFY box as well as on the
back of the scanner itself.
The Serial Number is required to register your SCANIFY on our website and is necessary
when downloading Fuel3D Studio. It is important that you keep your serial number easily
accessible as it is a unique identifier for your scanner and may be required if you have a
support request.
To register your device create an account at: http://www.fuel-3d.com/register/. The sign up
form will ask you to enter the serial number of your SCANIFY. This will link the specific
device to your account and allow you to download the software and access your account
dashboard. You can register up to 4 other people to your device/Serial Number.
Setting up your scanner
What’s in the box?
Inside your box you will find:
Fuel3D scanner
Three (3) tracking targets
Fuel3D target holders
USB data transfer cable
AC power adapter
International AC adaptor connectors
Warranty card
Fuel3D lens cloth
Quick start guide
Note:
If you are having problems registering your account please contact support at:
fuel3d.zendesk.com.
Find you serial on your scanner:
Example: 6341002002208
Find you serial on your box:
Example: 6341002002239
3DPE.ir/shop

4
Getting connected
The scanner requires two connections (included) to acquire a scan:
-2.0 Micro USB to USB data cable
-5V Power adapter
Plug the power adaptor into a wall outlet and the other end into the scanner. Plug the USB
into the scanner and your PC.
Once plugged into a computer Studio will automatically install the device drivers.
Note:
Device drivers must be installed before opening Fuel3D Studio, this may take
several minutes the first time a new scanner is connected.
Both connections attach at the bottom
of the scanner.
Select the appropriate power adaptor for your
region.
3DPE.ir/shop

5
Taking a Scan
Selecting a suitable subject
Some subjects may work better than others and we encourage experimenting with a wide
variety of items to get an understanding of what scans best.
Below are examples that can help you decide whether a subject is suitable to scan.
Subjects that work well:
Examples that work well:
Masonry
People
Flowers
Plants
3DPE.ir/shop

6
Subjects that may not work well:
Examples that may not work well:
Utilizing the target holders
Placement of the target
It is important to understand the scanner’s capture area when selecting a subject and while
scanning.
The scanner is able to capture a subject that is around 37cm/14.5” diagonal. If your subject
is larger than this, multiple scans may be taken and then stitched together to create a 3D
model.
The target also ensures that you are within the correct range of the subject you are
scanning.
Metallic –shiny or
reflective objects
will reflect the light
from the flashes
Too large –a
whole body
takes too
many scans
Lack of detail –
lack of surface or
color information
may result in
distortion in your
scan
Plastics –these
objects may be
reflective and lack
surface detail to
accurately capture
Scanner capture area
3DPE.ir/shop

7
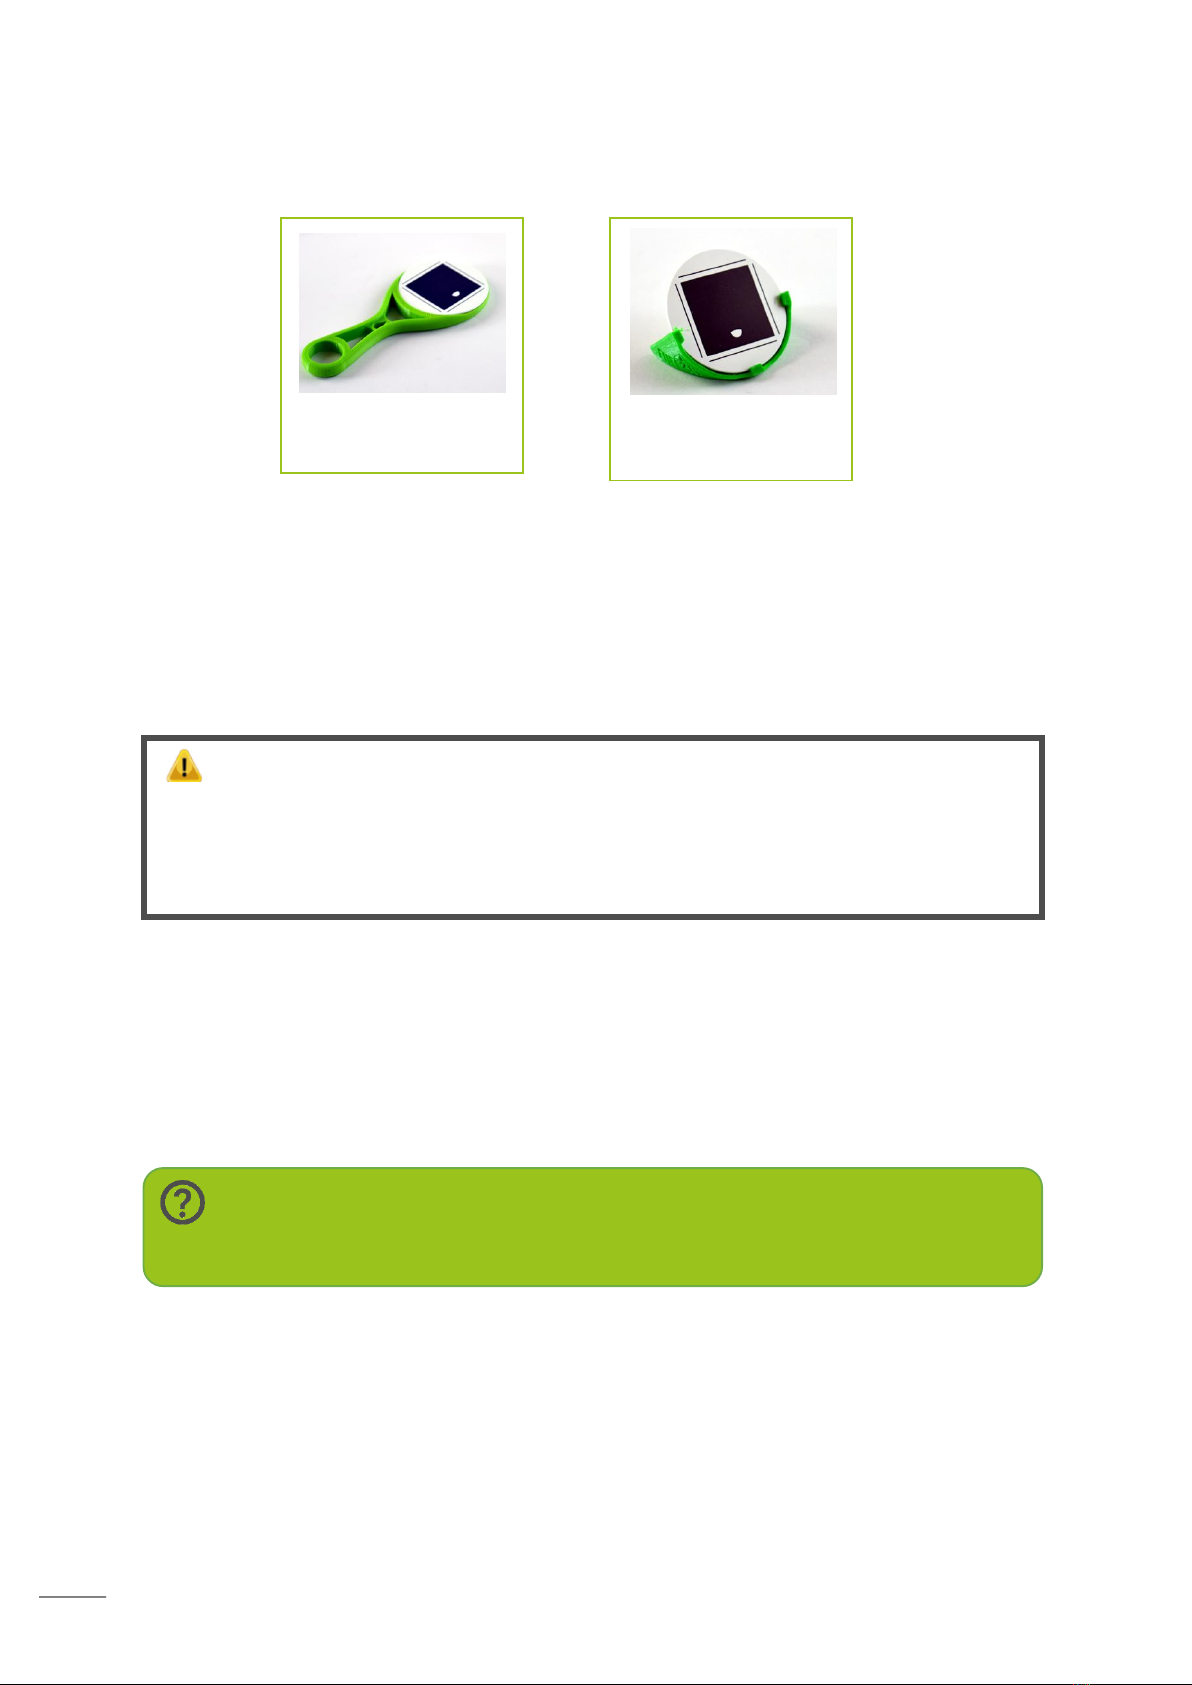
Included with the scanner are two target holder types:
You may want to place the target in different positions depending on what subject you are
scanning.
Scanning a live subject:
Place the target so that it is touching the subject. This ensures that the target moves in
relation with the subject which will reduce the chance of generating a poor quality scan.
When scanning a person’s face it is advised to use the handheld target holder and place it
against the chin.
Scanning an inanimate subject:
The target can be placed on the subject or to the side using, for example, the free standing
target holder.
It is important that the target is always facing towards the scanner.
You should not attempt to duplicate the target as this will cause errors when processing
your scans.
Tip:
Don’t worry if the target blocks part of your scan, you can crop it out later.
Handheld target
holder
Free-standing target
holder
WARNING
• Epilepsy Caution: The Fuel3D Scanner incorporates flashing lights which may affect
individuals who have photosensitive epilepsy or other such conditions. Users must
accept full responsibility.
3DPE.ir/shop

8
Acquiring a scan with Fuel3D Studio
Launching the View Finder
You can open the View Finder by selecting the ‘Launch View Finder’button that is located
below your list of projects.
The View Finder will then display a live view from the scanner.
Target tracking in the View Finder
The target is required to take a scan. The View Finder has a tracking capability and displays
to you, via a ring around the target, the distance that you are away from the subject.
There are three color modes used while tracking:
Red –Too far away from
the target (>
45cm/17.7”)
Green –Perfect distance
from the target.
(35cm/13.7” –
45cm/17.7”)
White –Too close to the
target (< 35cm/13.7”)
‘Launch View Finder’ button
3DPE.ir/shop

9
Ideal conditions for scanning would be indoors with good lighting. If lighting is too dark you
can use the guide lights. These are on by default whilst scanning but can be toggled ‘Off’ or
‘On’ within the View Finder interface.
Ensure there are no lights in the scan capture area. Shiny objects, such as jewelry, may also
cause problems.
Capturing you scan
A scan can be captured once the scanner is in range of the target. To capture a scan you
can depress either of the triggers or click on the ‘Capture’ button in the view finder.
Once a scan is captured a preview will be displayed in place of the live view. You can then
select whether to save or discard the scan.
Selecting ‘Save’will begin the processing of the scan and will refresh the live view. You
won’t be able to view the scan until processing is complete; you can see the progress of the
processing via the timer in the lower pane, below the scan preview thumbnail.
Your scan will
begin processing
Guide light radio
button
Note:
Once a scan has been taken, it will take 30 seconds for the flashes to cool
down before you can take another scan. This is shown by the progress bar at
the bottom of the View Finder.
3DPE.ir/shop
Autres manuels pour SCANIFY F3D2001
1
Table des matières
Autres manuels Fuel3D Scanner