Firstech 2WT13R-SF Manuel utilisateur
User Manual
By Firstech LLC, Version: 1.0
Applicable to the following remote(s);
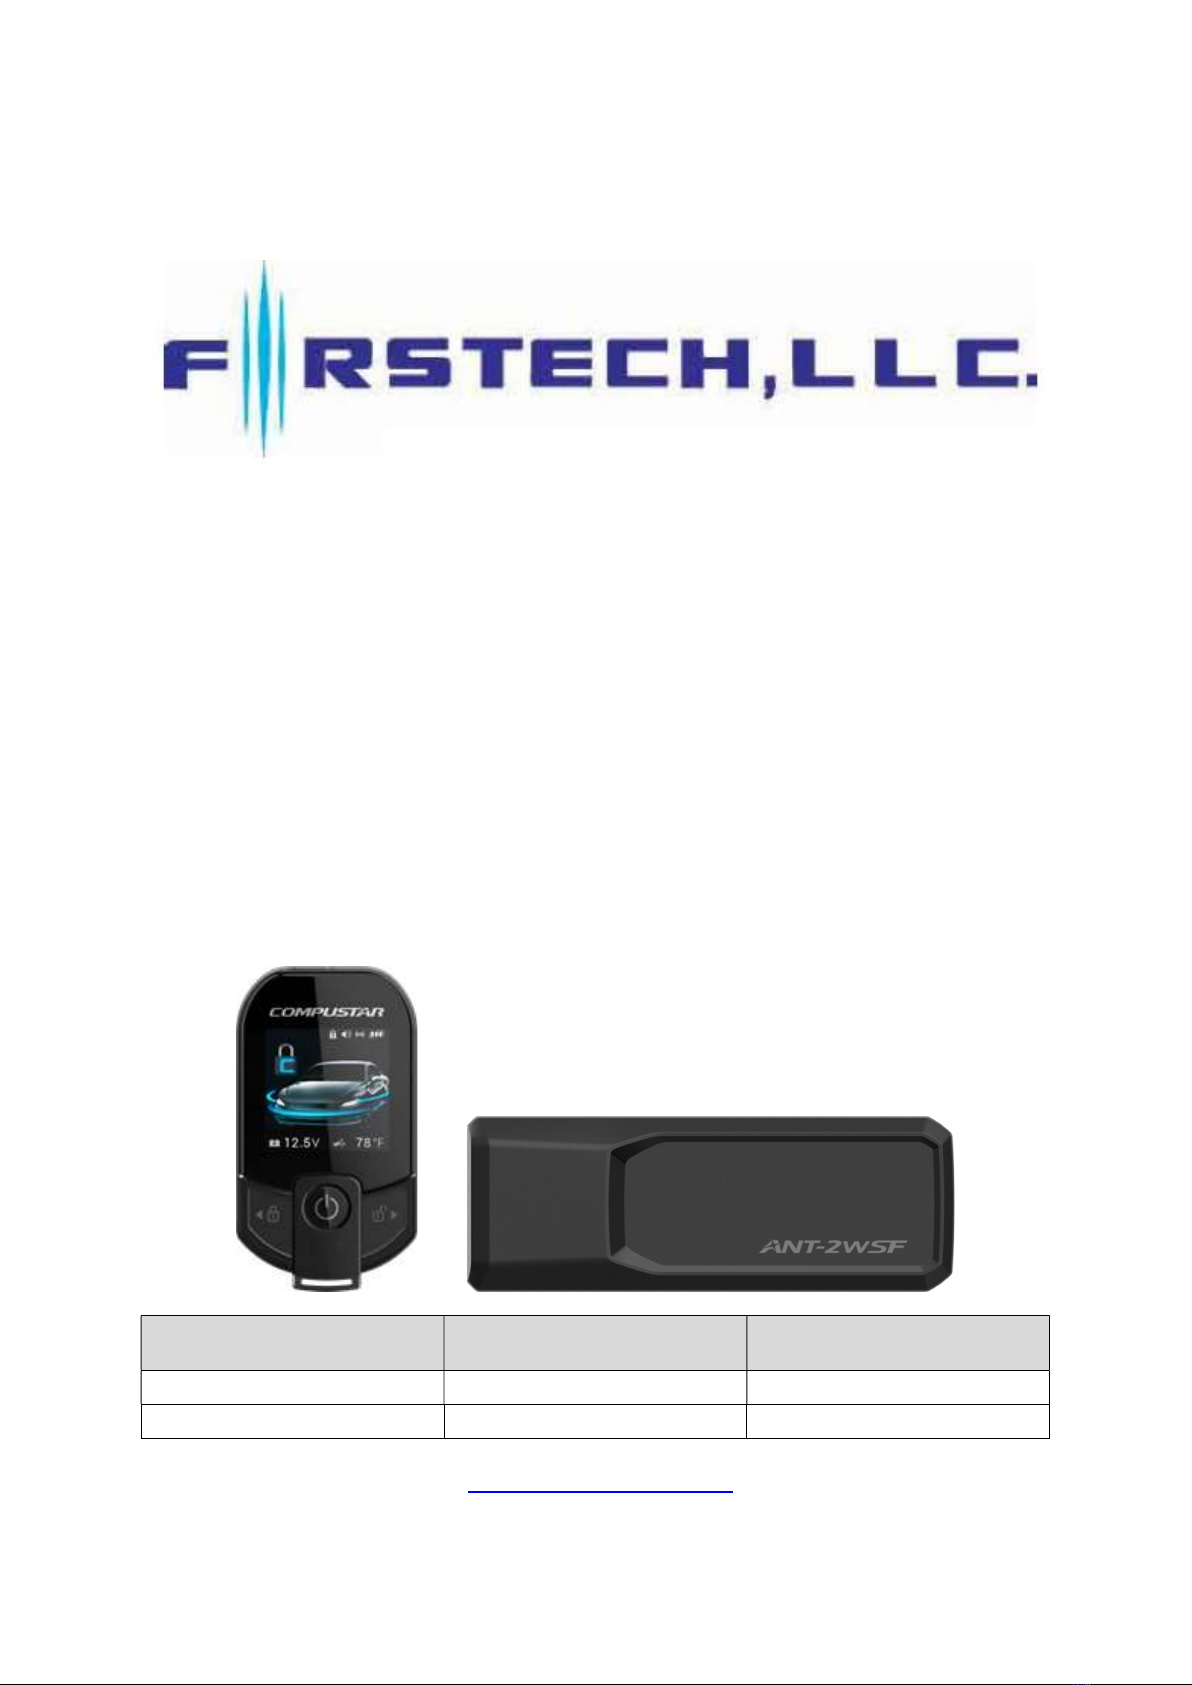
2WT13R-SF 2Way 3Button LCD Remote
Model Name FCC ID IC Number
2WT13R-SF VA5RCJ500-2WLR 7087A-2WRCJ500LR
ANT-2WSF VA5ANH500-2WLF 7087A-2WANH500LF
WWW.COMPUSTAR.COM

WARNING
It is the responsibility of the vehicle operator to ensure that their vehicle is parked in a safe and responsible
manner.
(1) When leaving the vehicle, it is the user’s responsibility to ensure that the gearshift lever is in “Park” in
order to avoid accidents upon remote starting. (Note: Make sure that the automatic vehicle cannot star
in “Drive”.)
(2) It is the user’s responsibility to ensure that the remote starter is disabled or put into valet mode before
servicing.
FCC COMPLIANCE
This device complies with Part 15 of the FCC Rules. Operation is subject to the following two conditions:
(1) This device may not cause harmful interference.
(2) This device must accept any interference received, including interference that may cause undesired
operation.
CAUTION: Changes or modifications not expressly approved by the party responsible for compliance could
void the user’s authority to operate this device.
IC COMPLIANCE
This device contains licence-exempt transmitter(s)/receiver(s) that comply with Innovation, Science and
Economic Development Canada’s licence-exempt RSS(s).
Operation is subject to the following two conditions:
(1) This device may not cause interference.
(2) This device must accept any interference, including interference that may cause undesired operation of
the device.
L’émetteur/récepteur exempt de licence contenu dans le présent appareil est conforme aux CNR
d’Innovation, Sciences et Développement économique Canada applicables aux appareils radio exempts de
licence.
L’exploitation est autorisée aux deux conditions suivantes :
(1) L’appareil ne doit pas produire de brouillage;
(2) L’appareil doit accepter tout brouillage radioélectrique subi, même si le brouillage est susceptible d’en
compromettre le fonctionnement.
Radiation Exposure Statement
This device complies with FCC radiation exposure limit set forth for an uncontrolled environment.
For ANT-2WSF: This equipment should be installed and operated with minimum distance 20cm between
the radiator & your body.
RF Specification
2WT13R-SF : 907 ㎒ ~ 919 ㎒ (7CH) DSSS
ANT-2WSF : 907 ㎒ ~ 919 ㎒ (7CH) DSSS / 125 ㎑ LF transmitter
Introduction
Thank you for purchasing a Firstech system for your vehicle. Please take a minute to review this
entire manual. Note that this manual applies to the 2 Way 3 Button Liquid Crystal Display Remote
(2WT13R-SF) whether you purchased the ALARM IT, START IT, or MAX IT system. There are
certain features listed in this manual that may not be available for your system. There may also be
features listed in this manual that require additional installation or programming before they are
active.
If you have any questions or concerns please contact the original place of purchase. For further
information you may also contact our customer support center at 888-820-3690.
Warranty Coverage
Caution: The Manufacturer’s warranty will be voided if this product is installed by anyone other than
an Authorized Firstech dealer. For complete warranty details visit www.compustar.com or the last
page of this manual. Firstech remotes carry a 1 year warranty from original date of purchase.
Compustar Pro 2WT13R-SF remote carries a 3 year warranty.
Warranty registration can be completed online by visiting www.compustar.com. Please complete the
registration form within 10 days of purchase. We do not include a mail in warranty registration card
with each unit – registration must be done online. To verify that an authorized dealer installed your
system, we highly recommend that you keep a copy of the original proof of purchase, such as the
dealer invoice in a safe place.
Remote Image
Quick Reference
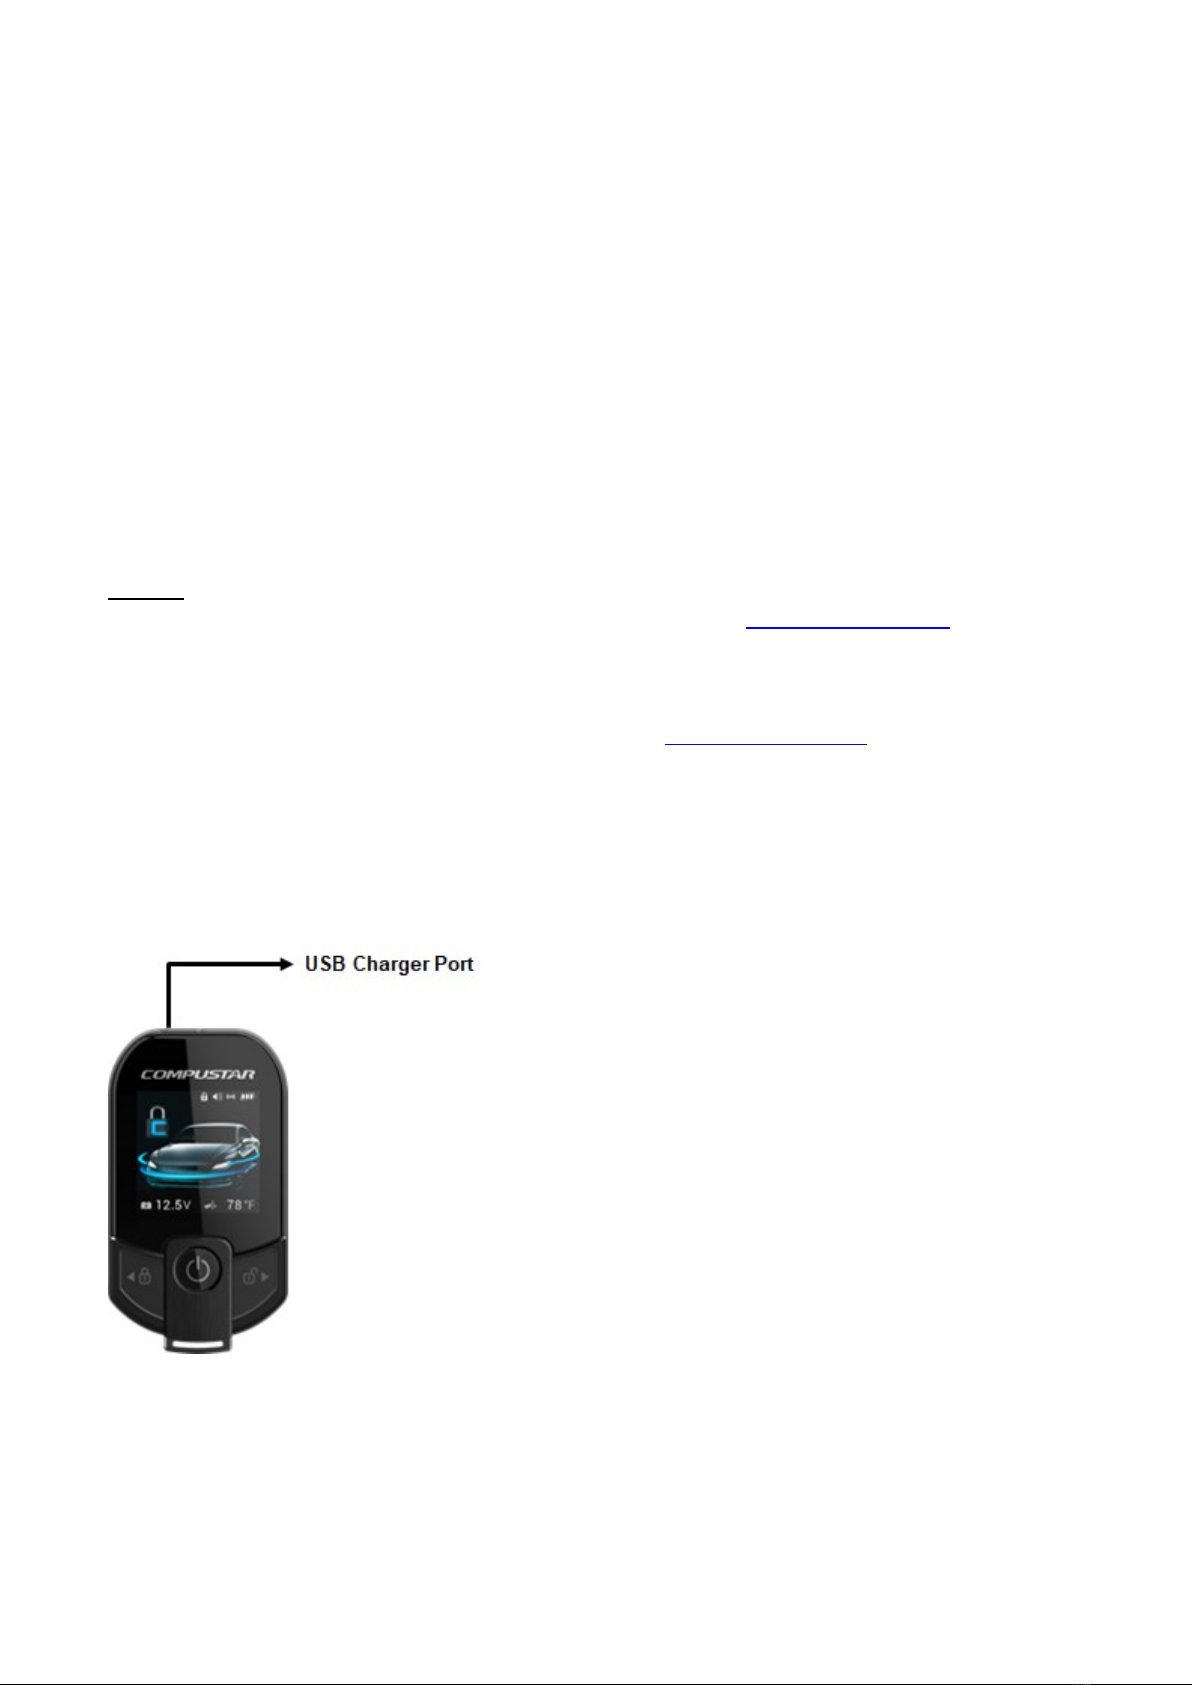
Remote Maintenance – Battery Charging
The 2WT13R-SF comes with a rechargeable battery. Use the included power adapter and micro
USB cable to charge your remote.
First, locate the micro USB port on the top of your remote. Connect your micro USB cable to your
computer or USB power adapter. The LCD on the front of the remote will showing that your remote
is charging. This should take approximately 2 hours.
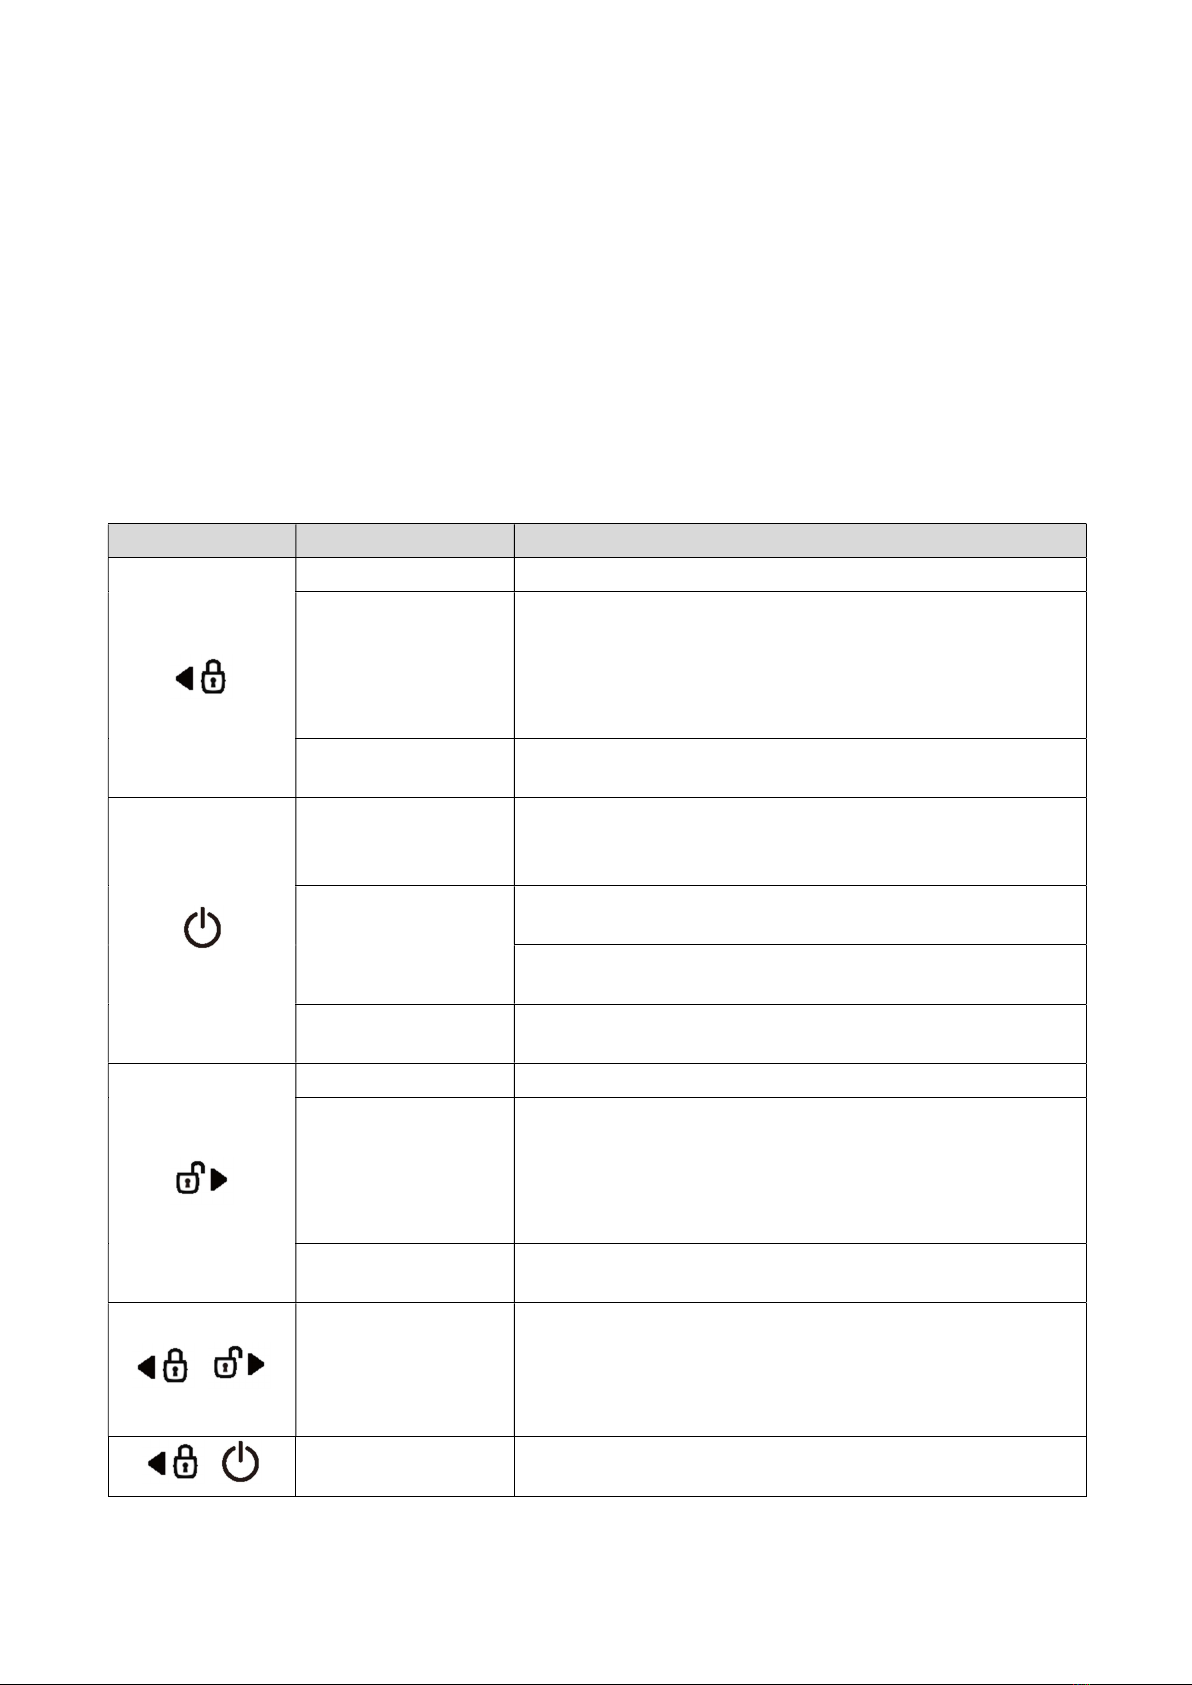
2 Way Remote Button Functions
Button Duration Description
half second Locks doors and if equipped, arms the alarm.
Double Tap
Used as Auxiliary 2 and Sliding door left, Head lights
function according to the setting of AUX 2 Config in the
remote menu.
Not available when set to OFF in AUX 2 Config of the
remote menu.
Long Hold
(2.5 sec)
Panic/vehicle locater (flashes vehicle’s parking lights
and sounds siren and horn).
Short
(0.5 sec)
LCD View / Car Check (updates vehicle status on
remote pager) / Secure Auxiliary / Temperature Display /
Vehicle Voltage Display
Double
Accesses Remote Menu (LCD View, Passive arming,
Alert mode, etc) See Remote Menu Table for details.
Run time extender. Resets the run time for Turbo Timer
or Remote Start.
Long Hold
(2.5 sec)
Holding this button will start your vehicle. Repeat and
this will shut your vehicle down.
Short(0.5 sec) Unlocks doors and if equipped, disarms the alarm.
Double
Used as Auxiliary 1 and Sliding door right, Defrost
function according to the setting of AUX 1 Config in the
remote menu.
Not available when set to OFF in AUX 1 Config of the
remote menu.
Long Hold
(2.5 sec)
Trunk release. Triggers the trunk release output and
opens the vehicle’s trunk.
+
Long Hold
(2.5 sec) Option programming menu 1. For use during installation.
+
Long Hold
(2.5 sec) Option programming menu 2. For use during installation.
Function Button Menu
Button Duration Description
Half second Move to the left of the remote menu
2.5 seconds The remote menu moves to LCD View.
Half second Remote menu selection and operation.
2.5 seconds The remote menu exits manually.
Half second Move to the right of the remote menu
2.5 seconds The remote menu moves to Power down.
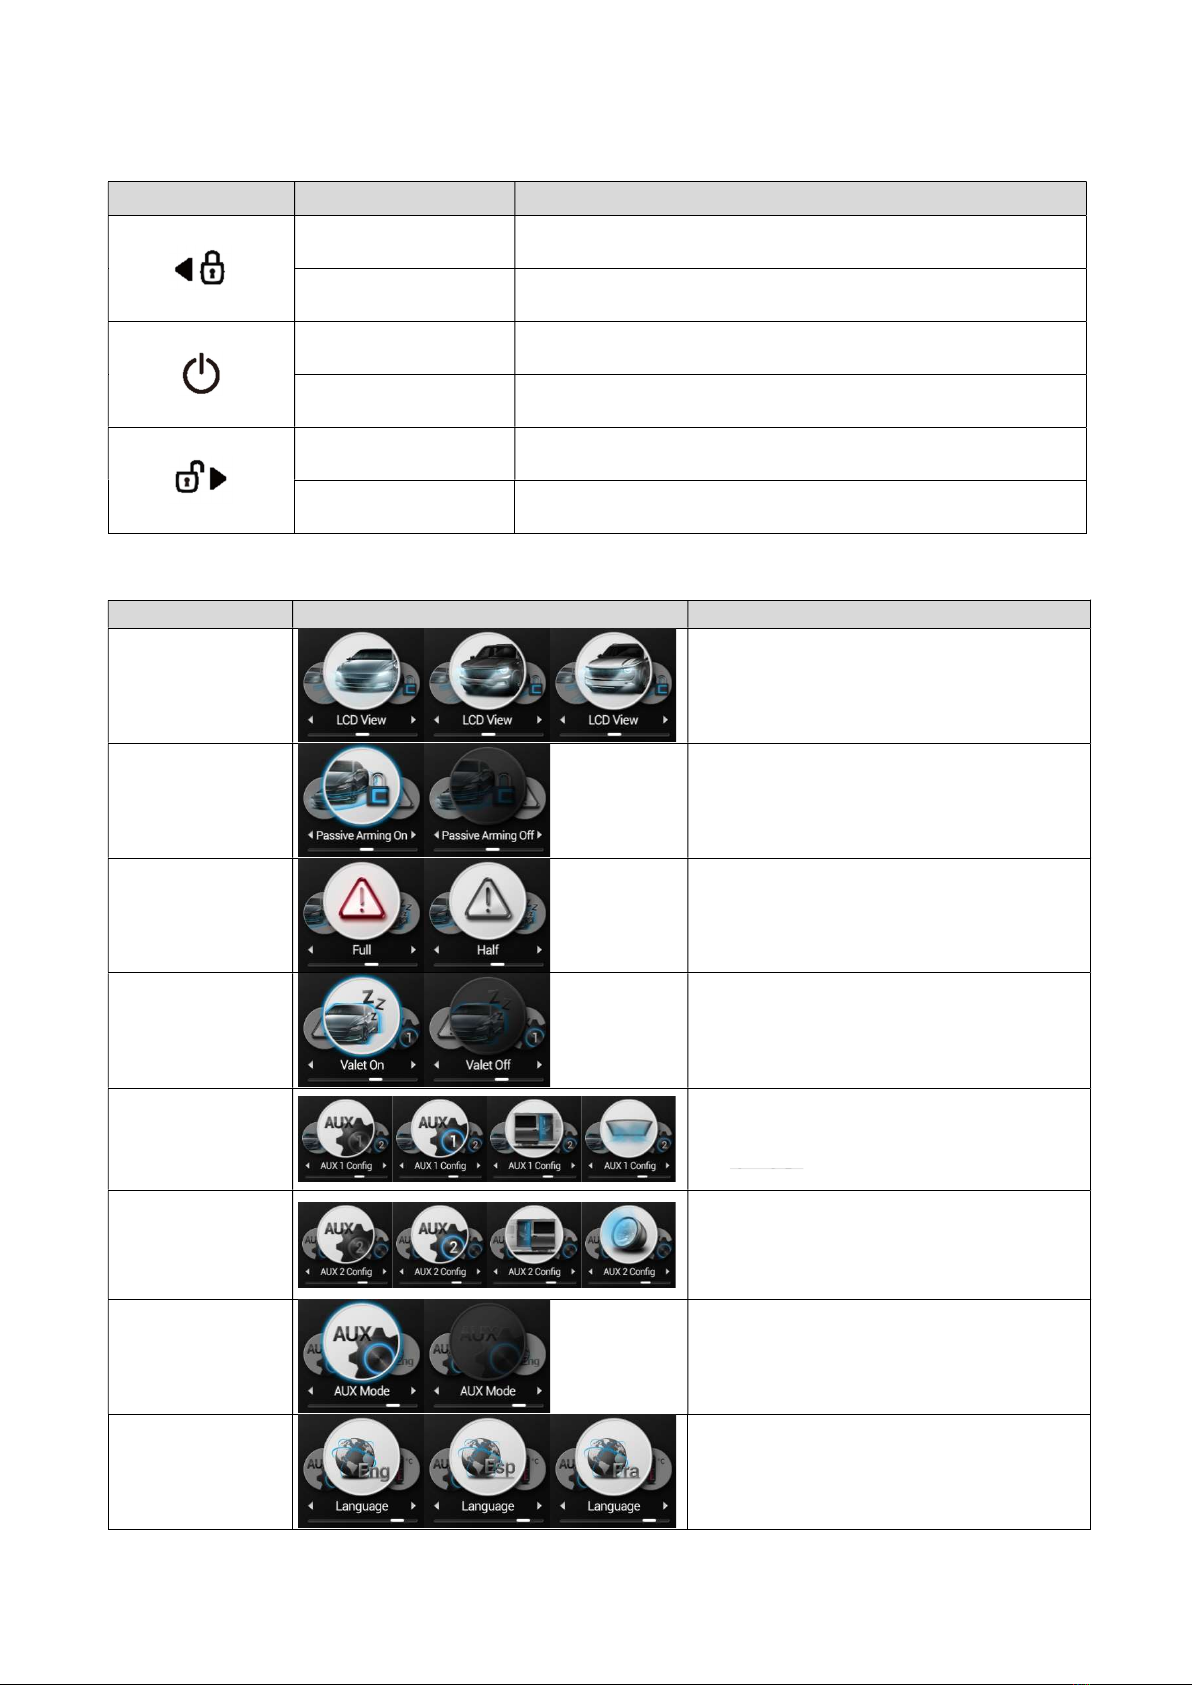
Remote Option Menu Table
Feature Select Function / Description
LCD View
Select the vehicle type (Sedan, SUV,
Pickup) on the main screen.
Passive arming
Passive arming On/Off
Alert mode
Sets your remote for Alarm or Starter
Only systems. Set to FULL for ALARM
IT and MAX IT features. Set to HALF for
START IT ONLY systems.
Valet mode
Valet mode On/Off
AUX 1 config
Used as Auxiliary 1 and Sliding door
right, Defrost function according to the
setting of AUX 1 Config in the remote
menu.
AUX 2 config
Used as Auxiliary 2 and Sliding door
left, Head lights function according to
the setting of AUX 2 Config in the
remote menu.
AUX Mode
Turns your Auxiliary Extender feature
on or off.
Language
Changes LCD display language from
English to French or Spanish.
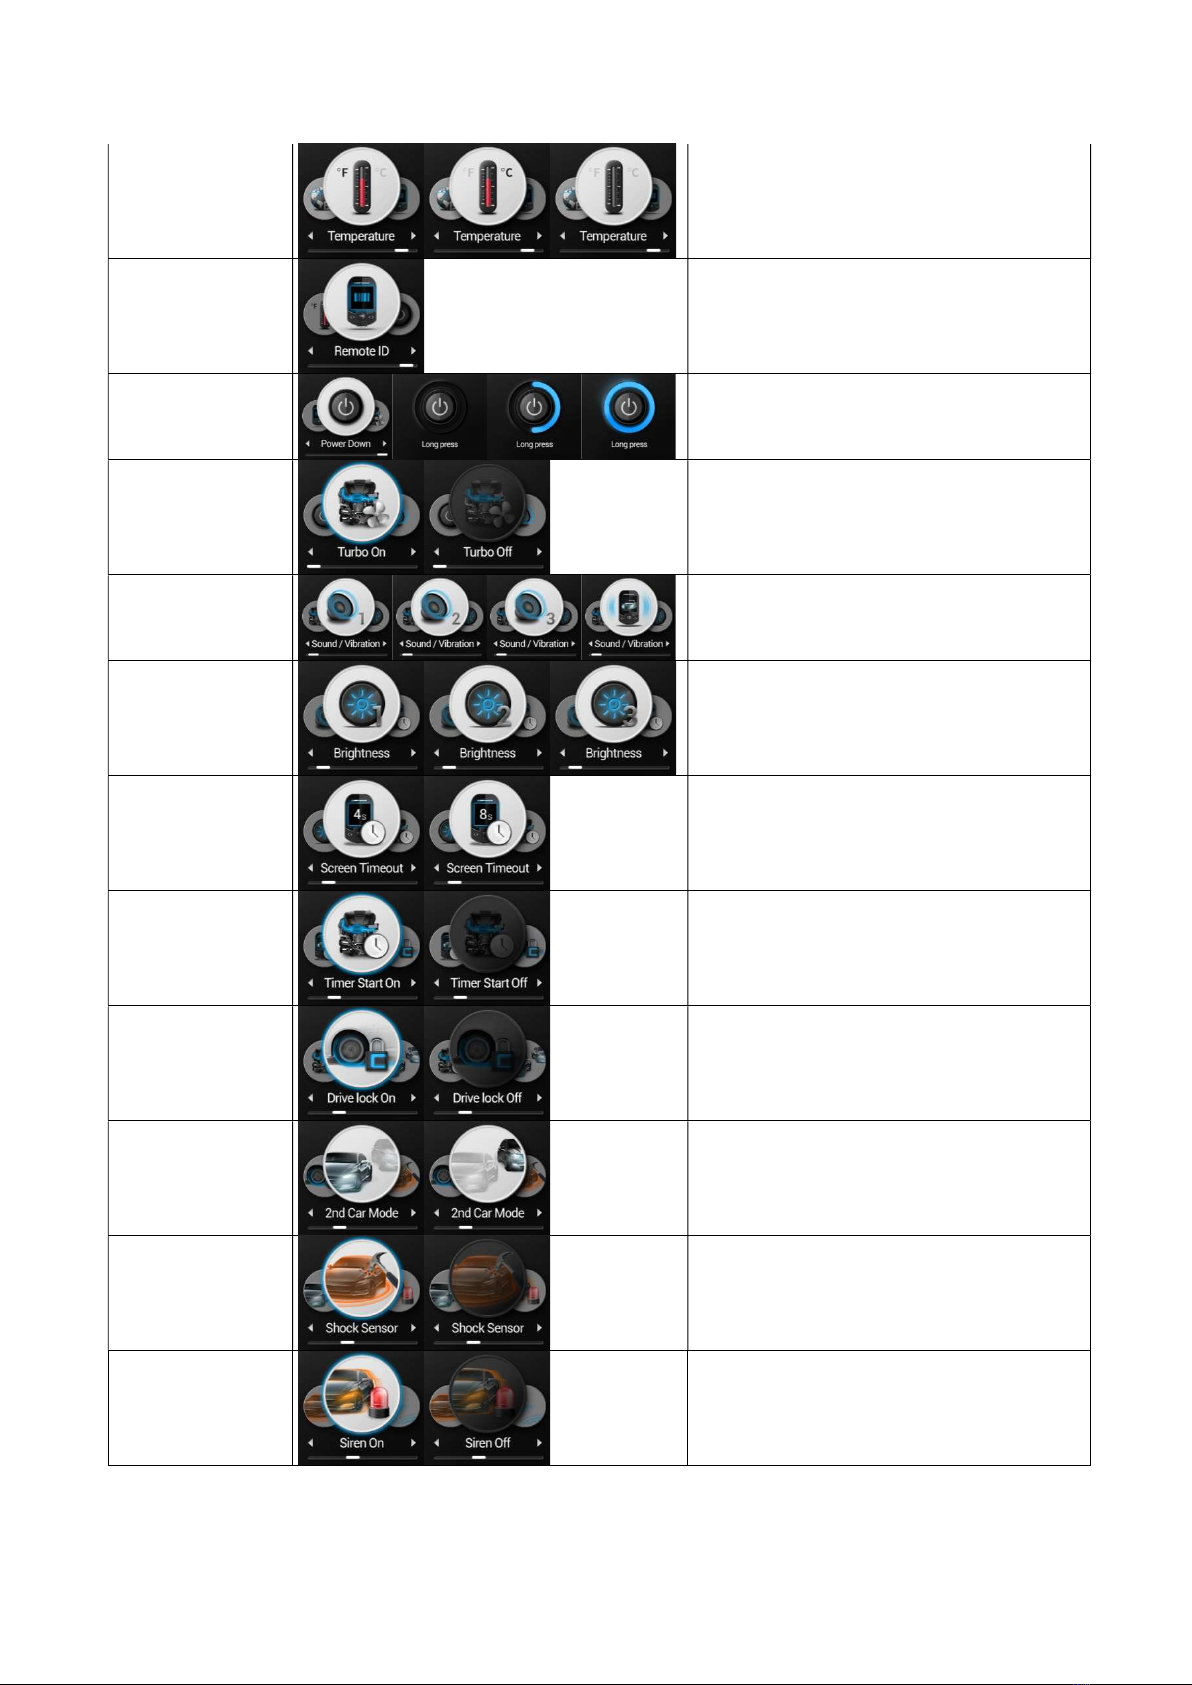
Tempurature
Changes the temperature readout from
Fahrenheit to Celsius.
If the temperature setting is set to off,
the temperature is not displayed.
REMOTE ID
Displays the electrical product number
of the remote.
POWER Down
Switch the remote product to power
down mode.
Turbo timer
Turbo On/Off
Sound/Vibration
Turns the silent mode on or off.
Adjust the volume of your remote. 1 is
the lowest. 3 is the highest.
Display
brightness
Adjust the screen brightness in 3 steps.
Screen timeout
Adjusts the time your LCD will stay on
after a button is pressed.
Timer start
Timer Start On/Off
Drive lock
Drive Lock On/Off
2nd car mode
2nd Car Mode On/Off
Shock sensor
Shock sensor On/Off
Siren
Siren On/Off
Proximity
Proximity On/Off
Auxiliary Extender Button Table
Button Duration Description
Half second Auxiliary 1
Double Tap Auxiliary 7
2.5 seconds Auxiliary 3
Half second Auxiliary 5
Double Tap Accesses Remote Menu.
2.5 seconds Auxiliary 6
Half second Auxiliary 2
2.5 seconds Auxiliary 4
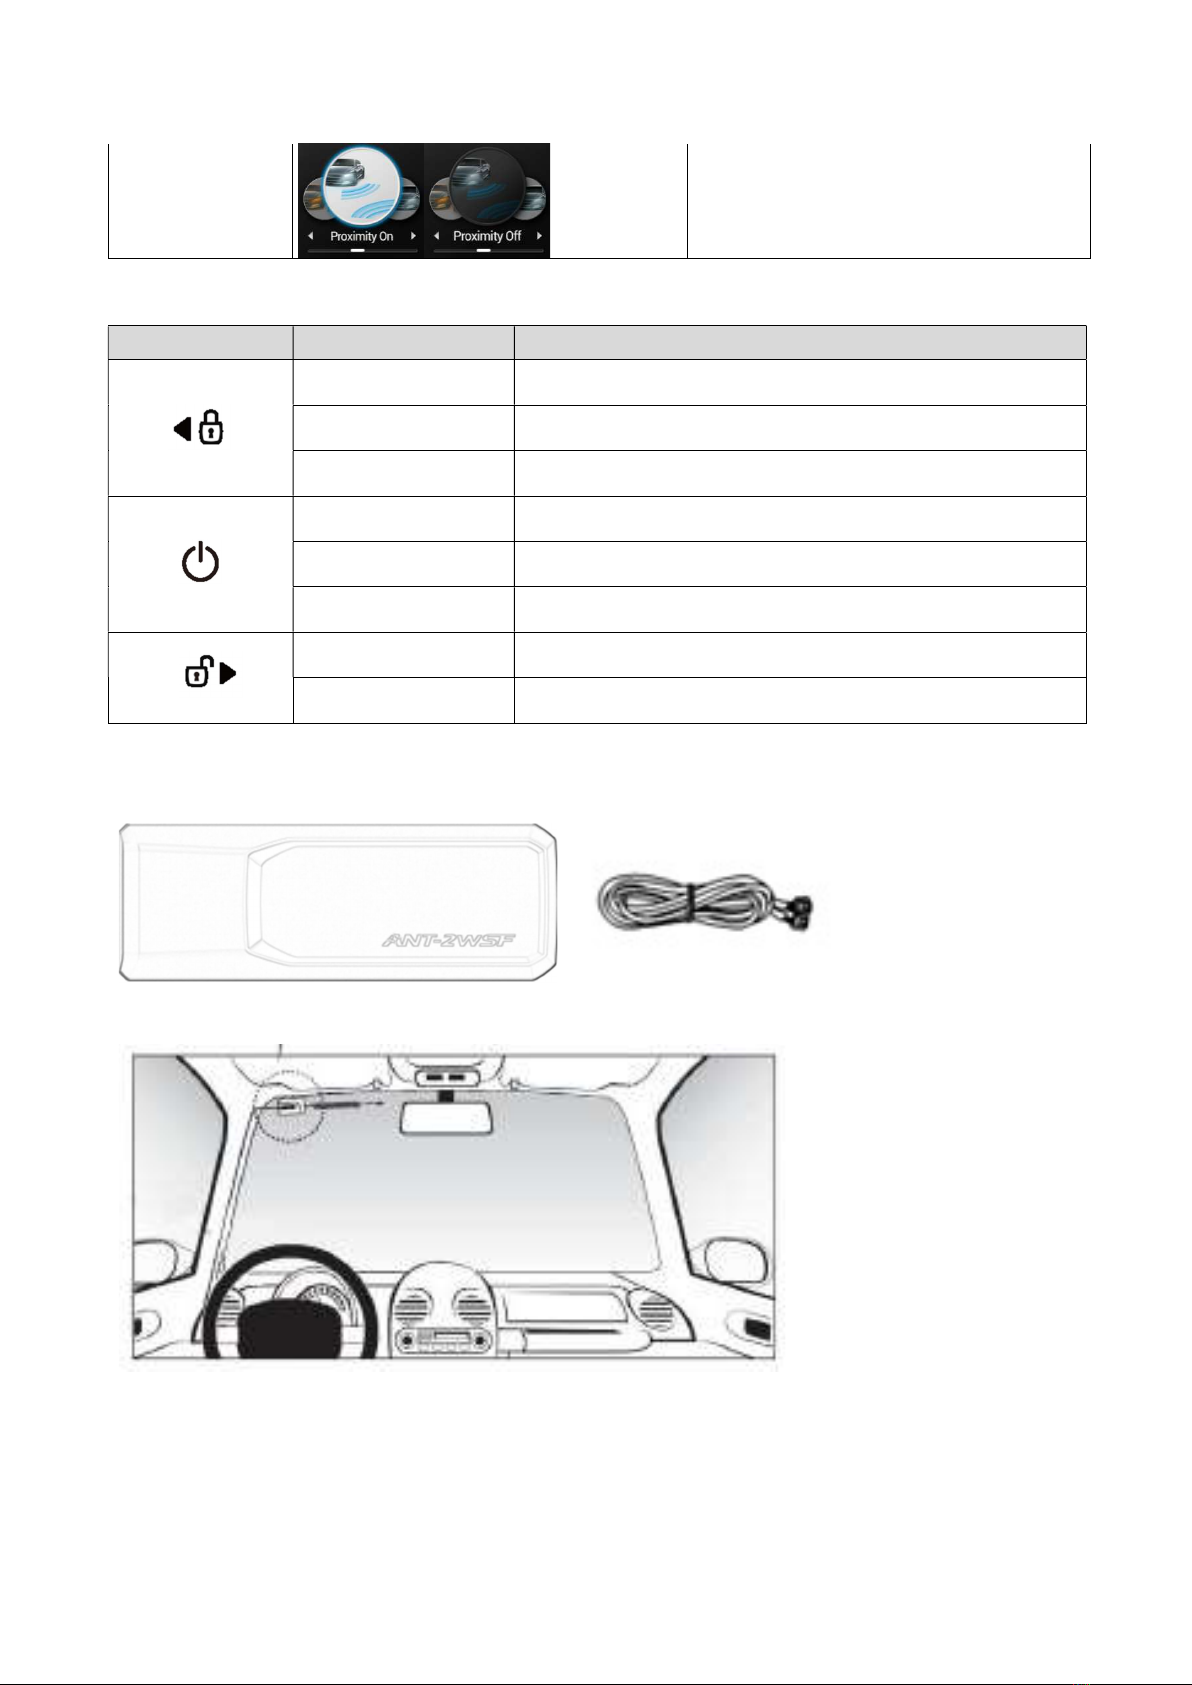
Description of antenna module installation position
<< Antenna Module >>
<< Harness >>
<< Installation of Antenna Module >>
Note: Use the power of car battery(+12volts).
The Antenna module have been calibrated for horizontal installation at the left-top corner of
the windshield.
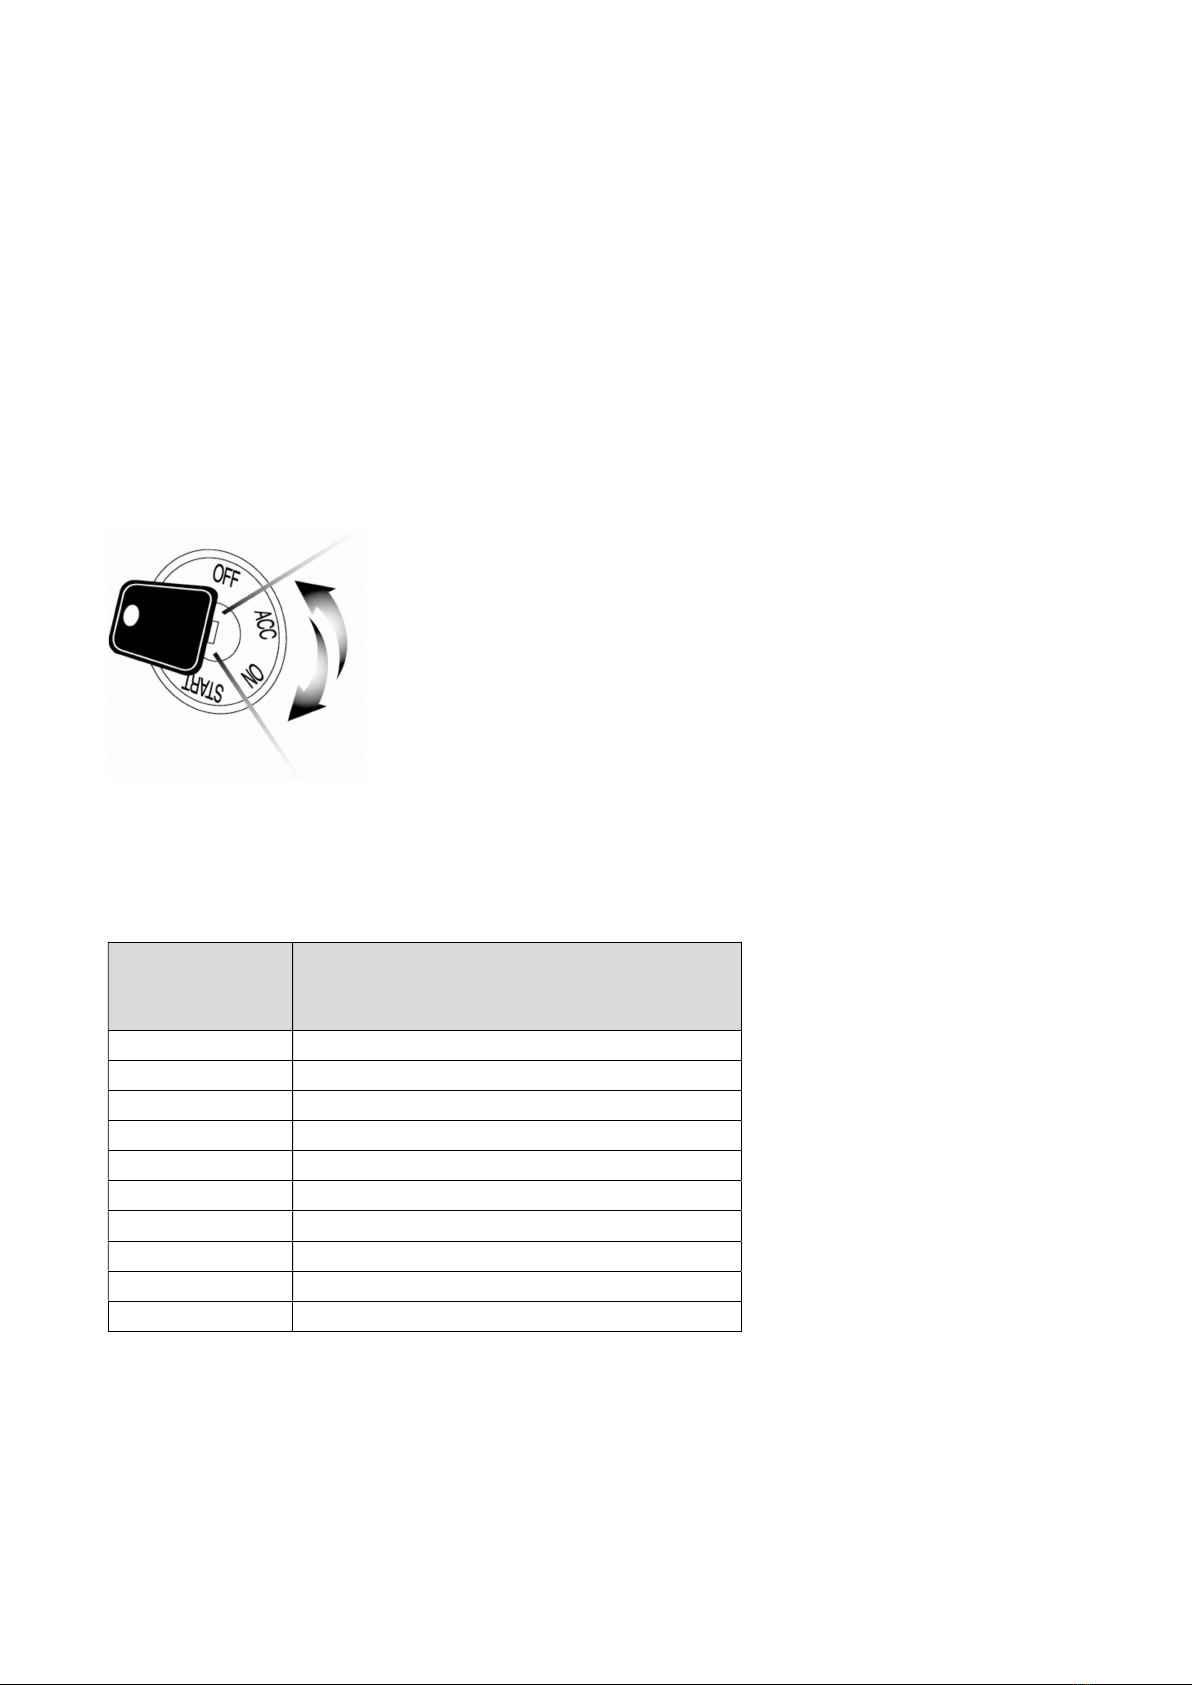
Remote Coding / Programming Routine
IMPORTANT: Every Firstech remote must be coded to the system prior to performing any
operations. All remotes must be coded at the same time.
Programming 2 Way 4 Button Remotes:
STEP 1: Activate Valet/Programming mode by manually turning the ignition key on and off (between
the Acc & On positions) five times within 10 seconds. The vehicle’s parking lights will flash once with
the successful completion of this step.
STEP 2: Within 2 seconds after cycling the ignition for the 5th time, tap the Lock button on 2 way
remotes or the (lock) button on 1 way remotes for a half second. The parking lights will flash once
to confirm the transmitter has been coded.
Exiting Programming: Programming is a timed sequence. The parking
lights will flash twice signaling the end of programming mode.
Programming Multiple Remotes: After the confirmation flash given in
step 2, code additional remotes by pressing button (I) on 2 way
remotes or the (lock) button on 1 way remotes. The parking lights will
flash once confirming each additional remote. All compatible systems
can recognize up to 4 remotes.
Remote Start Error Diagnostic
If the remote start fails to start the vehicle, the parking lights will flash three times immediately.
Following those three flashes the parking lights will flash again corresponding to the error table.
Number of
Parking Light
Flashes
Remote Start Error
1 Motor running or must first program tach
2 Key in ignition on position
3 Door open (manual transmission only)
4 Trunk open
5 Foot brake on
6 Hood open
7 Reservation off (manual transmission only)
8 Tach or tachless sensing failure
9 FT-DAS sensor shutdown
10 System is in Valet Mode
We recommend that you do not attempt any repairs on your remote starter. Contact your dealer or
call us directly.

Remote Start Shutdown Error Codes
If the remote start sequence has been completed and the vehicle shuts down, the vehicle’s parking
lights will flash 4 times, pause then flash again with the error code. Tap button 4 on 2 Way remotes
to initiate the shutdown error codes. On 1 Way remotes hold the Trunk and Start buttons together
for 2.5 seconds.
Number of
Parking Light
Flashes
Remote Start Shutdown Error
1 Lost engine sensing signal
2 Lost emergency brake signal
3 Foot brake triggered
4 Hood pin triggered

Limited Lifetime Warranty
Firstech, LLC Warrants to the original purchaser that this product shall be free of defects in material
and workmanship under normal use and circumstances for the period of time that the original owner
of this product owns the vehicle in which it is installed; except that the remote controller unit for the
period of one year from the date of installation to the original owner of this product. When the
original purchaser returns the product to the retail store where it was purchased or prepaid postal to
Firstech, LLC., 21903 68th Avenue South, Kent, WA 98032, USA within the warranty period, and
if the product is defective, Firstech, LLC, will at its option repair or replace such.
TO THE MAXIMUM EXTENT ALLOWED BY LAW, ANY AND ALL WARRANTIES ARE EXCLUDED
BY THE MANUFACTURER AND EACH ENTITY PARTICIPATING IN THE STREAM OF
COMMERCE THEREWITH. THIS EXCLUSION INCLUDES BUT IS NOT LIMITED TO, THE
EXCLUSION OF ANY AND ALL WARRANTY OF MERCHANTAPILITY AND/OR ANY AND ALL
WARRANTY OF FITNESS FOR A PARTICULAR PURPOSE AND/OR ANY AND ALL WARRANTY
OF NON-INFRINGEMENT OR PATENTS, IN THE UNITED STATES OF AMERICA AND/OR
ABROAD. NEITHER THE MANUFACTURER OF ANY ENTITIES CONNECTED THEREWITH
SHALL BE RESPONSIBLE OR LIABLE FOR ANY DAMAGES WHATSOEVER, INCLUDING BUT
NOT LIMITED TO, ANY CONSEQUENTIAL DAMAGES, INCIDENTAL DAMAGES, DAMAGES
FOR LOSS OF TIME, LOSS OF EARNINGS, COMMERCIAL LOSS, LOSS OF ECONOMIC
OPPORTUNITY AND THE LIKE. NOTWITHSTANDING THE ABOVE, MANUFACTURER DOES
OFFER A LIMITED WARRANTY TO REPLACE OR REPAIR THE CONTROL MODULE AS
DESCRIBED ABOVE.
Some states do not allow limitations on how long an implied warranty will last or the exclusion or
limitation on how long an implied warranty will last or the exclusion or limitation of incidental or
consequential damages. This warranty gives you specific legal rights, and you may also have other
rights, which vary State to State.
Firstech, LLC. is not RESPONSIBLE OR LIABLE FOR ANY DAMAGES WHATSOEVER,
INCLUDING BUT NOT LIMITED TO, ANY CONSEQUENTIAL DAMAGES, INCIDENTAL
DAMAGES, DAMAGES FOR LOSS OF TIME, LOSS OF EARNINGS, COMMERCIAL LOSS, LOSS
OF ECONOMIC OPPORTUNITY AND THE LIKE that may or may not resulted from the operation of
Compustar, Compustar Pro, Arctic Start, Vizion, or NuStart. NOT WITH STANDING THE ABOVE,
MANUFACTURER DOES OFFER A LIMITED WARRANTY TO REPLACE OR REPAIR THE
CONTROL MODULE AS DESCRIBED ABOVE.
Your Warranty
The product's warranty is automatically void if the date code or serial number is defaced, missing or
altered. This warranty will not be valid unless you have completed the registration card at
www.compustar.com within 10 days of purchase.
Ce manuel convient aux modèles suivants
1
Table des matières
Autres manuels Firstech Accessoires automobiles

Firstech
Firstech FTI-NSP2 Mode d'emploi

Firstech
Firstech FLEX 2 Manuel utilisateur

Firstech
Firstech FTI-FDK1- Type 2A1 Mode d'emploi

Firstech
Firstech FTI-GMT3 Manuel utilisateur

Firstech
Firstech 2WQ9R-FM Manuel utilisateur

Firstech
Firstech 1WS2R-AF Manuel technique

Firstech
Firstech Compustar FMX RF-2WG15R-FM Manuel utilisateur

Firstech
Firstech ADS FT-DC3-LC Manuel utilisateur

Firstech
Firstech FTI-HDP7 Manuel utilisateur

Firstech
Firstech FTI-FDK1 1A3 Manuel utilisateur


