Logging into Web Configuration GUI FAQs
.
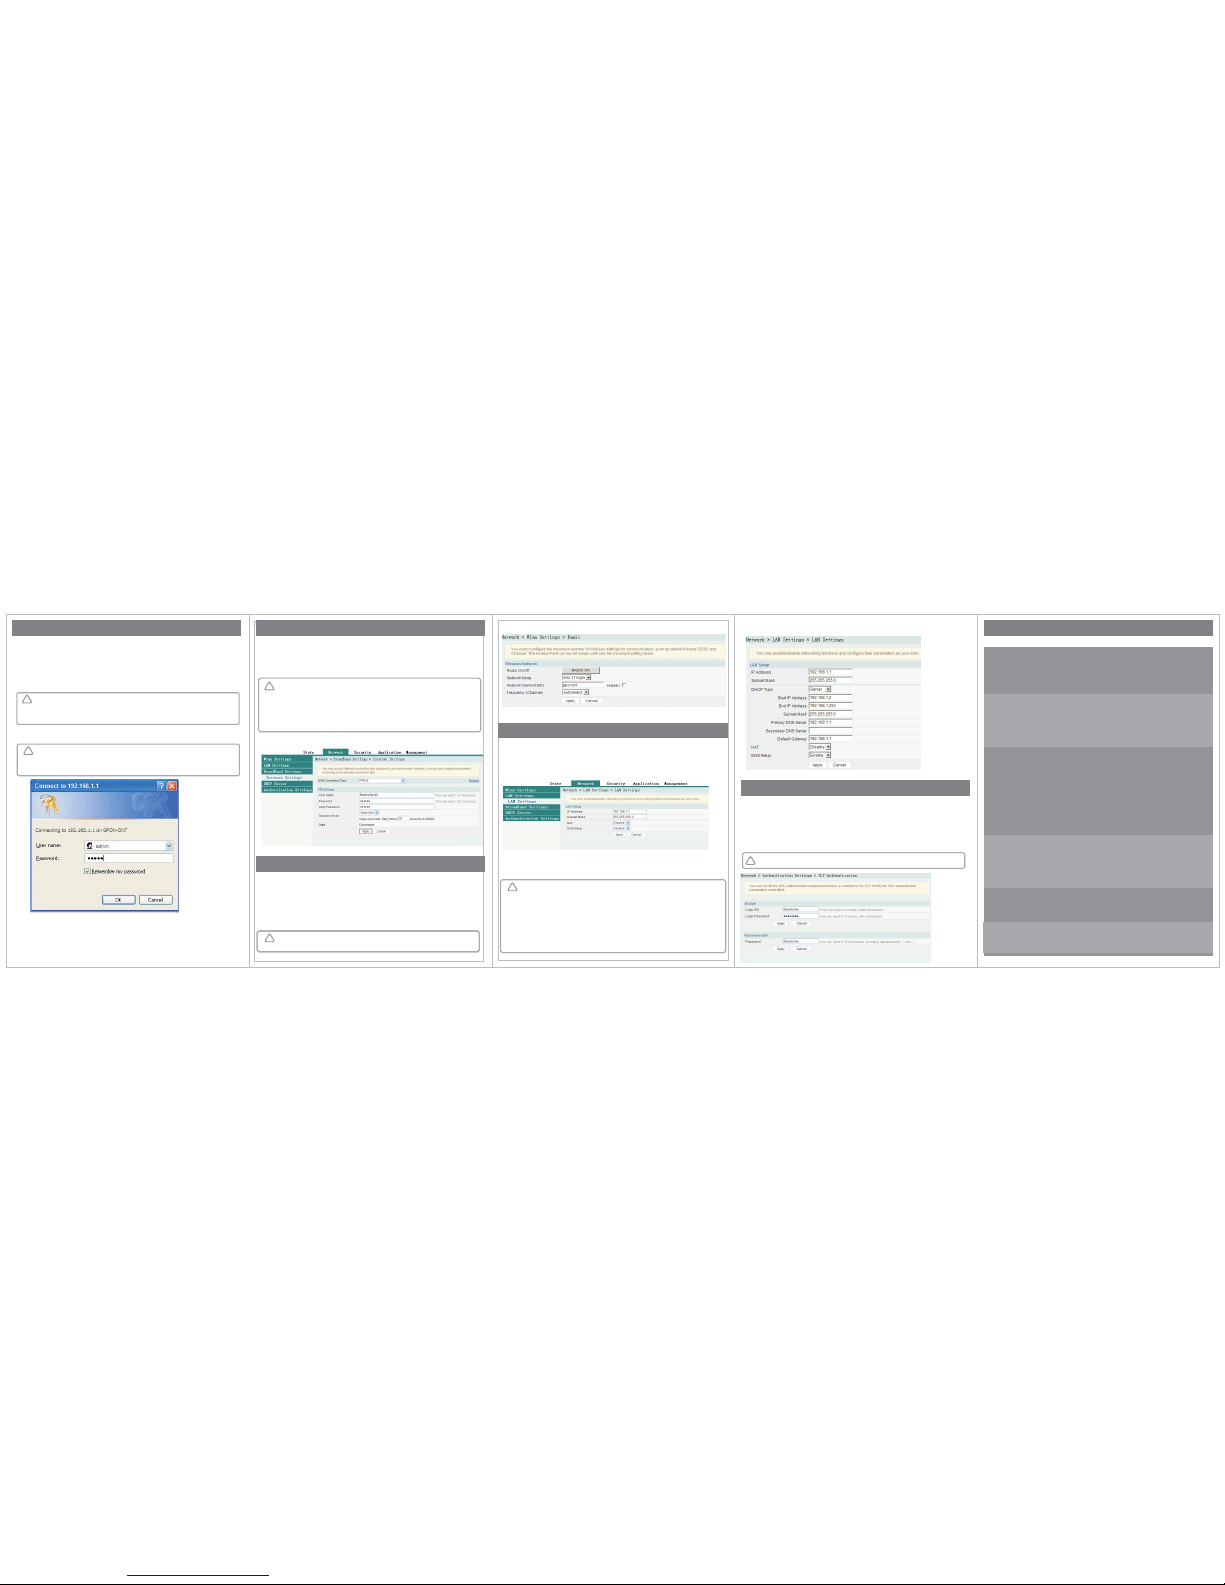
Step 1 Network Authentication Settings OLT Authentication
Step 2
Step 5 Apply
Select → → in the navigation bar.
In the screen that is opened, modify related parameters of ONU authentication.
ConfigureLogicSNandpasswordofSNauthentication
Click to save the settings.
Step 3 Apply
Step 4
Click to save the settings.
Configure the password of password authentication.
Configuring ONU Authorization
Step 1
Step 2
Set the IP address and subnet mask of the computer.
Select the Obtain an IP address automatically mode.
SetthestaticIP:TheIPaddressshouldbeinthesamenetworksegmentasthe
management IP address of the AN5506-04-F (recommended).
IP address: 192.168.1.X (X is a decimal integer between 2 and 253)
Subnet mask: 255.255.255.0
Enter http://192.168.1.1 in the address bar of the browser and press Enter. The user login dialog box
appears.
Step 3 Enter the user name and password in the login dialog box. After being verified, you can
access the Web configuration GUI.
Configuring Internet Access Service
Step 1 Network BroadBand Settings
Step 2 PPPoE
Step 3
Select in the navigation bar and click in the link bar to
open the configuration GUI for the Internet access service.
Select (recommended) for the WAN connection type.
Enter parameters of the PPPoE mode.
“”,。4
Configuring WIFI Wireless Access Service
Step 1 Network Wlan Settings
Step 2 RADIO ON
Step Network Mode
Step 4 AutoSelect channel1 channel 14 Frequency (Channel)
3
.
Select in the navigation bar and click in the link bar to open
the configuration GUI for the wireless access service.
Select to enable the WLAN service.
Select b/g/n for the .
Select or to for the in the
drop-down list
802.11
!
●●● ●
!
Note:
Parameters of the PPPOE mode includes:
User Name: Enter the user name provided by the ISP.
Password: Enter the password provided by the ISP.
Verify Password: Enter the password for a second time to verify whether the
passwords entered at the two times are the same.
Operation Mode: Select either the Keep Alive mode or the Manual mode in the
pulldown menu. Configuring LAN Service
Step Network LAN Settings LAN Settings
Step 2
Step 3
1
4 “ ,。
Select → → in the navigation bar. In the screen
that is opened, you can configure the LAN parameter.
Enter the LAN-side IP address 192.168.1.1 of the AN5506-04-F.
Enter the LAN-side subnet mask 255.255.255.0 of the AN5506-04-F.
”
Step 5 Network DHCP Serve DHCP Service
Step 6 Sever
Select → r → in the navigation bar. In the screen
that is opened, you can configure the DHCP server parameters.
Select for the DHCP type and configure DHCP server parameters.
:
Note:
Parameters to be configured of the DHCP server include
Start IP Address: Enter the starting value 192.168.1.2 of the IP addresses
automatically allocated by the DHCP server.
End IP Address: Enter the ending value 192.168.1.253 of the IP addresses
automatically allocated by the DHCP server.
Primary DNS Server: Enter the IP address 192.168.1.1 of the primary DNS
server of the DHCP.
Default Gateway: Enter the default gateway IP address 192.168.1.1 of the DHCP.
Subnet Mask: Enter the subnet mask 255.255.255.0 designated by the DHCP server.
!
●●●●●
Step Apply6Click to save the configured data. Step 7 ApplyClick to save the settings.
FAQ1: All indicator LEDs are extinguished after power-on.
FAQ2: The equipment fails to work.
FAQ3: LOS blinks
FAQ4 The LAN indicator LED is extinguished.
FAQ5:
FAQ6: Web p ag e
1.
2.
3.
1.
2.
1.
2.
3.
4.
5.
2.
3.
2.
1.
2.
Check whether the power cable is correctly connected;
Check whether the power supply and the power adapter are normal;
If the equipment works abnormally, check whether the power is connected normally or
the voltage is not within specifications;
If the equipment is overheated, check the ventilation. Make sure the equipment is not
exposed to direct sunshine or is near the heat source.
The indicator LED .
Check the received optical power levels with an optical power meter. Excessively low
receive optical power may indicate the fiber is faulty;
Check whether the optical fiber is connected normally to the appropriate interface;
Check whether the Rx optical power of the ONU crosses the normal optical power range
(overlow or overhigh);
Check whether the ONT module is aged or damaged;
Check whether the equipment at the central office end is operating normally.
Check if the network cable is damaged or incorrectly connected;
Check if the wiring color-coding scheme of the network cable is incorrect. If incorrect,
replace the original network cable with a standard CAT-5 twisted-pair network cable.
Check if the network cable crosses the allowed range of 100 meters.
The WIFI indicator LED is extinguished.
Checkifthewirelessterminalisconnected;
Check if the wireless function is disabled.
Logging into the failed.
Check the network card configuration, browser version of the user's computer;
Check whether the IP address of the user's computer is correctly configured.
Check whether the power switch on the equipment's rear panel is in the ON position.
:
1.
1.
●●
!
:
...
...
Note
IP Address: 192 168 1 1
Subnet mask: 255 255 255 0
The factory default management IP address and the subnet mask of the AN5506-04-F are:
●●
!
Note:
The factory default username and password of the AN5506-04-F are:
Username: admin
Password: admin
●●
◆◆
Note: The SN authentication and password authentication can be separately
configured and applied.
!
Note: If the connection fails after a channel is selected, another AP equipment
nearby is watching this channel. Please retry the connection after changing to
another channel.