Cookology Tennessee Manuel utilisateur
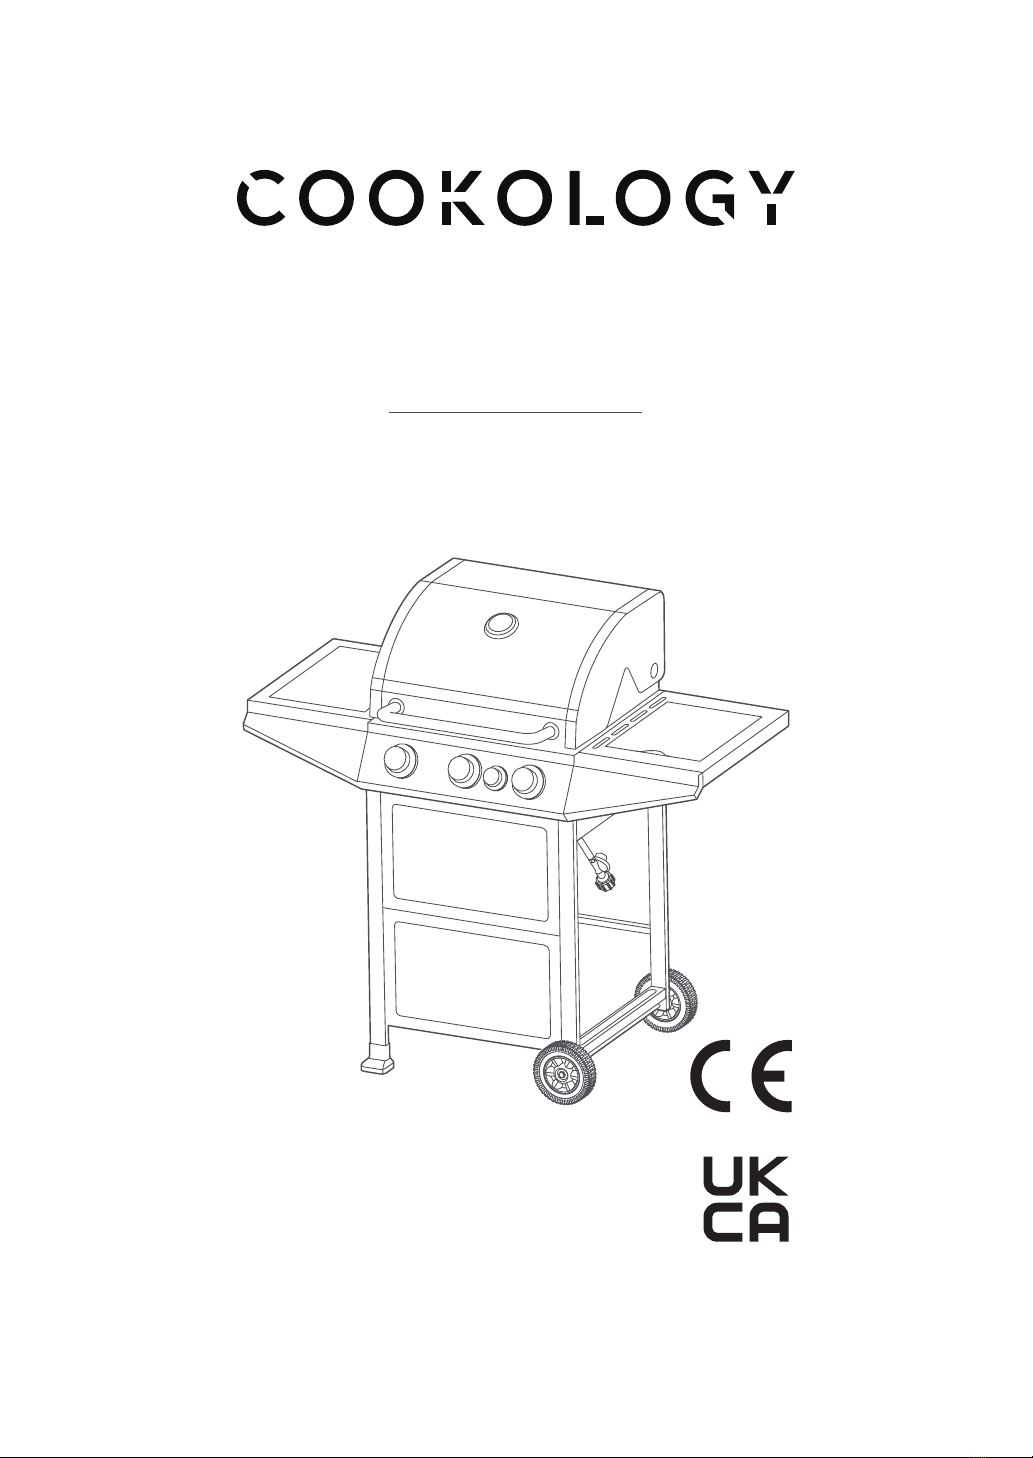
Freestanding Gas Grill
Before using the product, please read the instructions carefully and keep them properly.
This product is only used outdoors
Tennessee
Please register the warranty for this product on www.Cookology.com
2531-22
2531DN-0032
8504DN-0035
8504-22


SAFETY INFORMATION
DIRECTORY
Content that means [mandatory]
Content that means [prohibit ]
Content that means [note]
Use environment
02
02
03
04
PRODUCT INTRODUCTION Parts Introduction
Accessory list
05
06-07
INSTALLATION INSTRUCTIONS Grill installation steps 08-17
GAS CYLINDER Safety Instructions for Gas Cylinder Use
Gas cylinder specifications
Gas cylinder rubber seal inspection
Gas cylinder connection
Gas cylinder disconnection
Leak Testing
When to Leak Test
Safety instructions for leak testing
18
19
19
20
20
21
22
22
CLEANING AND MAINTENANCE Cleaning Safety Instructions
Clean inside of product
Cleaning lid
Maintain product surfaces
Burner Cleaning and Maintenance
Burner Assembly/Maintenance
26
26
26
26
27
27
PRODUCT USAGE Control Panel introduction
Before ignition
Ignition Main Burner Method 1
Ignition Main Burner Method 2
Ignite the auxiliary burner
First time use
Preheat the grill
Grease fire treatment
Avoid grease fires
23
23
23
24
24
25
25
25
25
TROUBLE SHOOTING TROUBLE SHOOTING 29
TECHNICAL PARAMETERS TECHNICAL PARAMETERS 30

SAFETY INFORMATION
2
Content that means [mandatory]
1.
2.
3.
4.
5.
Please use the product in an outdoor environment.
Leak test all gas supply line connections before every use.
A regulator complying with the in force national norm will have to
be connected to the gas tank in order to obtain the appropriate
gas pressure.
Use heat-resistant grill mitts or gloves when operating the gas
grill.
Although your gas cylinder may appear to be empty, gas may still
be present. Always turn the gas valve off after every use and
store/transport your cylinder accordingly.
Thank you for purchasing a Cookology Freestanding Gas Grill.
Make sure that the gas grill has been properly assembled according
to the instructions of this manual and all parts have been tightly
fastened. Improper assembly can cause serious bodily injury or
death, so it is crucial to follow the assembly and safety instructions
carefully.
Content that means [prohibit ]
1.
2.
3.
4.
5.
6.
7.
8.
9.
10.
11.
Do not use a flame to check gas leaks.
The gas grill should never be operated by children under the age
of 18. Accessible parts of the grill may be very hot. Keep young
children and pets away while it is in use and until it has complete-
ly cooled down completely.
Do not attempt to disconnect any gas fitting when the grill is in
operation or still hot. Before use, make sure that all the gas con-
nections are tightly secured. If they are not, turn off the gas tank
and check all gas connections.
Never lean over an open grill or place hands in the front edge of
the cooking box.
Do not enlarge valve orifices or burner ports when cleaning the
valves or burners.
A dented or rusty gas cylinder may be hazardous and should be
checked by your gas supplier. Do not use a gas cylinder with a
damaged valve.
Do not use the gas grill for any other use than the one for which it
is interested for.
This appliance must be kept away from flammable materials
during use.
Do not move the appliance during use.
Turn off the gas supply at the gas cylinder after use.
Do not modify the appliance.

3
Content that means [note]
1.
2.
3.
4.
5.
6.
7.
8.
9.
10.
11.
A.
B.
C.
D.
E.
F.
If a gas leak occurs, turn off the gas tank immediately. Remove all
accessories and contact your local fire department, then
after-sales service.
Keep the area around the grill clear of combustible materials,
including but not limited to; gasoline, flammable materials,
vapors, lava coal and wood chips.
You should exercise reasonable care when operating the gas grill.
It should never be left unattended, especially with the hood left
down, or moved while in operation. Carefully read this manual
and the instructions on the control panel before use.
Should the burners go out while in operation, turn all gas valves
off. Open the lid and wait five minutes before attempting to
relight, using the lighting instructions.
Should a grease fire occur, turn off all burners and leave the lid
closed until fire is out. If the fire does not subside momentarily
after turning the burners off, call your local Fire Department
immediately. If in doubt, always call your Fire Department for
assistance.
LPG is not natural gas. The conversion or attempt-ed use of natu-
ral gas in a liquid gas unit or LPG in a natural gas unit is danger-
ous and will void your warranty.
Keep any electrical supply cord and the fuel supply hose away
from any heated surfaces.
Exercise reasonable care when operating your grill.
Strong winds and low temperatures can affect the heating and
performance of your grill, so factor in these elements when posi-
tioning your grill outdoors for cooking.
The use of alcohol or prescriptive/non-prescriptive drugs may
impair the consumer’s ability to properly assemble or safely oper-
ate the grill.
Leaking gas may cause a fire or explosion which can cause seri-
ous bodily injury or death, or damage to property. If you smell gas
or hear the hiss of a leaking gas cylinder:
Shut off gas supply to the grill.
Extinguish any open flames.
Open the lid of the machine.
Move away from the cylinder.
If odour continues, keep away from the grill and immediately call
your gas supplier or your local Fire Department.
Do not attempt to correct the problem yourself.
4
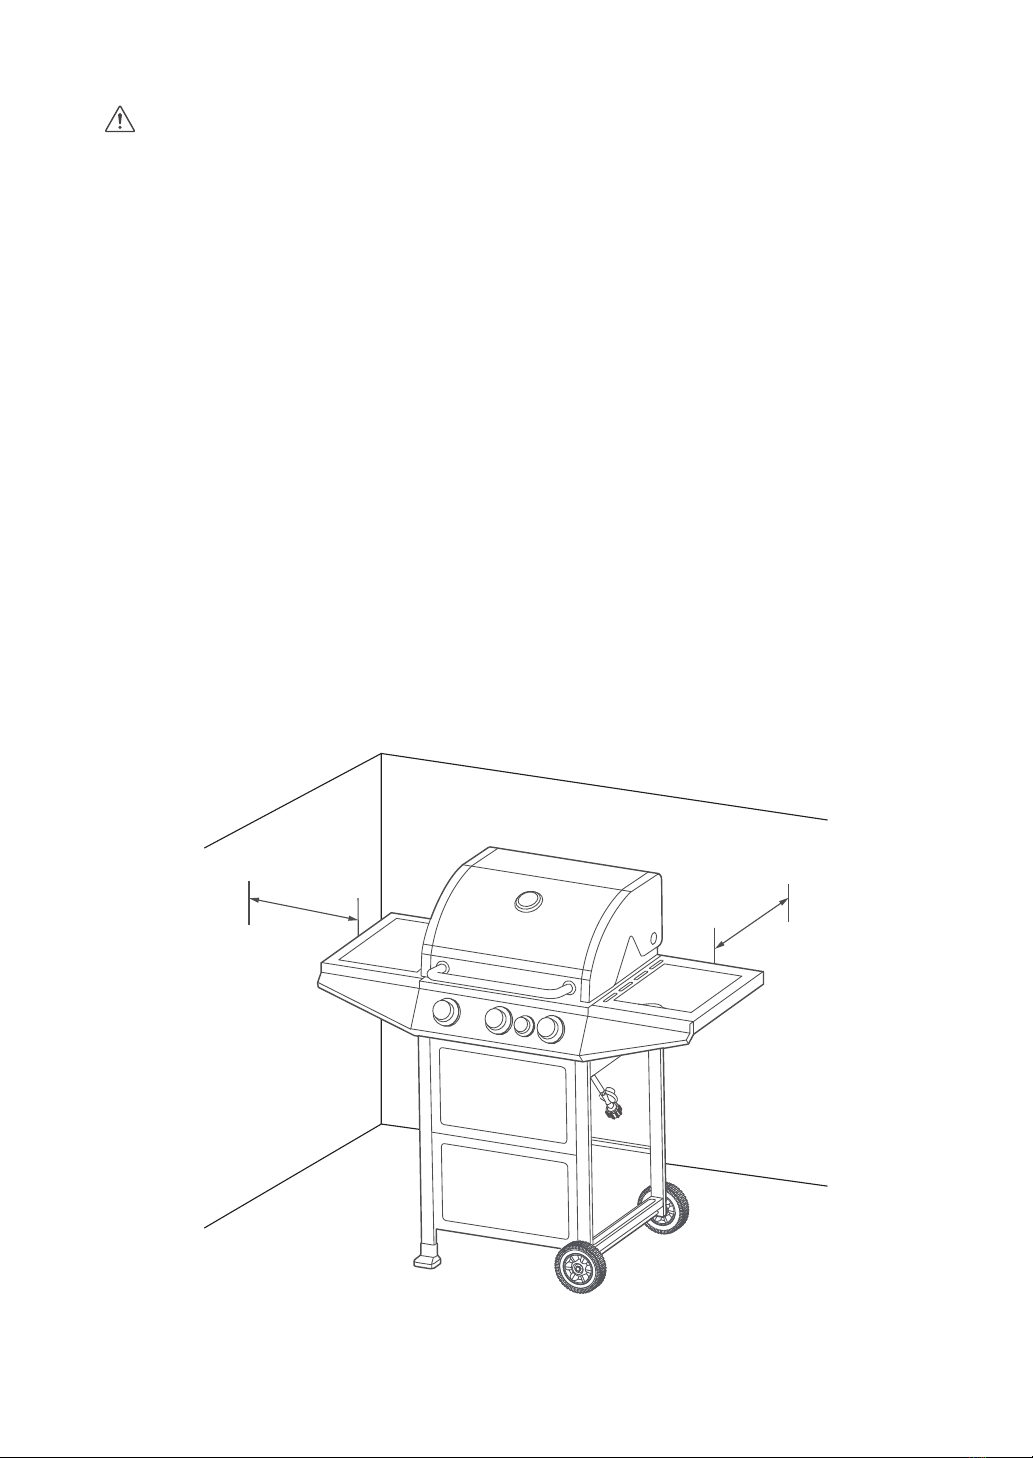
509 mm
509 mm
Use environment
1.
2.
3.
4.
5.
6.
7.
8.
Only use this gas grill outdoors in a well-ventilated area. Do not
use it in a garage, building, alley way or any other enclosed area.
Do not use the grill under overhead combustible construction.
The grill is not intended to be installed in or on recreational vehi-
cles and/or boats.
The grill must always be lit with the hood in the open position.
Under no circumstances must the grill be lit with the hood in the
closed position.
When in use, always place the grill and cylinder on flat level
ground.
The grill should be protected from direct draughts and shall be
positioned or protected against direct penetration by any trick-
ling water (e.g., rain). If used on a wooden table, the table must
be protected with a non-flammable covering to avoid any discol-
oring of the wood.
Always open the grill lid carefully and slowly as heat and steam
trapped within the grill can severely burn you.
Position away from the wall:

Due to the continuous upgrading of our products, if there is a difference between
the actual product and the picture below, please refer to the actual product.
Parts Introduction
PRODUCT INTRODUCTION
5
Control panel
Stove foot
Control panel
Thermometer
Gas cylinder
connector
machine lid
Side stove
Wheels
Accessory list
Code Schematic quantity Code Schematic quantity
A1 1 PC
A2 3 PCS
A3 1 PC
A4 2 PCS
A5 1 PC
A6 1 PC
400
500
600
700
300
200
800
100
50
100
150
200 2 50
300
350
400
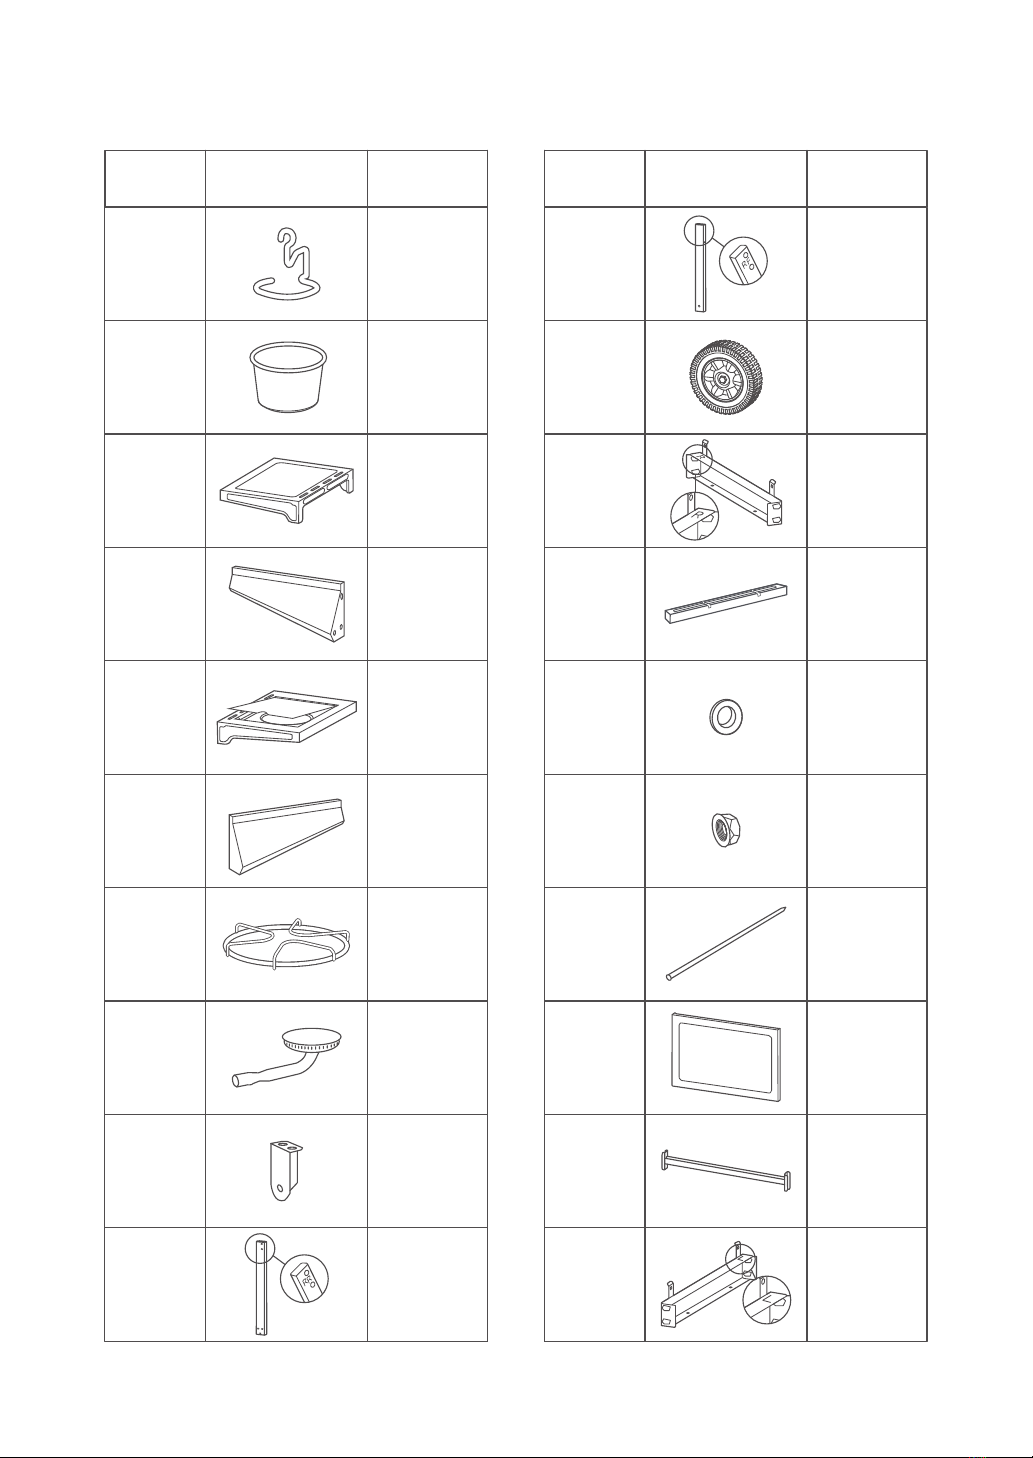
Accessory list
6
Code Schematic Quantity Code Schematic Quantity
A7 1 PC
A8 1 PC
A9 1 PC
A17 1 PC
A18 2 PCS
A19 1 PC
A10 1 PC
A11 1 PC
A12 1 PC
A13 1 PC
A14 1 PC
A15 1 PC
R
A16 1 PC
R
A21 1 PC
A22 2 PCS
A23 1 PC
A24 1 PC
A25 2 PCS
A26
A27
1 PC
1 PC

7
Code Schematic Quantity Code Schematic Quantity
A28
1 PC
A29 1 PC
A31 1 PC
A32 2 PCS
A30 1 PC
LF
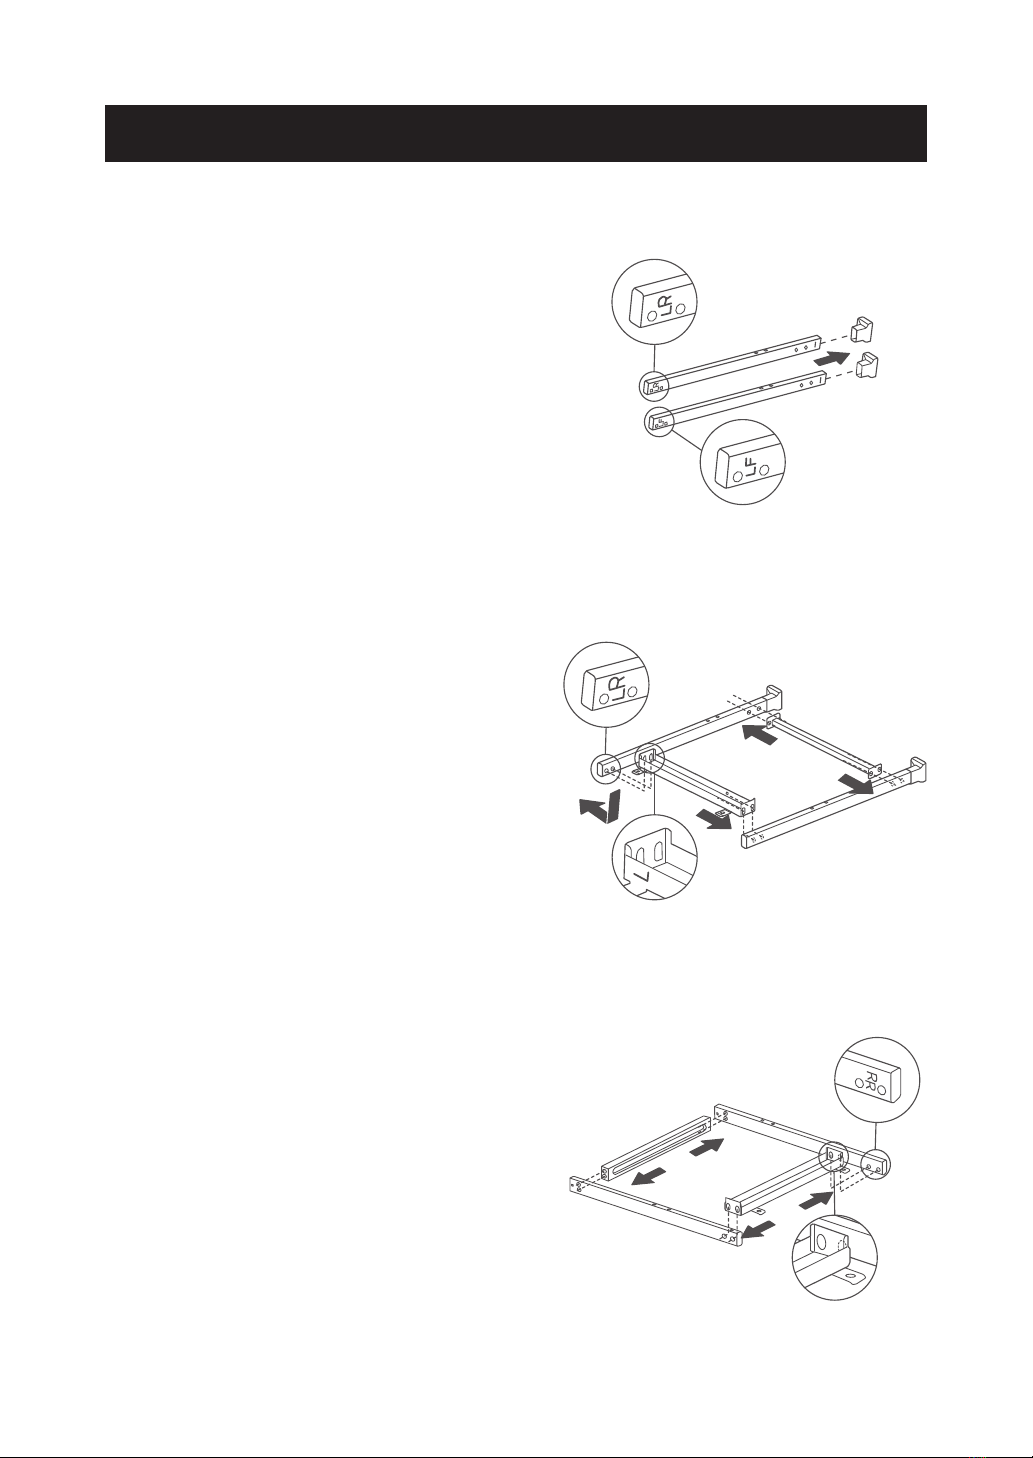
INSTALLATION INSTRUCTIONS
8
Push Foot Pad (A32) into Left Front
Leg assembly(A31) and Left Rear Leg
assembly (A30).
1.
Grill installation steps
2. Loosen the screws of Left Front Leg
assembly (A31) and Left Rear Leg
assembly (A30), turn the side with
"L" on Left Top Cart Frame Assembly
(A27)to side with "LR" onLeftRear
Leg assembly (A30), and then tight-
en the screws. Install Left Bottom
Cart Frame Assembly (A29) to Left
Front Leg assembly (A31) and Left
Rear Leg assembly (A30).
3. Loosen the screws on Right Front
Leg assembly (A17) and Right Rear
Leg assembly (A16), turn the side
with "R" on Right Top Cart Frame
Assembly (A19) to side with "RR" on
Right Rear Leg assembly (A16), and
then tighten the screws. Install Gas
Tank Supporting Plate (A21) on Left
Front Leg assembly (A31) and Left
Rear Leg assembly (A30).
R
R
Table des matières


