Cocraft HI 450 Manuel utilisateur

ENGLISHSVENSKANORSKSUOMIDEUTSCH
Important:
Read the entire instruction manual
carefully and make sure that you fully
understand it before you use the
equipment. Keep the manual for future
reference.
Viktig information:
Läs hela bruksanvisningen noggrant och
försäkra dig om att du har förstått den
innan du använder utrustningen. Spara
bruksanvisningen för framtida bruk.
Viktig informasjon:
Les disse anvisningene nøye og forsikre
deg om at du forstår dem, før du tar
produktet i bruk. Ta vare på anvisningene
for seinere bruk.
Tärkeää tietoa:
Lue nämä ohjeet huolellisesti ja varmista
että olet ymmärtänyt ne, ennen kuin
alat käyttää laitetta. Säilytä ohjeet
myöhempää tarvetta varten.
Wichtiger Hinweis:
Vor Inbetriebnahme die komplette
Bedienungsanleitung sorgfältig
durchlesen und aufbewahren.
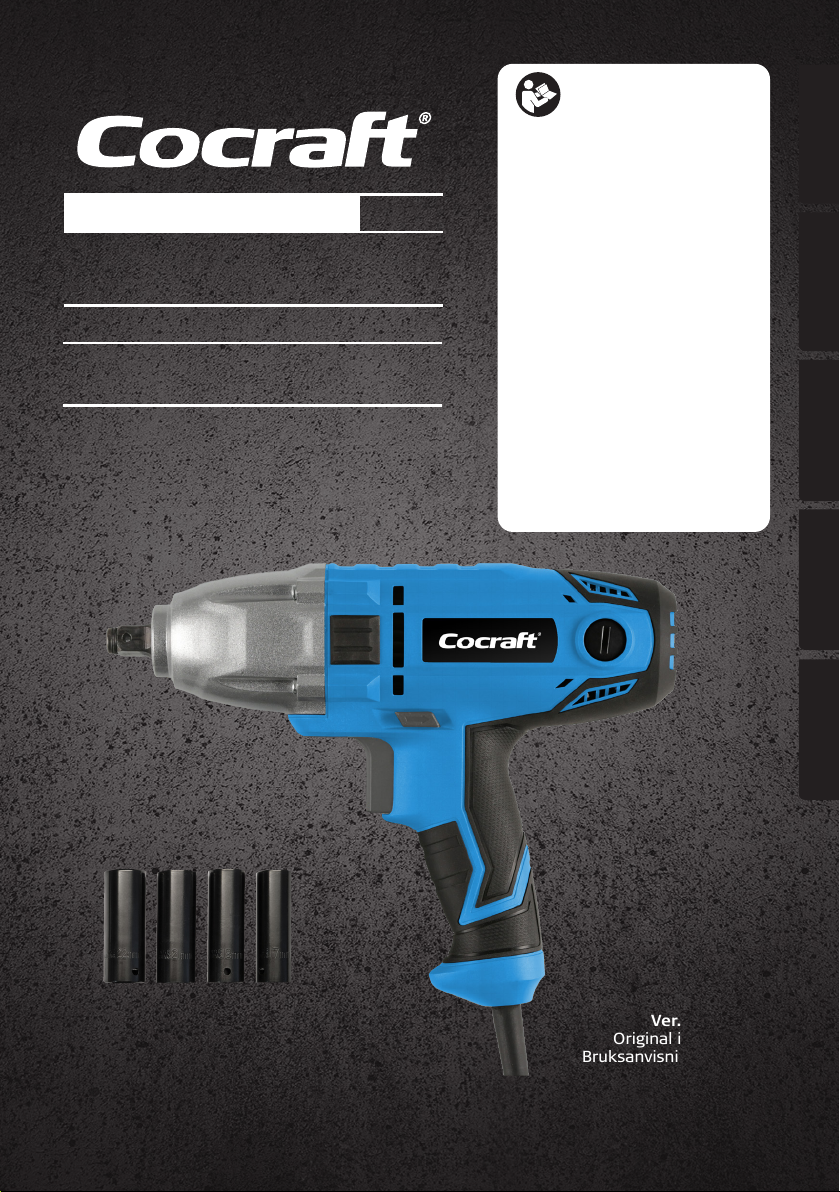
HI 450
PERFECT FOR CHANGING WHEELS
1/2″
41-2375
IMPACT WRENCH
MUTTERDRAGARE MUTTERTREKKER
MUTTERINVÄÄNNIN SCHLAGSCHRAUBER
Ver. 20200914
Original instructions
Bruksanvisning i original
Originalbruksanvisning
Alkuperäinen käyttöohje
Original Bedienungsanleitung
Art.no Model
41-2375 P1B-ZTH-13B


ENGLISH
3
Impact Wrench
Art.no 41-2375 Model P1B-ZTH-13B
Please read theentire instruction manual before using theproduct and then save
it for future reference. Wereserve theright for any errors in text or images and any
necessary changes made to technicaldata. Ifyou have any questions concerning
technical problems please contact our Customer Services.
Safety
General safety instructions for power tools
Warning: Readall theinstructions. Failure to comply with thefollowing instructions
can lead to electric shocks, fires and/or serious injury. Theterm “power tool”
in thewarning text below refers to your handheld mains operated or battery
operatedtool.
SAVE THESE INSTRUCTIONS.
1) Work area
a) Keep thework area clean and well illuminated. Cluttered and poorly lit areas
invite accidents.
b) Do not use power tools in explosive environments,e.g. near to flammable
liquids, gases ordust. Powertools create sparks which may ignite dust orfumes.
c) Keep children and bystanders away from thearea where you are using
thepowertool. Distractions can cause you to lose your concentration and control.
2) Electrical safety
a) Thepower tool’s plug must fit correctly into thewall socket. Nevermodify
theplug in anyway. Neveruse anadaptor plug together with earthed
powertools. Unmodified plugs and matching outlets will reduce therisk of
electricshocks.
b) Avoid physical contact with earthed objects such as pipes, radiators, ovens
and refrigerators. Thereis anincreased risk of electric shock if your body is
earthed.
c) Do not expose thepower tool to rain or other wet conditions. Waterentering
apower tool will increase therisk of electricshock.
d) Do not abuse themainslead. Neveruse thelead for carrying, pulling or
unplugging thepowertool. Keepthelead away from heat, oil, sharp edges
and movingparts. Damaged or tangled leads increase therisk of electricshock.

ENGLISH
4
e) When using power tools outdoors, use anextension lead that is suitable for
this purpose. Theuse of anextension lead designed for outdoor use decreases
therisk of electric shocks.
f) If using thepower tool in awet environment is unavoidable, awall socket
equipped with aportable residual current device (RCD) should beused.
Useof aRCD significantly reduces therisk of electricshock.
3) Personal safety
a) Pay attention to what you are doing and use common sense when using
powertools. Neveruse power tools if you are tired or under theinfluence of
drugs, alcohol or medication. Onemoment of inattention while using apower
tool may result in serious injury.
b) Wear protective clothing. Always wear safety glasses. Usingprotective
clothing such as dust masks, non-slip safety shoes, helmets and ear defenders
decreases therisk of injury.
c) Avoid accidental starts. Makesure that thepower switch is set to OFF before
plugging thepower tool into awall socket, fitting thebattery or picking up/
carrying thepowertool. Nevercarry apower tool with your finger on thetrigger
and never connect thepower tool to awall socket when theswitch is set to ON,
as this may result in bodily injury.
d) Remove all service tools/keys before switching on thepowertool. Aservice
tool left on arotating part of thepower tool may result in personal injury.
e) Do not overreach. Keepproper footing and balance at alltimes. Thisenables
better control of thepower tool in unexpected situations.
f) Wear suitable clothing. Donot wear loose-fitting clothing or jewellery.
Keephair, clothes and gloves away from movingparts. Loose-fitting clothes,
jewellery or long hair could become caught in movingparts.
g) If equipment for theextraction and collection of dust is available, make sure
it is connected and properlyused. Useof dust collection equipment can reduce
dust related hazards.
4) Use and maintenance of the power tool
a) Do not force thepowertool. Usethecorrect power tool for your application.
Thecorrect power tool will do thejob better and safer if used at therate for which
it was designed.
b) Never use thepower tool if thepower switch does not switch thetool
on andoff. Anypower tool that cannot be controlled by thepower switch is
dangerous and must be repaired.
c) Disconnect theplug from thepower source and/or thebattery pack from
thepower tool before making any adjustments, changing accessories or
storing thepowertool. Theseprecautions reduce therisk of thepower tool
starting unexpectedly.

ENGLISH
5
d) Storepower tools that are not being used out of children’sreach. Donot
allow people who are unfamiliar with thetool or its functions to operateit.
Powertools are dangerous in thehands of untrainedusers.
e) Maintain powertools. Checkfor misalignment, binding of moving
parts, broken parts or anything else which might affect theoperation of
thepowertool. Ifdamaged, have thepower tool repaired beforeuse.
Manyaccidents are caused by poorly maintained powertools.
f) Keep cutting tools sharp andclean. Properly maintained cutting tools with sharp
cutting edges are less likely to bind and are easier to control.
g) Use thepower tool and any accessories in accordance with these instructions,
taking into account theworking conditions and thework to be performed.
Useof thepower tool for apurpose other than that for which it is intended could
result in adangerous situation.
5) Service
a) Repairs and service should only be performed by qualified tradesmen, and
only with original spareparts. This guarantees that thesafety of thepower tool is
maintained.
Specic safety instructions for impact wrenches
• Warning: Useonly sockets and accessories designed to be used with theimpact
wrench. Chrome-plated sockets and accessories are only designed for hand tools
and MUST NOT be used for impact wrenches. Thesecan fracture and cause
bodilyharm.
• Always unplug theimpact wrench before changing sockets. Unintended starts
pose arisk for hand injury.
• Themains lead should be checked regularly. Neveruse theimpact wrench if
themains lead or plug is damaged.
• If themains lead is damaged in any way it must be replaced by aqualified electrician.
• Any extension leads used must be designed for outdooruse. Usinganon-compliant
extension lead poses aserious danger.
• Protect theimpact wrench from rain or moisture.
• Unplug theimpact wrench from themains when not inuse.

ENGLISH
6
• Checklist for avoiding accidents:
- Ensure that theuser and any bystanders wear safety glasses and ear defenders.
- Useonly sockets and accessories designed to be used with theimpact wrench.
- Checkthat all sockets are intact and undamaged beforeuse.
Note: Whentightening wheel nuts/bolts, atorque bar with thecorrect torque setting
should be inserted between theimpact wrench and theimpact socket, otherwise
thenut/bolt might be overtightened and thewheel could be damaged.
Product safety symbols
Read theentire instruction manual.
Always use ear defenders and safety goggles or avisor.

ENGLISH
7
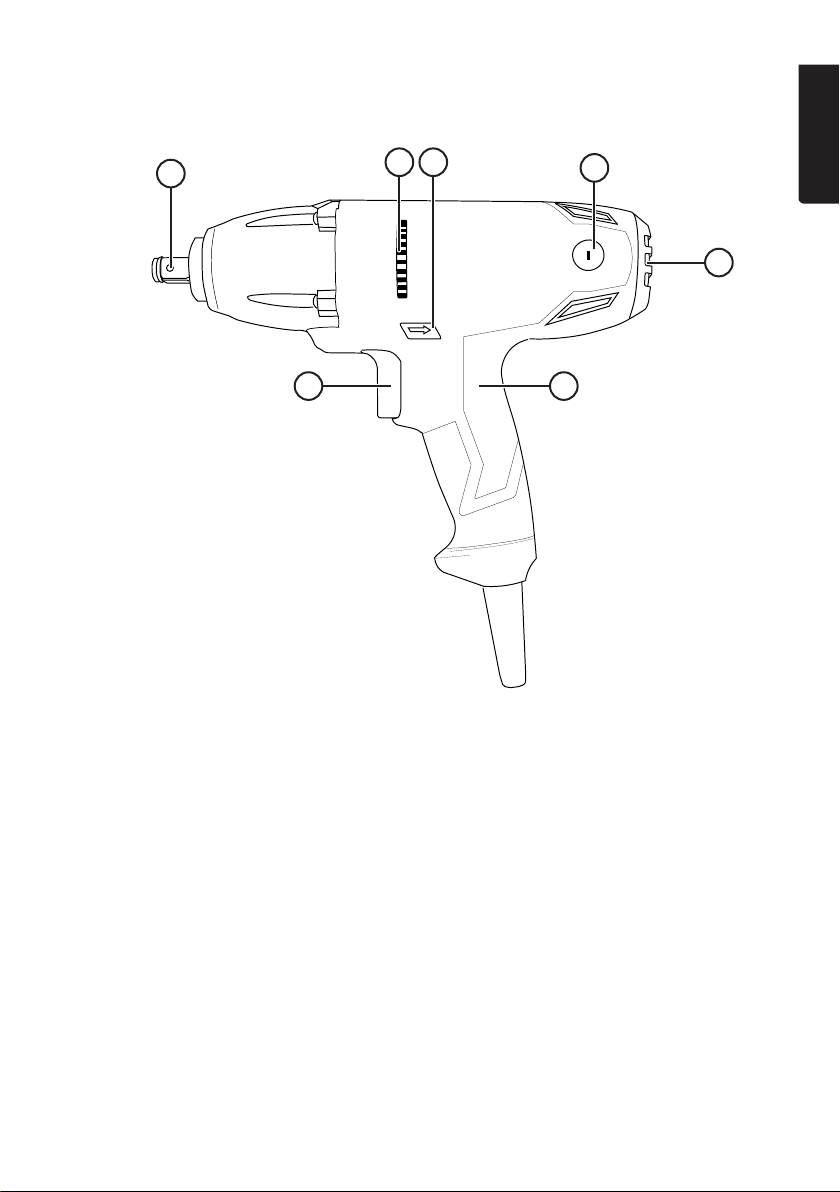
13 6 4
5
72
Buttons and functions
1. Socket drive ½" square
2. Power switch
3. Ventilation opening
4. Carbon brush holder
5. Ventilation opening
6. Forward/reverse selector
7. Handles
Operating instructions
Preparations
• Warning: Parkthevehicle in gear and engage thehandbrake. Vehicles with
automatic gear boxes should be put into P(Park) and thehandbrake engaged
before attempting to lift thecar. Ensure that any wheels still in contact with
theground are securely blocked with wheel chocks to prevent them from moving.
• Read thecar’s owner’s manual if you are at all unsure on how to position thejack
under thecar.

ENGLISH
8
Things to consider
• Park thevehicle on afirm and stable surface.
• Use afloor jack which can support theweight of thevehicle by agood margin.
• Support thevehicle on axle stands if you need to go under thevehicle for any reason.
• Never place any body part under avehicle that is only being supported by floorjacks.
• Some vehicles may have different threads on thewheel nuts on theright- and
left-hand sides of thevehicle respectively. Checkthis before loosening thenuts in
order to avoid accidentally tighteningthem.
• Screw on thewheel nuts/bolts by hand, using at least 3 complete rotations in
order to prevent possible thread damage when tightening with theimpact wrench.
Loosening the wheel nuts/bolts
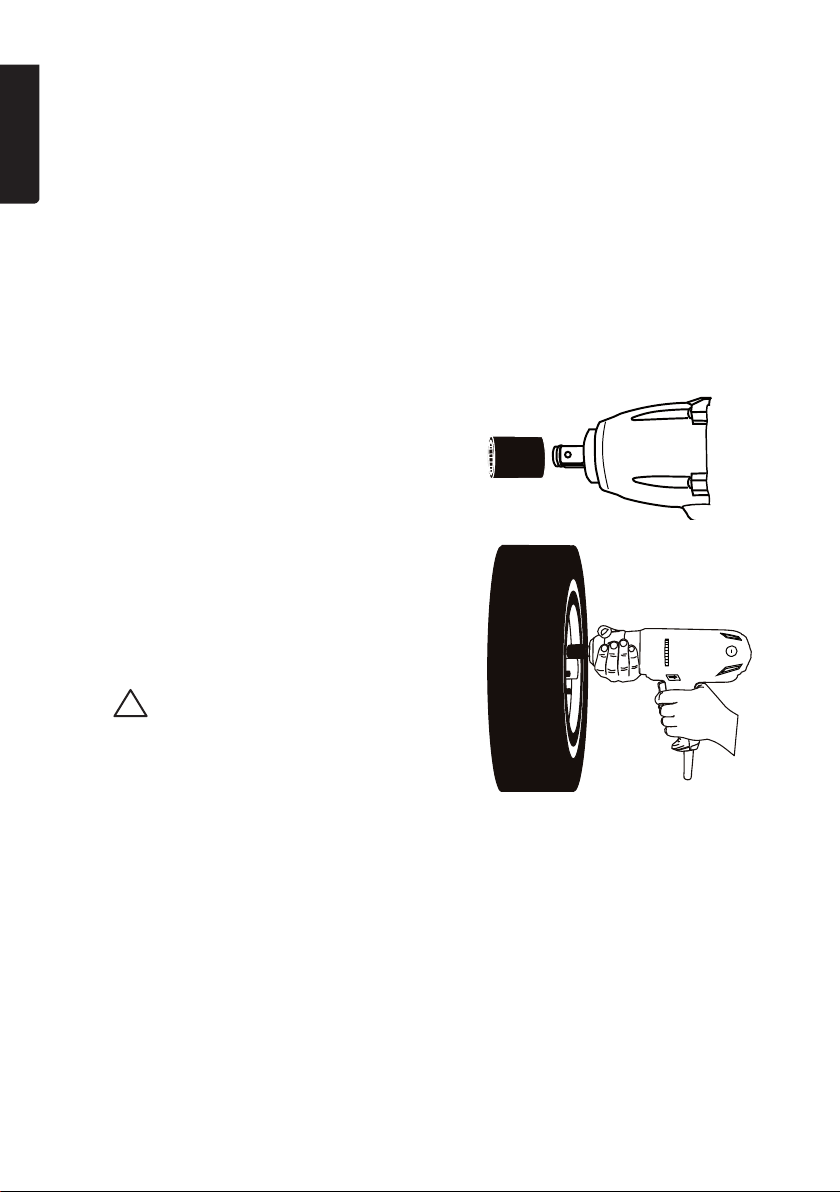
1. Attach an impact socket which fits exactly
onto the head of the screw/bolt or nut
which you want to undo onto the anvil of the
impact wrench (1). Use a hexagon impact
socket.
2. Fit the socket fully over the nut/bolt you wish
to loosen.
3. Hold the impact wrench firmly with one hand
around the front part of the tool, hold the
handle (7) with the other hand.
4. Press in the selector (6) for anticlockwise
rotation of the socket (to loosen the bolt).
Note: Do not use the impact wrench for
more than 15 seconds at a time in the same
direction if the nut/bolt does not loosen. If the
nut/bolt does not come undone:
- Change the direction of rotation using
the selector (6) and drive the impact
wrench in the opposite direction for a
couple of seconds.
- Switch the direction of rotation back
again and run the wrench in the original
direction.

ENGLISH
9
1
4
2
3
5
3
1
2
4
Tightening the wheel nuts/bolts
Note: When tightening wheel nuts/bolts, a torque bar (sold separately) with the
correct torque setting should be inserted between the impact wrench and the impact
socket, otherwise the nut/bolt might be overtightened and the wheel could be damaged.
1. Attach a hexagon impact socket which fits exactly onto the head of the screw/bolt
or nut which you want to undo.
2. Screw the wheel nuts/bolts in place by hand at least 3 complete turns in order to
prevent damaging the threads when they are tightened using the impact wrench.
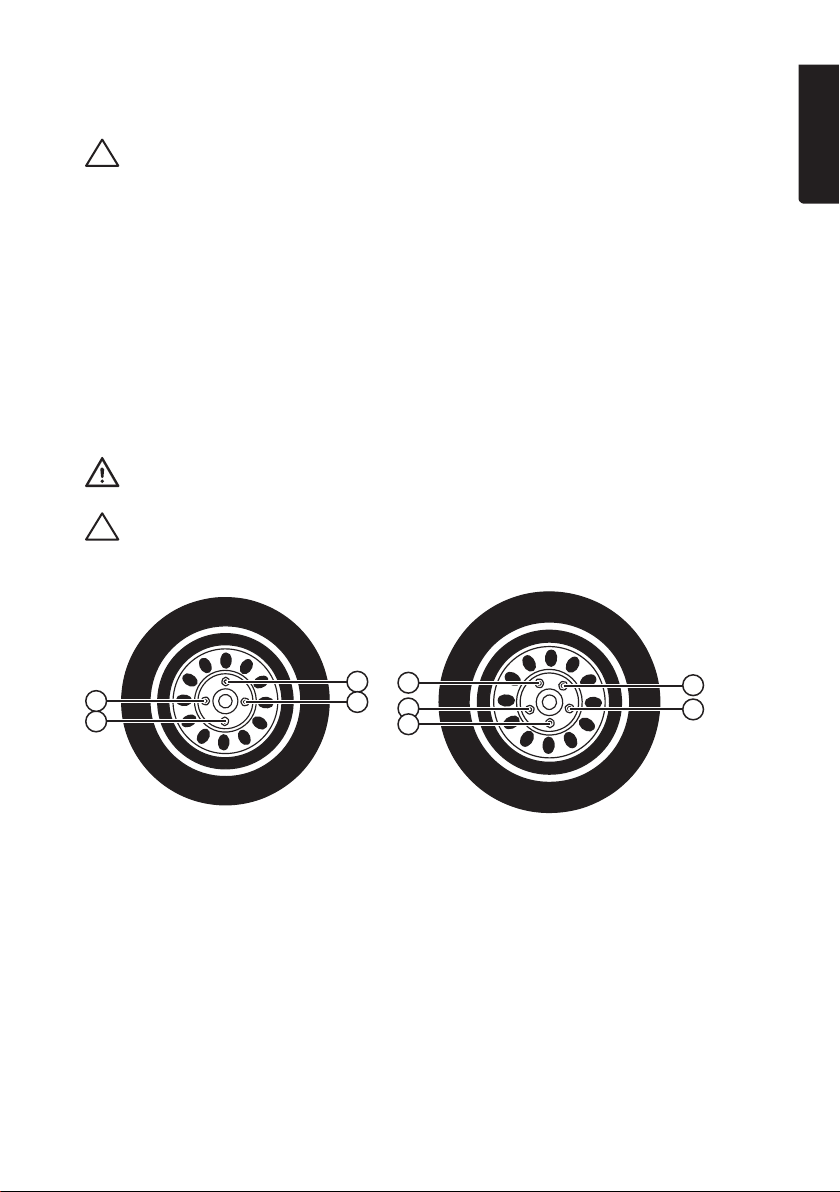
3. Fit the socket fully over the nut/bolt you wish to tighten. Always start with the lower
nut/bolt (see below pictures).
4. Hold the impact wrench firmly with one hand around the front part of the tool, hold
the handle (7) with the other hand.
5. Press in the selector (6) for clockwise rotation of the socket (to tighten the bolt).
6. Lower the jack so that the vehicle is standing on the ground.
Warning: Useatorque wrench to check that thewheels are fastened to
therecommended torque setting before using thecar after changing its wheels.
Note: Tighten thewheel nuts/bolts in thecorrectorder. Belowis anexample of
both a4- and 5-bolt wheelsetup.
Care and maintenance
• Clean the product by wiping it with a damp cloth. Use only mild cleaning agents,
never solvents or corrosive chemicals.
• Never attempt to repair or modify the product in any way. Repairs (and changing
the carbon brushes) must only be carried out by qualified service technicians.

ENGLISH
10
• Troubleshooting guide
Theimpact wrench will notstart.
• Is theplug securely connected to thewall socket?
• Is thewall socketlive?
Responsible disposal
This symbol indicates that this product should not be disposed of with
general householdwaste. Thisapplies throughout theentire EU. Inorder
to prevent any harm to theenvironment or health hazards caused by
incorrect waste disposal, theproduct must be handed in for recycling
so that thematerial can be disposed of in aresponsible manner.
Whenrecycling your product, take it to your local collection facility or
contact theplace of purchase. Theywill ensure that theproduct is
disposed of in anenvironmentally sound manner.
Specications
Rated voltage: 230–240 V AC, 50 Hz
Power 800 W
No load speed 0–3400 rpm
Max torque 450 Nm
Drive ½"
Included impact sockets 17, 19, 21 and 22 mm
Mains lead 3 m rubber cable
Weight 5.25 kg
Size 365 x 110 x 285 mm
Sound pressure LpA = 92 dB(A), KpA = 3 dB(A)
Sound power LwA = 103 dB(A), KwA = 3 dB(A)
Vibration ah = 6.83 m/s², K = 1.5 m/s²
Autres manuels pour HI 450
1
Ce manuel convient aux modèles suivants
2
Table des matières
Langues :
Autres manuels Cocraft Moteur à percussion