
Citizen C13D204R Manuel utilisateur
USER MANUAL
C13D204R
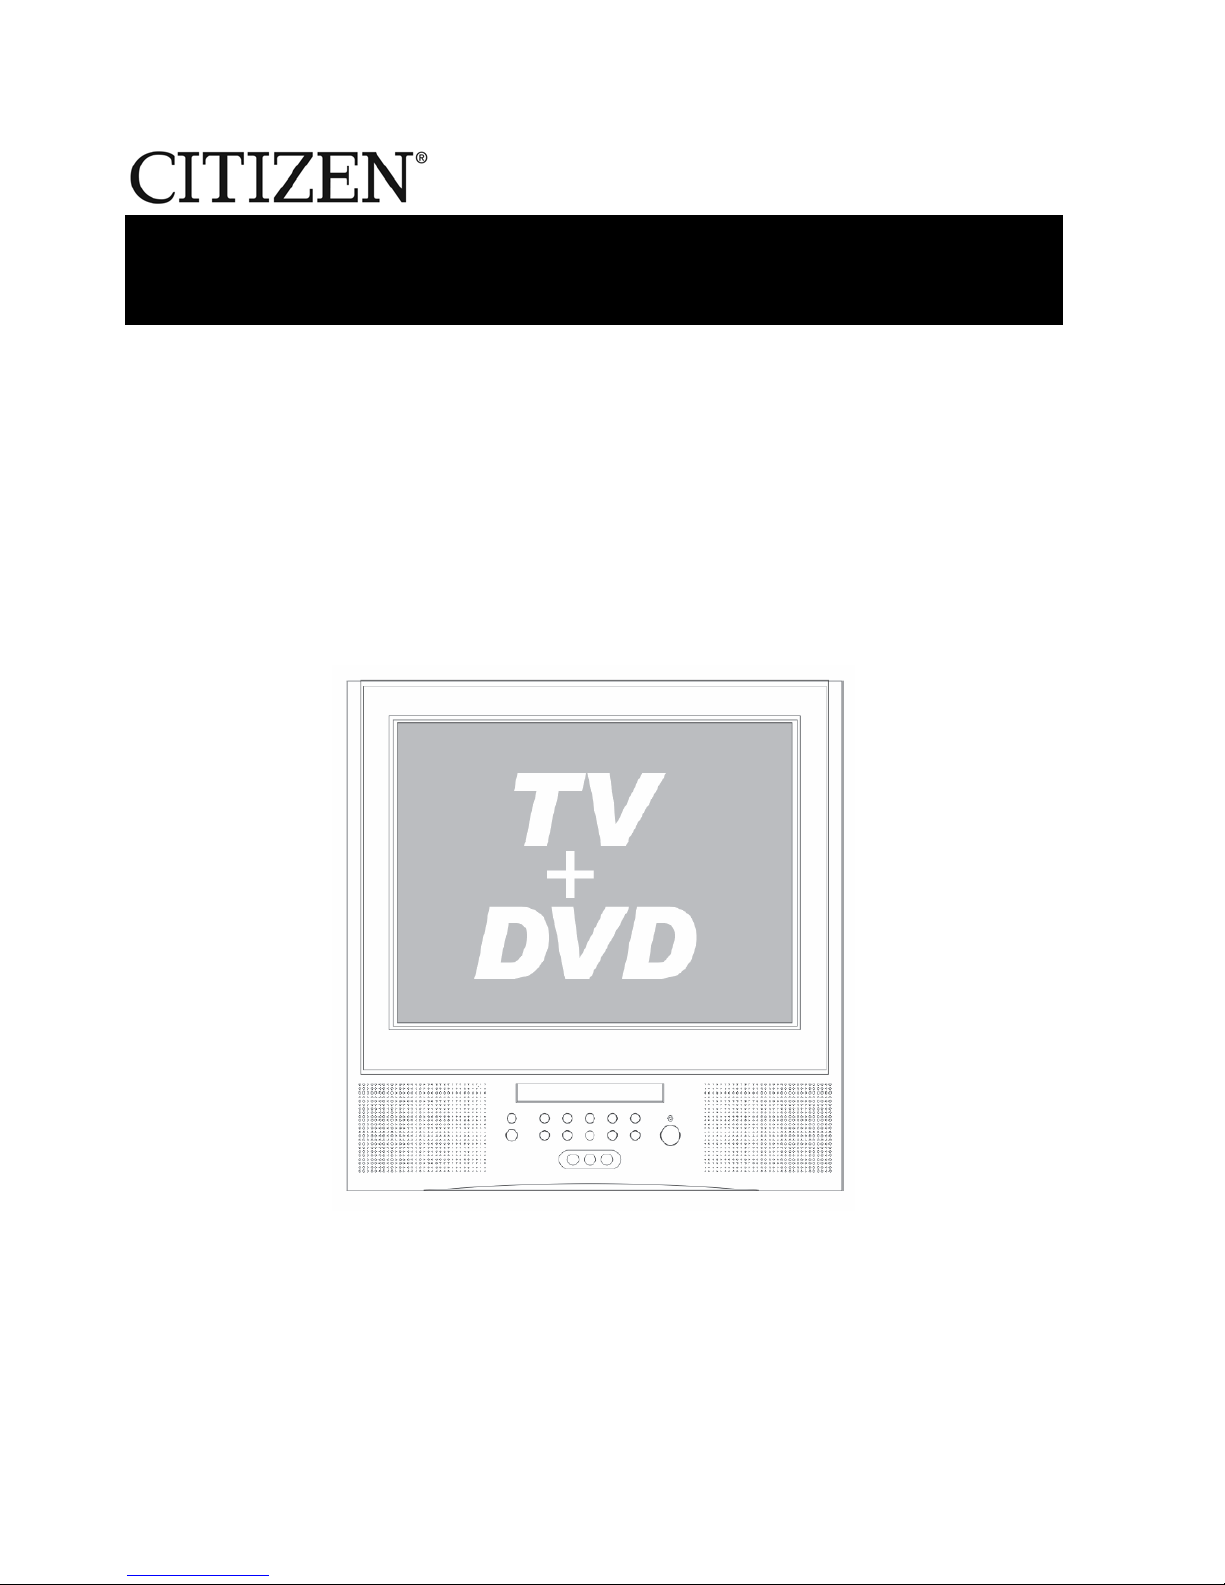
13” TV / DVD Combination
Colour Television with AC/DC Operation
www.citizen-electronics.com

CONTENTS
Before Operation
Basic operation
Warning and cautions...........................................................................
Installation..............................................................................................3
..............................................................................
Preparation of the remote control..........................................................3
Function buttons and ........................................
Front panel of the TV set.....................................................................4
Rear panel of the TV set.......................................................................4
Using the remote control......................................................................5
Menu
........................................................................29
Specifications .....................................................................................30
Antenna Connection
External Connections
Functions
Connection to the external audio and video equipment..................28
Troubleshooting guide
......................................................................................
DVD Operation
DVD Features.......................................................................................18
Advanced Playback..............................................................................19
Special Function Playback...................................................................20
DVD System Setup................................................................................22
Playable Discs.......................................................................................26
Disc Protection and DVD Characteristics..........................................27
Others
1
4
4
4
5
5
5
6
9
18
19
20
21
25
26
27
28
29
PRECAUTIONS
FCC WARNING-This equipment may
generate or use radio frequency
energy.Changes or modifications to this
equipment may cause harmful
interference unless the modifications are
expressly approved in the instruction
manual.The user could lose the authority
to operate this equipment if an
unauthorized change or modification is
made.
LASER SAFETY
This unit employs a laser.Only a qualified
service person should remove the cover
or attempt to service this device,due to
possible eye injury.
CAUTION:USE OF CONTROLS OR
ADJUSTMENTS OR PERFORMANCE
OF PROCEDURES OTHER THAN
THOSE SPECIFIED HEREIN MAY
RESULT IN HAZARDOUS RADIATION
EXPOSURE.
CAUTION:VISIBLE AND INVISIBLE
LASER RADIATION WHEN OPEN AND
INTERLOCK DEFEATED.DO NOT
STARE INTO BEAM.
LOCATION:INSIDE,NEAR THE DECK
MECHANISM.
Important safety Instructions
WARNING:TO REDUCE THE RISK OF FIRE ORELECTRIC SHOCK, DONOT EXPOSE
THIS APPLIANCE TO RAIN OR MOISTURE.
CAUTION
RISK OF ELECTRICSHOCK
DO NOT OPEN
CAUTION: TO REDUCETHE RISK OFELECTRIC
SHOCK, DO NOTREMOVE COVER (OR BACK).
NO USER SERVICEABLEPARTS INSIDE.REFER
SERVICING TOQUALIFIED SERVICE PERSONNEL
THIS SYMBOL INDICATES THATDANGEROUS
VOLTAGECONSTITUTING ARISK OF ELECTRIC
SHOCK IS PRESENTWITHIN THIS UNIT.
THIS SYMBOL INDICATES THATTHERE ARE
IMPORTANT OPERATING AND MAINTENANCE
INSTRUCTIONS IN THELITERATURE
ACCOMPANYING THEAPPLIANCE.
The important noteis located onthe rear ofthe cabinet.
IMPORTANT SAFEGUARDS
1. READ INSTRUCTIONS
All the safetyand operating instructions should be read before the unitis operated.
2. RETAIN INSTRUCTIONS
The safety andoperating instructions should be retained for future reference.
3. HEED WARNINGS
All warnings onthe unit and in the operating instructions should beadhered to.
4. FOLLOW INSTRUCTIONS
All operating anduse instructions should be followed.
5. CLEANING
Unplug this unitfrom the wall outlet before cleaning. Do not useliquid cleaners or aerosol
cleaners.
Use a dampcloth for cleaning the exterior cabinet only.
6. ATTACHMENTS
The manufacturer ofthis unit does not make any recommendations for attachments,as they
may cause hazards.
7. WATER AND MOISTURE
Do not usethis unit near water. For example, near abathtub, washbowl, kitchen sink,
laundry tub, ina wet basement, or near a swimming pool.
8. ACCESSORIES
Do not placethis unit on an unstable cart, stand, tripod, bracket,or table. The unit mayfall,
causing serious injury, and seriousdamage to theunit.
S3126A
(symbol provided byRETAC)
8A. Anappliance and cart combination should be moved with care.Quick
stops, excessive force,and uneven surfaces may cause the appliance and
cart combination tooverturn.
9. VENTILATION
Slots and openingsin the cabinet back or bottom are provided forventilation, and to ensure
reliable operation ofthe unit, and to protect it from overheating. These openings must not be
blocked or covered.The openings should never beblocked by placingthe unit on a bed,
sofa, rug, orother similar surface. This unit should never beplaced near or over a radiator or
heat source. This unit should not be placedin a built-in installation such asa bookcase or
rack unless properventilation is provided or the manufacturer's instructions have been
adhered to.
10. POWER SOURCE
This unit shouldbe operated only from the type of power sourceindicated on the rating plate.
If you arenot sure of the type of power supply toyour home, consult your appliance dealeror
local power company. For unitsintended to operatefrom battery power, or othersources,
refer to therespective pages in this Owner's Manual for their operatinginstructions.
11. GROUNDINGOR POLARIZATION
Important safety Instructions
22
This unit isequipped with a polarized alternating-current line plug (a plughaving one blade
wider than theother). This plugwill fit intothe power outlet only one way. This isa safety
feature. If youare unable to insert the plug fully into theoutlet, try reversing the plug. If the
plug should stillfail to fit, contact your electrician to replace yourobsolete outlet. Instead of
the polarized alternating-currentline plug, your unit may be equipped with a3-wire
grounding-type plug (aplug having a third (grounding) pin). This plug willonly fit intoa
grounding-type power outlet.This too, isa safety feature.If you are unable to insert the plug
into the outlet,contact your electrician to replace your obsolete outlet. Donot defeat the
safety purpose ofthe grounding-type plug.
12. POWER-CORD PROTECTION
Power-supply cords shouldbe routed so that they are not likely tobe walked on or pinched
by items placedupon or against them, paying particular attention to cordsat plugs,
convenience receptacles, andthe point where they exit from the appliance.
13. LIGHTNING
Toprotect your unit from a lightning storm, or whenit is left unattended and unused for long
periods of time,unplug it from the wall outlet and disconnect theantenna or cable system.
This will preventdamage to the unit due to lightning and powerline surges.
14. POWER LINES
An outside antennasystem should not be located in the vicinity ofoverhead power lines or
other electric lightor power circuits, or where it can fall ontoor against such power lines or
circuits. When installingan outside antenna system, extreme care should be takento keep
from touching suchpower lines or circuits, as contact with them mightbe fatal.
15. OVERLOADING
Do not overloadwall outlets and extension cords, as this can resultin a risk of fire or electric
shock.
16. OBJECT AND LIQUID ENTRY
Do not pushobjects through any openings in this unit, as theymay touch dangerous voltage
points or shortout parts that could result in fire or electricshock. Never spillor spray any
type of liquidinto the unit.
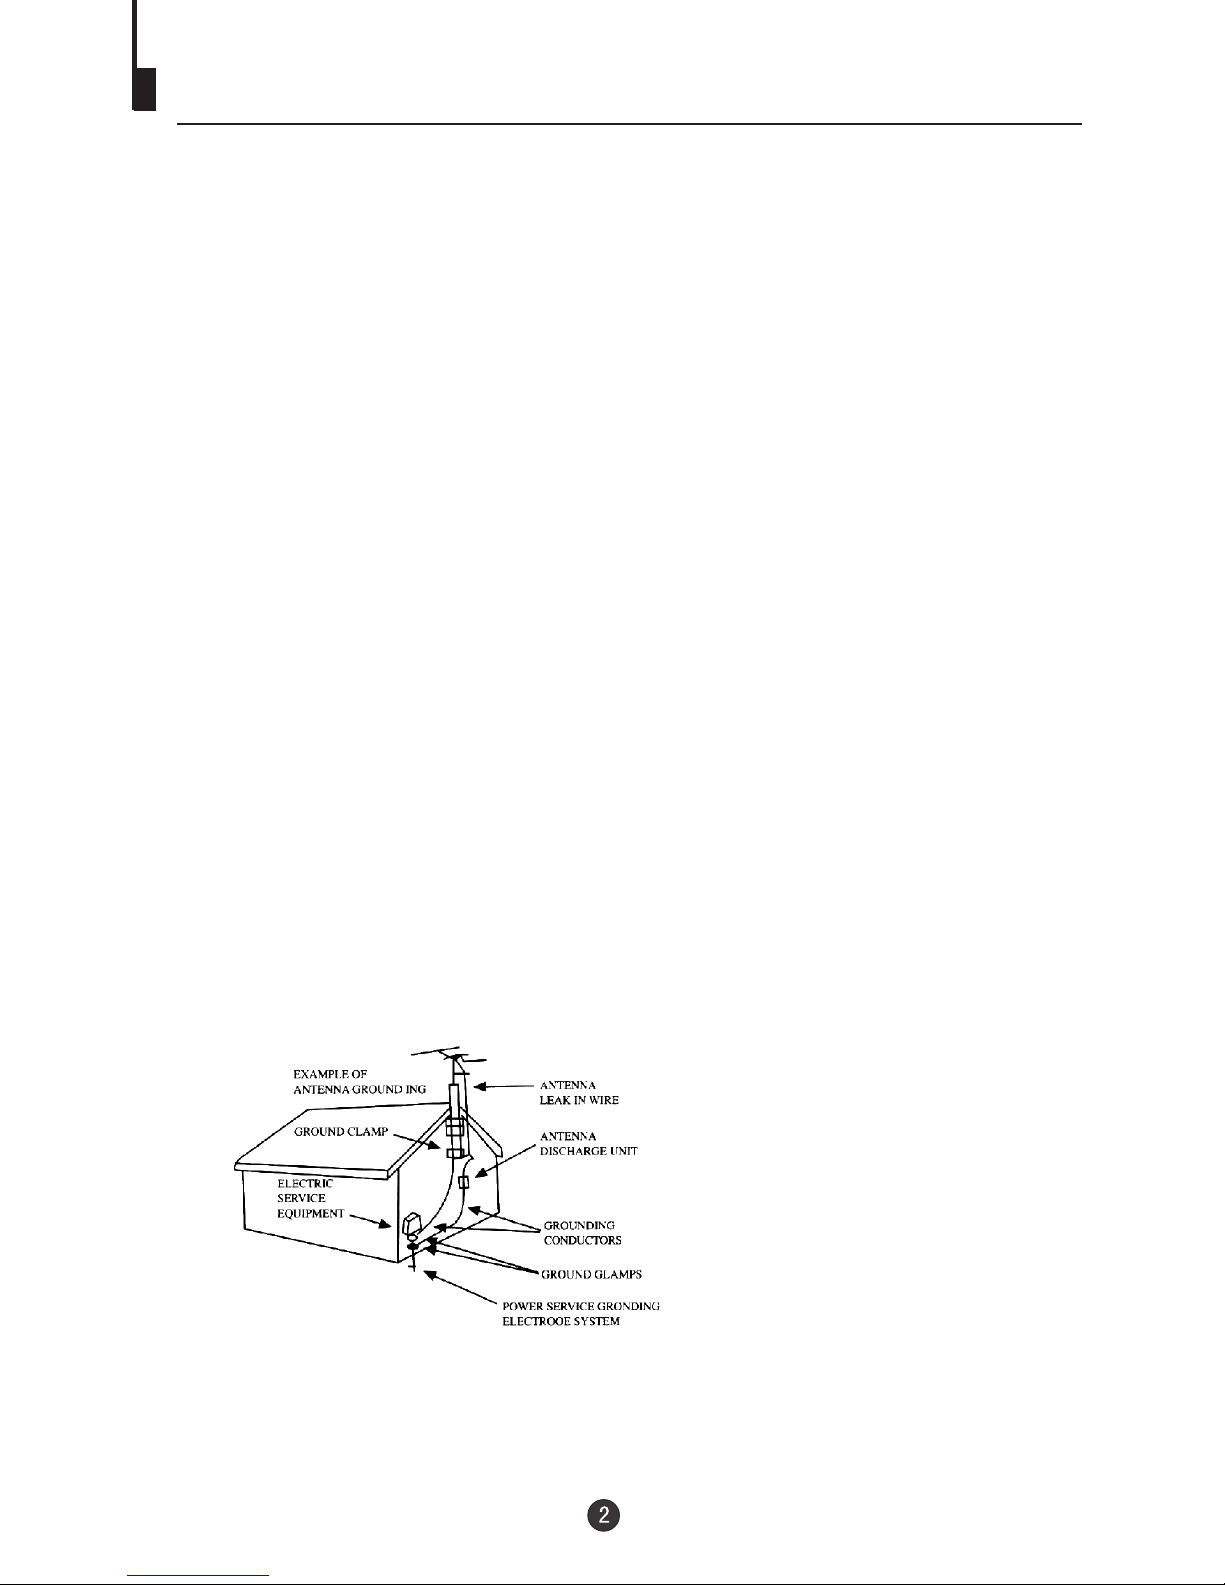
17. OUTDOOR ANTENNA GROUNDING
If an outsideantenna or cable system is connected to the unit,be sure the antenna or cable
system is groundedto provide some protection against voltage surges and built-upstatic
charges, Section 810of the National Electrical Code (NEC), ANSI/NFPA70, provides
information with respectto proper grounding of the mast and supporting structure,
grounding of thelead-in wire to an antenna discharge unit, size ofgrounding conductors,
location of antennadischarge unit, connection to grounding electrodes, and requirements
for the groundingelectrode.
18. SERVICING
Do not attemptto service this unit yourself as opening or removingcovers may exposeyou
to dangerous voltageor other hazards. Refer all servicing to qualified servicepersonnel.
19. DAMAGE REQUIRINGSERVICE
Unplug this unitfrom the wall outlet and refer servicing to qualifiedservice personnel under
the following conditions:
a. When thepower-supply cord orplug is damaged.

Important safety Instructions
b. If liquidhas been spilled, or objects havefallen into the unit.
c. If theunit has been exposed to rainor water.
d. If theunit does not operate normally byfollowing the operating instructions. Adjust
only those controlsthat are covered by the operatinginstructions, as an improper
adjustment of othercontrols may result in damage andwill often require extensive
work by aqualified technician to restore the unitto its normal operation.
e. If theunit has been dropped or thecabinet has been damaged.
f. When theunit exhibits a distinct change inperformance, this indicates a need for
service.
20. REPLACEMENT PARTS
When replacement partsare required, be sure the servicetechnician uses replacement parts
specified by themanufacturer or those that have thesame characteristics as the original part.
Unauthorized substitutions may result in fire, electric shock or other hazards.
21. SAFETY CHECK
Upon completion ofany service or repairs to thisunit, ask the service technician toperform
safety checks todetermine that the unit is inproper operating condition.
22. HEAT
The product shouldbe situated away from heat sourcessuch as radiators, heat registers,
stoves, or otherproducts (including amplifiers) that produce heat.
23. DISC SLOT
Keep your fingerswell clear of the disc slotas it is closing. It maycause serious personal
injury.
24. CONNECTING
When you connectthe product to other equipment, turn off the power and unplugall of the
equipment from thewall outlet. Failure to do somay cause an electric shock and serious
personal injury. Read theowner's manual ofthe other equipment carefully and follow the
instructions when makingany connections.
25. SOUND VOLUME
Reduce the volumeto the minimum level before you turn on the product. Otherwise, sudden
high volume soundmay cause hearing or speaker damage.
26. SOUND DISTORTION
Do not allowthe product output distorted sound for a longtime. It may cause speaker
overheating and fire.
27. HEADPHONES
When you usethe headphones, keep the volume ata moderate level. If you use the
headphones continuously with high volume sound, it may cause hearing damage.
28. LASER BEAM
Do not lookinto the opening of the discslot or ventilation opening of the product to see the
source of thelaser beam. It may cause sightdamage.
29. DISC
Do not usea cracked, deformed, or repaired disc.These discs are easily brokenand may
cause serious personalinjury and product malfunction.
30. NOTE TO CABLE TVSYSTEM INSTALLER
This reminder isprovided to call the Cable TV system installer'sattention toArticle 820-40 of
the NEC thatprovides guidelines for proper grounding and, in particular, specifies that the
cable ground shallbe connected to the grounding system of the building, as close to the point
of cable entryas practical.
Installation
Antenna connection
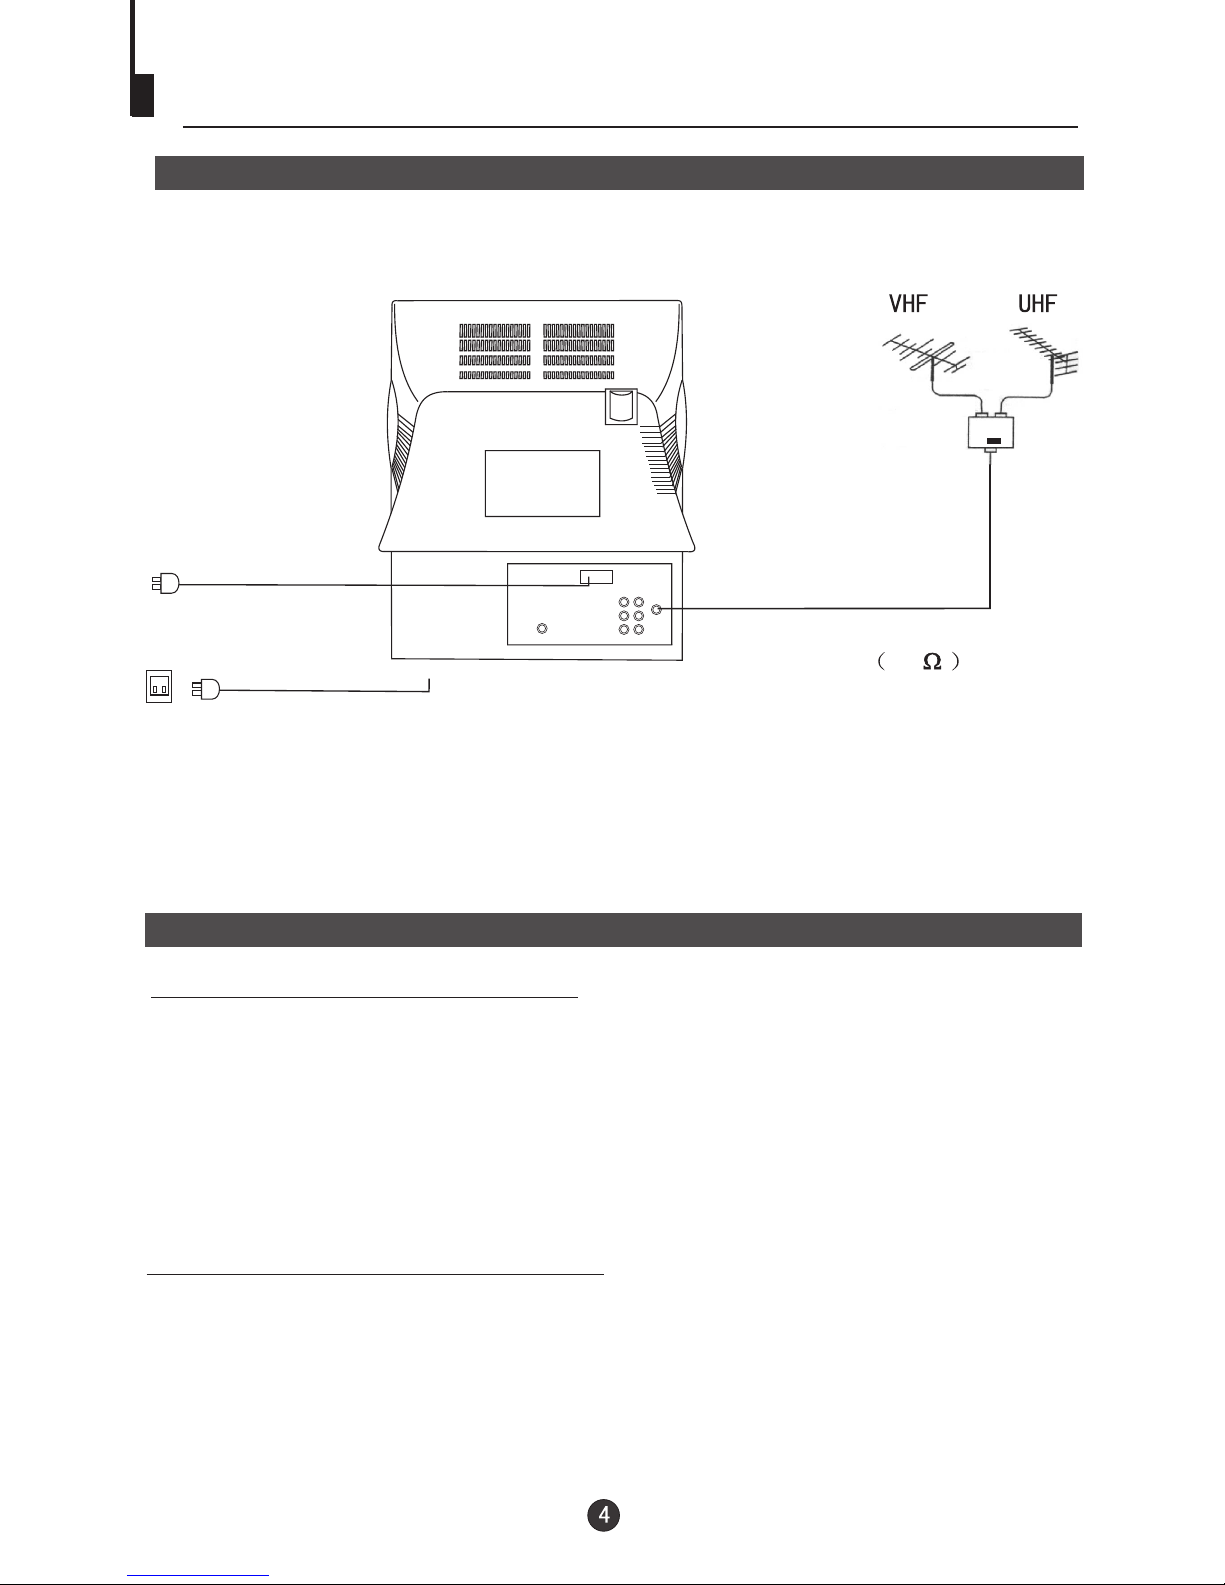
Generally speaking, to enjoy a clearer picture, we recommend that you use a CATV
system or an outdoor antenna .In different places, the suitable antenna type and position
may vary.
Preparation for the remote control
Battery installation
Tips for remote operation
Remove the battery cover.
!When the remote control will not be used for a long period of time or when the
batteries are worn out, remove the batteries to prevent leakage.
! Do not throw the batteries into fire. Dispose of used batteries in the specified
manner.
! Do not drop, dampen or disassemble the remote control.
Insert two size AAA batteries matching
the +/-polarities of the battery to the +/-
marks inside the battery compartment.
!
!
AC power socket
Mixer
(not incl.)
Note:
* It is recommended that a 75 ohm coaxial antenna is used to avoid
interference.
*To avoid interference from electrical signals, do not bind the antenna cable
together with any mains lead.
Antenna/ CATV input
75 standard
coaxial type
DC power socket
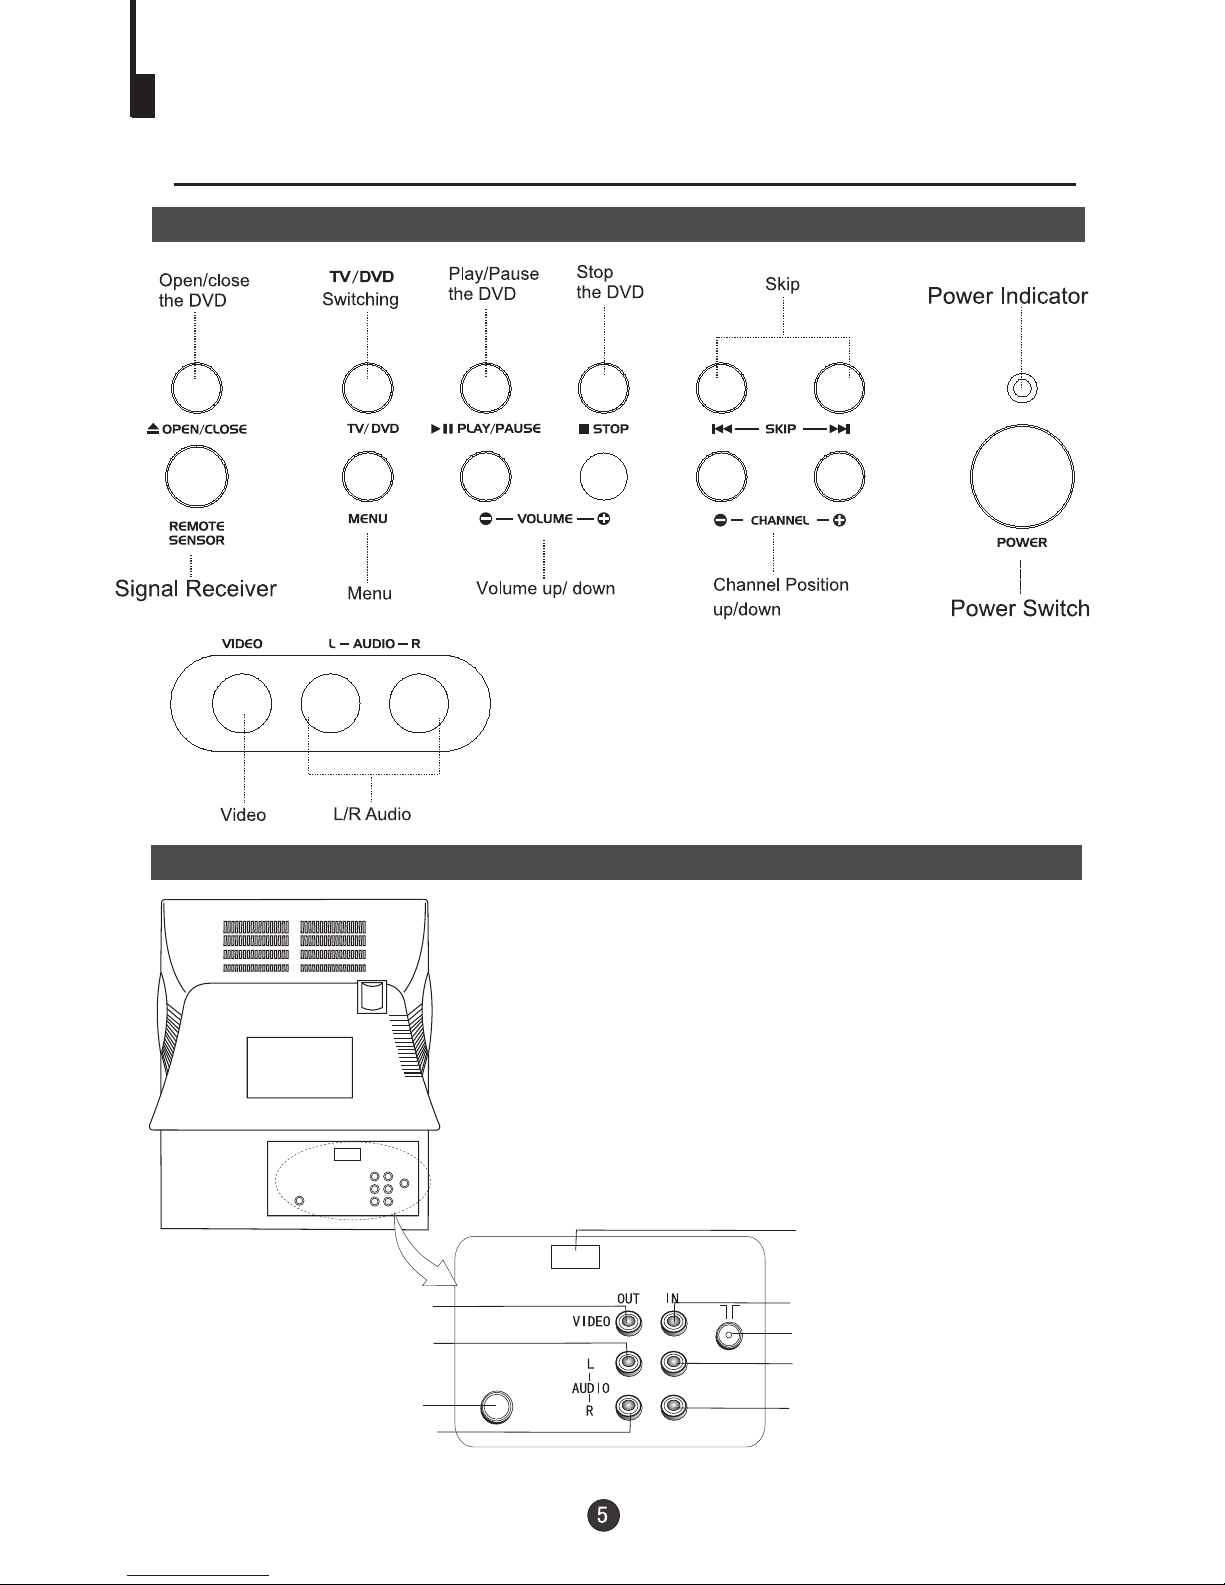
Function Buttons and External
Connections
Rear panel of the TV set
Front panel the TV set
COAXIAL
Audio left channeloutput terminal
Coaxial terminal
Antenna/ CATV input socket
Video output terminal
Audio right channeloutput terminal
Video input terminal
Audio left channelinput terminal
Audio right channelinput terminal
DC IN
DC input socket
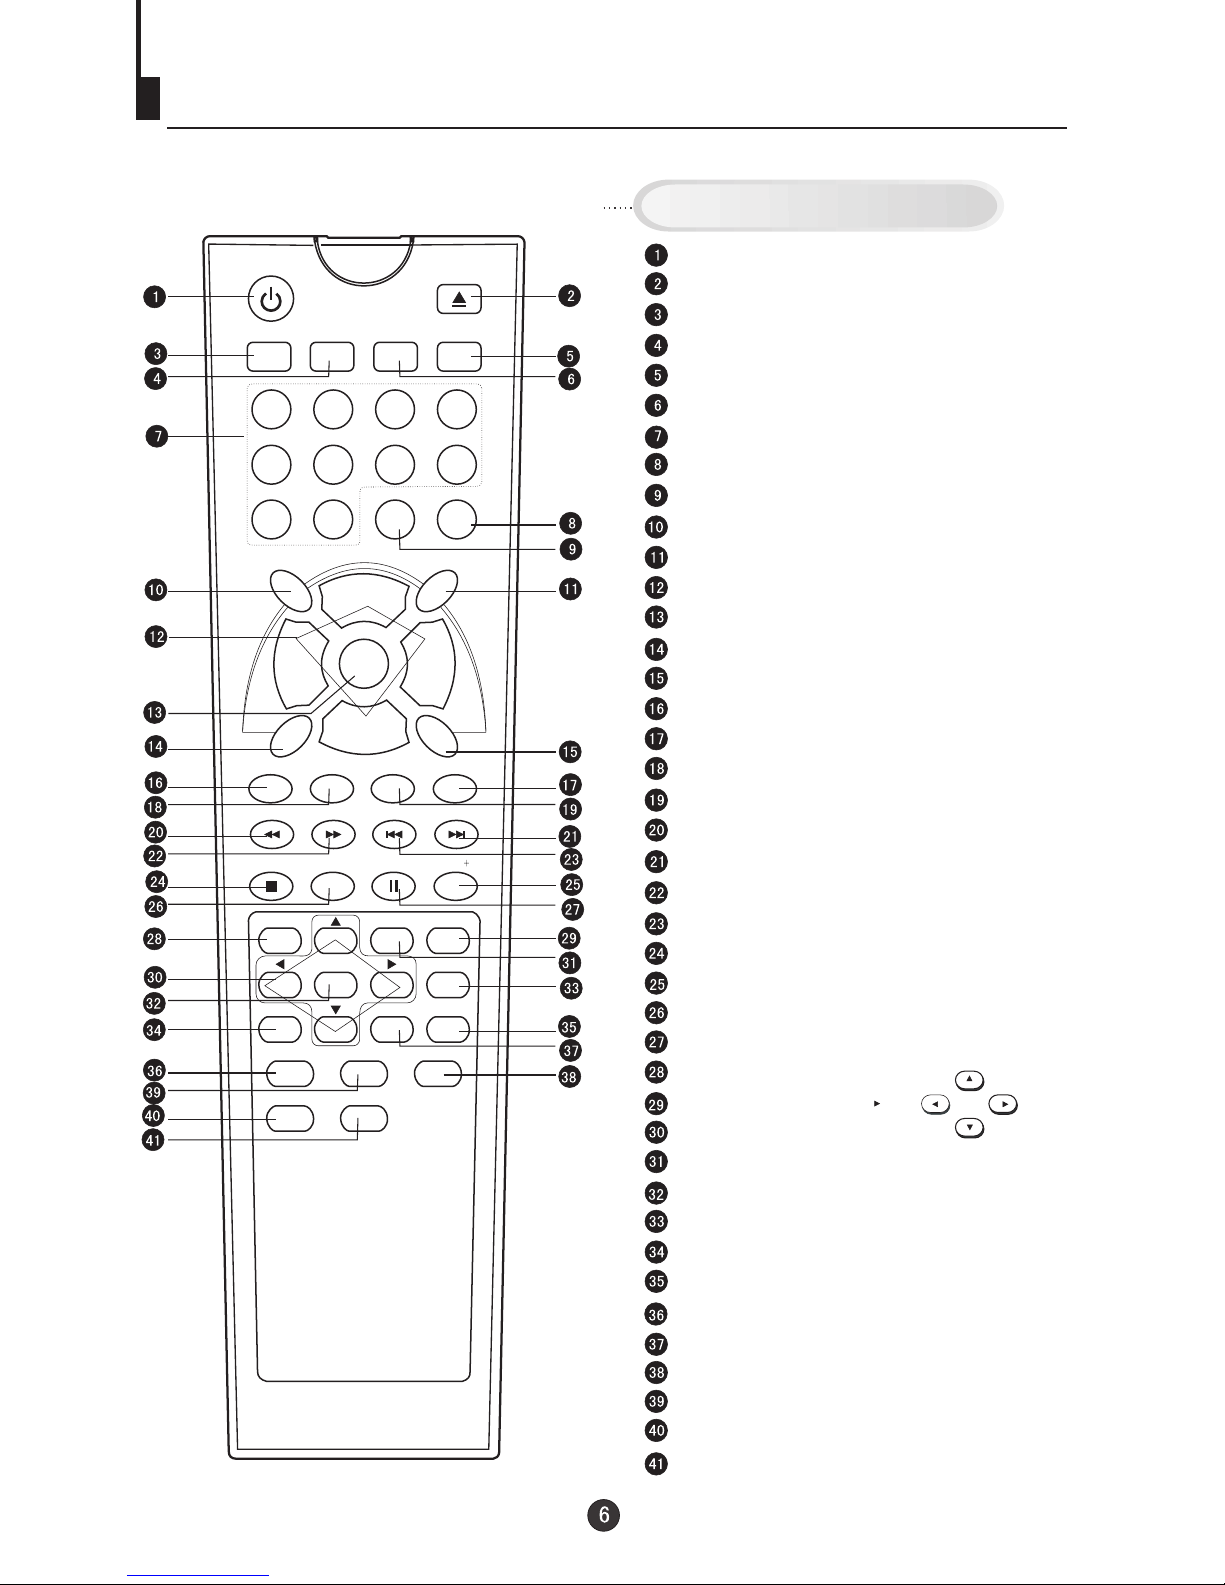
Using the Remote Control
OPEN/CLOSE
POWER
SCAN MUTE
1234
5678
TV/DVD
MENU
EXIT P.STD
90-/--
TV/AV
STOP
PLAY/ENTER
PAUSE/STEP
REV FWD PREV NEXT
SETUP
D.MENU
REPEAT
TITLE/PBC
SEARCH
ANGLE
AUDIO ZOOM
A-B
SLOW
PROGRAM
D.CALL
Stand By
DVD Open/close
Scan
Former Program
Mute
On Screen Display
Program Number
TV/AV Exchange
Digital Selector
(Not available)
TV/DVD
Volume/Channel Selection
MENU
Exit Screen Display
Picture Mode
Calendar
Time
(Not available)
DVD NEXT
DVD STOP
10+
DVD SETUP
DVD PAUSE/STEP
DVD MENU
DVD A-B REPEAT
DVD Cursor Move button
DVD REPEAT
DVD PLAY/ENTER
DVD SLOW
DVD ANGLE
DVD SEARCH
DVD AUDIO
DVD TITLE
Zoom
DVD PROGRAM
DVD CALL
DVD CAPTION (SUBTITLE)
CCD ( closed caption)
DVD FAST REVERSE
DVD FAST FORWARD
DVD PREVIOUS
Buttons on the remote control
UP
DOWN
LEFT RIGHT
CALENDAR TIME
10
CCD
RECALL DISPLAY
CH+
CH-
VOL- VOL+
SUBTITLE
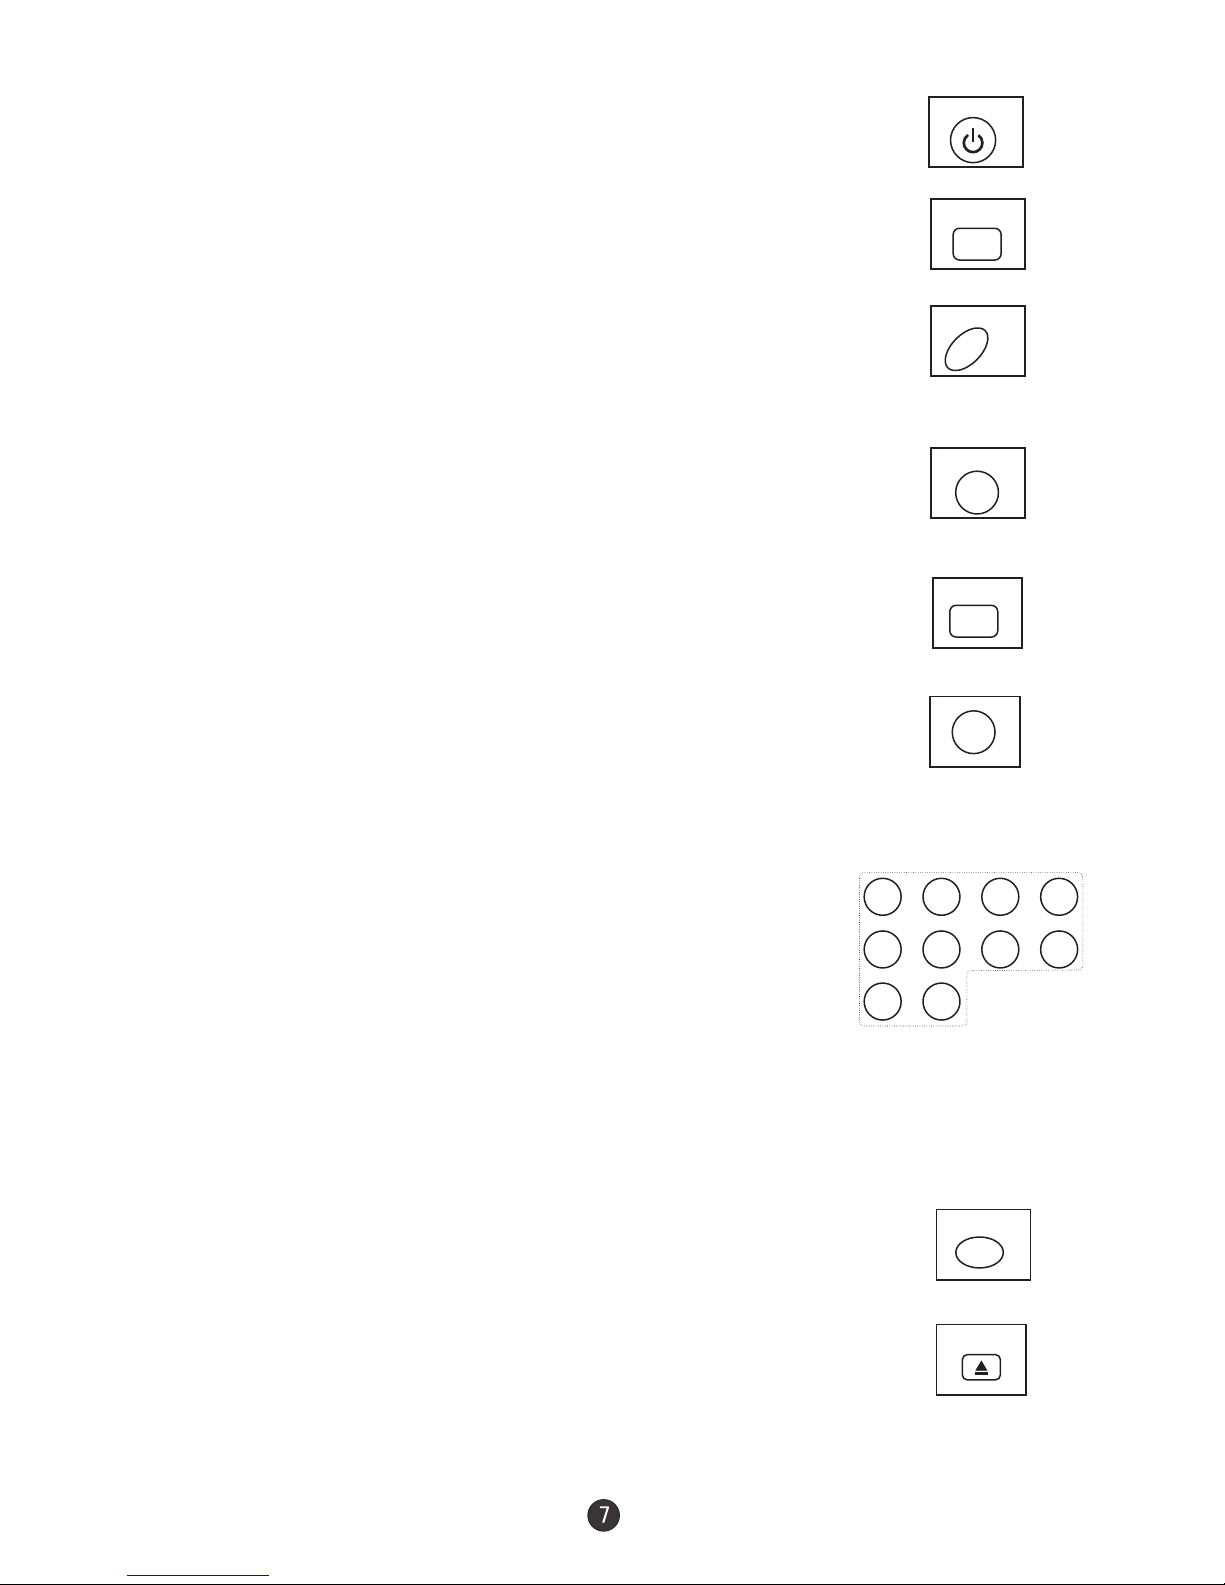
Remote Features
Power Button:
To turn power ON or OFF , press power button on remote control.
System and ChannelDisplay Button:
This will show you the currentchannel number. System will also
be displayed ifset.
TV/AV input Button:
This button hasfive settingA)Video1, B)Video 2,C)TV .
Pressing this button will cycle you through each option.
Mute Button:
Press mute button to turn off the TV volume.
Direct AccessChannel Select &digital selector:
Follow the procedure select the channel.
One Digit ChannelSelect:
When you want to select one digit channel ,press 0 and other
digit.
Two DigitChannel Select:
Three Digit ChannelSelect:
When you want to select a three digit channel .Press the digit
select twice ,then enter the three digits .
When you want to select a two-digit channel, press the two
digits.
CCD Button:
Press CCD button to set the C.Caption (Closed Captioned)
ON or OFF.
DVD/TV Button:
Press this buttonto change between TV and DVD.
OPEN/CLOSE Button:
Press this button to open or close the DVD disc tray .
POWER
DISPLAY
TV/DVD
TV/AV
MUTE
-/--
1234
5678
90
CCD
OPEN/CLOSE
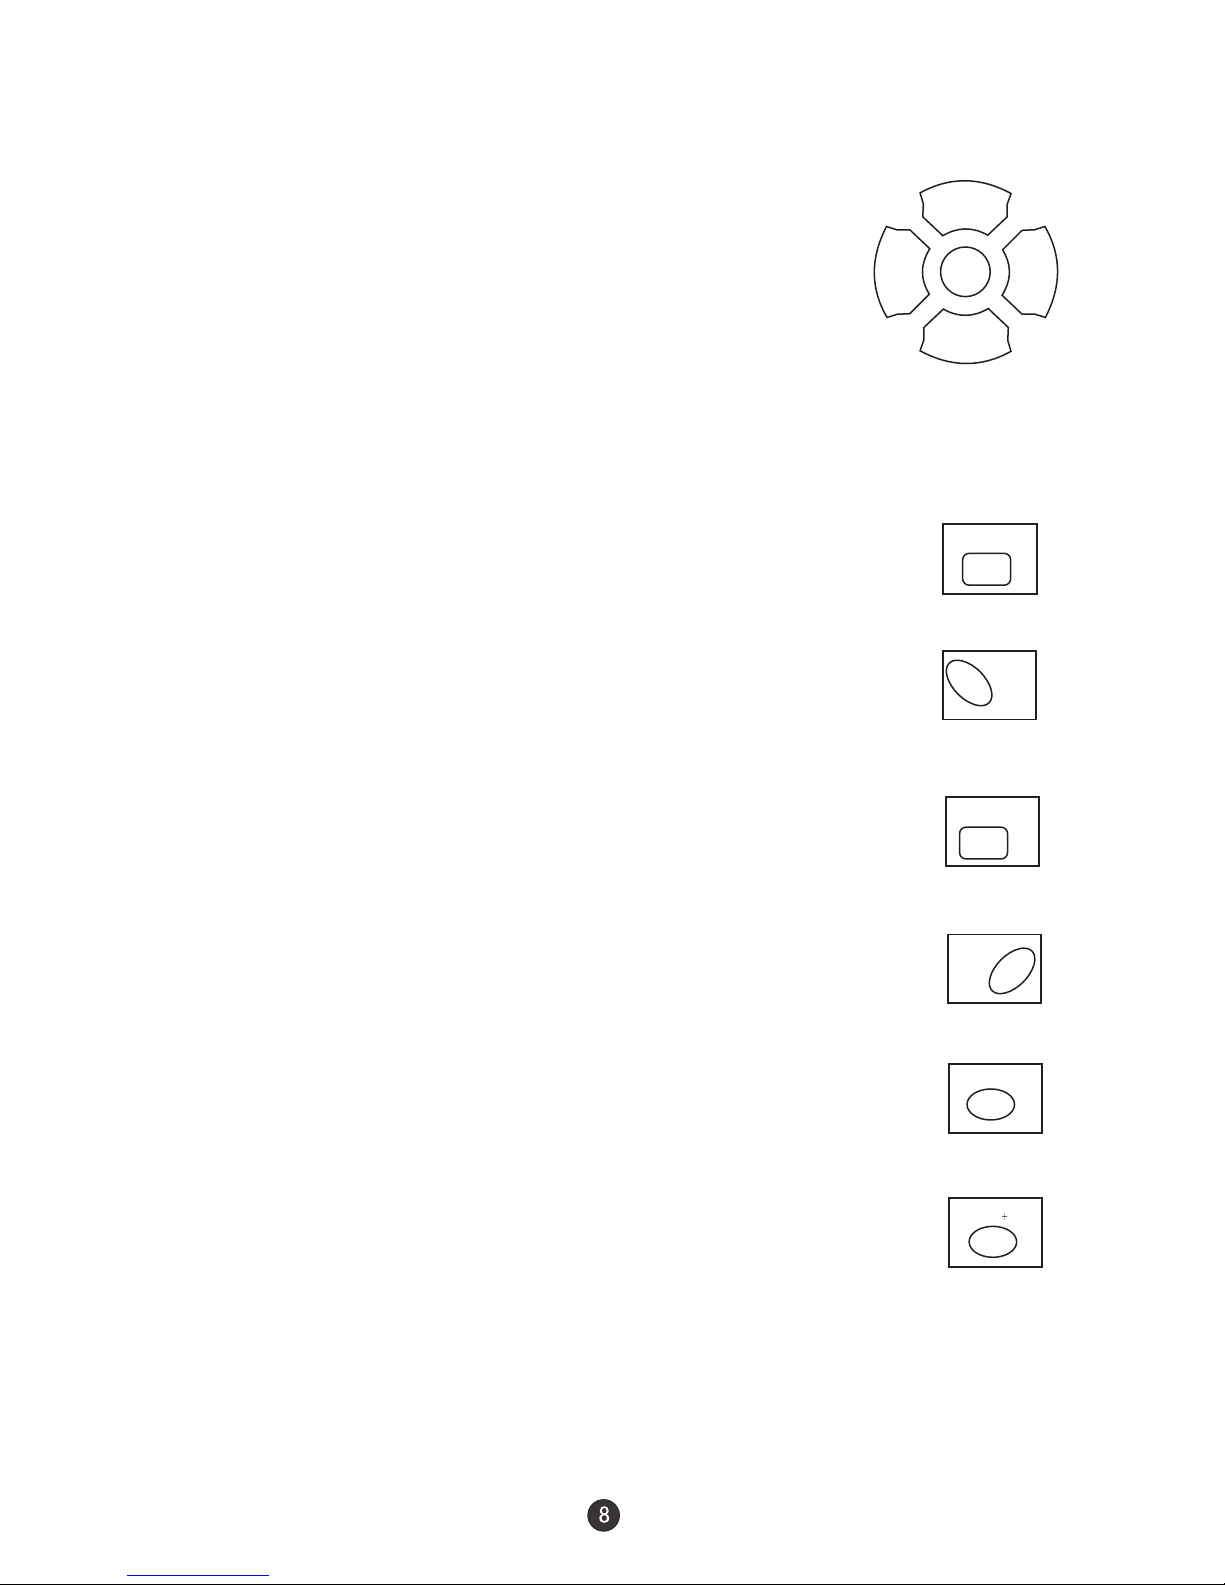
MENU
CH+
CH-
VOL- VOL+
Channel (+/-) SelectButton:
You can go up and down the channels by pressing CH (+)
button and CH (-) button. This button can also be used in adjusting the functions in
Menu Select Button:
You can select the menu by pressing the MENU button. You
can call onthe menu (PICTURE,TIME, TUNE and FUNCTION)
by pressing the corresponding button on the remote control.
the Menu Mode.
Volume (+/-) Select Button:
You can increase the volume by pressing VOL (+) button and
decrease VOL(-) button. This button can also be used in adjusting the function
selections in the Menu Mode.
Picture Preference SelectButton:
By pressing this exclusive personal preference button, you can
select different preset brightness shades for various viewing
environments.
Program Scan Button:
This feature automaticallyscans the available channels.
Pressing it again stops the channel scanning.
System and ChannelDisplay Cancel Button:
This button allows you to turn off the channel display and exit
system menus.
Last Channel RecallButton:
This feature allows you to recall the previously viewed channel.
Time Menu Button:
When pressed it displays Time Menu Screen.
10+ Button:
This button canalso be usedto select 2digit channel numbers.
RECALL
P.STD
SCAN
EXIT
TIME
10
Table des matières
Langues :
Autres manuels Citizen Combo TV DVD


