BOWHEAD REACH Manuel utilisateur

Bowhead
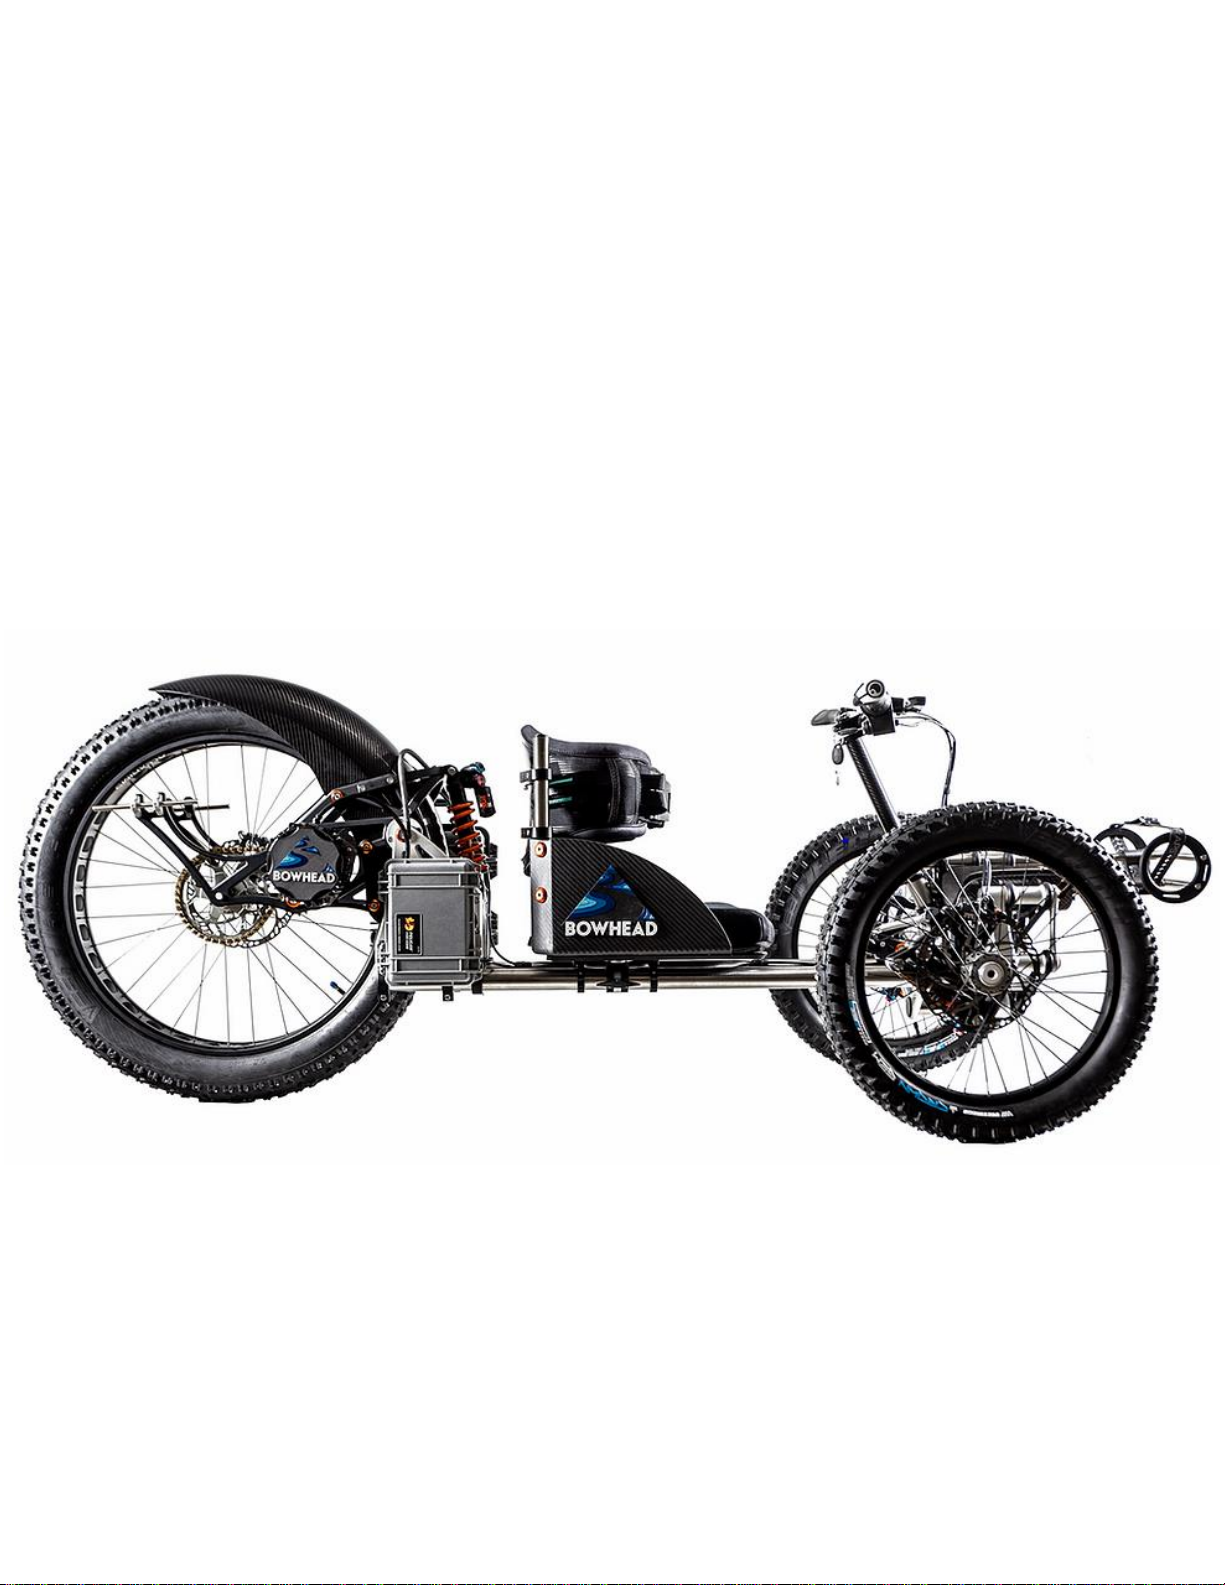
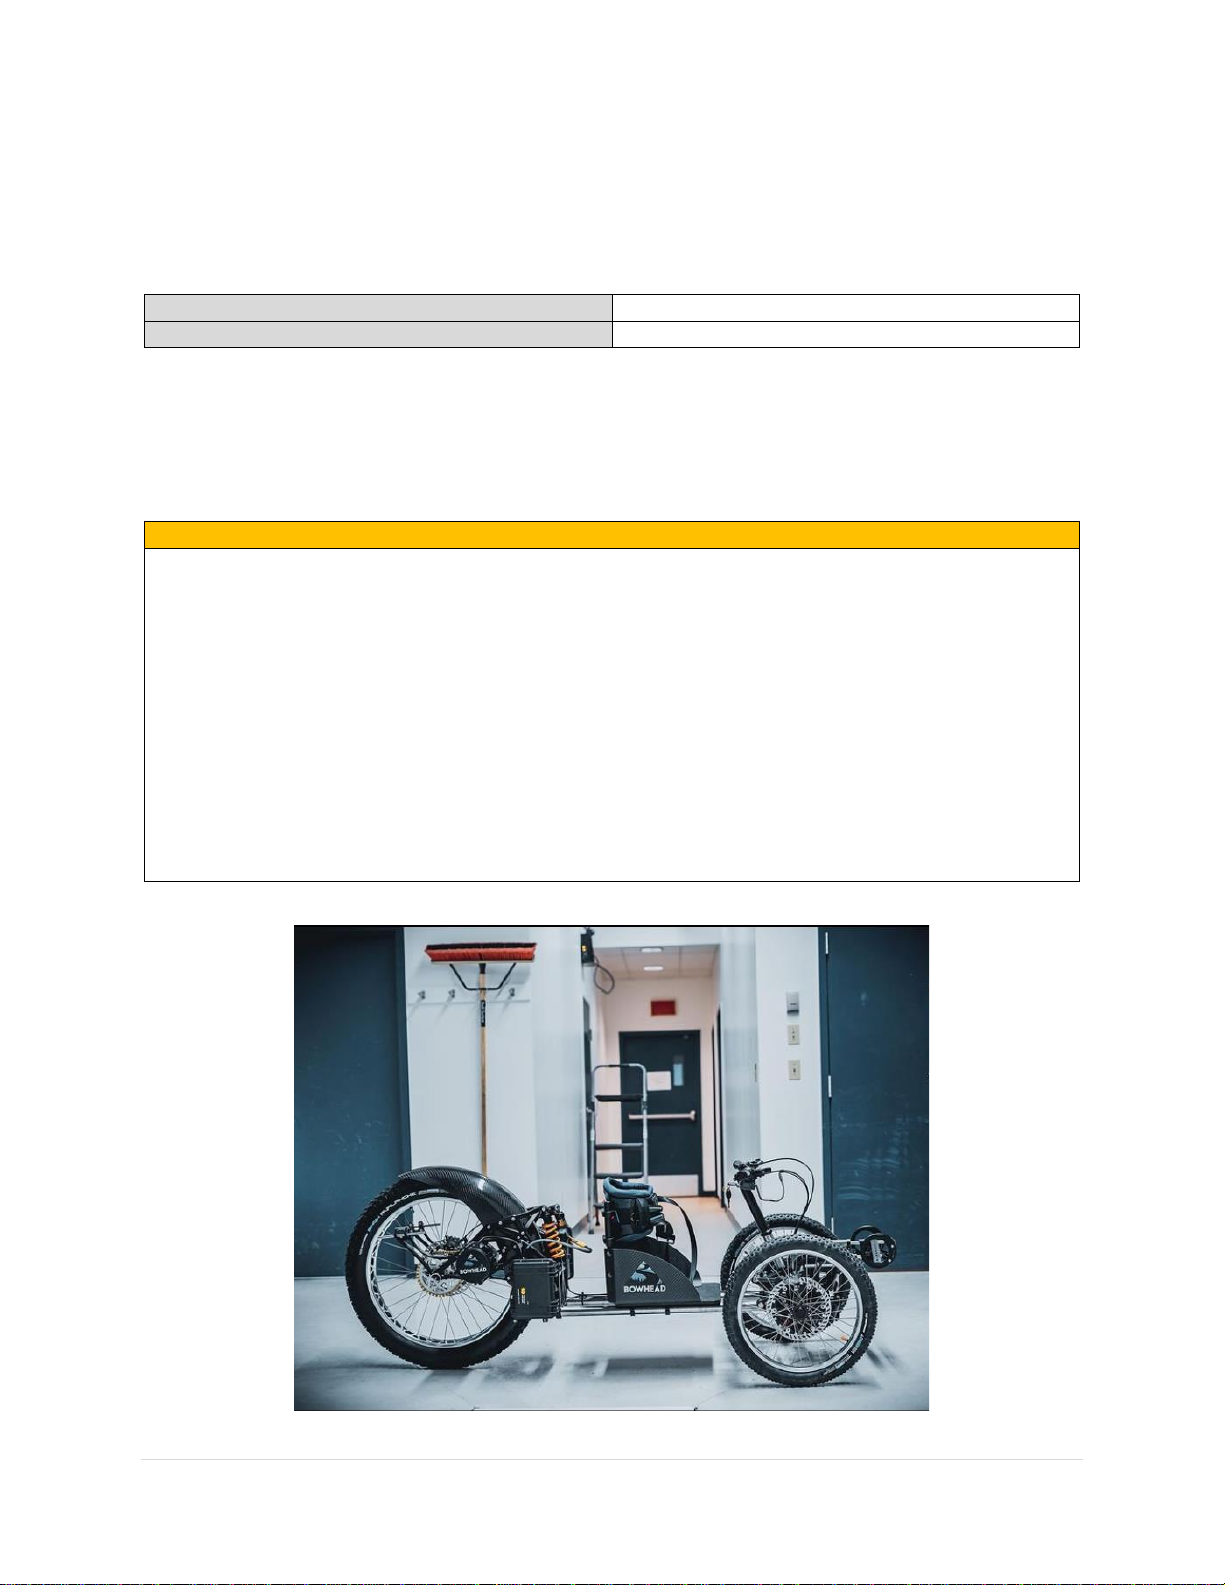
REACH Adventure Ebike
OWNER’S MANUAL
Read this manual carefully as it contains important safety & maintenance
information.

2 | P a g e
WARNING
Please read, understand, and follow all the instructions and safety
precautions in this manual and on all product labels prior to operating
your new Bowhead Reach.
Copyright 2021 Bowhead Design Corp. All information contained within this publication is based
on the latest product information at the time of publication. Due to constant improvements in
the design and quality of production components, some minor discrepancies may result between
the actual Bike and the information presented in this publication. Depictions and/or procedures
in this publication are intended for reference use only. Bowhead makes every effort to ensure
the accuracy of its documentation and assumes no responsibility or liability if any errors or
inaccuracies appear within. Any reprinting or reuse of the depictions and/or procedures
contained within, whether whole or in part, is expressly prohibited. The original instructions
for this Bike are in English.

3 | P a g e
Welcome!
Thank you for purchasing your REACH Adventure Ebike from Bowhead!
We take pride in bringing you a quality product that will offer years of enjoyment. Although
your Reach comes pre-assembled in a crate, it has travelled a great distance to reach you and
needs a bit of extra attention prior to riding. Please read and understand this manual fully
before riding your Reach and check out our “how to”videos on our YouTube channel
(https://www.youtube.com/channel/UCqZii12qtvKGZOnqSHkXGQg).
Be sure to check all hardware for correct torque (see “Tools and recommended torque values”
on page 10-12). Before each ride, follow the recommendations in the “Safety checklists” on
page 24. And finally, take care of your new Reach by following the guidelines in “Recommended
service intervals” on page 27. If you are not sure you have the skills, experience, and special
tools required for assembly and maintenance, get help from a local, certified, and reputable
bike mechanic, or contact Bowhead at service@bowheadcorp.com.
We are here to help!
If you have questions after reading this manual and watching the videos, please consult the
Bowhead Team via:
Visit our website to chat with our virtual Bowhead Bot
WARNING
Incorrect assembly, maintenance, or use of your Reach can cause component or performance
failure, loss of control, serious injury, or death. Even if you are an experienced bike rider,
you must read and understand the entire manual and any documentation provided for
subcomponents or accessories before riding. If you are not sure you have the experience,
skills, and tools to correctly perform all assembly steps in the manual, consult a local,
certified, reputable bike mechanic, or contact Bowhead at service@bowheadcorp.com.
WARNING
To reduce the risk of injury, close supervision is necessary when the product is used near
children.

4 | P a g e
Contents
Using this manual ............................................................................................ 5
Post crate Pre-Ride check ................................................................................. 7
Adjusting for comfort and Safety......................................................................... 8
Tools and recommended torque values................................................................11
Battery ........................................................................................................13
Operation.....................................................................................................18
Maintenance .................................................................................................25
Recommended Service Intervals ........................................................................28
Safety..........................................................................................................32
Troubleshooting.............................................................................................36
Warranty......................................................................................................38

5 | P a g e
Using this manual
Riding any bike or other vehicle involves some risk of serious injury or death. Your safety
depends on many factors including your bike knowledge, your bike’s maintenance,
foreseeable riding conditions, etc. There are also factors we cannot control or anticipate in
every situation or condition while riding. This manual makes no representations about the
safe use of bikes under all conditions. If you have any questions, you should contact Bowhead
immediately.
First adjustment and inspection of your bike requires specific tools and attention. Keep this
manual and any other documents that came with your Bowhead REACH. All content in this
manual is subject to change or withdrawal without notice. Visit www.bowheadcorp.com/help
to view and download the latest version. Bowhead makes every effort to ensure the accuracy
of its documentation and assumes no responsibility or liability if any errors or inaccuracies
appear within.
SAFETY SYMBOLS & WARNINGS
The following signal words appear throughout this manual. Your safety is involved when these
words and symbols are used. Become familiar with their meanings before reading the manual.
DANGER
DANGER indicates a hazardous situation which, if not avoided, WILL result in death or
serious injury.
WARNING
WARNING indicates a hazardous situation which, if not avoided, COULD result in death or
serious injury.
CAUTION
CAUTION indicates a hazardous situation which, if not avoided, COULD result in minor to
moderate injury.
NOTICE
NOTICE provides key information by clarifying instructions
IMPORTANT
IMPORTANT provides key reminders during disassembly, assembly, and inspection of
components.

6 | P a g e
VEHICLE IDENTIFICATION NUMBERS
Record your Reach’s identification number and date of sale in the spaces provided. Remove
the spare throttle key and store it in a safe place. The throttle must be replaced if all keys
are lost.
Bike identification number:
Date of sale:
BEFORE YOU RIDE
This Bowhead REACH Adventure Ebike may be used as an Off-Road Vehicle. Familiarize
yourself with all laws and regulations concerning the operation of this bike in your area.
WARNING
Failure to heed the warnings and safety precautions contained in this manual can result in
severe injury or death. Your REACH Adventure Ebike is not a toy and can be hazardous to
operate.
• Read this owner’s manual and review the safety information contained within.
Understand all safety warnings, precautions and operating procedures before operating the
Adventure Ebike.
• Never operate this bike without proper instruction.
• Always wear a helmet, eye protection, gloves, long-sleeve shirt, long pants and over-the-
ankle socks.
• Never operate this bike under the influence of drugs or alcohol.
• Never permit a guest to operate this vehicle unless the guest has reviewed the owner’s
manual and all safety labels.

7 | P a g e
Post crate Pre-Ride check
1.Open the crate and remove the 2 boards locking the wheels in place. With the help of
another person, slowly roll the bike out of the crate. Remove anything else (accessories,
additional components, packaging materials) from inside the crate and recycle the packaging
wherever possible.
2.Carefully unwrap the charger from in front of the seat and ensure all the following pieces
are included with your Bowhead REACH:
•Charger
•Battery
•Seat cushion (if ordered)
•Informational hang tags (attached to bike)
•Leg strap & Rear axle pin
If anything is missing, please contact Bowhead immediately.
NOTICE
If you are located outside of North America, your battery and charger will be shipped
separately. Your bike will come with an empty Pelican 1200 case pre-drilled and ready for
your battery to be installed. Please see New International Battery Installation Instructions
on page 18.
3.We also recommend the following (not included) for post crate pre-ride check and
maintenance:
•Strong friend or work stand to
lift your bike when required
•18mm socket wrench
•T25 drive-style screwdriver
•Bicycle grease
•H4 & H5 Hex Key
•Torque wrench (3Nm-30Nm) with
Hex bits
•Adjustable flat edge pliers
•Clean shop towel or paper towel
for cleaning excess grease
•Bike pump with pressure gauge
Now that your bike is un-packed, and you have checked to make sure you have all the
required components (List 2 above) for your REACH, it is time for the pre-ride check!
PRE-RIDE CHECK
1. Ensure you read and understand all hang tags attached to your bike. If you have any
questions, please contact us via email at service@bowheadcorp.com.
2. Please remove and replace your battery a few times following the “Battery removal
instructions” on page 14 to get accustomed to the locking mechanism.
3. Complete all sections in ‘Adjusting for comfort and Safety’ in the next chapter.
4. Complete the appropriate “Safety Checklists” in the ‘Maintenance’ Chapter on page 25.

8 | P a g e
Adjusting for comfort and Safety
The following steps are critical for your comfort and safety and must be performed before your
first bike ride.
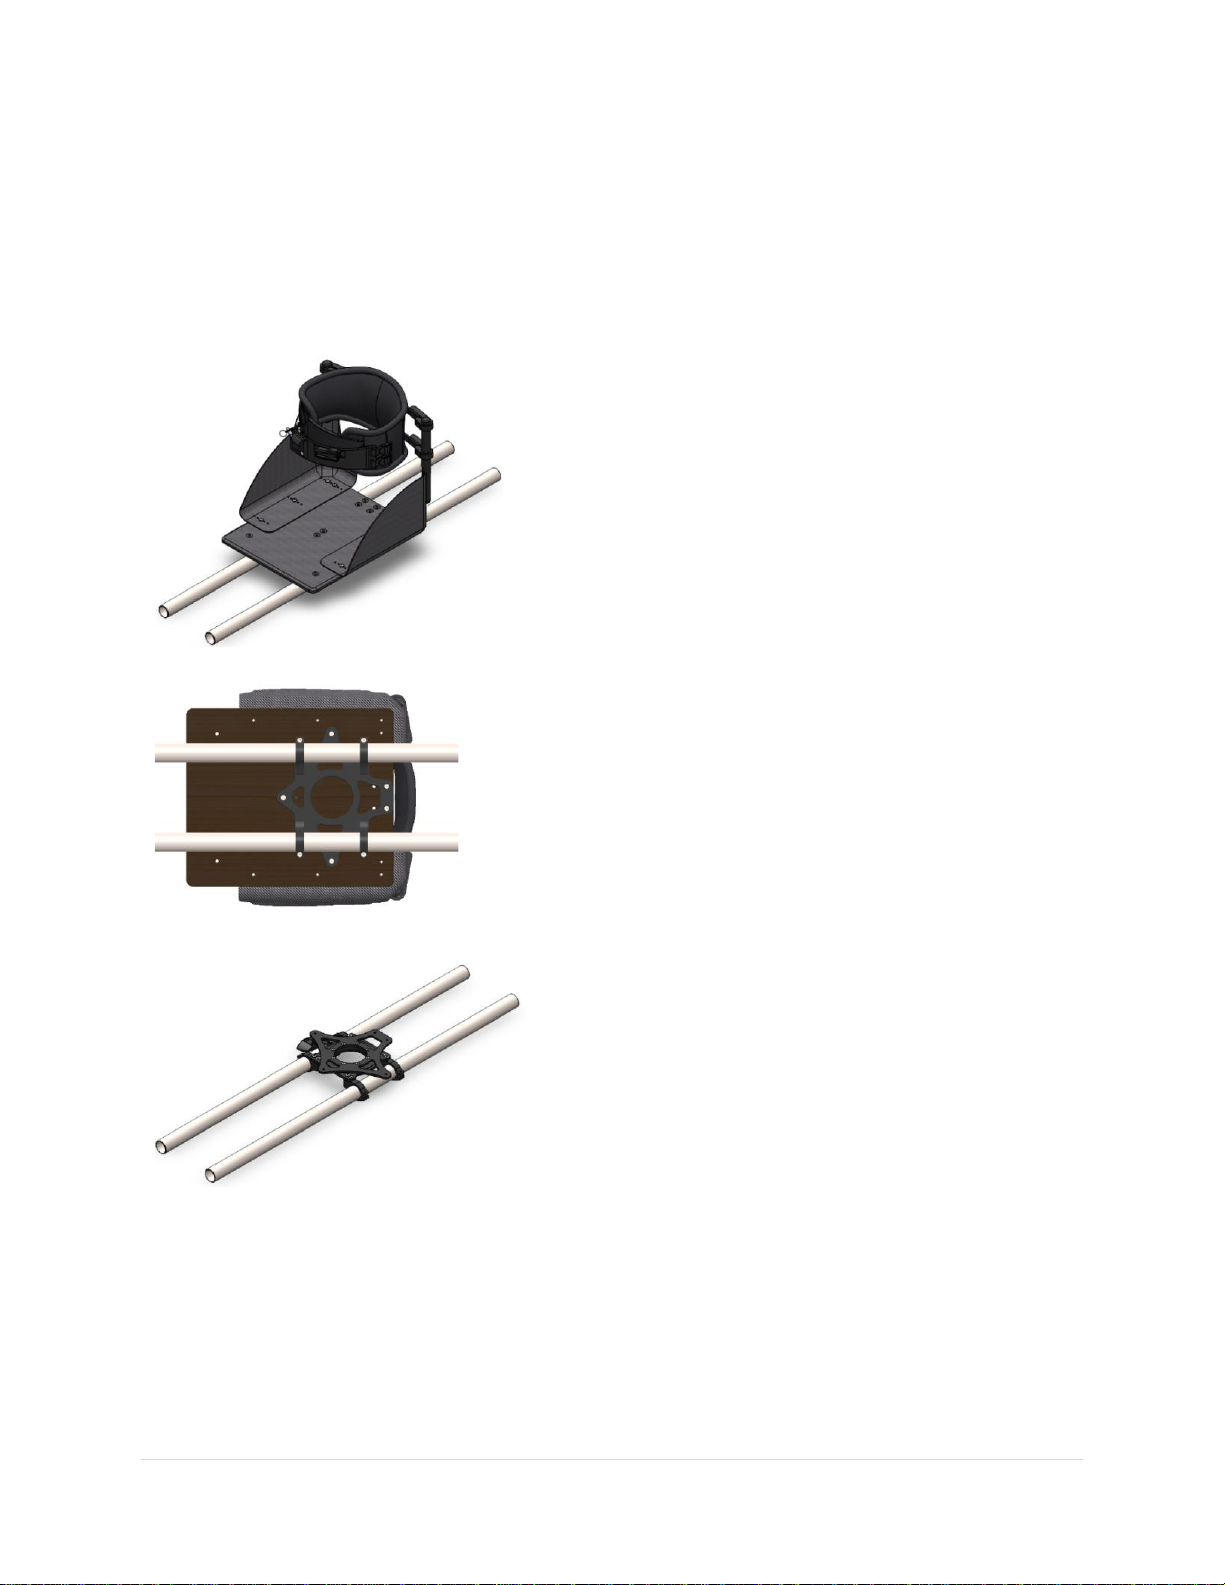
ADJUSTING THE SEAT POSITION
The seat is adjustable to slide along the frame
rails to accommodate various user height
requirements.
It is secured in place by 4 screws.
To move the seat plate:
i. The 4 screws located on the bottom of
the rail mount must be loosened.
A 5 mm Hex Key should be used to loosen
these screws.
ii. The entire seat assembly may now be
slid forward and backward to reach a
comfortable position.
iii. After locating the seat in the
appropriate position, the 4 screws must
be torqued to 12Nm to secure the seat
in its’ new location.

9 | P a g e
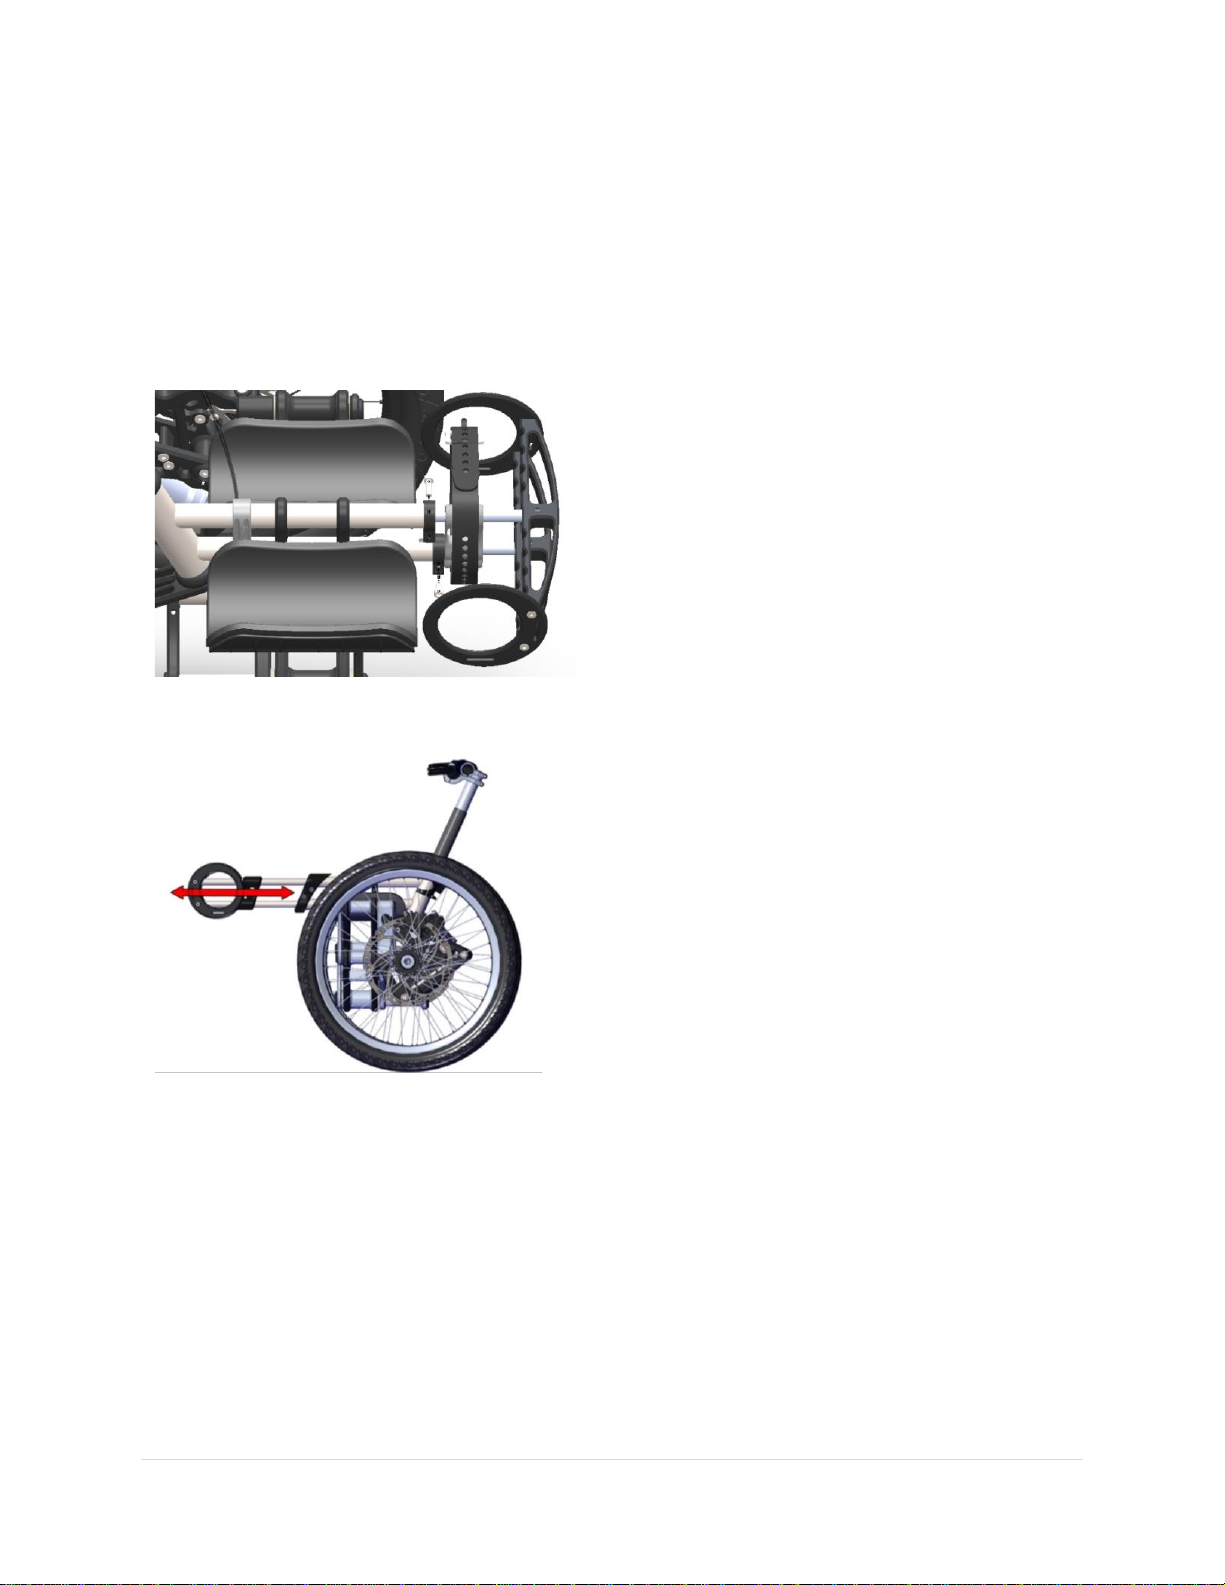
ADJUSTING THE FOOTREST POSITION
Similar to the seat, the footrest may also be
adjusted to an appropriate length for each
individual user.
It is secured in place by 2 screws.
To move the footrest:
i. The 2 screws located on either side of
the footrest frame must be loosened.
A 5 mm Hex Key should be used to
loosen/remove these screws.
ii. The footrest may now be slid forward
or backward to lengthen or shorten
this distance.
iii. Once the footrest is in a comfortable
location for riding the 2 screws must
be tightened (10Nm torque) to secure
the new position.

10 | P a g e
FINE-TUNE THE HANDLEBAR & BRAKE LEVER POSITIONING
Most riders will be comfortable with the handlebar angled so that the handlebar grips are
roughly parallel with the ground. Others may prefer the handlebar grips to be angled slightly
downwards.
The angle of the brake levers can also be adjusted for the most comfortable hand position
possible. To do so, loosen the brake lever clamp bolt, adjust the angle, and then re-tighten
according to the torque specifications in “Tools and recommended torque values” on the next
page.
However you prefer your handlebar and brake levers, make sure that you can twist your
handlebar 90° left and right without the handlebar or brake levers touching your body or the
frame of the bike. Ensure there is enough cable slack to allow the handlebar to turn fully to
each side without pulling cables taut.
If you adjust your handlebar or brake levers, be sure to tighten them according to the
specifications in “Tools and recommended torque values” on the next page.
NOTICE
Please contact Bowhead at service@bowheadcorp.com for additional instructions on
Quadriplegic handlebar and brake lever positioning.
ENSURE ALL HARDWARE IS TIGHTENED PROPERLY
Ensure all hardware is tightened properly according to the values in “Tools and recommended
torque values” on the next page. This is a critical safety step that you must not skip. If you
do not own a torque wrench or do not have the skills to check the tightness of your hardware,
consult a local, certified, reputable bike mechanic for help, or contact Bowhead.
Autres manuels pour REACH
2
Table des matières
Autres manuels BOWHEAD Scooter
Manuels Scooter populaires d'autres marques

First Choice Mobility
First Choice Mobility Roma Medical Corella S741 Manuel utilisateur

Carrera
Carrera impel Manuel utilisateur

Afikim
Afikim Superlight SL-3 Manuel utilisateur

CareCo
CareCo ZOOM Manuel utilisateur

Douglas
Douglas Vespa G.S. Manuel utilisateur

Gazelle
Gazelle with BOSCH System Manuel utilisateur